Crafts from waste materials: interesting ideas and options for making various things (75 photos). DIY crafts from waste material for children, kindergarten, school
1. FLOWERS WITH YOUR OWN HANDS. BEAUTY FROM AVAILABLE MEANS
The indescribable beauty of a flower opening under the warming rays of the sun will always delight people's eyes. But, unfortunately, it’s time for most flowers to bloom short-lived and fading petals sometimes remind us of former grace beautiful rose, romantic lily or touching wild flowers. But we learned preserve the majestic beauty of flowers creating with your own hands from different materials artificial analogues, which are often similar to natural flowers one to one.
In previous articles we have already told you how you can make flowers at home from satin ribbons (kanzashi), from fabric, from foamiran, from beads, from paper and other materials.
From this article you will learn how to create unique flowers from plastic bottles , from disposable cups and spoons, from buttons, from empty boxes and more waste material. You will be offered step-by-step master classes for beginners (photo and video lessons), with the help of which you can make your own flower crafts and decorations from improvised means. Every home has unnecessary waste material, and crafts from all kinds of corks, cups The yogurt jars turn out very beautiful!
Today, making homemade products from waste and natural materials is one of the most common types of needlework. In order to do beautiful flower at home, you don’t have to go for natural materials in the forest (cones, pine needles, tree bark), to the river (pebbles, smooth stones, shells ). At home you can always find unnecessary waste material that you are already planning to throw in the trash. Absolutely anyone can master the technique of making crafts and decorations in the form of stylish flowers from scrap materials!
If a child is growing up in your family, be sure to invite him to participate in making crafts from waste materials . For all-round development, it is necessary to teach your child to create a variety of crafts with his own hands from scrap materials. It will be especially interesting for the girl to take part in making flowers.
2. ORIGINAL IDEA. BOUQUET OF HOMEMADE FLOWERS FROM WASTE MATERIAL
We learn to create beautiful flower-shaped products from egg trays-containers . This cardboard packaging is good because it can easily be used to make the most different variants flowers for a bouquet.
For work take:
several empty container trays for chicken eggs, colored paper, scissors, glue, gouache, wire, accessories (buttons, beads, jewelry elements).
Stages of work:
cut the cardboard packaging and carefully separate the cells from it
Using scissors, we form flower petals from the walls of each cell. The petals can be given any shape (see photo)
Now you can paint the blanks with gouache, choosing the most matching colors. It is advisable to wait until the first coat of paint has dried and apply the second.
At the bottom of each bud we make several holes to secure the stem and decorate the core with accessories
Now you need to alternately thread the end of the wire into each hole of the bud and secure it from the inside
Now we form the core of the flower. You can fasten a beautiful button with the same wire
All that remains is to carefully wrap the wire with a strip of corrugated paper green to make a beautiful stem.
Using the same principle, we make each flower and form a bouquet, which can be placed in a homemade paper vase, for example.
3. MASTER CLASSES ON MAKING HOMEMADE FLOWERS FROM WASTE MATERIAL
Master class 1:
INTERESTING IDEAS FOR CRAFTSWORKERS! HOW TO MAKE ORIGINAL FLOWERS FROM PLASTIC SPOONS, FROM CANDY, FROM THERMAL MOSAIC.
Master class 2:
LEARNING TO MAKE FLOWERS FROM CAPRON, FROM BEADS, FROM BUTTONS. LESSONS WITH PHOTOS AND TIPS FOR BEGINNERS.
Master class 3:
ORIGINAL IDEAS FOR CREATING CRAFTS WITH YOUR OWN HANDS! WE CUT BLANKS FROM SHAMPOO BOTTLES AND MAKE FLOWERS FROM THEM.
Master class 4:
HOW TO MAKE BEAUTIFUL ROSES USING DISPOSABLE SPOONS AND A CANDLE FLAME. MK WITH PHOTO FOR MANUFACTURING PRODUCTS FROM WASTE MATERIAL.
Master class 5:
HOW TO FOLD CRAFTS IN THE FORM OF WATER LILY FROM DISPOSABLE PLASTIC SPOONS. DESCRIPTION OF WORK STEPS AND STEP-BY-STEP PHOTOS.
Master class 6:
HOW TO MAKE ASTER FROM PLASTIC CUPS. A BEAUTIFUL HOMEMADE BOUQUET CAN BE GIVEN AS A GIFT!
Master class 7:
VERY USEFUL TIPS FOR THOSE WHO WANT TO MAKE FLOWERS FOR THE GARDEN FROM PLASTIC BOTTLES. HOW TO PAINT CRAFTS IN THE FORM OF FLOWERS FROM BOTTLES.
Master class 8:
HOW TO MAKE GREAT LILIES FROM DIFFERENT BOTTLES AT HOME. LESSON WITH PHOTO.
Master class 9:
DETAILED LESSON WITH PHOTOS OF WORK STAGES. WE MAKE A FLOWER FROM A PLASTIC BOTTLE WITH YOUR OWN HANDS.
Master class 10:
ANOTHER WAY OF MAKING FLOWERS FROM PLASTIC BOTTLES FOR DECORATING VARIOUS CRAFTS. IDEAS AND PHOTOS OF WORK.
Master class 11:
LEARNING TO MAKE A BOUQUET
Nowadays, people do not think at all about the well-being of our common home - planet Earth. Everywhere you can see unrecycled plastic bottles, bags, shoe boxes, egg containers and many other wastes. All this is usually called waste material. However, if you put in the effort and imagination, you can use such material wisely, without cluttering the planet, but, on the contrary, decorating it!
Products made from such material Lately are very popular. Such crafts can be done together with your child, and at the same time develop his fine motor skills, instill respect for nature and develop creative thinking. Parents should teach their children not to throw away any unnecessary materials on the street, but to create beautiful things from them.
Waste material can be found in any home, so products made from it are not expensive at all. Do not rush to throw away used plastic bottles and jars - with the use of imagination, they will serve you for a very long time.
Original ideas from unnecessary materials
Colorful pendant
To make a pendant, take the following tools:
- paper plate;
- beads;
- pieces of plastic;
- wool thread;
- pumpkin seeds;
- plastic straw;
- hole puncher;
- knife or scissors;
- glue gun
Use a hole punch to make a hole in the plate. Make plastic petals (to do this, draw them on a piece of plastic and cut them out with scissors). Glue the petals onto the plate around its perimeter. Decorate the petals and pumpkin seeds. Place the seeds on plates. Now make the pendants. Attach a flower to the thread (glue seeds to the bead and fasten it to the thread). Attach the resulting pendants to the plate.
The product is ready and can already decorate any interior.

To make such a watch, take:
- old newspapers or magazines;
- cardboard;
- watch mechanism;
- glue.

Cut up unwanted magazines and newspapers into many small strips. Roll each strip. Paint the finished rolls with paints (you can use watercolors). If you made rolls from bright editions, then they do not need to be dyed.

Next, take a piece of cardboard, draw a circle on it, and cut it out with scissors. After this, glue all the rolls onto the resulting cardboard circle using ordinary PVA glue. Do this so that they fit as closely as possible to each other.

Having carefully glued all the rolls, attach a special mechanism and hands to the finished watch. The original watch is ready. They will look perfect in the kitchen or in a country house.
Lanterns made from waste material
On the eve of the New Year, everyone wants to decorate their home with beautiful crafts to get great decor and a great mood. A wonderful New Year's idea would be unusual lanterns made from ordinary plastic bottles. This craft will be an excellent option for a gift or New Year's decoration. To create lanterns, prepare paints, scissors, a knife, and thread.

Take unwanted bottles and decorate them with bright colors. For additional decor, decorate them with different patterns. Leave to dry. After this, use a knife to make slits in the bottle. Unbend the resulting strips and slightly compress the lantern. Make a hole in the lid and thread a thread through it - this will be a loop.

Pistachio picture
Pistachio shells will be an excellent material for making unique crafts. For example, you can even create a picture with their help. To do this, take shells, paints, glue.

To create a picture, make flowers from shells. Glue them on the underside. Each time, make the buds larger in volume. Decorate the resulting flowers with paints. For this purpose, paint with an acrylic base or aerosol is suitable. If using acrylic, dilute this paint with water in a bowl or plate. Place the flowers there for a few minutes and remove the already painted ones.

Use ready-made flowers to form patterns for the future painting. Glue it onto the base using a special gun.
Crafts for the garden
In the previous section, options for crafts for a country house were proposed. Below are ideas that will fit perfectly into your yard, vegetable garden or plot of land in your country house.
Peacock
Such a bird will certainly become a real decoration of the yard. To make a peacock, take a five-liter plastic bottle, film and wire. Make a base from a bottle and wire. Cut many strips of film to form a kind of fringe. Glue it to the bottle - this will be the tail and wings of a peacock.


If you have unnecessary rubber boots lying around at home, then it’s time to use them as flower pots. To do this, paint them to your liking, then make a hole to hang the future pot. Fill the boot with soil and plant the plant you like. The flower pot is ready.

Crafts from unnecessary flower pots
If you have unnecessary pots, you can use them to make a wonderful decoration for your garden. It all depends on your imagination. There are many photographs on the Internet with various crafts made from flower pots that will suit your taste. And if you beautifully paint the finished products, you will get a unique craft.

Pigs
There is nothing difficult about making wonderful pigs. All you need is regular five-liter eggplants. Paint them pink and cut out eyes and ears. You will get cute pigs that can be placed in the yard or in the country. It will look original!

Country crafts from bottles
Unnecessary bottles can be found in any home. You can make a huge number of useful products from them. For example, glass bottles are ideal for making a lamp, you just need to skillfully add a lamp and wiring. Plastic bottles are perfect for making a country tree that will decorate any area. Using the caps you can decorate a fence or walls in your country house.


Minion
This favorite of all children can be made from ordinary old tires. It is enough to paint them in certain colors, according to the chosen character, hand him a shovel or rake, and the original decoration of your summer cottage is ready!

Waste products are truly versatile and original, and this type of activity can become your hobby for a long time. long years. Remember that any item that can be recycled can be used to make various useful things that can also serve as original jewelry for home or garden decoration.
Be creative, imaginative and introduce new ideas. By doing this you will do good not only for yourself, but also for our planet, which needs to be protected from garbage accumulations. Do-it-yourself products made from waste materials will become a second wind for unnecessary materials and will bring new notes of comfort to your home.
After reading this article, you will be able to do extraordinary things with your own hands, using waste material. Use these master classes and create your own masterpieces!
99 photos of ideas for crafts made from waste materials


A popular trend in modern creativity is considered to be art dump, or Trash art, which is the making of crafts from waste material with your own hands, which are suitable for kindergarten and schools. Handmade masters use used and unnecessary items in their work: old newspapers, CDs, vinyl records, bottles, corks, plastic bags, boxes, cans and much more. "Trash" art protects environment from pollution, gives a second life to old things that have lost their intended purpose.
From disposable tableware
Plastic is often used in Trash art; plates, spoons, forks, glasses, and cocktail sticks are used in the work.
Chandelier
The instructions for making the lamp are easy to follow; the main materials are plastic spoons and a bottle. For work you will also need hot glue, a stationery knife, and a light bulb.
Use a knife to cut off the bottom of a plastic bottle. The volume of the container can be any, but it is preferable to use dishes with a capacity of 5 liters.

The handle of the spoons is removed to the base, leaving only the round part, which is carefully attached to the bottle using hot glue.

When the container is completely covered, a ring is made separately, connecting the spoons to each other.

The lamp is placed inside the finished lampshade, and a ring is attached to the top part.


Ladybug
To complete the craft, use 3 plastic spoons to obtain bigger size For insects, it is recommended to take canteens. A button is used to make the head.

The devices are painted with acrylic paint: two - red, one and the head ladybug- in black. After the first layer has dried, draw eyes and dots on the wings.

The handles of the spoons are cut to the base. Their red round parts are placed on top of each other and secured with a glue gun. The wings are then connected to the black spoon.

Ladybugs are placed in flower pots or in a garden plot. To do this, glue a thick wire to a black spoon and stick the free edge into the ground.

Rose pendant
Flower-shaped decorations are made from plastic spoons.

To do this, the handles of the devices are cut off to the base. Next, the spoons are held over a burning candle, giving them beautiful curves in the form of petals and gradually forming a rose bud. The flower is used as a pendant.

Christmas tree
Crafts are made from plastic spoons.

First, a cone is formed and glued from thick paper. The handles of spoons are cut off to the base. The parts are painted with acrylic paint, and glitter can be applied. Next, the spoons are glued in a checkerboard pattern to the cone, starting from the bottom tier and moving upward.
Masquerade masks
Making crafts from disposable plates. A pattern is applied to the convex part. Before this, slits for the eyes are cut out. The product is painted with acrylic paints, after drying the mask is decorated: ears, snout, mane, mustache and other elements are glued on.

Applications
Used for room decoration, made from whole plates or their halves. They decorate based on their own fantasy and imagination. Paint the dishes with acrylic paints.

To make a dinosaur, prepare parts from colored cardboard: head, paws, tail, body the size of half a plate, eyes. Glue the elements to the dishes.

The tail and fins of the fish are decorated with parts cut from plates, or used additional material: felt or other thick fabric, cardboard, scrapbooking paper, etc.

Fruits are made from a whole dish or from half, the designs are applied with acrylic paints.

To make an applique of Santa Claus, you will need the following elements: a fragment of a face the size of half a plate and a nose made of pink colored paper, a mustache, eyes, mouth and a cap. If desired, you can complement the look with a beard made of paper.


A nest made of a plastic plate looks impressive. Natural and artificial materials are used in production: twigs, feathers, grass, ropes. Poultry and eggs are made of thick fabric. You can decorate the product with eggshells.
Lamp
The lamp is made from plastic glasses forming a sphere. The lamp is used to decorate a room, decorate a holiday, or a party.

It is easier to use paper clips to connect cups, but a more durable construction is obtained when using a stapler or glue gun. The advantage of the former is the ability to quickly disassemble and remake the ball.
A circle is assembled from cups, its size is arbitrary, usually 20 pieces of equipment are used.


A lamp is placed inside the product; it is preferable to use a diode lamp. This will protect the craft from overheating. You can use an old table lamp after removing the shade.

Colored balloons are used to decorate the room; it is recommended to make several pieces of different sizes and colors.

Bell
The product is made from disposable cups, yogurt packaging and other small containers.

The dishes are painted with acrylic paint, and a hole is made in the bottom using an awl or nail scissors. A ribbon, string, braid is inserted into it, to which beads are added.
From bottles
Tulips
Flowers are made from several bottles with a capacity of 1.5 liters, you will also need wire, acrylic paints, scissors, foam balls.

The bottom of the dishes is cut off at a distance of 10 centimeters from the bottom. Semicircular cutouts are formed in the upper part, imitating flower petals. A puncture is made in the middle of the bottom using an awl, where the wire is inserted. All details are painted with acrylic paints. To keep the wire-stem firmly, a foam ball painted yellow is placed on it inside the bud.
Apples
Fruits are made from colorful plastic bottles. To do this, cut off the bottom of dishes of the same size and connect them together, fastening them with tape.

Leaves and twigs are cut out of the bottle separately and attached to the middle of the top of the apple.
Peacock
The bird is made from plastic bottles, their volume is arbitrary, depending on the required size of the figure.

The head is made from the cut off neck of the bottle and its bottom, connected together. The body is made from the remaining container. Feathers for the tail are cut out from the sides of the bottles and made into fringes. The parts are fastened together using strong wire.
The peacock is painted with acrylic paints, eyes, nose and other decorative elements are glued on.
Handbag
The product is made from rings from plastic bottle caps. Their number depends on the size of the handbag, usually 200-250 pieces are required. The diameter of the rings must be the same.

The parts are fastened with clamps; you can use multi-colored ones.
The rings are laid out in the shape of a handbag and firmly connected. The remaining “tails” of the clamps are cut off.

Piglet
A pig from a plastic bottle is used mainly for decorating a garden plot and local area.

The animal's body is made from a five-liter container. Cuts are made on it to attach legs, ears, and tail. The neck of 0.5 liter bottles is cut off - these parts are blanks for the paws. They must be the same length. Models for the ears are made from the neck of a one and a half liter container.
All parts are attached to the body using plastic glue. The piglet is painted pink. After the background has dried, draw a patch, glue or draw eyes.
Racing car
To make the machine, a small canister is used.

The bottle is painted with acrylic paint and additional elements are painted. Wheels are made from corks that are attached to the car. To make them spin, they are placed on a plastic or metal rod.
From tires
Decorative well
To complete the product you will need 3 car tires, 2 small diameter logs, 4 pieces of thin timber for fastening the roof, material for it (roofing, boards), enamel or acrylic paint.

To make a well, cutouts are made in the tires for support logs using a sharp knife or a handsaw. The tires are stacked on top of each other, aligning the slots into which the posts are inserted. To ensure the stability of the structure, they are driven into the ground. It is important that the length of the supporting logs is the same.
At the upper ends of the pillars there is a support for the roof - a strong crossbar or lattice. Then slate, boards or other material are attached.
When painting a decorative well, a background layer is first applied, and after it dries, additional images are painted, for example, imitation brick.
Sandbox
For making a nursery play area from an old tire it must be washed and painted with acrylic or enamel paint.

In the selected area, they dig a small depression for the sandbox, install a tire in it and fill the resulting cavity with sand.
Flowerbed frog
The figurine is ideal for placement in areas equipped with a pond. If there is no pond, you can imitate it with large stones painted blue.

To make a frog you will need 5 tires: 3 of the same diameter and 2 smaller ones. Tires are painted generously with green paint (acrylic, enamel). The body is laid out in the form of a two-tier flower bed of 3 tires of the same size. For the eyes, smaller diameter tires are used, which are installed vertically.
The elements are connected using rubber glue or self-tapping screws.
Flowers in the flower bed are placed behind the frog's eyes and on the lower tier.
Snowman made of cotton swabs
To make a snowman, use 3 foam or foam balls, preferably different sizes. They can be obtained from old Christmas decorations or make it yourself from pieces of material. You will also need ice cream sticks and cotton wool, black and red paints.

To stabilize the figure, a part of the largest ball is removed. Cotton buds cut in half and inserted into foam rubber or polystyrene with a hard edge. To hold the balls together, use toothpicks or glue. Sticks for the snowman's eyes, mouth and nose are pre-painted red or black, then inserted. Popsicle sticks are the hands of the figure.

Toilet paper cars
The instructions for creating a racing car are easy to follow and suitable for children to make on their own.

The machine is made from a bushing from toilet paper, in the middle a cut is made in the shape of the letter “H”. The edges are bent in opposite directions: the steering wheel is in front, the seat is in the back. The wheels are made from cardboard by cutting out 4 identical circles. All details are painted with gouache. The wheels are glued to the car. To make them spin, they are placed on a metal or plastic rod, making corresponding holes on the sleeve.

Photo frame made from discs
An ordinary flat photo frame can be transformed into an original sparkling product.

The frame is made from cut pieces of old disks. The shape and size of the parts are arbitrary. The pieces are glued onto the frame like a mosaic.
Jump rope made from plastic bags
The product is durable and durable. It is made of 3 polyethylene strips, each of which can be extended by tying parts of the bags.

3 parts are tied together into a knot at the base and a tight braid is woven. At the end of the work, the strips are secured again with a knot. The handles of the jump rope are made of electrical tape.
Fun checkers from egg trays
The game pieces are bunny and chicken figures. The field is made of cardboard or thick paper.

The figurines are made from cardboard egg trays, painted and decorated: they glue on eyes, ears for a hare, wings, beak and crest for a chicken.


Monster pencil case made from a shampoo jar
Before manufacturing the product, packaging from detergent cleaned of labels, washed and dried.

A model of a monster is drawn on the jar, the size of which must be at least 10 centimeters from the bottom of the bottle. Then the pencil case is cut out using a stationery knife. Arms are cut out from the remaining upper part and glued to the body with hot glue or superglue.
The monster's face is made using self-adhesive paper: a mouth, teeth, eyes are made. To attach the pencil case to the wall, use double-sided tape.

Pistachio shell painting
To make flowers you will need shells, a glue gun, and acrylic paints. You can decorate the picture with dry thin twigs.

When making flowers, the bottom layer is first formed, then the buds are gradually expanded in volume. Products are created in various colors and sizes. Painted and dried flowers are pasted onto the picture.
Flower pots made from rubber boots
From old shoes create hanging pots for plants. To do this, the boots are painted, a hole is made for fastening, filled with earth and flowers are placed in them.

New Year's toys made from light bulbs
Used light bulbs will be useful for making original crafts for the Christmas tree.

To paint and apply images, use acrylic paint; connect the parts using a universal glue gel or a glue gun.

The snowman's nose can be made from salt dough. The base is masked with hats, caps, hairstyles, bows, and so on.

To make shiny Christmas tree decorations, light bulbs are coated with an adhesive base and sprinkled with sparkles. If desired, you can alternate colored matte and shiny stripes.

Christmas tree made from corks
The craft is made from wine bottle corks. They are folded in the shape of a Christmas tree, starting from the bottom tier, and the trunk is attached last. Connect the plugs using a glue gun. The tree is decorated with rhinestones, beads, ribbons, braid and other elements.

Glass jar vase
To make the product, use any jar or bottle of a suitable size.


Pencil from a tin can
To make this craft you will need a tin or any other can, burlap, ribbons, and pins. Decorative elements can be chosen at your discretion.

The burlap is glued to the dishes using double-sided tape or glue. A ribbon with flowers is attached to the top. Finish the work by decorating the pencil holder with a bow formed from a dark ribbon and pins.
Milk carton house
An ordinary milk carton can easily be turned into a house using acrylic paints. Before painting the craft, the bag is thoroughly washed and dried, and the top part is glued together.

The house can be improved by placing a lighting element inside.

Flower pot made from clothespins
To make the craft, use a tin can and clothespins.

Take a tin container of any shape. Clothespins are attached around the circumference. If desired, the flower pot can be decorated with decorative elements: cardboard figures, ribbons, braid, etc.
Flowers from egg trays
To make a bouquet, use cardboard egg trays, from which a mock-up is made and petals are cut out.

According to the photo of the master class, the flower is painted. Gouache or acrylic paints are suitable for this purpose. A hole is cut in the middle of the flower, a stem is secured, which is used as a wire, and the product is decorated.

Pompoms from cupcake wrappers
The ball is used to decorate guest tables and desserts. To make this you will need paper cupcake wrappers. Their number depends on the volume of the pompom.


For production use foam ball, which can be replaced with a sphere made from crumpled old newspaper. The wrapper is pierced with a pin in the middle, then it is fixed at the base of the head and lubricated with glue.

Stick the element into the ball, press it, fluff the petals. The same algorithm is performed with the remaining wrappers, distributing them evenly over the sphere.

TV from a cardboard box
To manufacture the product, medium or large size packaging is used.

The top flaps of the box are removed and turned upside down. A rectangle is drawn and cut out on the front part - this is the screen of the future TV. Cling film or cellophane is glued to the hole. Next, the product is decorated: buttons, an antenna are attached, and painted. From the remains of the box you can make a remote control.
Souvenirs from matchboxes
Miniature cardboard packaging is used as souvenirs.

They decorate products based on their own fantasy and imagination: wrap them in wrapping paper or for scrapbooking, fabric, stick on buttons, beads, rhinestones and other elements.

You can put a miniature photograph in the box, decorate the packaging with inscriptions, candles, or create a three-dimensional picture.


Wine cork wreath
The craft is a Christmas wreath and is used to decorate a room or door.

To make the product, plugs are used, which are randomly connected to each other using a glue gun. Between the details there are red beads and beads imitating berries. If desired, the wreath is decorated with spruce and pine branches, on which Christmas tree decorations are placed.
Figures from old disks
The instructions for creating crafts are easy to follow and suitable for working with children.

The figures are decorated with colored paper and drawn on disks, forming the image of the character.


Toilet paper butterflies
They are one of the options for children's crafts. Butterflies are easy to make and the process of creating them takes a minimum of time.

To make insects, use sleeves that are wrapped in colored, wrapping paper or for scrapbooking. The wings are made of the same material and glued to the body. The product is decorated with flowers, eyes are glued on, and antennae are formed from braid, rope, and wire.
Aquarium out of the box
The craft is made from medium-sized packaging.

Rectangular holes are cut out on the front and top sides of the box. Cover the aquarium with paper, paint the inside, draw fragments underwater world. You can attach shells, pebbles, inhabitants, etc. to the bottom using double-sided tape.
Representatives of the underwater habitat are created from cardboard and paper; toys and souvenirs can be used. A rope is attached to them, its end is tied to a hook made of wire.
Cocktail sticks are glued to the top of the box in the cutout area. Hooks are attached to them marine life. Now they can be moved. If desired, stick cellophane or cling film to the hole in the front of the box.
Foam turtle
It's easy to create a floating bath toy from scrap materials.

To make it you will need a piece of polystyrene foam, a 0.5 liter plastic bottle, 5 corks, and decorative elements.
First, draw a turtle template on cardboard. Before this, the bottom of the bottle is cut off and correlated with the layout. Then the design is transferred to polystyrene foam and cut out. The shell in the form of corks and the bottom of the bottle is glued to the body. The turtle is decorated with beads, eyes are glued on, and nostrils are drawn.
What can be used as a material for DIY crafts made from waste material? What crafts would be interesting for children to make? What can you give as a gift to your grandmother or give to your cute little neighbor? What crafts will become your favorite toys? We show and tell.
DIY crafts from waste materials: cardboard wonders
Let's start with crafts made from the most popular waste material for DIY crafts - cardboard. Sheets of cardboard and boxes that remain after unpacking sofas and refrigerators have big size, which means the crafts made from them will be quite large-scale.
The cardboard holds its shape well, it is convenient for children to work with it, since small flaws are not decisive. Crafts made from this waste material - cool toys who will live in the nursery for a long time, and besides, they are free.
Little car owners
Make cardboard vehicles of all kinds for little car enthusiasts- trucks, convertibles, mopeds. Let the children choose the brand themselves. Let the kids, to the best of their ability, participate in the manufacture of cardboard machines - coloring, gluing, and in some places cutting the cardboard is just up to them. By the way, it is more convenient to cut cardboard not with scissors, but with a knife or cutter.


Build traffic lights, a car wash, a gas station, arrange road signs and provide your child with a steering wheel that will spin - there will be no limit to the happiness of little explorers. Draw your license and issue it after passing the exam. At the same time, it will be possible to simulate situations on a real road and learn the rules of the road.
Lots of cardboard, and no mortgage
Be sure to make a fairly spacious cardboard house for your children. The more windows, hatches, doors and doors there are in the house, the more interesting it will be.
Children, of course, must paint and furnish the house themselves. If you still have wallpaper after renovation, you can make a toy house that is very similar to the real one. The children will be delighted!

House from Cardboard Dad
If enough big box no, limit yourself to a dollhouse or a garage for cars made of a cardboard box. Help the children make smaller crafts with their own hands from waste material - miniature doll furniture, access to the upper floors of the garage, etc.


Crafts puzzles
A cardboard base and several cardboard strips glued onto it make interesting puzzles. The height of the sides and the width of the passages must correspond to the size of the ball, there are no other restrictions. When children master the simplest puzzles, they will be able to put together other, more complex ones themselves, so you can prepare several basics at once.

Moving crafts
Make a cardboard theater and act out your favorite fairy tale. Make a cardboard aquarium - the fish can be swapped and generally replaced with others, depending on your mood.


Build a hanging composition with a marine theme. This DIY scrap craft is super easy and great for helping kids fall asleep. Looking at the steamer swaying in the summer breeze and at the seagulls cutting through the air, they will peacefully sail away to the land of dreams.

DIY crafts from waste materials: stamps and stencils
Stamps are a big childhood love. Use objects with an interesting texture as stamps, make stamps from toilet paper cardboards, cut them out of erasers or bottle caps... And find a way to distract the children in time, otherwise all objects in the house that have not become drawing surfaces will become stamps.


Another craft idea is to use stencils. It will allow you to “draw” more complex shapes, than using stamps and will attract children's attention to the world of plants.


If aerosol paint is not at hand, use gouache or watercolor and old toothbrushes (this, by the way, is much safer). Dip your toothbrush into the paint and run your thumb over it. Try to direct the splashes of paint onto the contours of the leaves. This way you can create entire compositions.
Games with stencils
For adults, stencils are a reason to talk to children about plants and flowers. You can arrange a game: “print” on cards different plants, and then guess them and learn to name them correctly.
If a participant in the game does not immediately cope with the task, give him hints: for mint it could be the smell (close your eyes and smell), for raspberries - the taste of the berry, for nettles - information that it burns, etc.
DIY crafts from waste materials: girly treasures
For girls, you can make a lot of crafts and decorations with your own hands from waste material.
Material number one is buttons. Rings and bracelets made of buttons, button pins, a caterpillar made of buttons, a bag embroidered with buttons... By the way, learn how to sew buttons perfectly, because many modern children cope with this as poorly as with laces.


Have you ever made crafts with your own hands from waste materials? A positive answer to this question can be heard from many parents whose children attend kindergarten or school. Today we will discuss original ideas crafts from improvised materials.
Original ideas from the collection of needlewomen
First, let's figure out what waste material is. These are any available means that we use on the farm. Often, many items must be recycled, but you can make original crafts from them. By the way, such crafts will not only help your child get a high grade in an applied arts lesson, but will also decorate your garden plot.
What material is suitable for constructing crafts? Let's look at the main types of waste material from which you can make a real designer masterpiece. So, available tools suitable for modeling crafts include:
- carton boxes;
- toothpicks;
- cotton pads;
- matches;
- dried leaves;
- chestnut fruits;
- any bumps;
- buttons;
- threads;
- plastic or glass containers;
- cocktail straws;
- stones;
- various papers;
- wax candles;
- clothespins;
- CDs and much more.
If you want to show your imagination and realize creative ideas, use everything that is no longer useful to you on the farm.
We organize an exhibition in a kindergarten
Many parents are repeatedly faced with the problem of modeling crafts for their child. In kindergarten or school, they give similar tasks every now and then. You can safely help your child design an original craft that will take pride of place at any exhibition of hand-made items. We would like to present to your attention a master class on creating a simple, but at the same time original crafts made from waste material with your own hands for children in kindergarten.

Necessary materials:
- 2 pcs. clothespins;
- thin wire tape;
- cocktail straws;
- different-sized buttons;
- adhesive tape (duct tape or insulating tape);
- office glue.
Step-by-step description of the process:

To construct such a machine, you can use colored objects or, for example, invite your child to pre-paint a wooden clothespin with paints. As you can see, in a matter of minutes you can make a beautiful and easy craft together with your child.
Bouquet of buttons: a simple and beautiful craft for a schoolchild
Let's say your child is in 2nd grade at school and he was assigned to make a craft for his arts and crafts class. As you understand, parents are simply obliged to help their child accomplish this homework. We bring to your attention the construction of a designer craft from waste material with your own hands, or rather, from buttons. Let's try to make a beautiful and colorful bouquet. Shall we get started?

Necessary materials:
- different sizes of multi-colored buttons;
- green craft wire;
- felt fabric;
- templates for cutting flowers;
- wire cutters.
Step-by-step description of the process:

Decorating a garden plot: designers' ideas
Many housewives try to decorate their garden plot to make it cozy and unique. From waste material you can make crafts for your dacha with your own hands, for example, original flower beds, hanging flowerpots, stools, frames for climbing plants, animal figurines, decorations for an artificial pond, etc.
We present to your attention a step-by-step photo tutorial on how to create a craft from an unnecessary plastic canister with a nominal volume of 5 liters. Most often, housewives plant flowers, shrubs or ornamental trees. Today we propose to design a flowerbed that will not only be an excellent design solution for summer cottage, but will also testify to your impeccable taste.

Necessary materials:
- plastic bottle with a nominal volume of 5 liters;
- scissors or stationery knife;
- gouache paints;
- thick white cardboard sheets;
- pencil;
- glue or double-sided adhesive tape;
- decorative elements;
- ruler.
Step-by-step description of the process:

We also recommend
 Congratulations to the godson from the godmother in prose Birthday wishes for the godson in your own words
 Social benefits and pensions – what will change?
 A letter from Santa Claus and a certificate of commendation Sounds like “The Snow Maiden’s Song”
 Beautiful wish statuses for Valentine's Day Gathering your thoughts
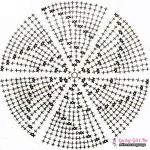
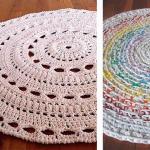 Do-it-yourself rugs from old things - turning waste into income
 Summer crocheted hats with flowers - many patterns, ideas and designs