Crochet vest for girls: options, patterns. Sleeveless vest for girls crochet Crochet vest for 7 years
In the autumn season, you really want to pamper your child with something pleasant and warming. For example, you can knit a warm and beautiful vest for a girl with your own hands. Both knitting needles and a crochet hook are suitable for this. Even beginning needlewomen can knit a vest for a girl; you just have to follow the diagram and description, and everything will definitely work out. Let's consider several options for different models of vests.
Knitted vest for girls - diagram and description
Classic sleeveless vests, vests with hoods, with or without buttons, with high collars - there are many varieties of vests that will suit a girl and at the same time be practical in the cold season.
The main thing is to choose a vest model that the girl will really like. After all, in this thing the child will go to kindergarten or school, where she, like any girl, wants to feel the most beautiful. To make the choice easier, let's look at different patterns and descriptions of knitting a vest for a girl.
Knitted vest for girls for beginners


You can start knitting a vest for a girl for beginners with this model. This hand-knitted vest for girls will go perfectly with any clothes and will protect the child in cold weather. A big plus is the presence of buttons and a hood.
Vest size: 74/80 (86/92) 98/104
For the vest you need: yarn (55% cotton, 45% polyacrylic; 140 m/50 g) - 100 (150) 200 g light gray and 50 (50) 50 g red; knitting needles and long circular knitting needles No. 3.5; 5 buttons with a diameter of 16 mm.
Mating: shawl Knit front and back rows.
Knitting density: 19 p. x 42 r. = 10 x 10 cm.
Pattern:


Back
Using red thread, cast on 59 (67) 74 sts and knit in garter stitch.
For armhole cutouts, 18 (21) 24 cm from the initial row on both sides, close 2 stitches and in each next 2nd row. decrease on both sides another 2 (3) 4 x 1 p. = 51 (57) 62 p.
After 30 (34) 38 cm from the initial row, close all the loops. The middle 27 (29) 30 sts form the neckline, the outer 12 (14) 16 sts form the shoulders.
Left shelf
After 1 cm, continue knitting with garter stitch with light gray thread.
For button holes, retreat 2 stitches from the front edge and knit 2 stitches together, 1 yarn over. In the purl row, knit a yarn over. Make the first hole for the button 2 cm from the starting row, the rest - at intervals of 6 (6.5) 7 cm = 24 (28) 30 r.
At the same time, for the armhole, after 18 (21) 24 cm from the initial row from the right working edge, close 2 stitches and in each next 2nd row. decrease another 2 (3) 4 x 1 p. = 28 (31) 34 p.
To cut the neckline, after 27 (30) 33 cm from the initial row from the left working edge, close 5 (6) 7 p. and in each next 2 p. close off another 1 x 3 p., 2 x 2 p. and 4 x 1 p.
Right shelf
Using red thread, cast on 32 (36) 40 stitches and knit in garter stitch.
After 1 cm, continue knitting with garter stitch with light gray thread.
For the armhole, after 18 (21) 24 cm from the initial row from the left working edge, close 2 stitches and in each next 2nd row. decrease another 2 (3) 4 x 1 p. = 28 (31) 34 p.
To cut the neckline, after 27 (30) 33 cm from the initial row from the right edge, close 5 (6) 7 p. and in each next 2 p. close off another 1 x 3 p., 2 x 2 p. and 4 x 1 p.
After 30 (34) 38 cm from the initial row, close off the remaining 12 (14) 16 stitches for the shoulder.
Hood
Using a light gray thread, cast on 58 (70) 80 sts and knit in garter stitch.
For side bevels in each next 16 (12) 10 r. on both sides decrease 4 (6) 8 x 1 p. = 50 (58) 64 p.
After 16 (18) 20 cm from the initial row, close all the loops.
Assembly
Stretch the parts according to the pattern, moisten and let dry.
Use a mattress stitch to sew the shoulder seams.
For the straps along the edges of the armholes, use red thread to cast on 48 (52) 56 stitches on the knitting needles for each strap and knit 1 cm in garter stitch. Then loosely close all the loops.
The side seams and the seams of the slats are made with a mattress seam. The top seam of the hood is made with a mattress seam. Sew the hood to the neck using a mattress seam.
For the stripes along the edges of the shelves and along the edge of the hood, using red thread on circular needles No. 3.5, evenly cast on 156 (190) 204 sts and knit 1 cm in garter stitch. Then loosely close all the loops.
Sew buttons.
Children's vest for school with a pattern


A children's vest knitted for a girl is a pleasure for both the needlewoman and the baby. After all, going to school wearing a beautiful thing that your mother or sister lovingly knitted is a reason for joy every day.
Vest size: for ages 2 (4) 6 (8) 10 years.
For the vest you need: yarn (100% wool; 50 g/100 m) – 2 (3) 3 (3) 4 skeins pale green, 1 (1) 1 (1) 1 skein yellow, 1 (1) 1 (1) 1 skein pale -pink; circular knitting needles No. 4 and 5, length 80 cm; for making buttons 4 rings for curtains with a diameter of 11 mm.
Bust width: 56 (60) 64 (68) 76 cm.
Vest length: 32 (35) 38 (41) 44 cm.
Knitting density: 16 p. x 22 r. = 10 x 10 cm, knitted with a pearl pattern.
Important: up to the armholes, the product is knitted on circular needles in rows in forward and reverse directions in a single fabric.
Pearl Pattern: 1st r. (= purl row): *K1, P1*, repeat from * to * until end of row.
2nd row: knit loops according to the pattern (knit stitches - knit stitches, purl stitches - purl stitches).
3rd row: *P1, k1*, repeat from * to * until the end of the row.
4th row: knit stitches according to the pattern (knit stitches - knit stitches, purl stitches - purl stitches). Repeat these 4 rows.
Back and shelves
On knitting needles No. 4, cast on with a pale pink thread 128 (139) 150 (161) 172 sts and knit 2 rows. facial Switch to a pale green thread and knitting needles No. 5, knit 1 r. facial (= faces row). Continue working with the pearl pattern and knit until the length of the product is 6 (7) 8 (9) 10 cm, finishing with knits. near. Move the loops to the other end of the knitting needles, switch to needles No. 4 and turn on the yellow thread, knit 4 rows. facial, evenly decreasing in the 1st row. loops up to 97 (105) 113 (121) 129 sts on knitting needles.
Then switch to needles No. 5 and a pale green thread, knit 1 r. knit stitches and continue working, distributing the pattern loops in the following sequence: 1 (0) 4 (3) 2 stitches of pearl pattern, *5 stitches of stockinette stitch, 5 stitches of pearl pattern*, repeat from * to *, finish 5 stitches. stockinette stitch, 1 (0) 4 (3) 2 p. pearl pattern.
When the length of the part is 17 (20) 23 (26) 29 cm (last row = purl row), bind off the loops for the armholes on both sides: knit 21 (23) 25 (27) 29 sts, bind off 6 sts for the armhole , knit 43 (47) 51 (55) 59 sts, bind off 6 sts for the second armhole, knit 21 (23) 25 (27) 29 loops.
Left shelf
On the loops of the left front, continue knitting, decreasing from the inner edge to form an armhole in every 2nd r. 3 times 1 p. Perform decreases before edging. loop, knitting 2 stitches together according to the pattern - knit crossed or purl crossed. After this, 18 (20) 22 (24) 26 sts will remain on the knitting needles. Then knit straight until the armhole height is 6 cm.
From the outer edge, temporarily leave the outermost 7 (8) 9 (10) 11 stitches for the fastener bar and continue knitting on the remaining loops.
To form a neckline from the outer edge, decrease every 2nd r. 4 times 1 p. = 7 (8) 9 (10) 11 p. Continue knitting straight until the armhole height is 14 (15) 16 (17) 18 cm. Then close the loops.
Right shelf
Knit similarly to the left one, but in a mirror image, attaching the thread from the wrong side to the left loops of the right front.
Back
Attach the thread to the left back loops on the wrong side and knit as follows: 3 times in every 2nd r. decrease 1 stitch on both sides = 37 (41) 45 (49) 53 stitches left on the needles. Then knit straight until the armhole height is 12 (13) 14 (15) 16 cm.
Temporarily leave the middle 19 (21) 23 (25) 27 sts and finish both sides separately.
From the inner edge to form the neck, decrease every 2nd r. 2 times 1 p.
Armhole straps
Along the edge of the armhole on the front side, cast on 45 (49) 53 (67) sts with yellow thread and knit 2 rows. facial Close the loops in the purl row.
Make the second armhole plank in the same way.
Sew shoulder seams, including trims.
Neck trim
Knit with needles No. 4 using pale pink thread. From the front side knit the left 7 (8) 9 (10) 11 sts on the right front, cast on 10 (12) 14 (16) 18 sts along the edge of the neckline to the shoulder seam, 4 sts from the shoulder seam to the left back stitches , knit the left 19 (21) 23 (25) 27 sts of the back, pick up 4 sts to the shoulder seam, 10 (12) 14 (16) 18 sts down to the left stitches of the left front and knit them = 61 (69 ) 77 (85) 93 p. perform 2 p. facial Close the loops in the purl row.
Left clasp strap
With a yellow thread, cast on from the front side along the front edge of the left edge of the loop - at the rate of approximately 3 sts out of 4 p. = 50 (54) 58 (62) 66 p. Perform 2 p. facial Close all the loops in the purl row.
Right clasp bar
Cast on the loops along the front edge of the right shelf with a pale pink thread = 50 (54) 58 (62) 66 p. Work 1 p. facial In the next row, make holes for buttons: 18 (19) 20 (21) 22 knit, *knit 2 sts together, cast on 2 new sts, knit 2 sts together, 5 (6) 7 (8) 9 knit.*, repeat from * to * 3 times, finish: knit 2 sts together, cast on new 2 sts, knit 2 sts together, knit 1. In the purl row, close the loops by knitting new loops 1 knit, 1 purl.
Embroidered flowers
Each flower consists of 4 stitches of a stitched stitch (= petals) and a double cross stitch in the middle. Embroidery should be done only on the shelves, color distribution - see photo. Fasten the ends of the threads.
Buttons
Make 4 buttons: sew the rings over the edge with 18 stitches of a laget seam. Then, inside each ring, use a contrasting thread to make a “web” of three large intersecting stitches and “darn” them with a “back needle” seam, placing a stitch behind each of the 6 rays of the “web”. Sew buttons.
Wash the product, lightly wring it out, lay it out and leave it to dry.
Crochet vest for girls
Among the unusual and practical things that can be crocheted, of course, there are vests. There are many varieties of them - from complex ones to those that beginners can knit. The big advantage of choosing crocheting is speed, so if you urgently need to knit an insulated cape for your child, crochet is the most suitable option.
A simple model for beginners


A crocheted vest for a girl is quite complex to make, but it always looks unusual and interesting. This vest will refresh your baby's look. Knitting a vest for a girl for beginners may seem difficult, but let’s try to figure out the pattern and description together. And if it’s too difficult, we’ll use video tutorials.
This vest model is made with motifs from section-dyed yarn.
Vest size: 3-4 years.
For the vest you need: Nako Spaghetti Effect yarn - 4 skeins (25% wool, 75% acrylic, 100g/60m) section dyed and leftovers and 1 skein of contrasting color thread. Kryusow No. 7, 2 buttons.
Back motif: Using a sectional dyeing thread, cast on 10 air loops and connect into a ring. Knit rows 1-7 of pattern 1.
Shelf motif (knit 2 symmetrically): Using a sectional dyeing thread, cast on 10 air loops and connect into a ring. Knit rows 1-9 of pattern 2.
Assembly: sew shoulders and sides.
Clothes sewn or knitted with your own hands are much more beautiful, elegant and warmer (if they are winter) than those bought in a store. A beautiful hand-knitted vest can decorate an ordinary blouse. Depending on what thread it is knitted from, it can replace a warm jacket in winter.
Crochet vest for girls
Depending on the threads used, the vest can be knitted festive and elegant, or ordinary, everyday. Such clothes can be worn at different times of the year, they can be stylish and versatile in any situation.
Even a novice needlewoman can crochet a sleeveless vest for a girl. The only thing she will need for her product is choose a simple one. Let's consider several options for knitting a sleeveless vest for a girl.
Vest made of squares
It will be easy for beginners to knit a vest, because it consists of squares. And knitting a certain number of identical squares is much easier than knitting the entire product at once, even if there is a pattern.
You need to decide on the yarn for the sleeveless vest. If a girl will wear the product in the cold season, then the threads should be wool or wool blend. If the sleeveless vest will be worn as elegant clothing, then you can take a cheerful acrylic color.
Before starting work, you need make a sleeveless vest pattern on paper, according to the size of a girl. In addition, you will need:
- threads;
- hook.
Since all children are different, to accurately determine the number of squares, you need to knit one for a sample. The simplest pattern chosen is:

Tie the edge of the finished square like this: two rows need to be knitted with single crochets, and the third row should be knitted with a crab stitch pattern.
Sample needed wash or wet it and wait until it dries completely.
We determine the dimensions of the sample and calculate how many such squares need to be knitted. To make the product fun, you can knit squares of different colors.
Sew the finished squares together y, according to the pattern. We process the edge of the neck with a crawfish pattern, and the bottom in the same way.
Children are always happy with any new thing, and if it is bright, then the girl will be doubly pleased. Crocheting sleeveless vests is not difficult, the main thing is to have a desire to get a new thing.
Elegant openwork vest
Depending on the thickness of the selected threads, the knitting density for the sample will be different. We knit a pattern according to the pattern, which consists of 6 loops plus 2 outer loops.
Description:

Having knitted the sample, having a description or diagram, we calculate the knitting density from it. Having taken measurements from the child, we determine the number of required loops on the front and back of the vest. We build a pattern, and only after that we begin work.
The back of the vest can be knitted like a simple rectangle, then in the finished product the sleeve turns out to be lowered.
You must make a cutout on the front of the vest. Its shape and size depend on your desire. Depending on the pattern made, the shelf of the product is knitted.
The finished parts are sewn along the side and shoulder seams. In order for the vest to have a finished look, you need to tie it along the neck, along the sleeves and along the bottom. The new thing is ready.
Simple crochet baby vest
As in the two previous cases, you will need to take measurements and make a pattern. Then you need to knit a knitting sample and use it to calculate the required number of loops for the front and back of the product, only then proceed to the main work.
For this vest it will be very simple - you only need to knit double crochets. The scheme will be very simple. Each row should begin with three air loops. We knit both halves (front and back) up to the armhole simply and straight, in the same way. Having attached the product to the pattern, we determine how and where to make decreases for a beautiful design of the armhole.
On the front shelf, mark the middle of the product - this will be the beginning of the toe cut. In the next row, the knitting will be divided into two halves, and each will be knitted separately. Gradually you will need to make decreases to widen the cutout. Periodically apply your work to the pattern to determine the decrease for the neckline.
A small neckline should also be made on the back shelf. Mark the middle of the product, attaching the finished work to the pattern, we determine when to make a decrease for the neckline. The height of the back neck will be no more than 5 cm.
Assembly.
Connect the parts, try on the product. If you knitted the parts according to the pattern, then nothing unexpected should happen. After trying on the vest, we sew the vest tightly; if necessary, we tie the neckline, armholes and bottom of the product. You can use a thread of a different color for contrast. The finished product can be decorated with embroidery or applique.
 To knit children's clothes you only need to buy soft, pleasant, hypoallergenic yarn. Each manufacturer has a special children's yarn.
The color of the finished product will depend on what you are knitting it for. A sleeveless vest for walking or for kindergarten can be knitted from either bright threads or pastel colors. For a school-age girl, it is better to knit a vest from neutral colors.
Any, even the simplest vest, can be decorated applique or embroidery. If you have been practicing for a long time, then the product can be knitted from different colors, subsequently without using any decorations for it.
To ensure that the finished vest, knitted according to the pattern, does not lose its original shape, it must be washed only by hand, in warm water. And dry only on a flat surface.
Probably, each of the parents has encountered the problem that their daughter has nothing to wear over a light blouse or turtleneck in cold weather. A good solution to the problem would be a crocheted vest for girls. If you yourself prefer this type of clothing, then you know very well how light and comfortable a sleeveless vest is. A children's vest will fit perfectly into a wardrobe for the autumn-spring period. And you can wear such a thing everywhere: to kindergarten, school, for a walk and at home.
In this article you will find several techniques for knitting a children's vest with a detailed description of the process and illustrations.
Openwork crochet vest for girls: master class
The knitting technique presented in this master class will allow you to knit a beautiful and cozy vest for a girl of any age. Due to the openwork squares, the vest will look good not only under children's trousers, but also under any dresses and skirts. A detailed description of the process and diagrams will help even novice needlewomen to crochet a unique vest for their beloved girl.
Necessary materials:
- yarn of three colors Alpina Lexi;
- hook 3.5.
Process description:
- We start knitting by forming a magic ring. If you have never encountered such a term, close the usual 6 chain stitches into a ring.
- All knitting will be based on this simple pattern.

- Next we move on to knitting stitches. To do this, cast on 3+1 lifting air loops. One loop will replace our double crochet stitch.
- We knit 11 double crochets in the round in the usual way. After each column we add 1 air loop.
- We tighten the magic ring and secure the outer posts with a loop.

- Add a new color to the knitting and make 3 lifting stitches.
- In the air lifting loop that we made between the stitches of the first row, we knit 2 double crochets.
- We fasten the loops on the hook and get a petal of 3 columns.

- We do the same with the remaining air loops in a circle. We fix the last and first column. As a result, we get a flower like this.

- We introduce a new color into the knitting by attaching it to the connecting loops of the petals.
- We knit 6 double crochets into the next row of chain stitches.
- Next we make picot. To do this, we knit 5 lifting loops and repeat 5 double crochets in the same arch between the petals.

- We connect the knitted arch with the new petal with 3 chain loops and repeat knitting double crochets.
- The result should be 4 sides of the square. Something like this.

- We knit the second square motif in the same way, but at the same time connecting it on one side with a ready-made square. We do this as shown in the photo.

- When the motifs are ready, use a needle to hide the ends of the threads behind the stitches on the wrong side of the knitting.
- In this way we knit the required length of the vest.
- We crochet the collar, sleeves and bottom of a vest for a girl using the “crawfish step” pattern according to the diagram.

- The crochet baby vest for girls is ready!
Classic crochet vest for 2 year old girl
This cozy vest is made of yarn with cashmere, which makes it incredibly soft and pleasant to the body. The buttons on the vest not only look stylish, but also provide reliable protection from the wind.
Necessary materials:
- 2 skeins of Alize yarn (80% Superwash, 10% cashmere, 10% nylon);
- hook - 3.5 mm;
- 5 buttons in the color of the yarn;
- 3 pins.
Product dimensions:
- chest circumference - 63 cm;
- length from shoulder to bottom edge - 30 cm;
- armholes - 12 cm.
Knitting back:

Knitting the right and left front:

Assembly:

Finally, I would like to give some useful tips on crocheting vests:
- Use only high-quality and proven yarn. It is better to give preference to materials that are softer and more pleasant to the body, so as not to cause irritation to the child’s skin.
- Choose the color of the product based on what you are knitting it for. If this is a vest for kindergarten or walking outside, choose bright colors. For older girls of school age, neutral tones are suitable.
- If you are a professional in crocheting, then it will not be difficult for you to decorate a sleeveless vest with a beautiful ornament or a crocheted flower. Especially recently, jacquard patterns have become popular.
- To ensure that the finished vest does not lose its color and shape, choose hand washing. It is better to dry the product on a flat, smooth surface.
- You can also decorate a vest for a girl with various beads, buttons and sequins. Your fashionista will simply be delighted.
Now, having crocheted a baby vest for a girl, you can try to create other products, for example, a blouse or sweater. I wish you creative success!
During the warm season, you look at things completely differently. I want something light and airy. So, it's time to wear openwork sleeveless vests! This piece of clothing will add a romantic touch to a woman's look. A crochet sleeveless vest will help beginners in their work. All that remains is to choose a model and bring your idea to life with diagrams and descriptions.
Crochet sleeveless vest model with pattern for girls
Little fashionistas will love the openwork sleeveless vest, which will decorate any young lady. A sleeveless vest for girls is perfect for a warm summer evening. To create it you need a hook and yarn.
First you need to familiarize yourself with the pattern of the product:
And here is the knitting pattern itself:

Additional flower scheme:

Cast on eighty-one chain stitches. Knit in single crochet stitches.

Turn the work around. Work the second row with a single crochet stitch.

Cast on four lifting loops and knit the back using the second pattern. When the first row is knitted, you need to cast on four lifting loops.

Now turn the work over and knit the second row according to the second pattern.

So, according to the second pattern, knit seventeen rows. Retreat in rapport on both sides. Now, according to the second pattern, knit three rows in the center of the sleeveless vest.

We knit the straps. There should be eight columns. We knit on them. Leave the four middle columns unknitted. On the sides behind the second pattern we knit two columns. Knit the second strap in this way.

We knit in front. Cast on eighty-one chain stitches; the knitting pattern is similar to the back stitch. Afterwards, fold the finished product and crochet it. The sleeveless vest is ready!

Using the pattern you need to knit a beautiful flower.

Sew a flower onto the sleeveless shirt and fasten a bead inside. Tie single crochets around the neck and armholes of the sleeves. And you can wear an exclusive item.
Elegant item for your wardrobe
Fashion trends have also affected women, because they want to look modern and attractive. An openwork sleeveless vest for women is good because it goes with any outfit.
For a women's sleeveless vest you will need yarn and a number six crochet hook. This pattern is knitted as one piece. Knit the initial ring, and then knit the back according to the pattern.

When the tenth row ends, cast on twenty-four chain stitches, skip twenty-four stitches from the bottom row, and double crochet the remaining stitches. The second opening is done in the same way. Fifty-two loops are equal to the lower back. Next, double crochet in both directions, connecting the stitches in each row at the shoulder seams.
Add between armholes like this: in the first row, add six stitches evenly, you should get fifty-eight stitches. In the second row, add four loops, we get sixty-two loops. We add eight loops in the third row, we get seventy loops. In the fourth we add six, we get seventy-six, in the fifth we add ten, we get eighty-six, and in the sixth we add eight and we get ninety-four loops.
To make shelves and a collar, knit all one hundred and sixty-two loops in a circle. Add eighteen loops in the second row, we get 180, knitting two from one loop. Then the second row is knitted without any additions. Wet the product and dry it.


Men's fashion for sleeveless vests with description
Boys also love to be trendy. Fashion is created for them too! Practical sleeveless vests are suitable for any season and weather. A sleeveless vest for a boy can also be a great gift. The presence of a children's drawing will be especially interesting.
You will need yellow, gray, blue-gray, black yarn and a hook.
For the front, cast on fifty-six stitches with gray thread. Knit in pattern according to the first pattern.

Having knitted twenty-three centimeters for the armhole, in each row decrease three loops once, two times and one once. When you start knitting the armholes, all the stitches need to be divided in half and each one knitted separately. In each row of the face, decrease one loop from the neck side, that is, fifteen loops.
For the back, cast on fifty-four chain stitches and knit double crochets. From the second row we knit the pattern according to the second pattern.

We knit the armholes in the same way as in the front and at the same height. We do not tie the throat. We finish at the height of the front part.
The sleeveless vest is easy to assemble. We connect the shoulders and sides. Tie the bottom, armholes, neck behind the third pattern, alternating colors.
A warm vest is one of the irreplaceable and very necessary components of a little girl’s wardrobe. In the spring it will replace a light jacket, and in the winter it will become a good insulator under outerwear.
This pattern for knitting a vest for a girl looks quite festive, but at the same time it is very easy to knit, which is good for those who are just learning the basics of this craft. Thanks to the detailed description, every mother will be able to give her baby such beauty that will warm her during the cold season.
How to crochet a vest for a girl?
In knitting, acrylic threads of two colors were used - purple and white, hook No. 2, scissors. This product is designed for a girl 1-1.5 years old, has the following dimensions:
Waist circumference – 58 centimeters
Height (including harness) – 30 centimeters
Shoulder width – 8 centimeters
Depth of neckline – 12 centimeters
If you need to knit a vest for a larger girl, increase the number of stitches and rows accordingly.
Back of the vest
Work begins with a set of 50 loops. This will be the base of the back. Next, each row will begin with three lifting loops, and end with a reversal of the product.
We will knit the back completely with double crochets (dc).
We knit the first 17 rows of fabric from CCH.
Row 18: 3 single crochets (SC) – 44 SC – 3 SC.
Row 19: 6 RLS – 38 RLS.
Row 20: 38 dc (that is, we knit to the sc of the previous row and do not knit further, unroll the knitting)
21-31: completely dc (38 loops each).
Row 32: 13 Dc – 12 Dc – 13 Dc.
The back is ready.

Vest panels (front part)
We knit the front part with the pattern shown in diagram 1. This is a repeat that will be repeated, that is, the 1st row is the same as the other odd ones, and the 2nd row is the same as all the other even ones.

To begin, we cast on 58 chain stitches and knit a row of dcs. Then we begin to knit a pattern of 15 rows, that is, 8 white and 7 purple, ending with white. Next we will knit the sleeve notch.
To do this, we start knitting the 16th row from the second purple fan, and end with the penultimate one. We knit the 17th row as usual, starting with 3 chain stitches and two double crochets with white yarn.
Now in the next row we will make a hole in the neck, thereby dividing the knitting into two parts - one and the second shoulder.
Row 18: (purple yarn) 1 chain stitch – fan (7 dc in one loop) – 1 sc in the central part of the white fan of the last row – fan – 1 sc – turn knitting.
Row 19: according to the drawing, that is, a semi-arch, an arch and a semi-arch again.
We knit 9 more rows like this. We finish with purple.
We will knit the next white row like this: 3 lifting loops and 2 sc in one loop - 1 sc - the central loop of the fan of the previous row - fan - 1 sc - turn knitting.
We will knit the next row of purple color like this: 3 lifting loops and 2 dc in one loop - 1 sc - fan - 1 sc. Close the knitting and break the thread.

We tie the thread and knit the second shoulder in the same way (symmetrically).

Now we sew both parts together.

Harness
We tie the bottom with fans of 6 dcs with an interval of 2 loops and a single crochet between them.

We tie the sleeves first with dcs, and in the second row we knit fans from 3 dcs with an interval of 1 loop and sc between them.

We also recommend
 Do-it-yourself rugs from old things - turning waste into income
 Summer crocheted hats with flowers - many patterns, ideas and designs
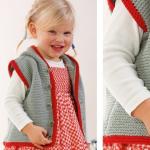 Sleeveless vest for girls crochet Crochet vest for 7 years
 How does a woman think? How do men think? This is the essence of a man’s calling - to be a breadwinner and provider.
 Ice cubes with chamomile for the face Rub ice cubes with chamomile on the face
 Sincere birthday greetings