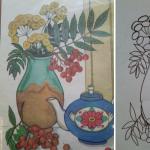
Jute filigree: the basics of openwork technique and ideas for beginning needlewomen. Master class on jute filigree: Panel "Underwater World" Pictures made of jute
Using jute filigree, you can create beautiful patterned crafts, lampshades, panels, boxes and more, and they look so unusual and elegant that it is impossible to look away!
The best thing about this relatively new type of needlework is that jute filigree does not require any special expensive devices and materials; all of them are available to anyone.
The main material is jute cord. Agree, it’s not at all difficult to purchase a reel. And if the idea involves working in color, then it can be painted in a variety of colors acrylic paints. In addition, you will also need tweezers, a thin knitting needle, transparent Titan glue, although regular PVA, an awl and scissors will do. Well, if you are a beginner, then you will need pattern stencils. They can be made by hand or purchased at any craft store.
In order to start working in this technique, you first need to decide on a pattern. Let these be the simplest drawings, but clearly drawn. To do this, you can make a sketch yourself or use a ready-made one. Next, this drawing needs to be placed in a transparent plastic file.
Carefully apply glue along the entire contour of the sketch, and lay a jute cord on top. Many craftsmen apply glue not to the sketch, but directly to the jute, which is carefully twisted with tweezers and laid on the adhesive base. Thin knitting needle the thread straightens out according to the pattern. This way you can work on the entire field.
After completing the sketch, the work requires drying. To do this, you can place it under a press and leave it to dry for about 6 hours. After this, using a knife, carefully separate the future product from the base and coat it with varnish.
The finished work may consist of several parts, which are then combined into one whole. Also, jute filigree can be supplemented with other decorative elements: beads, rhinestones and many others, all of this is also attached to the sketch with glue. 
 And here is the idea that simply captivated me. A blue glass bottle decorated with acrylic paints is used for the base of the lamp, and the lampshade is made of openwork filigree.
Looking at this master class, I understand that I have never seen such a beautiful napkin stand! 
Another great example of a lamp. Natural and bleached jute was used in the work. The base is decorated with jute branches and curls, marbles and artificial pearls. 
A great idea for those who love a cozy tea party. Why not decorate your kitchen with such an unusual decorative element! 
You can also make hair decorations using jute filigree. Beautiful, isn't it? 
 A panel using this technique can be a wonderful addition to your room. Of course, creating such a picture will take a lot of effort and time, but the result is clearly worth it!

And to see the whole process of work in this unusual, but very beautiful technology you can by watching this video.
The “Jute Filigree” technique involves creating light and elegant crafts from twine or thick cord. The techniques of filigree jewelry technology came to this art from weaving twisted wire.
Jute filigree involves creating light and elegant crafts from twine or thick thread
Working with natural thread is so pleasant that it immediately attracts young and beginning needlewomen. Simple tricks and a simple algorithm of actions allow you to quickly master this magnificent ancient technique.
Before starting the creative process, you need to stock up on simple and accessible materials:
- twine or any thick thread;
- transparent glue “Moment” or “Titanium”;
- PVA glue for processing;
- scissors;
- tweezers;
- acrylic paints or acrylic varnish.
Stencils serve as the basis for filigree work. You can draw them using your own imagination or print them from the Internet. The sketch should be drawn with clear black lines on white A4 paper and placed in a transparent file.
The oilcloth will serve as the base on which all the parts will be glued. After processing and drying, the openwork craft is easily separated from the oilcloth base.
To make a simple napkin made of jute, you need to draw two templates: a circle with a diameter of 5-6 cm and the outlines of the future craft.
The work begins with twisting the snail. A small loop is created and new circles are wrapped around it. A small amount of glue is squeezed onto the template, and the folded circle is placed on the file.


Important! To complete the work, the jute thread is always cut diagonally with scissors.
The tip is carefully glued and merges with the overall workpiece.

The next step is making the openwork base. Glue is applied along all the contours of the template and threads of the required length are placed. It is convenient to work with narrow tweezers or fingers. To keep your hands always clean, it is advisable to use wet wipes!


When all the threads along the external and internal contours are glued, you can proceed to the production of fastening “snails”.

These small circles of threads folded in a circle will connect the openwork details of the napkin. The finished craft should be thoroughly coated with a solution of PVA glue and water (1 to 1).
After the blanks have completely dried, they need to be separated from the file and glued together.
If desired, the needlewoman can paint the napkin with acrylic paints. Gold or silver colors are ideal.

Patterns for making openwork napkins and there are a great many cup holders. The main thing is to approach creative process with soul and irrepressible imagination.
Gallery: jute filigree (25 photos)


Jute filigree made from twine: master class and miracle craft lessons from masters on making an openwork vase
The art of jute filigree attracts not only young needlewomen, but also young guys with a creative streak. A master class on making an elegant dish from twine is presented by a novice master from the Belgorod region, Vladislav Trush.
To work, he uses a glass base vase and cling film, onto which he will apply elegant openwork patterns.

The base dish is covered with a transparent film, generously smeared with glue in the center, and the placement of the thread begins with a traditional snail. For convenience, the master holds the workpiece with sharp scissors and uses them to cut off the oblique ends.


The next step is to form “droplets” around the central circle. The master cuts 10-12 threads of the same length from the ball and places neat petals on the glue.

In the same way, the inner droplets are laid out in a circle, and the pattern turns out to be more saturated and rich.

To secure the structure along the entire circumference of the workpiece, 3-4 rows of jute thread are placed on the glue.
The next stage of work is the formation of the second circle of petals. The master decided that they would have an inclined, broken shape and consist of 3 decreasing droplets.
In the empty spaces between the curls, the young craftsman places small snails that will serve a fastening and decorative function.

The master carefully coats the finished work with PVA glue diluted in water. Let it dry completely, carefully remove it from cling film and excess glue, and then decorate it with golden acrylic paint.

The elegant vase for strawberries is ready! A young novice craftsman can make a magnificent gift for March 8th with his own hands for his mother or for his girlfriend.
Jute filigree made from threads, twine or ropes: step-by-step instructions for making a napkin holder
The art of jute filigree is based on the arrangement of natural threads in snails, drops and curls. They can be fixed to the surface with glue, then separated from it or remain in the form of decorative elements on the original base.
New patterns for work are offered by an experienced needlewoman with experience. Based on her stencils, you can make an original openwork napkin holder.

The art of jute filigree is based on the arrangement of natural threads in snails, droplets and curls.
In their work, craftswomen use glass pebbles, rhinestones and twine thread of different colors.
To make a napkin holder in the shape of a chestnut leaf, you will need skeins of gray-green and emerald shades, as well as brown pebbles for the legs and the central “nut”.
According to the prepared pattern placed in the file, the needlewoman lays out the threads, generously lubricating the base with transparent glue.


The inner veins of the leaf are made with gray-green thread, and the contours are beautifully decorated with bright emerald twine.
On a note! Jute of any color is available for sale, but the craftsman can always change the shade of the thread to his liking. To do this, it is advisable to paint it before starting work, completely dipping it in high-quality acrylic paint.
All leaves back wall Napkin holders are made according to the same pattern; at the base they are fastened with circles on both sides of the workpiece.

The next step is making the front wall of the napkin holder. The part is made according to a small pattern with a central pebble placed on a round base.


To connect the walls of the napkin holder, you will need a reliable base. They will use a wooden blank of 4 sticks, wrapped in jute thread.


2 openwork parts and 4 small legs are securely attached to the dense base. It makes a great napkin holder for festive family feasts.
How to make a box using jute filigree? Photo of the wonderful work of an experienced master Sergei Shevchenko
Jute filigree is made up of simple patterns in the form of the letters “C” and “S”, as well as filling in empty spaces with the help of snails and eights.
To make a rope box you will need: a base box, oilcloth, jute twine, glue and a good creative mood.

The progress of painstaking jewelry work in the following stages of the creative process:
Prepared stencils are glued to the base cardboard box, and all sides are covered with a protective film.


Fixed with liquid glue beautiful curls, circles and contour entanglements. When all the blanks are dry, they can be separated from the base and, if desired, painted with acrylic paint.


The bottom of the box is formed by laying the thread along the sides of the square. The twine is immediately placed on the glue, wrapped in one direction until the entire space from the corners to the center is filled.


For beauty and density, the bottom can be reinforced with circles and connecting rays.
In addition to the decor, the master decided to line the box with soft red velvet details, added pearls and white rhinestones. And I used small door hinges as a fastening mechanism.

The result exceeded all expectations! The result is a magnificent box that will be a gorgeous present for your beloved wife’s birthday.
Making an original gift: butterfly using jute filigree technique
In your eternal search for gift ideas, you can stop at making beautiful butterflies using jute filigree technique. For such a presentation you will need a minimum of material and 30-40 minutes of free time.

In your eternal search for gift ideas, you can stop at making beautiful butterflies using jute filigree technique
- To make the butterfly bright, it is advisable to use threads of different colors and add beads and glass pebbles as decoration.
- It is necessary to apply liquid transparent glue to the finished template, placed in a file, and carefully lay out the flexible strands of twine.
- Where the sketch lines are thick, you will have to glue 3-4 short strips of jute.
- The color scheme of the butterfly is chosen according to the taste of the needlewoman.
The black dots in the diagram are decorated with small twisted snails; in addition, they can be decorated with pebbles or flat beads.

The insect's body is formed by oval bases onto which large brown rhinestones are glued. After treatment with PVA glue and complete drying, the craft can be easily separated from the oilcloth base.

Bright butterflies can serve independently decorative decoration or placed on any fabric, wood or metal base.

Feather of the Firebird: a lucky talisman made of jute thread
Skillful home needlewomen are real dreamers and inventors. From ordinary twine they can make beautiful talismans for good luck and happiness.

A simple example is the Firebird's feather. To create it you will need a small roll of twine, some clear glue and a couple of beautiful pebbles.
First, as always, you need to make a sketch and place it in a transparent file. Apply glue in a thin stream along the contour of the design and carefully lay the jute thread, cutting off the oblique ends.
To place a glass pebble in the center of the feather, you need to make a base for it - a round snail from working thread.


Tips natural thread It is advisable to additionally lubricate them with glue, then they will not fray and will be neatly hidden in the work.
Those curves in the picture that will be decorated with rhinestones need to be reinforced with 2-3 strips of jute.

The finished work must be thoroughly coated with diluted PVA glue and set aside for 1-2 hours.
On a note! When the craft is completely dry, it must be separated from the base, remove excess glue with a hot soldering iron, a heated screwdriver, or simply cut with scissors.

An original talisman in the form of a Firebird feather can be used to decorate a coffee table, a mirror in the hallway, a kitchen cabinet or a wall above the bed.

Jute filigree is a simple and fascinating technique; you can download patterns and pictures on the Internet for free. It does not require special knowledge or special schemes. You can even use children's coloring books as templates for making original crafts. After mastering the simplest patterns in practice, you can easily move on to creating complex paintings using openwork filigree technique.
Dish or tray using jute filigree technique: master class (video)
Galina
After the product is ready, how can I remove the glue to make it neat?
Galina
Tell me, how can I remove the remaining glue from the product?
I wanted to make one picture, only from colored twine. I've had this picture on my wish list for a long time. That's what I did!
We will need:
- scissors,
- sample,
- Titan glue,
- plain, bleached and colored twine,
- stain of different colors.
I have this Nut for gray, Mahogany for red and pink, Larch for red and Oak for brown colors. We make pink and red from bleached twine, the rest from regular twine. Dip the twine into the stain for a minute, rinse, wring out and dry.

Here is the template. I made the picture together like a construction set, each detail separately, and then assembled it into a picture.

First we make sand, it comes in waves. I used regular and brown twine. We lay out the pattern as if there were no shells or algae.

That's how it happened.

Then we peeled it off the template, removed the excess glue with a hot knitting needle and set it aside. We started making a starfish.

Here she is. First the outline, and then we fill it.

We go through the bottom with bleached twine and round growths (or whatever they have) on top.

While the starfish is wet, bend it.

Now the shell, first the outline with bleached twine, then we make shadows with red twine, then we fill it with pink and brown growths on top.

Sea sponges. I make the outline of the hats from bleached twine double, so it turns out more voluminous. The sponges themselves are made of gray twine.

Something like that. We make each part separately, separate it from the template, remove excess glue and set it aside.

Here's a flower. I don't know what it's called.

The outline is red, fill it with pink and place a circle in the center. We also bend.


Now here's a shell. Bleached twine outline.

Here you can see the volume of the flower.

Then we make shadows at the shell with red twine.

And fill it with pink. And we also bend.

Now the algae. First the outline, then fill it.


And while it is wet, we bend it.

So we leave it to dry. When dry, put it aside.


There's double algae here.

And here are some more algae. Cut into equal short pieces, make the edges sharp and bend them in half. And we coat the long rope with glue, bend it and glue the shoots to it.

But it’s best not to glue them together right away, but to glue the shoots to the seaweed in the picture itself.

Now we make pebbles. Fold the snail out of brown twine and use your fingers to shape it into the desired shape.

Then we remove it from the file and place the pebble on the finger bone and press it in, making a convex pebble.


And so the rest of the pebbles.

And finally we got to the fish. Also, first outline with bleached twine.

And we fill it with multi-colored twine, and a small openwork on the gills and tail.

We removed it from the file, removed the excess glue and bent it as needed.

Here is the second fish. In some places I walked along the contour a second time for volume.

And the third fish.

Now we make the mesh. To do this, I took thinner twine.

Here I already trimmed the mesh and removed all the deprivation.

I started making corals, but I realized that I couldn’t bend it like that with twine, it wouldn’t be beautiful, there were too many zigzags. That's why...

I decided to make corals from dyed millet! Their texture is just like small balls.
I dyed the millet red. To do this, I poured millet into a bag, added red gouache, tied the bag and mixed. Fast and clean hands.

Now I took Titan and extruded it according to the coral pattern.

This is where the glue is visible, the main thing is not to go beyond the contour!!!

We fell asleep completely.

They pressed a little on top and immediately shook it off, where there was glue the millet stuck!


And here is another branch.

And now, for greater strength, I apply PVA glue on top.

Now the whole branch is coated, I do the same with the other one. Left it to dry overnight.

And in the morning I began to separate it from the file, first with my finger.

And then she helped with a knife.

Everything came off very easily, I turned it over and left it to dry.

Now we make a flower that is on the coral. Again, outline with bleached twine.

Then fill it with pink and a circle in the center.

Let's create volume. On your palm and press on the center.

Now the second layer of the flower, outlined with pink twine.

Bleached twine highlights. We fill everything else with pink.

Separately, I made several petals from red twine and added them to the flower. Each petal was bent.

Well, all the details are together, all that remains is to assemble the picture.

We make a panel and a frame separately.
We make the base from three-layer cardboard and a little more than the template by 2-3 cm, because the frame will lie on the base and extend slightly beyond it. We cut out slats from the same cardboard and wrap them with twine.

We cover the base with self-adhesive film. The reiki is also ready.

We collect our picture, observe the layers of what goes behind what.

I’ve already collected almost everything, all that’s left is to add some fish to our aquarium.

And here they are. I used glass pebbles to depict bubbles. It just got a lot more fun!

Now we need to decorate the frame. I made a lot of leaves like this. I was exhausted, it was the most difficult, or rather the most boring part of the work.

We bend them and glue them onto the frame, do not touch the edges yet, all the leaves are located in the center.

Now the slats are ready, all that remains is to connect them.

This is how we join the corners.

And cover them with leaves.


And now she’s already hanging in place!

Let's spin, twirl and show off!!!


Closer left corner.

Right. Here the little starfish hid.

Bottom right corner.

And the bottom left.

The whole bottom is complete.

Top.

A school of fish.

The flower is closer.


And the seabed is closer. These are sponges.


Starfish.

Another shell.

Here I want to show the volume of the picture.


Algae, I really like them, they look like they’re alive.

The maritime network is closer.

And each fish separately.


Here's a corner with starfish. The joint of the slats is almost invisible in the photo, and if you look at it in its entirety, it is not noticeable at all. She placed a bead in several shells, like a pearl.


Another corner.

Well, once again all the work in its entirety!

The wall is still empty, but who knows.

View from below.

And again the whole job!

We also recommend
 Video master class on creating animals using quilling technique
 Using coconut oil for the face and hair: benefits and harms Which skin is coconut oil suitable for?
 Condition of the woman and fetus in the eighth week of pregnancy How the baby develops in the 8th week of pregnancy
 Aggressive child - why and what to do Aggression in an 11-year-old child at home
 Advice for future dads The doctor as a mediator
 How to make a weapon from paper Weapons from a4 paper