Crafts Christmas tree from waste material. DIY Christmas tree made from waste material
Dear readers! Glad to welcome you again!
Our kindergarten prevents us from getting bored and sitting idle. 🙂And I am happy to share ideas with you, because, as they say, “one head is good, but two are even better.”
So, in October-November in kindergarten we were given the task of making a craft from waste material, as well as a DIY bird feeder. And in this article I will share how to make a bottle feeder, as well as a Christmas tree craft from a bottle.
In a word,
CRAFTS FROM WASTE MATERIAL FIRST-ROOM.
I think there are plenty of plastic bottles in every home. And if I needed to make a craft from waste material, the first thing that came to my mind was how to make a craft from a bottle? The approach of the New Year prompted us to make a Christmas tree:
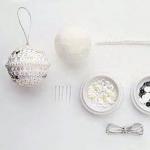
We will need:
Plastic bottles (at least three pieces, preferably green and the same shape);
Thick cardboard (for the base of the barrel, but we used a ready-made cardboard cylinder from toilet paper);
Colored self-adhesive paper in green and brown colors;
Green stained glass paint (if your bottles are green, you can do without it);
Red felt for the star, satin ribbon for decoration;
- « New Year's toys“- whatever you want (we have buttons, rivets, beads, etc.);
Glue (super glue, hot melt glue, moment - whatever you have).
Craft from a bottle Christmas tree description:
1. Making a “crown”. We cut tiers from the top of the bottles. If the bottles are not green, then we paint the tiers with green stained glass paint. Then we glue them together, placing one above the other.
2. Cover the cardboard cylinder with brown self-adhesive paper and glue it to the “crown”, placing it at the bottom.
3. Cut a lot of strips of green self-adhesive paper and stick on the “needles”.
4. Cut out a star from felt and attach it to the top of the head.
5. Decorate our crafted Christmas tree with toys (glue it on). We tie a ribbon.
That's it, the Christmas tree craft is ready!
Meanwhile, we move on to the second task:
FEEDER WITH YOUR OWN HANDS.
You can make a feeder from a bottle different ways, but the essence remains the same for everyone. In addition to the bottle, we used kebabs, thread, parchment paper, glue and felt-tip pens (for writing).
I think it's better to see once than to hear a hundred times. 🙂
Here is our version of “how to make a bottle feeder”:


In the pre-New Year bustle, sometimes there is no time for the Christmas tree: crowds in stores and at specialized Christmas tree markets discourage anyone from purchasing a fluffy beauty. However, in order to have a real Christmas tree in your home, you don’t have to buy it. From this article you will learn how to make a Christmas tree with your own hands from scrap materials.
We have collected for you more than 20 master classes with step by step photos instructions, so creating a holiday atmosphere in the house will not be difficult, even if there is absolutely no time left. These lessons will also be useful for mothers, because creating miracles with your babies is a pleasure!
By the way, if you already have a real tree (artificial or natural), a DIY Christmas tree will be an excellent themed gift for family and friends! In general, stock up New Year's mood and go ahead and create!
Let's start, perhaps, with the very simple option- Christmas tree made of paper. To make it you will need colored paper, scissors, glue, toothpicks and hole punch.
#2 Christmas tree made from wrapping paper
To make such a Christmas tree you will need: cardboard or thick paper, wrapping paper of several colors, scissors, glue or double-sided tape.
#3 Origami Christmas tree
To make a Christmas tree you will need: paper, scissors and patience :)

Look more Christmas trees from paper:
To create you will need: felt, scissors, needle, thread, glue.

You will need: felt, buttons and beads for decoration, needle, thread, cotton wool, scissors.

Find more felt Christmas trees in the article:
#6 Christmas tree from a plastic bottle
You will need thick paper, plastic bottle preferably green, scissors, tape.

#7 Christmas tree made from table napkins
You will need: table napkins, bead, sewing machine or a needle and thread.
You will need: a plastic bottle or wine glass, pasta, glue, paint.

Need more pasta ideas?
You will need: thick paper, pine cones, glue.

We have more ideas for crafts made from pine cones:
You will need: thick paper, coarse threads, glue, beads.

#11 Wire Christmas tree
You will need: thick paper, wire.

#12 Christmas tree made from dough
You will need: salty dough(cold porcelain or polymer clay), scissors. We form a cone from the modeling mixture, and then “pinch off” the legs using scissors. For greater realism, the legs can be slightly bent upward. Next, we send the Christmas tree to dry. After complete drying, the craft can be further decorated, for example, with paints, sparkles, beads, rhinestones, etc.

You will need: thick paper, colored paper, glue, a lot of patience.

#14 Christmas tree made from cardboard toilet paper cylinders
You will need: toilet paper roll cylinders, crepe paper, scissors, glue, thread.

Are there any bushings left? Make more original New Year's crafts!
#15 Christmas tree made of threads
You will need: paper, thick threads, scissors, glue, beads.

#16 Christmas tree from an old magazine
You will need: a magazine, glue, beads or glitter for decoration.

You will need: cotton wool, a dry twig, threads, ribbons, beads and sparkles for decoration.


#19 Christmas tree made from wine corks
You will need: corks, glue, tapes, paints.

#20 Delicious Christmas tree made from strawberries
You will need: thick paper, strawberries, chocolate.

#21 Christmas tree made of wrapping paper
You will need: wrapping paper, glue, whatman paper, decorations.

#22 Christmas tree made of balls

#23 Christmas tree made from dry branches
You will need: dry branches, rope, lanterns and other decorations.

#24 Christmas tree made of cotton pads
If you want to make a Christmas tree from scrap materials, then it’s time to pay attention to cotton pads. You will need thick paper for the cone, cotton pads, glue and beads for decoration. By the way, you can decorate the Christmas tree with any materials of your choice: sparkles, sequins, watercolors. Or you can just leave it white. As you prefer or as time allows.

More more crafts for the New Year from cotton pads:
#25 Christmas tree made of ribbons
You can make a cute Christmas tree from ribbons. To do this you will need a foam or foam cone, ribbons and a lot of safety pins. The top of such a Christmas tree can be decorated with a gold paper bow.

We are full of ideas for New Year's crafts made from ribbons
#26 Christmas tree made from a napkin: decorating the New Year’s table
Do Christmas tree possible from the canteens cloth napkins. Both the Christmas tree and the decor New Year's table. Try it and you won't be able to stop!

Help us improve: if you notice an error, select a fragment and click Ctrl+Enter.
DIY Christmas tree made from waste material: manufacturing master class with step-by-step photos.

DIY Christmas tree made from waste material
We have already made Christmas trees from waste materials: from pine shavings, tapestry scraps and others (see previous article). And today we will make an original and beautiful Christmas tree from those waste materials that are in every home!
A master class on making a Christmas tree from waste materials is conducted on the “Native Path” by a reader of the site, a participant in our Internet Workshop of educational games “Through play - to success!” Vera Parfentyeva is a technology teacher, head of a children's creativity group.
Christmas tree made from waste material “Silver Shine”: description
Based on the cone you can make interesting creative Christmas trees. To do this, you need to prepare various waste materials. We will take natural material:
- sawdust,
- seeds of melon, watermelon, bell pepper,
- leftover tea,
- small stems of grass,
- small seeds of flowers such as cosmos, calendula and other plants,
- thread trimmings.
- foam crumbs
- and much more.
Christmas tree made from waste material: materials and tools
To work you need:
- Whatman paper;
- PVA glue;
- waste material;
- silver spray paint.
Christmas tree made from waste material: a master class on making it in step-by-step photos
Step 1
Make cones with a height of 40-50 cm from whatman paper. At the base of the cone there is a circle of 15-20 cm. The circle must be glued using a strip of newspaper, a notebook sheet or ordinary office paper. It’s better to take not new, but scribbled sheets of paper - give them a second life.

Step 2
Option 1
Think about how you want to decorate your Christmas tree. The cone can be divided into sectors. Lubricate each sector separately with a thick layer of thick PVA glue, stick different seeds on each sector. For example, stick melon seeds along the edges of the sector (rays going to the center like garlands). In the center there is drunken tea, and on the sides there is sawdust.

Option 2
Or you can stick it in another way. For example, buckwheat seeds or grape seeds can be glued onto a cone in a spiral. And fill the rest with sawdust or tea.

Option 3
Or you can have all the available “garbage” in chaotic spots: melon or cucumber seeds, bell peppers, grape seeds, finely chopped herb stems, foam granules, tea leaves, remnants of thread and other things that you have prepared since the summer. And even a small onion!

This is what a Christmas tree completely filled with various “garbage” looks like.

Step 3
Paint the Christmas tree with silver spray paint. The main thing is that painting must be done either in an empty room or on the street. And, of course, wear a respirator so as not to inhale odors and aerosol particles.

A closer fragment of the Christmas tree. Beauty appears before our eyes!

Melon seeds look very beautiful. It’s as if garlands of light bulbs are shining from top to bottom!

Creative task:
— Have you prepared bones, plant seeds and fruits for creativity in the summer?
— What kind of plant and fruit seeds do you think would be suitable for making such Christmas trees?
- Think about what other materials can be used to make Christmas trees on a cone?
— Make your own Christmas tree on a cone from waste materials that can be found in winter time. The main thing is to carefully look at the “garbage” that is thrown into the bin every day. Give waste material a second life. Protect our planet from the garbage that litters the world's oceans every minute!

Oh, how I love the ideas of using garbage in children's creativity!
Numerous educational aids and expensive fancy toys sooner or later (and most likely, sooner) end up in the trash bin - and I am always tormented by remorse for wasted money (mine, relatives, friends). There are so many advantages in toys made with your own hands that you can’t count them! Waste disposal, development creative thinking, wonderful leisure time, savings... And the downsides? I don't see them, do you?
I plan to create these little men together with both girls - the Younger will puff and paint the cardboard bases, the Elder will finish drawing their “faces”. We will have a great time, and then we will be able to teach emotions, stage mini-plays and role-play scenes.
My eldest girl went to the cinema with her friend yesterday. Herself! Like an adult! Naturally, as an adult, I bought a bucket of popcorn, but from the happiness of making such serious decisions on my own, I went a little crazy and chose the biggest... no, the biggest bucket of food garbage. In general, for some reason she could not overcome five liters of popcorn, she honestly repented, like a businesswoman, bringing home the leftovers.

The remains inspired awe - they lay in a huge heap in the bucket, filling it almost completely, and asked me: well, what are we going to do?
We won’t eat, I’m telling you for sure! I hate popcorn, and for some reason my daughter doesn’t want it anymore. You can’t just throw it away - and then my child suggests making a craft out of this... hmm, wealth. Having asked skeptically what this disgrace looked like, she heard: “Mom, well, don’t you see, this is autumn leaves on the trees!" I didn’t see it, but I appreciated the idea and even slightly lifted my nose with pride. True, not for long - by simply Googling I found out that my child is far from the first to come up with this idea. Well, okay, eh We'll still get creative!
Hi all!
DIY Christmas tree, what could be the best gift on New Year 2019. But if you don’t take into account the ones we talked about in the previous article. Did you know that such a symbol of the New Year should be in every home. Therefore, I suggest you consider all the most popular materials for making a Christmas tree. Believe me, there are a lot of them, you can make such a craft from almost anything.
We will make the prickly symbol from materials such as pine cones, plastic bottles, isolon and even candy. I chose lighter options - made from cardboard. You can make such masterpieces with your kids. I assure you that they will absolutely love this activity. The main thing is to choose something suitable and accessible for children.
In general, any work done with one’s own hands is valued many times more. Therefore, if you decide to give something to your loved ones, let it be something themed, made with your own hands. No one will remain indifferent to such a gift. I am confident that the product will take pride of place on festive table. We will decorate it and remind you of you.
Speaking of the festive table, who has already prepared the upcoming menu? If not then welcome to mine. There will probably be a recipe for you too. There's a new salad with shrimp and tangerines. Or you can make a regular Olivier in the shape of a pig. And there are a couple more options. So, I will be waiting for you!
So we talked a little about the coming year and gifts. While we get down to business, let's stock up necessary material and get down to business. The main thing is not to be lazy and it is advisable to start preparing now. All options are simple and accessible to everyone, show maximum effort and everything will work out.
DIY Christmas tree for New Year 2019
There are a lot of ideas for creating Christmas trees. They come to mind perfectly when there is something at home that you don’t need, but it’s a shame to throw it away. It is at this moment that we are placed not by real thoughts that are brought to life. It is enough to show a minimum of effort and the first thing you should do is enter a search query into the Internet. Well, probably everyone will succeed and it’s not worth going into details here. Well then, let's go further to analyze suitable ideas.
And the first option presented will be a beauty made from cotton pads. Do you think it's impossible? I want to prove it back to you and post a small master class.

You see, everything is quite easy and simple. We stock up on a pack of cotton pads, glue and a stapler. You can make the base for the cone yourself from whatman paper. This is done very easily, see below.

We carry out everything according to the instructions. You need to use strong glue so that the cone holds well. And the finished work pleased us for as long as possible. If this option for making a base turns out to be beyond your capabilities, purchase a ready-made cone in specialized handicraft stores. Believe me, you can choose the right height and size there.
We will decorate the finished Christmas tree with multi-colored beads. Don't forget about the star, it plays an important role in the decor. Well, it's time to move on to the next option.
Let's talk about another craft made from tinsel. This work would be ideal for a kindergarten or for an activity with children. It’s quite easy to do, but it will add so much beauty to your room. I suggest not just wrapping a finished base with tinsel, but making something unique. Candy will help us with this.

Attach the tip of the prepared sweets to the cone. Scotch tape can serve as a fixative. So that when removing the candies, the tree remains safe and sound. Now that everything is hanging in its place, you can start wrapping the base with tinsel. By the way, the color of the fluffy decoration can be any; in our case it is green.
Here's another one interesting idea make a New Year's beauty from pasta. First we start gluing the base. For this we choose suitable form cereals We decided to go with feathers, but the curls look just as good.

We will start attaching the pasta from the very top of the head. Going down, twisting slightly to the side, with each new circle. This way we will get to the very bottom.

Now that the cone is completely covered with cereal, let's start painting it. For this we need gold-colored spray paint.
Spray paint work at home is prohibited. Since during spraying it releases toxic substances. The ideal place for painting would be a balcony or street.
In places where there are gaps we decorate with tinsel. We'll hang colorful balloons and decorate the top of the head with a star. The finished work can be planted in a pot. To do this, you will need to pierce the base with a stick (for sushi). And stick it into the pot, having first filled it with alabaster cement mixture.
But keep in mind that in this case the cone must be made of foam material.
You can decorate the pot decorative stones. By the way, in this work it is not recommended to use earthenware, preferably metal.
Check out more amazing pasta creations. Painted in green color. And the shape of the flour product is slightly different. But despite this, everything looks perfect.

So, in conclusion of this subtitle, we will consider another way of making crafts. We will make our New Year symbol from pompoms. Remember, back in childhood we were taught to make them in kindergarten. I remember we also made chickens out of them. Who forgot? More for you detailed diagram manufacturing.

It is advisable to use yarn that is thicker and fluffier. Now that the pom-poms are prepared, we decide on the version of the Christmas tree. And here are two options for you.
In the first case, the product is made of pompoms of a smaller size. Here the base is used where all the fluffy blanks are attached. In the second option, everything is a little different. The balls here are very large and this forest beauty is made without any additional base. Thus, all the thread blanks are attached to each other using glue. It is advisable to use high-quality glue. I have a hot gun for such purposes. Which is filled with glue sticks. When heated, they melt and hold the bonded material together very tightly.

We will decorate such a beauty with available materials. It can be anything from ordinary rhinestones and beads to decorative buttons.
In general, there are a lot of options for creating Christmas trees. Today we will look at quite a lot of them. All this is done so that you can decide and make a choice. The New Year is already close, which means you need to stock up on such crafts now. Well, or at least start thinking about making them.

Let's move on to the next topic, no less useful and very relevant, so to speak.
Crafts from fir cones and pine cones for the garden - in the form of a New Year tree
When in kindergarten they are given some task to make a craft, parents are divided into several parts. Some people simply ignore it by blaming all their busyness on work. Some rush into panic without understanding what is required of them. And most still sit down on the Internet and look for a suitable idea. And as they say, “he who seeks will always find.” This is exactly what I will help you with now.

We will make a Christmas tree from cones, no matter from which tree they fell from pine or spruce. Our task is to choose the smallest ones, and pay attention to the size. Try to choose the same ones.
Let's start with the simplest option. To make it we need a cone big size. We have decided, now we need to choose a suitable pot. You can take a regular one a plastic cup having previously hammered it with something heavy. And decorate the surface with burlap, for example. Sew a small bag from this rough material and plant a pot with a Christmas tree in it.

Such a mini product should be decorated with beads, the color is not important. The main thing is that it turns out bright and beautiful. By the way, the star can be cut out of thick cardboard. The edges of the cone can be decorated with white paint.
Well, all the work is ready, now you can take it to kindergarten. In principle, you should not have any difficulties in your work. If you have any questions, write in the comments. I will definitely answer and help.
One more no less interesting option Cover the homemade base with cones. We will make the cone from thick cardboard. We use hot glue as a fixative.

The direction of the cones should be chosen independently. The photo shows one of them. Once the base is completely finished, you can begin decorating. Here we turn on our imagination. There are a lot of options, these could be: beads different sizes, walnuts in shell, decorative rowan, acorns, etc. In a word, the decoration should be similar to the main material, which means made from natural materials.
Some people make bows from ordinary rope. They attach them to the finished work and it turns out very beautifully. Just don't go overboard with the quantity.

If you disassemble the cones into scales you can create very beautiful work. True, it will be a little more difficult in the execution of the previous options. We will attach the material to the foam base.

We decorate the finished work at our discretion. I would recommend that you paint the ends of the “scales” in White color. As if creating an image of snow. Don't forget about the asterisk, it plays a very important role.
Now that the work is ready, you should worry about its storage and care in advance. Of course, such a Christmas tree should be kept out of the reach of children. Because the product is very fragile. But care will not require much time. Our task is to remove the accumulated dust on the surface. A regular toothbrush does the job perfectly.

Well, let’s take the finished beauty to the kindergarten. I think the teacher will appreciate your work. Be sure to please yourself with such a prickly craft. It looks very beautiful in the interior.

On the holiday table, such work will occupy the most “crown” place. By the way, an ideal gift for family. Let's not be lazy and start preparing.
How to make a Christmas tree from improvised materials (photo ideas)
In general, creating a Christmas tree is not a tricky thing, and if you really want to create a masterpiece, then you will definitely succeed. Moreover, such beauty can be created from various materials, which will probably be at hand. So it’s time to look back and take a closer look at what “a shame to throw away” is. Well, there’s no need to throw it away, I suggest you make a New Year’s beauty. Below I will present a few photo ideas.

And here is the first of them, which one New Year without spruce branches and garlands. I propose to mount these attributes in the form of a Christmas tree on the wall and decorate them beautifully with balls. Here's an example of this you should be able to do. I think it turns out great.
An equally interesting idea for a sweet beauty made from caramel sticks. But the version of the wooden symbol looks quite interesting. Made from popsicle sticks. You can get a little creative and decorate it with some kind of garland on top. Or cover it with rhinestones and voluminous beads of bright colors.

Look, a version of such a Christmas tree will become not only a symbol of the New Year, but also a kind of talisman. After all, it is made from banknotes. I think everyone will like such a beauty for the holiday. Only the technique of execution should be decided in advance. In principle, nothing complicated, the main thing is to purchase a base in the form of a cone. Or make it yourself from whatman paper, and then carefully attach banknotes to it. By the way, the star is made of the same material.

Look what kind of Christmas tree they made from plain paper and skewers. The main thing is not to take an ordinary one White list, but something interesting. For example, with printed text in an unfamiliar language. And look at the size of the squares, they are all different, starting with the largest and ending with the smallest. Regular cardboard is used as the base for the weight, so the tree will be more stable.

Let's look at a couple more ideas. For example, here is a wonderful option made from ordinary thick threads. Red beads, decorative snowflakes and buttons of different colors were used as decoration. By the way, a cone made of foam material is also used here as a base.

Look what beauty can be created from corrugated paper. And all thanks to the special structure of this paper. As a base we use the same cone shape. But the paper itself will be cut into squares. We will start making this craft from the very bottom. All our beauty will be attached with hot glue.

And in conclusion of this subtitle, another idea for creating a prickly beauty. We will make it from ordinary sisal. The color of which can be absolutely any. This material can be found in handicraft stores. We decide on the decor ourselves; it can be anything.

Let's move on to the next topic of making a New Year's symbol.
Master class on a Christmas tree made from plastic bottles
Well, are you ready to create a unique Christmas tree from an ordinary plastic bottle? Then let's get to work, we'll need a little. With a minimum amount of material, we will make with you the most unique New Year's beauty. And believe me, it will be no worse than other crafts.

We will need:
- Empty 2 liter plastic bottle (green)
- Scotch
- Scissors
- Sheet of paper (landscape)

Manufacturing technique:
1. First of all, let's start making a stand for our future craft. To do this, cut off the neck of the bottle. Make marks in advance to ensure smooth edges.

2. Now we will make a base (trunk) to which we will later attach all parts of the tree. To do this, roll a sheet of paper into a tube. The diameter of which should be equal to the hole in the neck.

Secure the edges of the resulting tube with tape. And insert the finished barrel into the hole.
3. Let's move on to the next stage. We will prepare needles for our Christmas tree. But first you need to make small blanks in the amount of 12 pieces. As you can see in the photo, they are all different sizes. Everything is correct, because the tree will be narrower towards the top. Therefore, we will attach large parts from below.

Size of blanks: rectangular shape - 8 by 7 cm, 8 by 5.5 cm, 6 by 4 cm. You don’t have to stick to the given dimensions and make all the shapes twice as large.
Please note that if you plan to make a large Christmas tree, then double the size of the blanks. Don't forget about the trunk; it will also be much longer.
4. It's time to create needles. Take scissors and one of the cut out rectangular pieces. And we begin to cut it into strips 3-4 mm wide. without reaching the edge. On average, you should maintain a distance of 0.7-1 cm from the edge. We do the same with all parts.

Take the scissors in your hands and use the sharp side to go over the cuts with needles. As if twisting them to the side. Take this matter seriously. Take your time and don’t put all the strips in one pile at once. It is better to divide them into 3-4 times. This will make your work look much better.
5. Now we will attach all the twisted forms to the trunk. To do this, we wrap the finished workpiece around the base. Next we carefully tape everything together, maybe in several layers. So to speak for reliability.

We do this with all the parts, moving to the very top. To finish the job, take one of the small pieces. Then twist it in your hands and secure it with tape. We put the finished spare part on the very top.

Congratulations, we made a wonderful Christmas tree. By the way, any schoolchild can do this kind of work. Here are the kids preschool age will be great helpers. This kind of work can be decorated with beads of different sizes, but without fanaticism.
Making a three-dimensional Christmas tree out of paper - step-by-step instructions
Here’s another interesting idea: making a Christmas tree out of paper. At first glance, this work seems quite simple, and it is. But despite this, its production still requires step-by-step instruction. That is why I decided to present to your attention a short video tutorial. Where we will not only learn in detail how to make such beauty, but will also additionally receive recommendations that are definitely worth listening to.
The work is truly amazing. When you repeat everything after the author of the video, everything turns out very quickly. I also liked that everything in the video was recorded so slowly that it was simply impossible not to have time to repeat one of the steps.
I found another great idea on the Internet for creating a Christmas tree out of paper. Look, in principle there is nothing complicated in its manufacture. So take a piece of paper desired color and get down to business.

Like these ones interesting works You can create it from paper with your own hands. And we move on, we need to sort out quite a few more crafts.
We make a Christmas tree lamp from isolon
Before you start making crafts from isolon, I suggest you first talk about the material itself. So, what is this? I won't scatter with clever words, so as not to confuse you, I’ll just say this is construction insulation. But despite this, it is in great demand in needlework. Especially in making giant flowers. We will make a Christmas tree for you in the shape of an unusual lamp.
Below is a video with a complete master class on creating this beauty. So, stock up on material and start watching. Watch the entire tutorial before you start. This is the only way to understand whether you can do this job.
This is beauty, I believe that such beauty should decorate every home. I think we need to get down to business now.
Delicious DIY candy tree
What could be better than a delicious gift made in the shape of a Christmas tree. The base of which is made of champagne. So to speak, two in one drink and a snack to go with it. And believe me, the entire technique for making such a craft is so simple that even a child can do it according to the instructions.
And to make our forest beauty more rich and bright, I propose to complement it with tinsel. The color will be the appropriate green. Yes, that’s what I keep saying and saying it’s time to get down to business.

We will need:
- Champagne – 1 bottle
- Double sided tape
- Candies
- Scissors
- Tinsel
- Beads on a fishing line
Manufacturing technique:
1. First of all, let's process the bottle. Be sure to degrease it using any alcohol tincture. Then we cover it from top to bottom with double-sided adhesive tape. We immediately remove the protective layer so that there are no difficulties in the future.

The tape can be absolutely any color. This does not play a special role in this case. It will still be hidden behind all our beauty.

2. Now that the bottle is prepared, let's start decorating it. We take tinsel and start wrapping it from the very bottom. Take your time, our task is to make one row for now. Then we stop and place candies in a circle on top of the tinsel. Sweets should be attached by the tail. This way, when you remove one of the candies in the future, it will be practically unnoticeable.

Thus, it is necessary to fill the entire space of the bottle.
Try to choose candies with a brighter label. So finished work it will look much more impressive.
Now you can start decorating the finished Christmas tree. Absolutely anything can happen here. It is advisable to use beads on a thread. So that they can be removed later. As for the rest, let your imagination work.

Everyone will be happy with this gift. Despite the minimal amount of material used in the composition, the Christmas tree came out wonderful. And the decoration of the bottle itself is simply very beautiful.
The idea of making a Christmas tree from cardboard at home
Well, we've come to final stage. Let us consider another idea for creating Christmas trees from cardboard. Doesn't seem possible? I want to convince you that such beauties have become very popular in the West. And if in our country it is made in the form of a small craft, then everything is different there. Look for yourself...


They are made to full human height. And the design of such a Christmas tree can be absolutely anything. You can see it for yourself in the picture above. If initially the forest beauty is presented in a more real form. But in the second version everything is different, we see in front of us a certain geometric detail. Which, by the way, is very similar to the symbol of any new year, and it is decorated with a bright garland. And at the top is a star we all know. Go ahead…..

Look at this unique masterpiece, I’m sure not everyone can find such beauty. Because you need to apply maximum effort to create it. Although in reality everything is quite easy. Initially, you can see that the entire design is applied to a base in the form of a cone. Which, by the way, you can make yourself using cardboard. And then you can safely turn on your imagination. The only thing is that if you want to make a Christmas tree on a stand, then you should think about the stand in advance. Although even without it, the work looks no worse.

More shocking human-sized Christmas trees. In this case, we see that the work is in progress. And as you can see, all products are made from the most ordinary cardboard. It's all about the decoration; it will definitely cover up all unnecessary defects.

Here's another interesting idea. A Christmas tree in this style initially turned out to be very unusual. That is why it does not require any additional decorations; it will be superfluous.

Look at the beauty you get if you do the work in soft colors. This Christmas tree can decorate any room. For a girl, you can make a forest beauty in pink.
Below I will present you several templates that will help you implement your ideas. And here is one of them, by the way, you can play a little with the size. It doesn't have to be A4 size cardboard.

This work is best made from thicker cardboard. So that when you hang a toy on the spout, it does not bend. Naturally, a hanging toy should not be very large. Everything should be in moderation.

Here is another template, which, by the way, looks just as good in practice as the others. Again, this is just a diagram. And what the finished work will look like primarily depends on you. It's all about the design, the colors you use.

Finally, I will present to your attention another interesting template. By the way, you can use it to make a human-sized Christmas tree. The main thing is to decorate it correctly; you can learn about design options from the subtitle by going a little higher.

Wow, before writing this article I didn’t even think that a Christmas tree could be created from almost anything. Any material at hand can be used. The main thing is to turn on your imagination at the right time.
Well, guys, it's time to say goodbye. You choose one of the options. Or take the entire article to your bookmark. And I’ll go get ready to write a new one. After all, the new year is very soon, and that means we need to speed up. There is still a lot of work to do.
See you again, dear readers. I would be glad to receive any feedback in the comments below. And in order not to lose a note, share it on in social networks. This is quite simple to do, click one of the buttons below. And then everything is according to the instructions. For now, I’ll be waiting for you......