Raffia hats patterns. Summer crocheted hats with flowers - many patterns, ideas and designs
A hat is one of the universal accessories. This headdress can be sewn from fabric or knitted from yarn. The latter option is especially suitable for hot summer days or vacation time. Any needlewoman can master crocheting summer hats, they are so easy to make.
How to crochet a hat?
All hats are crocheted using the same principle. First you need to take your measurements and think about the future model. Place a measuring tape around your head. It should pass through the back of the head and the middle of the forehead. The resulting number should be remembered. This will be the size of the finished headdress.
Knitted hats can be completely different - with large, small brims, openwork or a solid pattern. It is also worth paying attention to the type of yarn. Summer hats are often crocheted from cotton and linen threads. They keep their shape perfectly. In addition, they are easy to starch. This treatment makes the edges more rigid. It is best to use threads of medium thickness.
The technique of knitting hats comes down to the fact that first you knit the crown. To do this, close the air loops into a ring, and then begin to make increases. After uniform knitting, you get a bottom that has folded edges. After that they move on to the fields. Make increases and knit the same number of loops to the desired width.
Crochet hat: knitting pattern

You will need:
- Measuring tape
- Threads of medium thickness
- Hook 3 (or any other that matches the yarn)
Manufacturing instructions:
- Tie 3 air loops and close them around with a half-column. Knit 2 single crochets into each stitch.
- Start the 2nd row with a lifting air loop. Then, in each column of the previous row, knit 2 loops according to the pattern. Complete the knitting by connecting the beginning and end with a half-stitch. This action should be repeated at the end of each row.
- In the 3rd row, start repeating: 1 single crochet in the 1st loop, 2 in the 2nd. We start the row with an air loop and end with a connecting post.
- 4th row: the first 2 loops - along the 1st stitch, and in the 3rd we knit 2 single crochets.
- Making additions in this way, knit another 10 rows. We got the bottom of the future hat. There are about 68-70 loops at its base.
- Next we knit the crown. To do this, we perform 1 stitch in each loop. In this way, you need to knit the fabric to a height of 12 cm. We knit 2 stitches into the last loop of the row.
- Start making additions. Knit 2 stitches into the first loop and skip the next one. Knit the fabric in this way up to 18 cm (total height from the beginning).
- Next row: 1 loop in the 1st column, 2 in the next. Repeat alternating until the end of the row.
- Continue knitting the hat by knitting 1 single crochet at a time. Knit in this way until the brim of the hat reaches the desired width. Cut the thread and pull the tail through the loop. Then carefully hide it.
Crochet hat for a girl: job description

You will need:
- Thin yarn like “Iris” - 100 g.
- Hook 2
Manufacturing instructions:
- Knit 12 air loops and close them into a ring.
- 1st row: 1 double crochet, 1 chain crochet, 2 double crochets in 1 chain, 1 chain crochet. Repeat this way until the end of the row.
- 2nd row: 1 double crochet, 1 chain crochet, 1 double crochet, 1 chain crochet, 2 double crochets in 1 chain, 1 chain crochet.
- 3rd row: 1 double crochet, 1 chain crochet, 1 double crochet, 1 chain crochet, 1 double crochet in 1 chain, 1 chain crochet. Knit the next 3 rows in this manner.
- 7th row: knit 1 double crochet into each loop, and 1 chain stitch between them.
- Let's move on to the fields. And we knit 2 double crochets for each loop of the previous row. Between them there is 1 air loop.
- The next rows are double crochets in each stitch. We knit in this way until the fields reach the desired width. We cut the thread and pull it through the last loop using a hook. We carefully hide the tail on the wrong side.
- You can decorate the finished hat with a ribbon or crocheted flowers.
Crochet summer hats: how to knit?
This hat model is quite simple to make. At the same time, she looks quite stylish. It can be worn with a summer sundress, denim shorts or linen trousers. The headdress is universal and suitable for any style of clothing.

You will need:
- Cotton or linen yarn, 320 m. per 100 g. - 1 skein.
- Hook 2
- Line for fixing fields
Manufacturing instructions:
- First, we calculate the diameter of the bottom of the future hat. To do this, take a head circumference measurement. Divide the resulting number by 3. Then subtract 2 cm from it. This is done because after washing the product will shrink a little, but then stretch during wear.
- We begin to knit the bottom. To do this, we close 3 air loops into a ring. Then we knit 6 loops into it.
- We start adding from the 2nd row. To do this, we knit 2 single crochets into each loop.
- 3rd row: 2 single crochets in 1 loop, 1 in the 2nd. We alternate knitting in this way until the end of the row.
- We knit according to the pattern until the diameter of the bottom of the crochet hat is equal to the number that we obtained thanks to the calculation at the very beginning.
- Let's move on to making the crown of our headdress. To do this, we knit 1 single crochet into each loop. The 1st row is performed quite tightly. Thus, we continue knitting, periodically trying on the workpiece. You need to finish the crown when it reaches the height of your ear. At this point, you need to create holes for threading the decorative tape. To do this, we knit the last row of the crown with single crochets.
- Next we move on to the fields.
- 1st row: in every 10th loop of the previous row we knit 2 single crochets. We perform the next 3 rows without additions, according to the drawing.
- 5th row: make an increase in the form of 2 single crochets in every 12 loops. We knit the next 3 rows without increases.
- Row 9: adding 2 stitches to every 14 stitches. The next 3 rows are unchanged.
- 13th row: adding 2 stitches in every 16th loop to the end of the row. Next we knit 3 stitches without increments. We have formed a slightly flared brim of the hat. Let's move on to strengthening them.
- Cut a long piece of fishing line. We press it to the last row and carefully tie it with a single crochet. When we come to the end of the row, we should cut the fishing line and connect its edges. To do this, they are melted with a lighter. We cut the thread and carefully hide it inside the headdress. Crochet summer hat is ready!
- Almost all hats do not hold their shape when finished. They can be made tougher in a variety of ways. Usually starch and sugar syrup are used. A gelatin solution is no less effective. Take and heat 1 tbsp. water. Pour a 25 g bag of gelatin into the hot liquid. Mix everything thoroughly. Then add 0.5 tsp to the solution. salt and 4 tbsp. l. 9% vinegar. The liquid should be poured into a large bowl. Then they put the knitted hat there and let it get wet. Next, the product is wrung out and the water is allowed to drain.
- Cover the table with a bag or polyethylene. We put a three-liter jar on it. We put a hat on her. Let's give it shape. We pay special attention to the crown. Let it dry a little. Then we remove the hat and leave it standing on the polyethylene. We wet the fields with a sponge and smooth them thoroughly. They should lie flat on the table. Let the product dry. After this, the headdress is ready to wear.
Crochet hat: photo


In order to crochet a hat, you need to take a head circumference measurement. Knitting starts from the bottom. Usually the air loops are closed into a ring, and then the additions begin. Knit this way until the workpiece reaches the desired size. Then they move on to the crown. It is knitted without any additions. For fields, a certain number of double columns must be made. They will help expand them. Then the fields are knitted without increments until they reach the desired width.
Vladimir Sbitenkov 0
Hats are designed to decorate and protect our heads. Sometimes a long-awaited favorite accessory ceases to please due to a sudden allergy to the material of the hat from which it is made, or quickly loses its shape. To avoid such situations, now we will tell you what a summer hat should be made of. After all, the materials used to make clothes and accessories are very important; we wear them close to our bodies, and we don’t want to part with some of them for just one season.
So, a good hat for summer should, first of all, be ventilated, lightweight and hypoallergenic. In the summer heat, it is especially important that the scalp and hair “breathe,” since drops of moisture accumulated under heavy artificial material can cause irritation or even allergies. Therefore, when choosing a headdress, pay attention to the composition on the tag or label.
Materials that are suitable for wearing in the warm season:
- straw - made from dried stems of cereals and legumes, this material is almost the best choice for sunny weather. Straw makes a lightweight summer hat, ventilated, which easily restores its shape from steam if it suddenly becomes deformed. Boater hats and world-famous Ecuadorian panama hats with dense weaving (Cuenca straw, sisal, toquilla, brisa, etc.) are classically made from this material. Try not to keep straw hats in water, as this will cause the straw to swell and cause the hat to become permanently deformed;
- Shantung is an expensive, noble material. This is Japanese silk paper. It has practically the same properties as straw. Such hats, as a rule, have a more rigid shape and an absolutely smooth surface, unlike inexpensive straw, which is very pleasant to the touch. Hats made from this material are well represented by the world-famous manufacturer Goorin Bros. These hats are tightly woven and hold up moisture better than straw;
- impregnated paper is an economical alternative to straw. Paper hats are very light, ventilated and, which is especially nice for fashionistas, bright and colorful. It is more convenient to paint such material in various colors. But they, like straw, don’t really like moisture, so it’s better not to leave such a hat in water on summer vacation. Inexpensive summer bright women's hats, as a rule, are made of just such material;
- cotton is a natural fabric, hypoallergenic, which is often used to make youth hats, baseball caps and Panama hats;
- linen is also a natural fabric used to make lightweight caps, soft-brimmed hats, and baseball caps;
- knitted jersey - practical cute hats, which, by the way, are very popular now. The knitting for such hats is large, made of thin threads, so such hats do not particularly protect the hair, they serve more as a decorative element;
- thin jeans - it is usually used to make caps, baseball caps and Panama hats, but due to its good technical properties, they also began to make hats with small brims from it;
- thin felt - earlier in the article we discussed the possibility of wearing a felt hat in the summer, we repeat: felt is natural wool, it supports heat regulation well and in the summer you can wear it “in portions”, due to the fact that it is quite dense and windproof, you just need to sometimes take off the hat a garment to allow the scalp to breathe. Men's hats, such as fedoras, homburgs, and bowler hats, look more advantageous and respectable in the classic felt design, so why give up your favorite accessories in the summer, just choose hats in light colors.

Don’t be surprised if you see polyester in the composition of a hat; it is added to hats made of paper and cotton to give the material flexibility and elasticity; this does not at all affect the quality characteristics that a summer hat should have. The main thing is to try to avoid 100% acrylic products; such hats look very beautiful due to the bright colors in which this material is usually painted, but you may feel uncomfortable in them due to poor thermoregulation.
Thread - begonia, hook 2.1. 1 skein was enough.
I'll try to write how I knitted (from memory)
I knitted a strip of fillet mesh around the circumference of my head (4 rows) - in a circle - this is how the bandage turned out
Then I attached the thread and knitted the strip on top with fillet. I tried it on my daughter. The holes were large. I tied them with fans, but at the same time adjusted the pattern so that it did not expand, but vice versa
Fields:
When moving to the brim, I knitted 1 row of sc (I always knit 2-3 rows of sc, but here I didn’t knit it and the hat doesn’t fit so tightly to the head - I did this deliberately so that the hat would be looser at sea)
then 3 rows of arches from 5th century. P.
And then fans according to your favorite pattern
Then I tied a double ring of regilina sc, then in a crawfish step.
Hat “Little Lady”
diagram and description of the side part
Diagram of the bottom and crown for exhaust gas 49-50 cm.
My yarn
My connected 13 rows of the bottom:
Up to the 13th row inclusive, we knit the same for all sizes.
* * *
ATTENTION:
When knitting a pattern in those places where we stick the hook into the post, it is advisable to use the “deep” sticking method. The hook must be inserted not under the two upper half-loops of the column, but into the body of the column itself. This method will not allow the pattern to shift when we knit with the crown.
* * *
Starting from the 15th row for all sizes we knit according to the pattern. Repeat rows 15-20 two more times.
They differ from the 15-20th only in the last row. Instead of a dc, I knitted a sc.
We also knit rows 33-38 according to the pattern.
38th row - RLS in each column.
The fields start from the 39th row.
We finish with the CROWN and insert the FIRST regelin equal to the circumference of the head. I made one vein. This is where we complete the work of the RLS. Steam.
We knit the BRIMS of the hat.
In the 39th row we make increases in every 3rd column,
In the 45th row - every 4th, in the 51st - every 5th.
The point is that in each row with increases you need to add 56 CH (7 reports). That is, in the 39th 168/56 =3, in the 45th (168+56)/56=4, etc.
STRENGTHENING FIELDS.
After the last row of fields is knitted, they need to be steamed well.
On a horizontal table surface, the fields should have the shape of a flat circle.
We take the SECOND regilin (TWO veins at once) and tie it with RLS. The length of regilin is not measured in advance!!! They just cut off the excess later.
We straighten the fields well.
Let's steam!
We tie the same row of RLS again. And we tie the last row with a “crawfish step” through the post.
On a plane, the fields should still be shaped like a flat circle.
Once again we steam the fields with an iron through a damp cloth!!!.
To add rigidity, I used SALVITOSE, which is used in felting.
Air dried.
DECORATION.
It must be removable - on a pin or button.
Knitting daisies is very easy.
Dial a chain of 2 v. n. In the first of them, knit 8 half-stitches and close them in a circle in the 1st half-stitch.
When the whole chamomile is ready, tie each of its petals in succession with connecting posts. This will allow them to keep their shape and not curl.
For the centers of the daisies, make small pom-poms using a regular dinner fork.
We wind the thread around the teeth of the fork. Then we tie it with an additional thread in the middle, remove it from the fork and tighten the knot. Then fluff and trim. Sew to the center of the daisy.
Two daisies are small, and one is slightly larger. For it, the scheme is the same, only for the petals we dial not 7, but 9 v. P.
I made a decoration on a button clasp for bags.
We will need a button and a knitted circle - this is what the daisies will be sewn on:
In finished form:
We attach the button to the hat
Scheme (for petals only):
Designations: the sketched dots on the diagram are the loop that is on the hook; the numbers in brackets are the number of loops that we pull from the connected column (to make it easier to count loops)
Blind (connecting) loop
I knit from Soso threads (50g=240m) with a regular hook No. 1.5 (without a handle)
Step by step photo of the process:
1. We knit 6 single crochets into a sliding loop
tighten the thread and close it in a circle.
2. Grabbing only the back half of the loops, we knit 11 single crochets (1 sc in the first half and 2 sc in the subsequent ones), connecting in a circle.
Half loops of a smaller circle will be needed for the upper petals.
3. We knit arches for the lower petals: cast on 5 air loops (c), skip 3 loops of the circle, fasten to the fourth; repeat 2 more times, fasten the last arch into the loop from which the first arch was knitted.
4. We begin to knit the first lower petal: Cast on 4 stitches. p. If you turn the knitting a little, the back (purl) jumpers will be visible
there is one loop on the hook (shaded point in the diagram), we pull out one loop at a time from the purl jumpers (4 sticks), we pull the last one out from under the arch (outermost stick)
there should be 6 loops on the hook
5. Close the row: grab the working thread and knit loops in pairs on the hook (grab the working thread and pull it through 2 loops, grab the working thread and pull it through the next 2 loops). We have the first row (connected column)
6. If you turn the knitting a little, the purl jumpers will be visible,
We knit one in. P.; we pull out the loops from the purl jumpers (1 on the hook + 5 from the jumpers + 1 from under the arch = 7 loops).
We close the row in pairs.
7. Next, we begin to cut the loops. In the sixth row, we begin knitting from a blind loop (insert the hook into the first jumper, grab the working thread and pull it through the loop on the hook). from further jumpers we pull out a loop and the last one from under the arch
We close the row in pairs.
To finish the first lower petal, we knit a blind loop into each purl jumper, and one under the arch
We make one blind loop in the next arch and begin to knit the second lower petal in the same way as the first. After you tie all three arches, it will look like this
To move to the upper petals, make 1 in. p insert the hook into half the loop of the small circle and knit a blind loop
On a small circle you need to tie 3 arches from 4 in. p (2 arches for petals and 1 for the core)
8. Dial 5 v. p and knit the first connection. upper petal column
First upper petal:
Two petals
We tie the upper petals with single crochets (I laid thin wire along the contour to better hold their shape). The lower petals were tied with stbn (without wire). It turned out like this
Sew on beads, maybe small beads, and admire
Starching caps
1. Wash the cap in warm water (30-40 degrees). I use bleach laundry detergent for white hats and colored laundry detergent for colored ones.
2. Prepare the starch. To do this, pour 2 tablespoons of starch into a bowl and dilute it with 1/2 cup of cold water (to avoid the formation of lumps). Then pour boiling water, about 1 - 1.5 liters, stirring constantly. The mixture should be thick and transparent. Leave to cool.
3. Thoroughly starch the washed hats, squeeze them out (without twisting), removing excess starch.
4. To dry the hats, I use regular inflatable balloons, after inflating them to the desired size.
5. During the drying process, I periodically give the brim the desired shape, and iron the brim of the openwork caps through a layer of fabric.
MORE HATS AND FLOWERS WITH THEM WITH DIAGRAMS
click on the picture to enlarge
Hamanaka Eco Andaria,Katia Raphia And Fibranatura Raffia.
But first, some background...
It all started with my boundless love for hats

Because In the cold season, I prefer that my ears are closed from the wind and cold, then in the summer and spring I go out and knit my favorite hats that protect my head from the scorching sun and create cool looks. I knitted different hats: they were semi-cotton with 2 threads, from Lanoso Lazeus cotton cord (I love these hats dearly and wear them to this day, by the way!).


And now I am captivated by hat raffia!
Moreover, I even wrote my first real one based on it!
To write MK I needed to knit a lot of hats and caps. And it is designed for 3 types of raffia, which can be found on the Ukrainian and Russian markets without any problems. I wrote the master class long and hard. It’s one thing to knit a product, and quite another to release your writing to the world in a form in which everyone could understand it. But the job was done and quite successfully. A comparative review of three types of raffia is an article arising from my hectic writing activity.


Reference:
Raffia is a natural fiber produced from the leaves of the Raphia farinifera palm tree. This tree has very large leaves that are harvested, cut and divided into long parallel strips. These strips are then dried to produce long strands of raffia.
Raffia is a renewable resource. It is collected in such a way as not to damage the tree, so the tree will soon grow new leaves for the future harvest.
Raffia is also an inexpensive material. Therefore, it has found wide application in many industries.
In the summer of 2016, I tested my first raffia. It was Spanish Katia Raphia(hereinafter referred to as Katya). The yarn is excellent. Read the review about it.
This same year I tried Mondial Rafia, also Spain. But she simply cannot be compared with Katya, she is only suitable for bags, etc. things that are not in contact with the body. In the canvas it is very hard and prickly. And it looks like cellophane. Although its cost is very low. But it doesn't suit hats at all.
It so happened that in 2017 the factory changed the conditions for working with Ukraine (where I live) and it became extremely unprofitable to transport it, so another raffia appeared on the Ukrainian market - Japanese Hamanaka Eco Andaria(hereinafter referred to as Hamanaka).
And since I had been nurturing the idea of writing my own master class on a raffia hat for a long time, and to write it I needed to test the third type of raffia, which can be easily bought, I took a Turkish one to try Fibranatura Raffia(hereinafter referred to as Fibernature).
| Katia Raphia | 50 grams / 115 meters |
| Hamanaka Eco Andaria | 40 grams / 80 meters |
| Fibranatura Raffia | 40(35) grams / 80 meters |
Appearance
Katya and Hamanaka are packaged in individual bags. Winding - ordinary skeins. The fiber material is wound on a thick cardboard cylinder; each reel is not packaged in separate bags.
Katya is a thick paper tape, matte and smooth. Hamanaka - the tape is a little thinner, but more airy, shines like oilcloth at first glance, the shine in the product is quite democratic and unobtrusive. Fibronature is a very dense matte thick tape. For all three types of raffia, the width of the ribbon can vary in a skein: from thicker to thinner.
All three types make rustling sounds when knitting. Hamanaka rustles the most. Hamanaka knits the best, the knitting just flows, I would put it that way.
Nodules
There are both in Kata and Hamanaka. Fibernature doesn’t have them, they don’t bother with tying knots, but simply after the thread runs out, they put an elastic band on the bobbin and wind it further. I have had up to 5 such breaks in 1 bobbin, and each time with an elastic band :) I can’t say whether this is good or bad... I probably like it even better than knots, because I like to tie knots with a large overlap, so that this overlap is firmly hidden in knitted fabric. And Katya and Hamanaka tie knots and cut their ponytails, this sometimes scares me, because it seems to me that they might come undone, but these are my personal problems, such cases have not happened. As I know.
Strength
In my opinion, Katya is the strongest, followed by Hamanaka and Fibronatura in last place. Hamanaka has a very delicate and thin ribbon and there is a possibility of accidentally making a hole in it with a crochet hook when knitting. If you simply take the fibernature and stretch it with your fingers along the width of the tape with little effort, it breaks simply from the pressure. This is not the case in Kata and Hamanaka! However, if the tape is twisted, then all three types are quite strong. In general, knit carefully - and everything will be fine when working with any of the three types. And if you have hook hands like me, then choose a more durable one :)
Wear resistance
In last place in this parameter is Fibronature. Already the second time of bandaging, it becomes too shabby. Katya can become worn out after being bandaged over and over again, but Hamanaka remains virtually unchanged. It is just getting narrower and it is advisable to steam it before reusing it, otherwise the knitting density will change.

Color palette
The widest is Hamanaka, Katya is in second place, and Fibronatura is in third place.

Care for a raffia hat
Raffia yarn itself is very wear-resistant. The hat can be wiped with a damp sponge. It is not advisable to wash it, it is cellulose after all. Only if you drop it in the dirt, then wash it very carefully, after washing, put it on some kind of base so that it takes the shape you need. It can be folded several times. If the brim of the hat becomes wrinkled during storage or transportation, simply steam it with an iron.
You can and should iron your hat! In the process of knitting, it will seem to you that you are knitting an uneven, awkward creature. BUT! Please don't be afraid. As soon as you finish the product, everything will fall into place and you will have exactly what you wanted :) After all, raffia is not an ordinary yarn and during the knitting process it can have unevenness, bends, and waves on the margins. And an iron will fix everything.

wearability
The hat from Katya is the softest to the skin on the forehead. Hamanaka is also soft and pleasant. The toughest Fibronature.
Definitely Fibronatura is not my choice. I personally don’t feel comfortable wearing such a hat.

Consumption
Katya and Hamanaka's consumption is approximately the same: on average, 1.5 skeins for a hat with a short brim and 2.5 for a hat with a wider brim. Fibronature, personally, I didn’t have enough 3 skeins for a hat with a wider brim, although everything was knitted strictly according to my wishes.
* due to your individual knitting, your consumption may differ slightly

Price
Katya and Hamanaka are approximately on the same level. Not cheap. 1 skein costs about $6. Fibronature costs 2 times less. But that's where its merits end (in my humble opinion).


Remember at the very beginning I wrote about the boundless love for hats? - so, this love turned into something beautiful and at this stage resulted in a collaboration with a cozy yarn and tools store azuleta.com, which printed a beautiful brochure with my master class and puts it in kits for knitting hats inside and out. This is what the brochure looks like. Although I can’t even dare to call it that... This is a whole book! Very cool book!

And if you want to use any materials from this blog for non-commercial purposes, then a direct link to the source is necessary.
Related Posts:
We also recommend
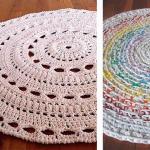 Do-it-yourself rugs from old things - turning waste into income
 Summer crocheted hats with flowers - many patterns, ideas and designs
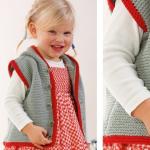 Sleeveless vest for girls crochet Crochet vest for 7 years
 How does a woman think? How do men think? This is the essence of a man’s calling - to be a breadwinner and provider.
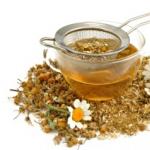 Ice cubes with chamomile for the face Rub ice cubes with chamomile on the face
 Sincere birthday greetings