How to make a beautiful French manicure or French gel polish on short and long nails yourself. Step-by-step instructions for performing a French manicure at home
Now there is a huge variety of types of manicure and nail decoration. However, it does not lose its popularity French manicure(although it also happens completely different types). And to make the jacket happy longer and shine brighter, you should apply it with gel polish.
Kinds
First, you should decide on the look, because French manicure has a lot of them, and the right option can be selected for any occasion. The most used types of French manicure include:
- Classical. A very popular option due to its versatility, simplicity and at the same time elegance. It uses soft natural colors: The nail plate becomes pink or clear and the tip of the nail is highlighted white. This option is perfect for both everyday wear and celebrations.
- Lunar. Inverted version classic version, it is also called the reverse. There are two options for this manicure: not the tip of the nail, but the hole is highlighted with white, making it look like a crescent, or the cuticle area is repeated. The color scheme can also be completely varied; this manicure looks very original, which is why it gained its popularity.
- Hollywood. One of the brightest options for this manicure. It is achieved through the use of contrasting colors and painting the tip of the nail with various ornaments and designs.
- Art. This option can without a doubt be called the brightest among all. The colors can be any, the main rule is that they contrast with each other. In addition to contrast, various bright and shiny decorations are often used here: beads, rhinestones, figurines, etc. This manicure is ideal for bright girls who like to attract attention.
- On foot. The classic French manicure looks great not only as a manicure, but also as a pedicure, giving your feet a neat, well-groomed look. If desired, any type of jacket can be done both on the arms and legs, it all depends only on how comfortable it will be for the girl.

Advantages and disadvantages
Manicure with gel polish has a number of undeniable advantages, which more than sufficiently compensate for some of the disadvantages. Among these advantages are:
- Therapeutic effect. Often girls cannot boast of their own strong and beautiful nails, for many they are very soft and flaky. Gel polish will help strengthen your nails and help them grow longer. Plus, the gel polish itself is completely safe; it does not contain allergic substances or impurities that harm the nails.
- Strength. This manicure itself is very strong and durable. With high-quality application, it will last 2-3 weeks, even if its owner often does household chores.
- Application at home. To get such a manicure, you don’t have to go to a professional; you can do everything yourself, the main thing is to purchase the necessary materials.
- Diversity. The range of colors for such a manicure is simply huge, and most importantly, you don’t have to limit yourself to one color, you can combine several options and decorate your nails in every possible way.
The disadvantages of this type of manicure include:
- Price. A manicure with gel polish at a salon will be quite expensive due to the high price of gel polish. However, you can compensate for this by doing a manicure at home.
- Special lamp. If you do a manicure yourself, you will have to purchase quite a lot of materials, including an ultraviolet lamp, since such a manicure will not dry on its own. The cost of the entire set will also be quite high, however, it will still be more profitable than constantly going to the salon.
- Thinning. With frequent use, gel polish can thin your nails, but this depends on individual characteristics every girl.
- Fake. Very often, fakes are sold under the guise of high-quality and expensive gel polish. It is unlikely that you will be able to determine this on your own, so if you have a familiar master, it is better to consult with him first.


Design ideas
There are a lot of ideas for designing a French coat with gel polish. Since the fashion for French manicure does not fade away, various new products are constantly appearing. There are more and more master classes on how to use various techniques. Therefore, we can say that the number of combinations is limited only by imagination. Among the brightest and most popular are:
- Manicure with acrylic powder. He is quite popular among girls brittle nails, because among others positive characteristics, it strengthens nails well. This is a huge field for creativity; with the help of this powder you can create a neon manicure, with metallic glitter, matte and many other beautiful and original options.


- Ombre. Another fashion trend to date. Moreover, it is present not only in manicure, but also in hair coloring, clothing, etc. This type of manicure is a smooth transition from one color to another, while you can make a double color spectrum or even use more colors, add drawings, stickers, stones or any other decorative elements.
You can use different shades of the same color or combine soft and bright colors, or you can try to combine completely different colors, for example, blue and red and see what happens.


- Multicolored. A multi-colored manicure will look original when each nail has its own special color or design. The main thing is to choose colors and shades so that they combine with each other, forming a single composition. For example, when the long-awaited spring comes, you always want something bright. In this regard, why not make one nail a soft pink shade, another orange with sparkles, a third purple, a fourth blue, and your thumb yellow. The result is a very stylish spring design.


- Dark. Dark manicure is always stylish and elegant. And it’s not just black, as many people think; manicures in dark colors can also be varied. For example, matte dark green, decorated with some kind of pattern, looks very beautiful. The same black can be diversified by adding red flowers to it. A deep burgundy color will always look trendy and universal.
- Translucent. One of the types of manicure that is at the peak of fashion. It can be either plain or colored; most often it is used not for all nails at once, but for individual ones and imitates the texture of lace fabric.
It looks very stylish and will look especially good with a matching evening dress.


Necessary accessories
In order to create the perfect French manicure at home, first of all you need to buy the entire necessary set of tools for it. It includes:
- UV lamp. It is better to buy a more powerful lamp, since if it is not powerful enough, it will take much longer to dry.
- Orange stick.
- File.
- Nail degreasing agent.
- Cuticle softener.
- Base.
- Directly gel polish. Several colors, depending on wishes. A good alternative to white varnish can be a white or bleaching pencil. It is very easy to use, you don’t even need a stencil and after it your nails look very natural.
- Stencil to draw a smile line.
- Top.
- Gel polish remover.
- Brush. If you want to make a manicure with a pattern, you will need an additional thin brush.

Preparatory stage
So, when the entire manicure set is prepared, you can start preparing your nails. Do not underestimate the importance of the preparatory stage; proper preparation will allow you to enjoy a beautiful manicure for a long time. The preparatory stage includes the following steps:
- If there is any coating on the nails, it must be removed, then wash your hands thoroughly so that no nail polish remover remains.
- The cuticle is coated with a softening agent for 5-10 minutes, and then removed with an orange stick.
- If there are burrs, they must be removed. It is also necessary to remove the pterygium; how long the varnish will stay on the nail depends on its quality removal.
- Next, using a file, you can give your nails the desired shape and length. After filing, it is important to remove all dust.
- After all these procedures, you don’t need to do anything else with your nails. except to leave them alone for a while and let them dry.


Step-by-step instruction
After all the preparatory procedures, you can begin to apply gel polish. The application technique includes the following instructions:
- First a thin layer applied base and dries under a lamp.
- If a girl cannot boast of perfect nails, you can use camouflage gel polish. This is a gel that is applied to the nail (except for the regrown area) to make it smooth. Camouflage gel creates an artificial nail on top of a natural one, but does it as naturally as possible. Camouflage gels have a tint genuine leather: beige, pink. After application, dry the nails under the lamp for several minutes.
- Next, a colored coating is applied to the regrown area., you can choose any shade, it all depends on your desire. Then the nails are dried again under the lamp for several minutes. If you are using a bright or dark varnish, it is best to cover the nail in several layers, this will give the color richness.
- After everything has dried You can apply the top coat and dry your nails again.
- If necessary, you can take a napkin and wipe the nail with a special product to remove the sticky layer, but now many varnish manufacturers make them so that no sticky layer is formed.
- After all procedures you can apply moisturizing oil, if it is not there, then you can use regular olive oil.
You can watch a detailed master class on creating the perfect French manicure in the following video.
French, made with gel polish, perfectly emphasizes the beauty of natural nails, but many girls are faced with the fact that there is no time or money to go to the salon. That’s why it’s now so popular to do your own manicure at home. It’s not difficult to learn the secrets of a perfect manicure and learn how to do it at home, the main thing is to practice and over time you will get better and better. Here are a few tricks for those who are just starting their journey in the field of home manicure:
- When purchasing the necessary set of products, it is better to buy professional equipment and varnishes. Of course, it’s not cheap, but it will last a long time and keep your nails healthy and beautiful.
- When choosing a gel polish, you should pay attention to the consistency and which one is more convenient to work with. It’s all individual, some people prefer thinner options, others prefer thicker ones.
- Many people, before getting a manicure, purchase only what is necessary to create it, and they forget about what may be needed for removal. This, of course, cannot be called a serious problem, but it is better to buy the entire necessary kit at once.
- If you really want to make a drawing, but there is no experience, then for starters you can simply draw dots in a contrasting color. It will look stylish, but does not require any special skills.
- All layers must be applied carefully, carefully ensuring that the varnish covers the entire nail, but does not spread.


Using dots
If a brush is not enough to accurately create beautiful dots, you can use a dots.
Dots are a special stick made of wood or plastic with a metal ball-shaped tip.
It’s easy and convenient to use; if at first you draw only neat dots, then over time you can learn to draw entire masterpieces using dots. The technology for using dots is as follows:
- Some varnish applied to the palette.
- The tip of the dots is strictly perpendicular drops into the varnish.
- Drawing is done by applying dots. You can leave them in the form of dots, or you can continue to fantasize.


Reverse French - instructions
Without a doubt, moon manicure is very popular now, so It would be relevant to consider the instructions on how to do it at home:
- Manicure. First you need to prepare the nail surface for work, namely remove the pterygium and cuticle.
- Degreasing. After this, you need to degrease your nails, because if this is not done, the coating will last less time.
- Base. Next, apply the base varnish. It can be either transparent or have a tint, it depends solely on your wishes. It is best to apply the base in several layers, thanks to this the base color will be brighter and the manicure more durable. After application, the base is dried under a lamp.
- Light varnish. After the base has dried, a light varnish is applied to the entire surface of the nail; the color can vary depending on your wishes. The main attention should be paid to the area around the cuticle and paint it as evenly as possible. After application, the bottom layer is also dried under a lamp.
- Colored varnish. After this, you need to attach a stencil to the base, or simply carefully paint the nail with colored varnish, without touching the light area. It also dries under a lamp.
- Top. When everything is ready, all that remains is to cover the manicure with topcoat and dry it again in the lamp.
Watch the video below for a master class on creating such a manicure.
Options for drawing a smile line
The biggest problem when creating a beautiful French manicure on your own is precisely the careful work with the smile line. Now there are a lot of devices to facilitate this process, but you still need to approach the work with full responsibility. The most popular options are:
- Stripes. It is not difficult to purchase such stencils; they are often found in sets for French manicure, or they can also be purchased separately. Nothing supernatural - just strips of adhesive paper that can be of any shape. For a classic French jacket, the arch shape is suitable. Using the strips is very simple: you just need to glue the stencil to your nail, leaving the tip open, after which you can safely draw on it. Then, after waiting for it to dry, you can simply peel off the strip.
- If there is no doubt about sleight of hand, you can create a beautiful French manicure without using stencils, and using a brush. You can use a brush from a jar of varnish, or you can purchase a thinner one separately.
- For an express manicure, you can use a whitening pencil. Such a manicure cannot be called a full-fledged one, but if there is absolutely no time and you need to get your nails in order, this option is ideal. The whitening pencil is applied to the back surface of the nail either on wet hands or by wetting the lead.
It is important that the lead is well sharpened.


French manicure is so versatile that it will look good on both short and long nails. Many girls prefer long nails, which is not surprising, because they visually lengthen the fingers, and there are many more manicure options with such nails. They can be given absolutely different shapes:
- Spicy. A very elegant and catchy option. It is better to do such a manicure in a salon, with a trusted manicurist, as it is important to model them correctly to avoid damage.
- Square.
- Oval.
- Can be combined different nail shapes, for example, square and oval.
- Nails with edges.
French will look great on any shape of long nails. However, if things are simpler with long nails, then to create beautiful manicure on short nails I'll have to try more carefully. Those with short nails should note the following:
- Overgrown part of the nail for a French manicure it should be no less 3 mm, it's better to grow to 5 mm.
- A narrow smile line will look more elegant and beautiful, because if you make it too wide, the entire nail will visually appear smaller. Various patterns along the nail can help create the illusion of additional lengthening.
- If you want to do holiday decor, it is important to stop in time and not overdo it. You can make a discreet design or add a little sparkle. It will look beautiful and gentle. While if you add too many decorative elements, the overall look may turn out to be vulgar.


If you give preference to practicality and always want to stand out with grace appearance, then the choice of manicure will most likely be made in favor of the constant classic manicure, namely French. When talking about who this design would suit, it is impossible to define any boundaries, because it always turns out to be “in place”, be it daily work in the office or something gala event. He was especially loved by brides.
What is French manicure
First of all, this is a universal design option that looks amazing on nails of any length. It creates a complete look and is suitable for the fair sex with any type of appearance, in addition, thanks to it, your hands will always look well-groomed.
All the attention in this technique is paid to the tip of the finger, unlike its mirror brother, the moon manicure. edge nail plate In French design, the gel polish is usually highlighted in snow-white color. If you are interested in non-standard solutions, then the edge can be highlighted in any desired color.
Sometimes even masters combine several at once and draw them with separate, clear lines. As for the main color of the nail, it is best to pay attention to pastel shades or delicate translucent tones, which will look ideal in contrast with the colored smile at the tip.
Why is it better to do a French manicure using gel polish?
With the advent of gel design, women's lives have become much easier. Its main advantage is its practicality, because the average period of wearing such marigolds is at least two weeks. As for gel polish when working on a French manicure, of course you will spend a little more time on the work, about two hours. But, at the same time, you will reduce the time spent on daily correction of cracked varnish. Gel polishes in light shades have their own specific characteristics when worn:
- Firstly, due to their consistency, they are not homogeneous and lie unevenly;
- Secondly, they crack and this is very noticeable on light shades.
The duration of wearing this design varies from two weeks to a month, and the plus is that it is not noticeable as the nails grow. But, if you compare gels with regular varnishes, then the advantage in socks becomes obvious.
Necessary tools for a French manicure
Due to the fact that the smile of the main pattern in a French jacket must be clearly outlined and, most importantly, neat, you will need a little more material than when working with gel polishes normally.

Let's list all the necessary materials once again:
- UV lamp;
- Manicure set;
- Bafik;
- Primer or degreasing agent;
- Base and top coat;
- Gel polish in a pastel shade (transparent is also suitable);
- Contrasting color of the gel for drawing a smile (in the classic version of the French jacket, give your preference to snow-white);
- Orange stick;
- Lint-free wipes;
- Nail polish remover;
- Stencils for French;
- Thin brush for patterns.
You can buy all these simple devices in specialized stores for nail industry specialists.
Step-by-step instructions for performing a French manicure with gel polish
First, be sure to prepare your nails for the work ahead. To do this, carefully treat your nails and remove the cuticle. During the preparation stage, do not forget to give your nails the desired shape and remove dead skin particles around the nail bed. After this stage of the work is completed, we proceed directly to the design:
1. Level the nail plate with a buff and treat with a degreaser;
2. Now apply a layer of base coat and dry it in a lamp;
3. Cover the nail with the base color and also dry it in a lamp. It may take more than one application, each of which needs to be dried in turn;

4. Draw a smile line using a stencil or a thin brush, then, making sure that it is even, dry them in an ultraviolet lamp;
5. Apply top coating and dry your nails for a few more minutes;
6. Now all we have to do is remove the sticky layer using nail polish remover and a lint-free cloth;
7. Your French manicure is ready.
As you can see, the work is not difficult and a girl can handle it even without special professional training. Difficulty may arise when applying the gel to right hand or left, depends on what kind of leader you have. You will have to tinker with it a little longer, but with careful and careful work you will succeed.
Which gel polish to choose for a French manicure.
The main rule when choosing a material for work is, of course, its quality. As for your choice when choosing colored gel polish for a French manicure, in fact, as for any other design, pay attention to the following:
- Dense and rich color that applies well in a maximum of two coats. Otherwise, when performing work, you may develop bald spots and an uneven shade;
- Gel polish should not be very liquid, but thick will not work either. As a rule, they lie in several layers and cause pigmentation. And also, the nails under such a gel will form a lump and soon cause detachment.
Most the best option For the nail base, choose a gel polish of a delicate shade that best matches your natural color of the nail plate.
Many artists use gel paint or regular paint to paint a smile. acrylic paint. Because its shade is much brighter regular gel and is easier to work with, laying down in a thin and even layer.
Which brush to choose for a French manicure
So, we have already found out that working with this design will not be difficult at all. However, this requires accuracy and perseverance. Of course, you can use a stencil, but experts highlight their lack of practicality and the fact that it is not always possible to get the desired shape of a smile. This is where a brush for drawing a design comes to your aid.

The right brush should be as thin and long as possible, with its help you draw a fine line between the main color and the pattern. In order to paint the tip of the nail a uniform color, it is not suitable and you will need to buy the most ordinary gel brush, you can also use a brush from a bottle of varnish. Before you get the perfect line, you will have to practice to get better at it, so to speak. This can be done on special tips or simply on a piece of paper; this is necessary so that you can calculate the pressure and get used to working with a thin brush.
This tool will also be useful to you for subsequent work with gel polishes; it is with its help that masters in salons make drawings of any complexity.
When choosing a brush, pay attention to the fact that it should be soft and perfectly smooth. If uneven fibers stick out on it, they will interfere with drawing and making blots.
Video: French Manicure
Tags:

French manicure has been trending for more than one season. The reason for this is the technology available to beginners and versatility. A high-quality French jacket is relevant both for a special occasion and for office everyday life. French manicure with gel polish is not only beautiful, but also practical. The coating will last 2-3 weeks. Fashionable items 2018 offer different variants French, with whom we will get acquainted.
Required Tools
If you decide to do a French manicure with gel polish at home, you need to prepare everything you will need during the process. Searching for a tool you suddenly need distracts you from your work and affects the quality of your manicure.

You will need:
- Basic manicure accessories - scissors, nail file, nippers, buff.
- Primer.
- Base coat for gel polish.
- Cuticle oil.
- Pink and white gel polish for a classic version, colored varnishes for a bright jacket.
- Top coating.
- Stencils for French manicure.
- Orange stick.
- Cotton buds.
- Nail polish remover.
- Additional decorative elements upon request.
- Lamp for coating polymerization.

Preparation
French manicure with gel polish looks perfect on well-groomed hands. Carelessness will ruin even the work of a first-class master from the salon. To make your nails look beautiful, you need to carry out preparatory procedures. It won't take much time, and the result will pleasantly surprise you.
- First of all, you need to remove the old coating, or its remnants.
- Make it European or trim manicure— determine the length of the nails, shape them with a file, remove the cuticle.
- It's time to take a bath with sea salt.
- Treat nails with a degreasing agent.
- Use a buff to buff the surface of the nail plate. Important! Grind strictly in the direction of nail growth, otherwise there is a risk of damaging the nail plate.
After the above procedures, do not wet your hands, do not use cream, balm, or oil. Try not to come into contact with foreign objects.

Classic French
- Apply primer to sanded and grease-free nails and wait until it evaporates from the surface.
- Carefully apply the base coat and dry in a lamp. Drying time depends on the varnish and lamp power.
- Apply pink or beige gel polish and dry your nails. If necessary, apply a second coat and dry.
- Use white polish to draw a smile line on the regrown part of the nail plate. If you are not sure, you can use special stencils. If the varnish accidentally smears, it's okay. By using cotton swab the defect can be corrected.
- Send your fingers under the lamp to dry again.
- Apply top coat and dry.
- Remove sticky layer.
- Rub the oil into the cuticle, this will give your hands a well-groomed look and protect the skin from drying out.

Some masters practice joining the main and white flowers. Due to inexperience, the line where two varnishes meet will be very noticeable. You can disguise it with decorative elements. But first it’s better to get your hands on it using the method described above.
Fashion trends in 2018 offer a bold and bright option - a colored jacket. This manicure involves the use of two contrasting colors: red and blue, yellow and black, green and burgundy, etc. There are no clear rules or restrictions here. Girls who don’t want to stand out too much use transparent or nude varnish as a basis, and bright colors paint the smile line. Coloring all ends with different colors is encouraged.
More fashionable option colored French - coating of one color with varnishes of different textures. The base is matte, and a glossy finish is used for the tip. Or vice versa.

Girls with longer nails can allow a gradient transition of several colors to be made on the grown part of the nail. If desired, the joint line between the coatings is framed with a strip of gold or silver sparkles.
Drawing on one or more fingers, pebbles, stickers - also fashion trends This is not the first season of French manicure. The main thing is not to overdo it with decorative elements, otherwise it will look bad.

The color French technique is no different from classic manicure. You need to prepare the same set, trim it or European manicure, prepare your nails for applying gel polish. Important! If more than three colors are used, the manicure should be in harmony with clothing or accessories. The right time for a colored jacket is summer, when colorful dresses, blouses, and shorts are in style.

Perfect manicure
Reverse French
Fashion trends in French manicure suggest a departure from the classics. In the 2018 season, the so-called reverse French is relevant. The idea is that the smile line is formed at the base of the nail, along the cuticle line. The result is a mirror version of the classic French manicure. Stencils in the shape of a triangle or crescent will help you draw a line. Preparation is no different from the traditional version. You will need the same items and varnishes in the desired colors.

Algorithm for performing reverse French:
- Apply primer to degreased and sanded nails.
- Cover your nails with base coat and dry.
- Apply varnish of the main color in one or two layers, dry each in a lamp.
- Using a brush or stencil, draw a “smile” along the cuticle. Its size is chosen at your discretion.
- After drying, if necessary, apply a second coat of smile and put your nails under the lamp.
- Apply top coat and let dry.
- Remove the sticky layer and treat the cuticle with oil.

To extend the life of your manicure, you need to follow simple recommendations:
- Don't skimp on tools and materials. High-quality manicure accessories will cost more, but will last longer and provide good results.
- It is better to purchase gel polish, base and top coat of the same brand.
- Each layer of coating must be applied to the end of the nail, sealing it. Then chips and cracks will appear much later.
- You need to dry the coating exactly as long as indicated in the instructions. Deviation in time, up or down, negatively affects the quality of the manicure.
- On the first day after a manicure, it is recommended to refrain from visiting the sauna, swimming pool, or taking a bath.
- You should wear gloves when washing dishes and doing other housework. You will extend the life of your manicure and protect your hands from the harmful effects of household chemicals.
As you can see, you can get a French haircut without going to the salon. French manicure on nails with gel polish looks elegant and stylish at any age. The main thing is not to rush and choose quality materials. There is no need to stop at the classic pink version, it's time to experiment and play with colors.
Every beautiful person most likely has an idea of what a French manicure looks like. And even some men know the technology of this nail art. However, time does not stand still, and now it is considered relevant to perform a French coat with gel polishes. But not all young ladies know the correct sequence of actions. That is why we have prepared this article. In it we will present detailed step-by-step instructions that will allow you to execute your desired design correctly and with pleasure.
Preparatory stage
Every young lady who decides to decorate her hands with a French manicure should first of all treat her nails.
It's very easy to do this:
- First you need to choose the required form. The ideal options for French are “oval” and “square”. But there are also options with “pointe shoes” and “claws”.
- Then you should adjust the length. Experts say that French gel polishes can be performed on both natural nail plates and extensions. However, to create a classic version, the latter should be as natural as possible. But colored French manicure can be done even on very long and clearly unnatural nails.
- Further required by any in a convenient way remove cuticle.
- Finally, polish the nail plate with a special tool.

What is required to perform a gel manicure?
Most young ladies have no idea what actions are required to work with gel polishes. Therefore, they hesitate to try out many designs that are fashionable and currently relevant. However, in reality, gel manicure is not difficult. And if you understand its technology, you’ll hardly want to bother with conventional varnishes again.
So, to perform a French manicure with gel polish, you need to prepare:
- base - a means for better adhesion of the varnish to the nail plate;
- white, pink and transparent varnish - to create a classic version, and any other tones - for a colored jacket;
- special stencils for French or a thin brush;
- top - a means for securing the design and its subsequent protection from various damages;
- clinser - liquid for removing stickiness;
- lint-free napkin;
- ultraviolet lamp.
Technique for performing a classic French manicure
As we wrote earlier, the design being studied is not complicated and is not too different from nail art made with ordinary varnishes. However, there are still some differences. Next, we will look at the step-by-step technology of traditional French in order to explain to the reader in more detail the features of gel nail art.

So let's get started:
- To perform a classic French manicure with gel polishes, you should place the necessary tools and materials next to you.
- Then apply a base coat to the treated nail surface.
- And dry it in ultraviolet light for thirty seconds.
- Then apply a layer of clear or pale pink varnish.
- And dry it for three minutes.
- Now you should attach special stencils to your nails or pick up a brush, dip it in white varnish and draw a “smile” on the tip of the nail.
- Dry the manicure again for three minutes.
- And cover your nails with topcoat.
- Carry out final drying for two minutes.
- And remove the stickiness with a napkin soaked in cleanser.
Technique for making a colored jacket

A French manicure made with acidic, pastel, dark, matte or other varnishes looks very fashionable and stylish. It is also easy to perform at home. After all, the technology is almost similar to what we explained earlier. And then the reader will be able to verify this. Colored French gel polishes are carried out as follows:
- The first step is to choose a design.
- Then the corresponding varnishes are prepared.
- Next, the nail plate is covered with a base.
- And dries for half a minute under the lamp.
- The next step involves applying and fixing the base color for three minutes.
- Then, depending on the nail art you like, the tip of the nail is decorated with a round, triangular or wavy “smile”.
- The separated area is painted over with colored varnish.
- After which the manicure is fixed in ultraviolet light.
- And covered with a top.
- The top is also dried.
- Finally, the master removes the stickiness using a cleanser and a napkin.
How to make a reverse French

Recently gained popularity new technology manicure Its name, indicated in the title of the current item, is often used by professional craftsmen. But beginners or amateurs who are familiar with gel manicure only in general terms prefer something different. In this case we are talking about lunar manicure. Doing it at home is quite simple. But reverse French gel polish will look very impressive, stylish and fashionable. The main thing is not to be afraid to try new technology.
It consists in next steps:
- First you need to prepare the varnishes of the desired shades. For the classic version of a manicure, light pink and white polish are required; for colored shades, you can choose arbitrary shades, that is, those that suit a particular person.
- Lunar design is also done using special stencils or a thin brush. Experienced craftsmen use the second tool because they have sufficient dexterity. For beginners, it’s better to start with the first one to ensure the clarity and accuracy of the nail art.
When everything you need is ready, let's move on to action - performing reverse French with gel polishes at home:
- After applying and drying the base, coat the nail plates with varnish of the main color. For the traditional version - transparent or pink, for the colored one - any other.
- Fix the manicure under the lamp for three minutes.
- Then we draw a “smile” at the base of the nail with a thin brush or decorate the nail plate using special stencils.
- Dry the resulting design under the lamp for three minutes.
- And we finish the job by applying a top coat, drying for two minutes and removing the stickiness with a cleanser.
French manicure using ombre technique

Many young ladies do not want to perform the classic French gel polish on natural nails or extensions. Because the traditional design seems quite boring and ordinary. And then professional craftsmen offer an original and very gentle version of the design being studied. You can get acquainted with it thanks to the presented photo. If the reader also liked the manicure, then we offer detailed step-by-step instructions:
- The technology begins with the treatment of marigolds.
- This is followed by application and drying of the base.
- To create a gradient, you need a special stretching brush. Moreover, it is important to draw the reader’s attention to the fact that a design with ordinary varnishes can be made with a sponge, but a gel one is not even worth trying.
- When the right tool ready, visually divide the nail plate into two parts.
- Apply clear or light pink polish to the area at the base of the nail, and white to the tip. The main thing is that the colors are located as close to each other as possible.
- After that, take a brush and carefully smear, stretch the shades, gradually mixing them and erasing the hard border.
- This step is completed when the young lady achieves the desired result of nail art.
- Then the nails are fixed under the lamp.
- Cover with top coat and dry again.
- Finally, all that remains is to remove the stickiness using a cleaner.
French manicure with foil

Another original version of the technology being studied involves the implementation of a shiny jacket on nails with gel polishes. To perform, you should prepare any basic shade, an apricot manicure stick, special foil for nail art and glue. When everything you need is ready and at hand, you can proceed to action:
- First, the nails are polished.
- Then they are covered with a base and dried.
- Next, they should be painted with a base tone varnish. It can be transparent, light pink or any bright color.
- It also needs to be fixed in ultraviolet light.
- And only then proceed to applying foil. This is quite easy to do. But first of all, you need to apply glue to the tip of the nail so as to outline the main detail of the jacket.
- We apply the foil to the nail plate and carefully straighten it with a stick.
- Then we pull sharply.
- We cover the design with topcoat, dry it and get rid of stickiness.
Unusual colored jacket
We are used to the fact that French manicure involves perfect... straight line“smiles” and a certain rigor of design. However, leading masters offer several spectacular options that differ significantly from the classic French jacket. In the following video you can learn the technology of one of these great ideas.
Summer French gel polish
Various designs, including images of fruits and berries, are becoming increasingly popular every year. However, summer is the season when these types of manicures become especially relevant. To create them with ordinary varnishes, you will have to spend a lot of time and effort. But a similar procedure with gel will be completed quickly enough and will bring a lot of pleasure.
Fashionable black jacket
Another popular trend this season is an inversion of the traditional manicure. This design looks very stylish, impressive and unusual. It's easy to make it at home. Especially if you prepare a special mattifying top.

First of all, the nail plates are corrected and covered with a base, which is then dried under a lamp. The second step is to apply matte varnish, if you plan to work with black and glossy varnish. Or glossy if a matte top is available (it should be applied after drying). Next, the nails are fixed in ultraviolet light and complemented with a glossy “smile”. The manicure dries again, but the top is no longer applied. Otherwise, it will not be possible to achieve the desired jacket option, and the gel polish coating will be damaged. Don't be afraid to experiment!
Beautiful well-groomed hands and a superbly executed manicure is an integral accessory when creating bright image modern woman. A decoration that makes a statement social status its owner, her impeccable taste and even her personality. French manicure with gel polish lasts a long time and looks stylish. It can be done very well even at home.
Classic French manicure is very popular, its peculiarity is that it is colored White color the tip of the nail, the so-called “smile line”.
The rest of the nail plate is covered with clear varnish or soft pink, beige, or nude.
This manicure option is always universal. It is suitable for any occasion, both everyday and formal occasions. French is done with a special gel polish. This durable coating not only looks great, but is also extremely durable, and therefore does not wash off for almost three weeks.
You can get a French manicure with gel polish without leaving your home. To do this you need a set of varnishes and cosmetical tools for nail care - for removing cuticles and moisturizing, degreaser, base, primer and fixative varnish.
Special tools will also be required:
- usual accessories for manicure;
- sanding buffs;
- Ultraviolet lamp.
The process of performing the discussed manicure only looks labor-intensive, but in reality it turns out to be quite simple:
- First of all, you need to moisturize and remove the cuticle.
- Then process the nail plates with a nail file, giving them the selected shape.
- Degrease the surface of the nails and then remove the natural shine by sanding.
- The next stage is the work of applying the primer.
- After it has successfully air dried, a base is applied and cured using a UV lamp.
- Then the nail plate is evenly coated with gel polish of the background color and dried again with a lamp for two minutes.
- Now the most crucial moment is to apply the smile line with white gel polish and dry it in a lamp for two minutes.
- After this, the almost finished manicure is covered with a protective coating and cured in a UV lamp.
- Then the sticky layer is carefully removed and the beautifully executed manicure is finally wiped with a degreaser.
French for short/long nails at home
The fashion trend of today dictates naturalness in everything. Therefore, it is preferable to perform French on short nails.

Long ones are only suitable for a special occasion.
First you need to choose the shape of your nails. Why you should pay attention to the length of your fingers and the shape of your hands so that the manicure looks harmonious.
The following nail plate shapes are in fashion:
- Square.
- Square with rounded corners.
- Oval.
- Round.
- Almond-shaped.
Square shapes are more suitable for long fingers - this will make them look shorter. This form can also be used simply for a short nail plate. When processing the nail, you need to pay attention to the fact that too sharp corners will cling to everything during the further use of the manicure. They need to be blunted a little, while holding the file perpendicular to the nail. Rounded corners square shape They look interesting, but you need to act carefully so that all nails look the same.
Oval and round shapes are good for short nails. She will make even rough fingers visually softer and more feminine. Nails are carefully filed and rounded.
The almond shape looks great on long manicure. It's quite easy to get it. The nail is filed on both sides, and then the tip is rounded.
If the shape of your nails is naturally inharmonious, then you can completely correct it using special French techniques.
They are suitable for both long and short nails:
- lunar or reverse French;
- drawings;
- applique;
- decorative elements - rhinestones, molded flowers, sparkles.
To perform a neat French manicure at home, you should use stencils. In addition to traditional colors (white, flesh, peach), fashion also has quite bright colors, and their combinations.
Manicure ideas with patterns
A French manicure with gel polish with a pattern can be perfectly combined with makeup, clothing style, its color, serve as a magnificent detail, complete the image, make it whole and unique.

You can apply various patterns to all fingers, or selectively, focusing on only one or two.
Most often, the ring finger is chosen for this purpose.
Pay attention to the designs that are in fashion today:
- Abstract figures, lines, all kinds of geometry perfectly complement the same geometric designs on clothing or accessories.
- Seasons. It all depends on what the weather is like outside today, so a manicure can be winter, spring, or summer. Accordingly, drawings of butterflies, berries, leaves or cold crystal snowflakes are great idea, which is impossible to go wrong with.
- Floral patterns have already become a classic in the design of French jackets with gel polish. Here you can show your most irrepressible imagination. From modest daisies to luxurious roses and sophisticated lilies. Usually floral motifs applied at the very last moment when performing a manicure. You can make drawings with a thin brush, use stamping and volumetric blanks. It all depends on the chosen style.
- Ethnic motives are a great opportunity to express yourself and show your inner essence.
- Cartoon characters. Never give up your childhood! Good mood will always be guaranteed, you just have to look at your nails.
- Animalism (image of animals). With the help of their images you can tell a lot about yourself to the world around you. And such drawings can also serve as some kind of mysterious symbol, amulet, totem.
Ideal colored French gel polish
Today, famous stylists are increasingly moving away from tradition in the design of French coats with gel polish. Interesting ideas appears more and more every day, as the boundaries of creative possibilities are pushed forward. New colors and shades, unusual decorative elements and materials for their implementation are appearing, and the texture of gel polish itself is changing.

This season, originality and unusualness in the design of French manicure with gel polish are popular. Non-standard solutions and bright shapes attract attention.
Here are some ideas for decorating a colored jacket with gel polish that would be quite appropriate for everyday wear:
- The smile line can now be stretched almost to the middle of the nail, making it unusually wide.
- Looks luxurious fashionable combination glossy and matte coatings of the same or contrasting shades.
- All kinds of geometric shapes are used to design nails - these can be rectangles, squares, or various circles and ovals. Sharp corners leave a particularly striking impression.
- This season, the technique of the negative must be used - a space free of color coating, its combination not only with the smile line, but also with various decorative elements.
- It is very popular to use velvet sand when decorating nails, which makes an unexpected impression.
- The smile line can be created using rubbing.
Moon manicure – inverted French
This type of French manicure became popular thanks to Dita Von Teese and Lady Gaga. For the first time, lunar manicure was presented to the public in 2007. Designers of the House of Christian Dior for the show new collection"invented" unusual option French manicure, which was successfully demonstrated by models on the catwalk. This interesting technique was picked up by well-known personalities in show business, and their fans spread it with great enthusiasm. new idea Worldwide.

An inverted French manicure or moon manicure has such an interesting name due to the fact that it is performed by focusing attention on the nail hole instead of the traditional “smile” at the tips.
In this case, the lower part of the nail plate is highlighted in a contrasting color - dark or, on the contrary, light. Sometimes the lunula is indicated by a silver or gold tone, glitter or embellishment.
The shape can be semicircular, similar to a sunset. This option prevailed for about ten years. Today, stylists prefer a new design, designating the nail hole and the area around the cuticle in the form of an inverted “smile.” This method allows you to visually lengthen your nails, make them more graceful, beautifully outline them and give them an interesting shape. This manicure is performed on both short and long nails.
French manicure with gel polish with stencil
Even complex versions of French manicure can be mastered at home if you use a stencil to make perfect shape smile lines. This applies not only to the classic French jacket, because now you can buy stencils of the most incredible patterns - from the classic “smile” and simple straight lines to zigzag, triangle, circles and fancy colors, hearts and other designs.

Using stencils for manicure you can save a lot of money, because they are inexpensive, up to a hundred rubles. Moreover, the set contains more than a hundred various options smile lines.
Here's how French is done using a stencil:
- The base is applied to fully prepared nails.
- After the base has completely dried, the nails are covered with varnish of the background color, possibly in two layers.
- Then stencils are glued to the surface of the nail plates to perform a French manicure, while leaving the very tip of the nail free, but not less than 2 mm.
- Now comes painting with a different color of varnish using a stencil in two layers.
- You can remove the stencil immediately after painting or after some time, when the varnish has dried well. It all depends on the experience of the craftswoman. The main thing is to be careful not to damage the drawing.
- After this, the nails are covered with a final, securing layer of clear varnish. In this case, it is quite possible to use various, preferably ready-made, decorative elements. These can be stickers, glitter, rhinestones, etc.
Millennium French or shiny manicure
It's bright holiday option, suitable for a fun party, romantic date and even for a wedding celebration. However, it is also perfect for bright sunny days. summer day spent on the beach. This is a very difficult technology to implement.

In general, the millennium French manicure is performed like a regular French manicure. Only along the smile line is it decorated with bright sparkles, sparkling microdust, shimmering mica or shimmer. Sometimes the tip of the nail is decorated with rhinestones. All this beauty is secured with transparent varnish.
The base can be any color - from transparent to black or white. Sequins can be fixed strictly on a certain line or stretched all the way to the cuticle.
Wedding manicure ideas with gel polish
Delicate pink, lavender, peach, beige French gel polish in a single composition with white is ideal for a bride’s look. The main thing is that the manicure fits perfectly with the whole look as a whole, serves as a great accessory, a complement, as a bridal bouquet or gloves. It is important that it looks harmonious next to jewelry.

Exquisite painting and decor are perfect for this special moment. It will look ideal together with a dress and veil, imitation of natural and decorative materials– silver, gold, pearl beads, diamond rhinestones and sparkling sequins.
You just have to have a sense of proportion and not spoil the delicate image of the bride with excessive shine.
You should not mix gold and silver decorative elements - this is bad form.
Here are some manicure ideas for a wedding:
- The bride's hands are always in sight, so it's better to do wedding manicure for long nails - they look elegant and sophisticated.
- Floral motifs are well suited for painting and decorative decorations of wedding nail art.
- Butterflies will look great too.
- If the wedding takes place in winter, then it is quite possible to draw snowflakes and glue sparkling “ice” crystals.
- Geometric patterns and abstract designs complemented with shiny sequins will also look luxurious.
- The trend of the season is lace nail design, echoing the material of the veil, sleeves or skirt. This technique is performed using special ready-made stickers or films that imitate lace.
- Classic French gel polish will be an ideal universal addition to any wedding dress.
French New Form for short nails
The name of the New Form French manicure speaks for itself. It's just an unusual form of "smile". In general, the technology for applying such a manicure is traditional. However, the contrast line should be made in a zigzag or beveled to one edge of the nail plate.

This manicure looks very unusual, so you need to be careful here in order to create the right impression and not spoil the overall appearance. Should be given Special attention shape of nails. Very careful processing is required. All nails must be the same length. Only under this condition will New Form look harmonious.
This type of manicure looks better on short nails than on long ones. It is permissible to grow or extend a nail by 5 mm, but no more. The main thing, of course, is the health of the nail plate, its smooth, even surface.
Current colors for French manicure with gel polish
For French manicure, gel polish has become popular in 2018. natural colors which nature itself suggests.

- These are pastel, nude - beige, pink, peach shades, they are in trend.
- Sand shades, ivory, and pale yellow are also considered fashionable.
- The colors of the sky are soft blue, the grass and foliage are mint, and the colors of wildflowers are lavender.
All these tones go well with the basic ones: black and white. A special trend is strict grey colour, which creates a stylish look, combining perfectly with a variety of shades.
Brighter manicure – for special occasions and celebratory moments. It involves the use of bright natural tones - chocolate, plum, cherry, olive, dark wine.
Of course, the classic French manicure remains unchanged, so, of course, sophisticated transparency dominates here, which emphasizes the beauty of natural, well-groomed nails.
Matte manicure still takes pride of place in this diverse palette of colors and gel polish application technologies. This is restraint, some severity, noble expressiveness. Besides dark colors, traditionally used for matte manicure, this year it is quite possible to use light colors. It will do fashionable image unusual and memorable.
We also recommend
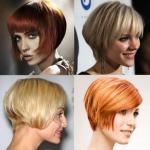 Fashionable bob haircut options according to face type: choose yours, photo See women's bob haircuts
 Charming and attractive DIY Cockerels!
 Crafts from threads: do-it-yourself magical toys
 Napkins with voluminous crochet butterflies
 Four beautiful DIY hair ties - master classes for fashionistas and their mothers Homemade hair ties
 Sometimes you really need to be supported...