Decoupage vase: design options in various styles. DIY vase decoupage! Vase decoupage ideas
Master class on making a vase using decoupage technique
Pavlukhina Vera Aleksandrovna, teacher additional education MAOU DO Youth Center "Zvezdochka" Tomsk
Target: mastering the depupage technique using the example of decorating a glass product.
Tasks:
- convey your experience through direct and commented demonstration of consistent activities;
- teach the skills of broadcast actions and techniques, ways to achieve the desired result;
- increase the motivation of participants Master Class and to create your own new style of creative activity;
Description: Due to its simplicity, this master class is accessible to anyone who is interested in mastering this technique. younger schoolchildren, and more adults. Everyone can feel like a creator and an artist; it is in the depupage technique that the basis is taken finished product, all you have to do is create your own style by imagining it, realizing your ideas.
Safety precautions when working with liquid substances (varnishes, paints, glue)
Before starting work, make sure that the containers containing varnishes, paints or glue are in good condition.
It is recommended to work in a ventilated area
It is advisable to use personal protective equipment when working with varnishes.
Cover the table with oilcloth
Avoid getting glue or varnish into your eyes, mouth, or nasal mucous membranes.
When working with hand glue, use wet wipes,
If glue gets into your eyes, rinse them with water.
Be attentive while working, do not get distracted
Use liquid substances (varnishes, glue, paints) only strictly for their intended purpose.
At the end of the work, close liquid substances (varnishes, glue, paints) tightly, rinse the brushes, and ventilate the room.
From the history of decoupage
The word "decoupage" comes from the French verb decouper ("to cut").
The history of this technology goes back to the distant past. Back in the 12th century, oriental craftsmen manually created thin paper with various images, which was used to decorate furniture, walls, household appliances. Covered with varnish, these drawings created the illusion of artistic painting.

Screen. China 13th century

Chest of drawers XV century
Soon this fashion smoothly flowed to Europe. Original, exquisite products made using this technique gave a certain exclusivity to luxury items. Unlike true works of art, they were much cheaper and were not inferior in quality to the original samples. Over time, the technique of cutting and pasting designs was transferred to other household items - vases, boxes, lamps and much more. People of different classes were happy to engage in such creativity.
Nowadays, this type of creativity is very popular.
Everyone's favorite holiday is approaching, which means it's time to gather interesting ideas. Have you already thought about New Year's decor your home? I invite everyone to create a fabulous environment together using bright decorations made with your own hands.
The year of the Fire Rooster is coming, so I advise you to meet and appease this bird with bright, original, beautiful decor so that he brings happiness to your home and does not leave it throughout 2017.
I propose to start decorating the vase.
Necessary materials:
- glass vase
- paint-primer (acrylic, universal)
- paper napkins
- scissors
- glue for decoupage (PVA is possible)
- synthetic brushes
- sponge or sponge
- acrylic paints
- acrylic lacquer
- semolina

Using a brush, prime the surface of the vase with primer paint and leave to dry (this “procedure” must be repeated 2-3 times).

We select the fragment we need on a napkin and carefully cut it out. Separate the two lower layers, leaving only the top layer with the pattern.


We attach the drawing to the vase and determine the place where our fragment will be located.
Using a brush and glue, glue our picture on top of the picture from the middle to the edges onto the dried, primed surface of the vase (carefully smoothing out wrinkles and bubbles with a brush).


Leave the vase until completely dry.

Using a sponge (a piece of sponge) using the “poke” method, we decorate the entire outer surface with white paint (matching color), slightly extending to the edges of the picture (for realism). Add a little blue tint.


We “live” our picture and leave it until dry.
Apply varnish on top with a brush.

After 1 hour, apply another thick layer of varnish.
After the varnish has dried, you can decorate the vase with semolina. Apply decoupage glue only to the area where there is no picture, and sprinkle with semolina.


The vase is ready.

Such a vase will become beautiful decoration and will bring comfort and coziness to your interior, and without a doubt it can become a good gift on the eve of the New Year holiday.
People learned about the decoupage technique relatively recently. However, she quickly became popular. Now many craft stores sell everything you need for decoupage. Vases, boxes and even pieces of furniture - you can decorate anything.
This decoration option will be interesting for people who love unusualness and originality. An item made by hand is unique and emphasizes the tastes of the owner. Of course, the materials are not sold in single copies, but the ways of combining and using them depend solely on the flight of fancy.

The decoupage master class is not difficult even for beginners. During school craft lessons, many made appliqués cut out of paper. Decoupage is applique, but more elegantly done. There are many items that can be decorated, and in this article we will talk about ideas and tips for decoupaging vases.


Materials
The item that will be decorated – a glass vase, glass, jar or bottle will do. Upon completion of the needlework, even the most inconspicuous container will become a beautiful flower vase.
- A primer for decoupage will come in handy, but you can do without this component.
- Paints – acrylic or gouache.
- Brush.
- Napkins for decoupage.
- Scissors.
- Foam sponge.
- Film - a file for sheets works well.
- PVA glue.


Simple instructions for beginners
Below we will describe step by step how to decoupage a vase at home. Before starting work, the container that will be decorated must be degreased. It is enough to wash it with soap or wipe with an alcohol solution. When the surface of the vase is degreased and dry, you can begin to decorate it.

If there is a primer, it must be mixed with paints and applied to the vase using a sponge. The color of the paint needs to be thought out in advance; it determines how the drawing will look. If there is no primer, instead of it, ordinary white napkins are glued to the surface of the vase.

PVA glue is applied to the surface with a sponge. The difference between the two methods is that with a primer the surface will be slightly rough, this adds unusualness to the craft.

You must wait until this layer dries. The napkins can be gently dried with a hairdryer. It is not advisable to treat the primer in this way - it may deteriorate.

The napkins need to be dyed. Below is a darker shade, above is lighter. The primer is already painted, so this step is not needed for it.

Cut out the parts from the napkin that will be glued to the vase. For beginners, it is advisable that they are not too small or too large.

Large parts are difficult to glue smoothly and not wrinkle, and small parts can be damaged during gluing. For the first time, it is better to choose those patterns that will not be spoiled by slight asymmetry. Then you won’t have to spend a long time aligning each element.


For even gluing of the cut out parts you will need a film. It is possible to do without it, but there is a risk that the drawing will become wrinkled. The file is wetted and pieces of napkin are placed with the bright side facing the film.

Excess water is carefully removed. Then they press the drawing to the surface of the vase. The film is removed, and the pattern remains on the vase. The product needs to be dried again and the design covered with glue diluted with water.

If, when cutting out, there are excess pieces left on the parts, they can be painted over to match the background color. It would be nice to varnish the vase. This will strengthen the decor and make it shiny. It is desirable that the varnish is transparent and does not spoil the work with additional shades.

The described option is the simplest of instructions for decoupaging vases with your own hands. There are also more complex methods of decorating objects. For example, you can add three-dimensional patterns from glued threads or beads to the above option.

For beads, it is better to use super glue rather than PVA. Creating three-dimensional patterns is more painstaking and requires the ability to carefully work with very small materials, but the result justifies the effort.


A photo of a decoupage vase with three-dimensional drawings will help you clearly see how this decorative option differs from simple decoupage. This idea is inspiring, but it’s still better for beginners to practice with easy creative ideas. Moreover, even a small pattern on a vase will transform it beyond recognition.


Photo of decoupage vase


The main material for decoupage is paper or napkins with a pattern. The images from them are transferred to the surface and fixed with glue.
The following devices will be needed:
- brushes of various sizes;
- container with water;
- paper glue;
- acrylic or polyurethane clear varnish;
- multi-colored acrylic paints;
- additional decorative elements - beads, beads, shells, lace, etc.
Everything you need can be found at home or purchased at affordable prices at the nearest store or craft supply store.
Technique for applying a pattern to the surface of a vase
The decoupage process includes the following steps:
- Prepare materials and equipment for work.
- Trim the edges of the selected picture and attach it to the surface of the vase. It is better to immediately mark the contours with a pencil - they will serve as a guide when gluing the picture.
- Apply a small layer of glue to the marked area.
- Gently press the image, straightening all edges and bubbles. To secure, apply another layer of glue on top.
- Paint the background with multi-colored paints and add bright touches to the details of the picture if necessary.
- After drying, coat the surface with clear varnish in one or more layers.
You can decorate not only a vase, but also other containers - jars, mugs, jugs, decorative vessels.

Features of decoupage vases from various materials
When starting to decoupage a vase, you should take into account the characteristics of the material from which this product is made.

The simplest and most popular options are vases made of ceramics and glass, transparent, plain or already having some pattern that needs updating and additional decoration.

Ceramic vase
On an unpainted ceramic surface, it is best to use images without a background, carefully cutting off unnecessary edges of the parts. This will give the product maximum naturalness and accuracy. If the vase has a white background, then you can use ordinary paper napkins with a pattern as a material for decoupage.

A finished ceramic vase can be coated acrylic paint and keep in the oven at a temperature of up to 150 degrees - the painted surface will become smooth and shiny.

Glass vase
To work, you will need a standard set of decoupage tools. Before decorating, the glass surface must be wiped with a piece of cotton wool soaked in an alcohol solution.

To get a smoother surface, after gluing the picture and applying clear varnish, you should smooth out any unevenness using a piece of sandpaper and apply another layer of varnish on top.

Care should be taken to ensure that no particles of dust or dirt remain on the surface of the vase before varnishing. When decorating transparent glass vases, you can translate not only the picture, but also all the images along with the background.

Ideas for decorating vases
Currently, there are many popular styles and options for decoupage that can be used to decorate any vase.

With their help you can give the new kind any product, harmoniously combining the design with the overall style of the interior, or prepare a vase as a gift souvenir for every taste - from classic to sophisticated and fashionable style.

Romantic vintage
This style is not only one of the classics, but it is also luxurious and never goes out of style.

Jewelry in this style has an antique effect, beautiful flower arrangements and a dark background.

To decorate a vase in a vintage style, you must follow these steps:
- Apply a layer of light paint (white, brown, yellow shades);
- after drying on top, add another layer of more dark paint so that it contrasts with the previous one;
- You can transfer the prepared picture onto the resulting background and then cover the vase with a layer of transparent varnish.

There are also special varnishes that, when applied, create natural cracks on the surface (craquelure). They differ not only in color, but also in the size of the cracks, their shape and quantity - the better the material, the better they look.

Cracks can be filled with special bronze powder before varnishing. Vintage vases are usually decorated with flowers, floral patterns, butterflies, birds, silhouettes female face and images of crowns, old photographs.

Shabby chic
This style, like vintage, implies a worn-out effect and the creation of romantic mystery. It differs from the previous one in more refined and embellished details - here the cracks are not made “old”, but elegant and luxurious. The details are more delicate, mainly a pastel palette is used: light green, pale pink, blue, beige, yellow tones.

Floral motifs in this style are combined with beautiful images of animals, angels, small birds, ribbons - anything that gives the vase coziness and tenderness can be depicted in the decoration.

To decorate a vase in the shabby chic style, you can use the following scheme of actions:
- Apply brown or dark paint to the surface of the vase. yellow color.
- After it has dried, cover the vase with light crackling paint of such a color that it is noticeably lighter than the previous one. You will get delicate romantic cracks, not as contrasting as in the vintage style.
- Paste pre-prepared pictures - for example, with images of flowers, leaves and butterflies.
- Cover the entire treated surface with a layer of clear varnish. Once dry, apply another coat if necessary to ensure the vase is smooth and shiny. This coating will last longer than a rough layer of paint and paper, and will be much more practical to use.

It is worth noting that the effect of antiquity can be achieved using ordinary paper napkins, creating torn edges of the picture and pasting them so that they are replaced along the contour or at the junction of the images. For example, a white background of napkins on a pink or green surface.

By following these simple recommendations, you can easily short time create unique stylish vases that will create a cozy atmosphere in any room or become a wonderful souvenir for a birthday, wedding, anniversary or New Year's holiday.
IN Lately handmade is in particular demand, because many lovers of beautiful things and decor are already tired of the abundance of factory trinkets that are offered in modern stores.
Decoupage of a glass vase is precisely a clear example how to quickly and easily create beautiful element DIY decor.
Description of the decoupage technique
 Do not assume that decoupage is a tribute modern fashion. The French kings were also fond of this technique. In the 17th century, it literally filled the entire Old World, which is not at all surprising, because when minimum costs could be decorated dishes, boxes, kitchen furniture and any other household utensils, creating real masterpieces.
Today, decoupage is used to decorate glass and ceramic vases, frames for mirrors and photographs, boxes, napkin holders, stands, furniture fronts and many other interior elements. Such items fit especially well into apartments and houses decorated in the style shabby chic and provence.
At the same time, decoupage of a vase is a universal way of decorating, because if you wish, you can choose a design that will ideally suit any room.
The advantages of this design option are undeniable, since by resorting to it, even a novice craftsman will be able to turn the wildest ideas and dreams into reality, receiving an original or even personalized product as a result.
As for the technique itself, it’s not at all difficult to make a decoupage vase, box or any other thing with your own hands, and even a five-year-old child can cope with the task if desired. The finished result will amaze even the most experienced critic, since instead of artistic painting, design using the decoupage technique involves the use of ready-made prints, which means that the “drawing” will be without flaws.
Decoration materials
One of the main advantages of this technique, in addition to its spectacular design, is the low cost of the materials required for it. Moreover, many of them can be found on your farm, so even for the production of the first works it is not always necessary to purchase required material. So, a novice master will need:
- vase or any other element for decoration;
- primer, PVA glue;
- texture paste (you can use Goi);
- printed napkins;
- gouache or acrylic paints on water based, brushes;
- clear or craquelure varnish.
To perform more complex work, you can use decorative putty, beads, fine broth, foil, mica, feathers and any other decorations that, in the opinion of the master, will fit perfectly into the overall composition.
Having completed everything preparatory work and clearing workplace from foreign objects, you can start decorating the workpiece.
Master class on decorating a vase
Decorating various elements using the decoupage technique is not difficult at all and, as a rule, a novice craftsman just needs to watch a tutorial video on the Internet or even get acquainted with brief description decorating process to learn its basics. Over time, it will be possible to try something new, complicating the technique and thereby making it more interesting and unusual.

Decoupage allows you to create an imitation of the finest porcelain from an ordinary ceramic or even glass vase with your own hands. The master class involves performing the following manipulations:
- Before you make a floor vase with your own hands in this original technology, it is necessary to properly prepare it, using any degreaser and primer that provides better adhesion of materials to the surface of the vessel.
- You can paint a vase only after the soil has completely dried, and if the master wants to get an unusual texture, then it is best to apply paint using foam sponge making chaotic movements.
- Ideally, the print should be glued to the primed vase before painting it. To do this, you need to cut out the design you like from a napkin or the thinnest piece of paper, wet its front side with water and place it on a pre-prepared file with the wrong side up, since it is much easier to transfer the print from it to the vase.
- The surface of the vase is coated with PVA glue, after which the cut out print is transferred to the treated area.
- In order for the image to fit perfectly on the figured surface of the vessel, it must be leveled using a brush and a less concentrated PVA solution, prepared in proportions of 1 to 5 with plain water, which is applied over the image.
At this point, decoupage of a glass vase (master class) can be considered complete, unless, of course, the author wants to supplement the composition with some original decorative elements.
 So, for example, you can use grainy Goya paste of a neutral color, which is applied to the surface of the workpiece with the smallest spatula, trying to create an effective texture that slightly matches the drawing (this way you can decorate existing imperfections). It is noteworthy that the dried surface can be tinted or painted in any color you like, using canned paint or regular gouache.
If you want to leave the surface of the vase perfectly flat and smooth, adding visual depth to the print, then it is best to completely cover it with transparent construction varnish. Decoupage of a vase in vintage style looks very strong and unusual. A craquelure varnish will help a novice master to achieve the effect of antiquity, which, when dry, forms characteristic cracks, as in the paintings of ancient masters.
And in order to make these cracks as expressive as possible, experts strongly recommend covering the surface of the vase two layers of contrasting colors(first a dark tone, and after it dries completely - light). The next stage involves applying craquelure varnish to the second layer, and this must be done before the paint has had time to set properly, because only then is there a chance to get those treasured cracks that effectively imitate antiquity.
Recently, experienced craftsmen are increasingly resorting to the “Decoupage on Fabric” technique, using coarse burlap or thick linen as the base rather than transparent vases.
In this case, a similar procedure is assumed (except for degreasing and applying primer), however, decorated textiles are not used in their own form, but as decoration for other elements.
 Alternatively, you can use a textile print for decoupage vases, boxes and napkin holders using only the most thin fabrics. It is not for nothing that in the old days, in noble houses, the walls were covered with natural silk and beautiful chintz.
Some may be surprised, but the decoupage technique has become so popular that the developers included it as one of the most difficult tasks in the Avatar game. So, according to the plot of the game, the gamer can move to a new level only after he succeeds yellow flower, but instead he is very often offered other options. The essence of this task is that the player is forced to do decoupage with any other print until he comes across the coveted yellow flower, after which the stage is considered completed.
Attention, TODAY only!
The decoupage technique is gaining increasing popularity. This is a troublesome task, but quite interesting. In addition, it does not require special investments. Everything you need is at hand, but if it’s not there, there are specialized stores where huge selection goods for decoupage. But the main thing, as in any other handicraft, is imagination. Having a rich imagination, you can decorate, embellish and update almost any surface with your own hands using this technique. You can make any old furniture, kitchen utensils, boxes, jewelry. But Special attention Let's turn to decor on glass, namely decoupage of a beautiful glass vase. After applying bright designs, any glass flower vase will be transformed, becoming truly unique, decorating your interior and adding zest!
We decorate a glass vase with napkins using the decoupage technique
Let's see how you can make a stunning one from an ordinary, transparent vase. original gift. We present to your attention step-by-step master class. Let's arm ourselves with everything we need and go into battle!
Materials you will need:- Decorated object. Glass flower vase, flask of any size and any shape.
- Napkins. The choice of design depends on the flight of your imagination.
- Scissors. Choose scissors with sharp blades. Napkins are a very thin material; dull scissors can cause ragged edges.
- Acrylic paint.
- Glue for decoupage. You can use regular PVA glue.
- Brushes of different sizes.
Let's look at a step-by-step MK for beginners


Agree, it is very simple and beautiful. The most important thing is that it was made with love and with your own hands!
Floor vase for decorating your home interior yourself
The mission of the floor vase is to unite the home interior together. But what to do if the interior has changed, but the vase remains? Don't rush to throw away the old one and buy a new one. It can be decorated using the decoupage technique.
Now let's watch another master class on decorating a floor vase! After all, the amount of work in the process of decoupaging a floor vase is very different from working with a simple glass vase! You can also watch a training video lesson at the end of our master class.
Detailed study of instructions for beginners
We remove all contaminants and degrease the workpiece using a cotton swab and alcohol. If the old vase had minor reliefs, you can use sandpaper to smooth the surface. Next, prime the old vase in 2 layers.
Then, (to create a three-dimensional effect on the vase using the decoupage technique), generously moisten the fabric in PVA glue, decorate the vase with fabric on top and bottom, as in the photo below. Have you already seen how great they look on huge floor vases?

Now we begin to form the desired texture of the fabric - making the folds and smooth transitions clearer.
In order to decoupage a vase with an aging effect, we make egg decoupage. It's a painstaking task, but very productive! You can see how it will look in the photo below.

All that remains is to coat the product with several layers of varnish. When all layers of varnish are dry, our vase is ready!
The photo clearly shows how sophisticated and delicate it turned out.

Craquelure technique for creating cracks in finished products
Craquelure is a decoration effect in the form of cracks. The craquelure technique in decoupage imitates an aged surface.
Any needlewoman is faced with the desire to learn this technique. To achieve the aging effect, a special varnish is used, which is applied between two contrasting paint colors.
After drying, the varnish tears the top layer of paint. The size and frequency of cracks depends on the amount of varnish applied. Often cracks are sprinkled with bronze powder to achieve the greatest effect. So let's explore this technique together!

We will need:
- Glass vase;
- Acrylic paint in two colors (red and green) varnish;
- Set for craquelure, we will use PVA glue;
- Sponge;
- Brush;
- Napkins.
Step-by-step instructions for beginners
First, mix the colors, add a drop of red to the green color. Then we cover the surface of the pre-prepared vase with this paint. This color will be the background for the craquelure. It is better to apply this paint in two layers.

Cover the entire surface of the already dried vase with undiluted PVA glue. Once this layer is dry, begin applying the contrasting paint color. It's best to do this with a sponge. You should also remember that when decoupaging a vase with craquelure, you cannot paint it twice in the same place, otherwise cracks will not form. After the paint is applied, dry the vase with a hairdryer. The longer you dry the glue with a hairdryer, the larger the cracks will become.

Now we cover the bottom of the vase with white acrylic paint. It's better to do two layers.

Then carefully glue floral motifs. When they are dry, we coat our vase with varnish.

All that remains is to put a worthy bouquet of flowers in it!
The craquelure technique produces quite original products that will decorate any interior and more. You can make souvenirs and gifts for friends and family with your own hands at home or make other old furniture in the house!
Video tutorial for beginners in needlework
We also recommend
 Fashionable bob haircut options according to face type: choose yours, photo See women's bob haircuts
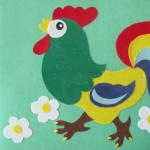 Charming and attractive DIY Cockerels!
 Crafts from threads: do-it-yourself magical toys
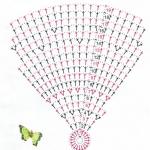 Napkins with voluminous crochet butterflies
 Four beautiful DIY hair ties - master classes for fashionistas and their mothers Homemade hair ties
 Sometimes you really need to be supported...