Felted crafts. Felting wool for beginners - a description of dry and wet felting techniques
How to felt wool - basic felting techniques. Information and advice for beginners part 1
Hi all! It's time to add some handicrafts to computer-related posts. In the near future I will post several translations of master classes on felting toys, but now I would like to tell you about felting techniques. So, how do you felt wool?..
Content
Introduction;
Dry felting;
Wet felting.
Introduction
Felt (English) – [noun] felt, felt; [verb] to felt wool, to knock down felt Let's start with the most important thing. Remember, not so long ago there was an advertisement on TV for a shampoo that made your hair smooth and silky. Then they showed the ugly split ends in close-up. So, sheep's wool in normal condition it looks about the same =)

Because of this “layering,” human hair can even form tangles and “fall off.” But what is not good for our hair is good for felting. It is this structure of sheep wool that allows you to create wonderful toys, clothes, felt boots, carpets and much more. Naturally, not only sheep’s wool is suitable for felting. You can use alpaca, camel, llama and yak wool, as well as cashmere, angora and mohair. 
So…
Felting (felting, felting) - the process of creating various products from unspun wool by interlocking and interweaving its fibers different ways. There are many various types felting - dry, wet, nuno-felt, felting of knitted items. Below I will discuss the main techniques.
How to felt wool?
Dry felting
I want to warn you that this type of creativity is not suitable for children under 10 years old and those who like to create while watching TV (although I do this). If you are too distracted, you can pierce your finger right through - the needles are very sharp, and the notches tear the skin well. A felting needle is a thin tool, shaped like the letter L and equipped with small notches. With its help, the fibers are easily tangled, and the process itself is similar to creating a three-dimensional sculpture, where instead of plasticine there is soft, pliable wool. 
Example. Felting wool using a needle
1. Separating the wool from the unspun sliver, rub it a little between your palms, tangling the fibers. Then roll it into a tight cylinder. 
2. Let's start felting. We insert the needle deeply, first of all compacting the workpiece inside. Gradually turn it, falling evenly. The ball will be compacted and its surface will be leveled. 
3. As the workpiece compacts, you should change the needle to a thinner one. If the figure no longer deforms when compressed, you can stop felting. To create a relief, it is necessary to process the same place with a needle many times.
Tip 1. After pulling the wool from the combed ribbon, rub it between your palms, this will tangle the fibers and make them easier to mat.
Tip 2. You can determine whether the desired density has been achieved by compression. After deformation, the product returns to its original shape. Please note that if you overdo it, the wool fibers will begin to tear.
Tip 3. When felting large items, use a sliver for the inside, this allows you to save more expensive wool. (It is possible, but not particularly recommended, to use padding polyester)
Application
You can distinguish applique as a subtype of dry felting. In this case, we roll the wool onto some kind of base, mainly felt or wool. You can use wool to decorate clothes, give new life old things, for example. 
Wet felting
Felting wool with soap is a classic method known since ancient times.
I will briefly describe the process:
The wool layout is soaked in a hot soapy solution, then ironed and rubbed in different directions, gradually increasing the pressure. To facilitate work in the initial stages, a vibratory grinder is often used. You get a canvas - felt. Advice. When making patterns for the desired product, keep in mind that when wet felting, the wool will shrink by 30-40 percent
1. Separate identical shreds of wool, 8 centimeters long, from the woolen tape. Place them on bubble wrap in one direction, slightly overlapping each other. Similarly, we lay out 3-4 layers, the wool fibers in each of which are perpendicular to the previous one. 
2. The last layer can be applied with a pattern from scraps wool thread, scraps of wool, etc. 
3. Prepare a soap solution. To do this, dissolve soap in warm water (there is a special soap for wet felting, which is gentle on the skin of your hands, but you can also use baby soap, liquid soap, or even dishwashing detergent) - whatever you have on hand. We wet our workpiece and cover it with a net or bubble wrap. 
Using soft circular movements, stroke the fur in all directions. Gradually increase the pressure. This stage can be completed when individual fibers no longer separate from our fabric.
4. Place the workpiece along with the film on a bamboo napkin and roll it into a tight roll. We wrap this structure in a towel - this will help remove excess water. We ride back and forth a hundred times. Then we unfold it, turn the canvas 90 degrees and make a roll again. 
5. When falling, the canvas will decrease by 25-30 percent. Rinse the finished canvas in warm water and leave to dry. Do not wring - just squeeze slightly to remove some of the water. 
Carpets, paintings, clothes, bags, jewelry and accessories are made this way.
Felting in the washing machine
Subtypes of wet felting include felting in a washing machine. It requires almost no physical effort and can be done in two ways:
1. Using a deboning pan Volumetric forms covered with wool, fixed with nylon and sent to the washing machine. 
2. Felting knitted products Currently, you can find special yarn for felting on sale. Using a crochet hook or knitting needles, you knit a product that is 30 percent larger than required (to know the exact shrinkage, a test sample is felted and the compression in width and length is calculated from it) and either sent to the washing machine or felted by hand. Looks very interesting, doesn't it? And it’s easier than wet felting, in my opinion. 
That's all! Felting is the most interesting creative process. Don't be afraid to experiment! Sincerely,
If you decide to take up felting, but have never encountered it, then you should not take on complex toys or paintings. You should start with small jewelry, such as a flower brooch and beads. With help step by step instructions and any beginner can handle this.
Schemes for beginners
Small cute brooch
To felt a brooch in the shape of a lily of the valley, you will need the following tools:

 The first step is to make the frame for future leaves of our flower. To create them you need wire and wool. Green colour. It should be placed on the brush under the frame. This strand needs to be carefully pierced with needles. Consider one important point: The strand of wool should be larger than the frame.
During operation, the strand is turned over, all actions from the previous point are repeated.
We wrap the ends of our future sheet - we have a blank! We put the frame on it again. We process the edges of the leaves using thin needles. The main thing in this process is to give the product naturalness and naturalness. This can be done using green wool.
Apply a small amount of glue to the ends of the leaves. Apply green wool again on top of the glue. . Carefully twist it like this to make a stem.
Next we start making the branches. For this you will need wool white. We make pancakes from wool. We place a bead into the resulting pancake; it can be of any color. We decorate the bead using wool. Special needles for felting come to our aid.
Dip the resulting workpiece into a soap solution, and then roll it out in your hands. If some threads of wool have come out, remove them using ordinary office scissors.
We cut off the top of the workpiece and make 8 cuts. Our lily of the valley flower is beginning to form. We dip the resulting buds into acrylic varnish. Carefully wring out the workpiece and send it to dry. We also make unblown flowers - these are white and green balls.
Now let's start forming the brooch. First, we string the flowers and buds onto the wire. We make several such branches. We fasten them with glue and green wool. We complement the accessory with leaves and a clasp. You can add green ribbon.
Felted beads step by step
The next decoration is beads. For production you need:

Manufacturing process step by step:

In conclusion, finished loops with beads strung on a chain or waxed cord.
Wet felting from wool
 Thanks to techniques such as wet felting, you can make stunning scarves, bags, slippers and other accessories from wool. This technique has one feature: pieces of wool must be placed in a special soap solution. Let's look at the main features of this technique.
The first step is to prepare a soap solution. To do this, you will need a bar of soap and boiling water (about 2 liters). Grate the soap and place it in hot water. It is necessary to mix the solution thoroughly so that the soap is completely dissolved, and let it brew. If you don’t have bar soap, replace it with liquid soap.
An important rule: the solution must be infused until it thickens. It usually doesn't take longer2 hours.
As soon as the soap solution reaches the consistency we need, we can begin handicrafts. To do this, the work surface must be covered with a special bubble film - it prevents the fibers from sticking together and can be used more than once. The film should be laid with the bubble part facing up.
To begin with, you should lay out a base layer on the film, then a background layer, and only then with a pattern or print. Be careful, each layer must be thin, they must be laid overlapping and perpendicular, this will help avoid the appearance of gaps. All layers must be the same thickness.
Next, we treat the workpiece with ordinary running water, this must be done very carefully, so a regular spray bottle will come to the rescue. We cover the future product with nylon cloth and carry out the procedure of wetting it in a soap solution. When the workpiece is well saturated with water, we finish by rubbing the canvas by hand.
Dry method
 Dry wool felting for beginners requires much less cost than wet felting. Using this technique, you can create unusual and original decorative elements, toys, accessories and other interesting things.
They take a piece of wool, place it on a sponge and form the intended shape using special needles. At the same time, one should not forget about the shrinkage of dry raw materials.
Important: be extremely careful! By making punctures, you can break the instrument or injure your hands.
Start with thicker needles. And when the product becomes denser, replace them with thin ones. During the felting process, the needles are held at right angles, and the material is placed not suspended, but directly on the surface of the sponge.
We make toys and figures
Animal figures, such as wool sheep, look especially cute. Making one using the dry felting technique is very simple for beginners:

Attention, TODAY only!
Felting wool, or felting, is a very interesting, fascinating type of needlework that is popular today. Modern craftswomen use this technique to make clothes, shoes, all kinds of accessories and jewelry. Unique toys come to life in their hands. With the help of felting, drawings are made on fabric and felt, paintings and even entire panels are created.
Felting painting
So, what is this type of needlework? Let's figure it out.
Wool felting (from the English felt - felt, felt, stuffing) is a technique in which dense felt is obtained from lush, airy wool. Only natural wool has the ability to mat: the fibers adhere to each other due to their scaly structure.
Do you think felting is a hobby of modern needlewomen that appeared relatively recently? You are deeply mistaken. Felting from wool is one of the oldest types of needlework: people made things from felt already about 8 thousand years ago. Currently, technology is acquiring more and more artistic features; with its help you can create truly amazing things.

Wool beads and bracelet. Photo: inhomes.ru

Felt squirrel. Photo: madeheart.com

Stole with tulips. Photo: livemaster.ru

Felted children's vest. Photo: mbuzgorpolbk.ru

Felted handbag with a cat. Photo: livemaster.ru

Wool slippers. Photo: livemaster.ru
Types of felting
There are two main types of felting - dry and wet. Using the dry felting technique, carried out by piercing wool with special needles, three-dimensional products are most often created: toys, souvenir figurines, jewelry. The wet felting technique, carried out using soapy water and friction of fibers, is suitable for making clothes, panels, canvases, bags - in other words, flat products.
Often, dry and wet felting are used in the manufacture of one product. For example, when making toys, some flat elements are made using the wet felting technique: ears, paws.
Let's take a closer look at dry felting, which is the most fashionable today.
For a person who has not previously encountered felting, we recommend starting to get acquainted with this technique with a felting kit: fortunately, modern manufacturers have provided enough wide choose. In the future, you can move on to bringing your ideas to life.

Anna Rybalchenko
felt toy maker
Materials and tools
Whatever items you decide to make from wool by dry felting, you will need the same materials and tools.
Unspun wool
For dry felting, coarse or semi-fine dyed unspun wool is used. It is not advisable to choose wool that is too thin (merino), as it is quickly destroyed by the needle - and this can lead to the product becoming oversize, which is almost impossible to correct.

Semi-fine wool for felting. Photo: realtex-yug.ru
Felting wool is sold in the form of combed strip and carded wool. Combed tape is neatly laid in long ribbon wool fibers. To make the felting process more effective, such wool must be thoroughly tangled before working with it. Carding looks like cotton wool, only wool. Such a mass, consisting of tangled fibers, does not require preliminary preparation and quickly falls off.
Remember that wool shrinks by about a third - so stock up on plenty.
“Some people use undyed wool called sliver (cheaper) as the base of toys, then roll it with warp wool. I would not recommend using a sliver for the base, as it falls very poorly and the toy inside will turn out soft, which will make it worse to keep its shape. If you want to save money, then for the base it is better to use semi-fine Russian wool in a combed strip.
In general, the coarser the wool and the greater the fineness (fiber thickness), the faster it mats, which greatly speeds up the process of creating a product. If you are planning to make a toy with the effect of fluffy wool, then put the same wool in the base as on the surface, because when fluffing the product, the needles will pull up the wool fibers located in the middle of the base.”
Anna Rybalchenko
Needles for felting
Felting needles are special needles with small notches at the bottom. When the needles are inserted into the wool, the fibers catch on the notches and become tangled with each other.

Needles for felting. Photo: saleslook.ru
Needles of different thicknesses are used for work: usually the felting process begins with thicker needles, which are then replaced with thin ones. Thick needles are used for direct felting, that is, compaction of the material, medium needles are used to give the product an outline, and thin needles are used to form the final touches. Thick needles (nos. 30, 32, 36) contribute to rapid matting, but after their use, clear puncture marks remain on the product. It is in order to “retouch” them that thinner needles are used (Nos. 38-42).
Needles come in not only different thicknesses, but also different forms sections: triangular (three-beam) and star-shaped (four-beam). For initial work, triangular needles are usually used; for the final ones - in the shape of an asterisk: the punctures from them are more accurate and invisible.
In order to make your work process easier, purchase high-quality needles, preferably imported ones (made in England, Germany, USA).
“Despite the variety of types and shapes of needles, for felting you most often need needles No. 36 (“triangle” or “star”) for working on the base and needle No. 38 “star” for finer work, sanding and decorating the face of a toy. I would recommend having at least five needles of both types in stock, because even the best quality needles break at first for beginners.
In addition, there is another type of needle that helps create a fluffy fur effect on felt toys - these are the so-called reverse needles. These needles easily enter the product and pull the fur out of it to the surface. To create the fur effect, I advise you to use needles No. 40 reverse: they carefully pull out the fur without tearing the toy.”
Anna Rybalchenko
Felting brush
A special brush for felting will protect the working surface and your hands from needle pricks, which, by the way, are sharper than a regular sewing needle. The brush can be replaced with a dishwashing sponge.

Felting brush. Photo: 9.paraalisveris.me
A piece of wool is placed on a brush or sponge and pierced with needles until it becomes felted.
“If it is not possible to use a brush or mat for felting, then when choosing a sponge, pay attention to the fact that it is hard and does not sag under pressure, otherwise you will not be able to felt on it.
When using a brush for felting, I’ll tell you one secret: to prevent the product from being injured by the bristles in the place where it lies, I put a viscose rag folded in two layers (it is sold in any hardware store as for wiping off dust). Thanks to this, the product does not suffer from contact with the brush, and the needles easily pass through the cloth.
In any case, periodically separate the part from the brush or sponge so that it does not stick to it.”
Anna Rybalchenko
In order to protect your fingers from needle pricks, novice felters are recommended to use special rubber or leather thimbles.
Decorative elements
Ribbons, braid, lace, beads and glass beads, glass eyes and other elements are used as decoration for the product.
“Sometimes when making a three-dimensional product, padding polyester is used: it serves as a base on which wool is applied. I don’t recommend using it, as it practically doesn’t fall off - the toy inside will be soft and easily dented.”
Anna Rybalchenko
Anna's works


When working, the needle should be inserted perpendicular to the product or at an angle, depending on the purpose. Anna Rybalchenko talks about this rule: at what angle the needle is inserted, at this angle it is pulled out. Quick and sharp blows with a needle will speed up the process at the initial stage - this way the product will fall off much more efficiently. However, speed and strength must be combined with attentiveness.
“It is important to constantly move and twist the product so that it falls evenly from different sides. This way, the needle will not be exposed to the wool for a long time in the same place, and the wool fibers will not be damaged. Otherwise, you risk getting wool dust instead of a dense base.”
Anna Rybalchenko
When the needle enters the felted part, a crunching sound should be heard. If the toy starts to “crunch” - continue, you are on the right track!
When creating the base, try to felt the middle of the product well. To begin with, take no a large number of wool and gradually increase the volume by adding wool little by little.
“You don’t need to take a large amount of wool at once and give it a shape - you either won’t get what you planned, or the inside of the toy will be under-filled, which will then affect the quality of the finished product. If the product is dense inside, it will be much easier to shape and polish it.”
Anna Rybalchenko
When finishing, the punctures should be made as close to each other as possible. Work at this stage takes place on the surface, the needle is inserted onto a pair of notches. Use a needle to carefully remove all irregularities - ideally, there should not be a single bump on the finished product. If in some places the strands are not aligned, you can apply small pieces of tangled wool fibers and thus sand the product with them.
“Remember: when grinding, the size of the product will further decrease, so you need to start this stage when the product is already hard and cannot be squashed with your fingers.”
Anna Rybalchenko
If you squeeze the finished product with force, but it does not change shape at all, then the shrinkage is sufficient. Tap the table with your finger and then with the toy - the sound should be the same.
To connect parts, which occurs by pressing them against each other, it is necessary to leave the joint “loose”. Loose fibers from one part are threaded into another using a needle. The joint is strengthened: it is laid with a piece of wool, rolled up and sanded.
For paired parts (for example, ears, paws), it is recommended to immediately prepare the same amount of wool. It is difficult to measure wool for the second piece if the first one has already been felted.
If the product is made according to your idea, before you start felting, make a sketch of the future product. Do not forget that preliminary preparation is the basis of any work.
Anna Rybalchenko shares her experience in creating toys:
- Felting the base is a long and painstaking process. Therefore, in order to speed up this stage at least a little, I advise using not one, but two or three needles at the same time when working on the base. You can combine two needles No. 36 and one No. 38, for example. This will significantly speed up the felting process.I also fluff the toy with two or three needles at once. If you do this with one needle, the fur on the toy turns out to be sparse, which looks unsightly. The photo below shows how I roughly hold the needles. When the needles are exactly at this distance from each other, they shed the wool best and fastest. The photo also shows how and what kind of cloth I use to cover the bristles of the brush.
- To make the base of the toy dense, I start with a small skein (strand) of wool, twist it into a roller (as in the photo below) and carefully roll it, and only then, step by step, add new wool. Thanks to this method of felting, you will not overdo it with the volume of the base. When working with wool, it is easier to add volume than to remove it.
- Two or even three different colors of wool can be mixed together using two combing brushes, and then a completely new interesting shade can appear that will add zest to your product.
- If you are passionate about the idea of creating toys from wool, but do not have artistic skills and knowledge, a detailed study of animal anatomy from photographs can come to your aid. By understanding the basic structure of an animal's body, you will much more easily achieve similarity to the original.

Felting can be great family leisure. Wool is completely safe unless there are allergic reactions to it. This means that even children can be involved in such an activity, instilling in them hard work, perseverance and a sense of beauty.
“Children will find it easy to work with wool using the wet felting technique (felt beads, scarves and other simple things) - this is really a fairly safe type of needlework. Sample dry felting I would recommend with a child over 10 years old, because by this time it is already well developed fine motor skills, and the child will cope with sharp needles. 55
Ancient crafts have always been of interest to lovers of creativity; thanks to the uniqueness of handmade products, such things have always been in demand. Felting wool, clothing, and its exclusivity represent a new trend in fashion these days. Modern needlewomen create not only clothes and all kinds of accessories from wool. Interesting, bright toys, elegant sweaters, scarves and coats come to life in their hands.
Felting, felting, stuffing - these are clothes that have undergone such processing and are particularly soft and dense.
The creation of felted products involves two methods: wet and dry. Craftswomen, using one method or another, describe it in detail using examples of things they have created.
Limitless possibilities of felt
The revival of the felting technique especially appealed to today's fashionistas. Items made by felting from natural wool are not only fashionable, they are very warm. In addition to clothing items, today's craftswomen felt everything from wool. Any element of the interior, children's toys, everything is in the hands of needlewomen.
Wool felting, clothing self made and many useful things made in this way today represent real art. At the same time, this is an interesting, simple and convenient creative creation of warm, unique wardrobe elements.
For beginning craftswomen, it is recommended to choose wool with obvious properties of good adhesion of its fibers to each other. In addition, this wool must be unspun. You can buy the unspun material you need for your work in specialized stores or using catalogs and recommendations from online stores. As a rule, this purchasing option provides guarantees of the purity and quality of the product.
Depending on the purpose, you need to choose coarse or fine wool. Coarse wool can be used for bags, slippers or home furnishing accessories.
Items of clothing and accessories, children's toys will require the use of semi-fine and fine wool structure.
The portal "Fair of Craftsmen" provides significant assistance to needlewomen: felting from wool, handmade clothes are presented there by master classes of experienced needlewomen with step by step execution products.
Basics of wet felting wool
The essence of wet felting wool fiber consists of wetting it with a soap solution and then carefully smoothing it in different directions. The finished product is a dense material - felt.
In wet felting, you should make the necessary increase in the pattern of the product, since wool shrinks up to 40%.
To obtain small volumetric objects, a ball of wool is crushed in your hands. A flat fabric is obtained when wool is used. Clothes and accessories that represent the openwork fantasy of the craftswoman can only be made by rolling the workpiece for a long time or smoothing it with hand effort. Only this method allows you to get a bright thing with all kinds of color transitions.
Necessary and auxiliary tools and materials
The main material for felting is unspun wool. Material used for felting different types. Depending on the planned product, you need to purchase one of several types of wool fiber:
- The coarsest wool is the so-called combed wool.
- Semi-fine wool.
- Very thin.
- A flat working surface with certain dimensions.
- Polyethylene film with bubble finishing.
- Mesh with a dense structure (mosquito).
- Soap and water solution.
- Water.
- Spray.
- Accessories for finishing the product.
Wet felting technique
The effort of a needlewoman’s hands is the main tool in processing an amazing material called “wet felting from wool.” Clothing, as a result of using this procedure, allows you to bring the most incredible ideas to life. The basic scheme for implementing this technology:

- Formation of a fibrous web of a certain orientation, that is, laying out wool.
- The procedure for obtaining a base for felting (prefelt), processing the original material, pre-moistened with a special composition, into a single needle-punched fabric.
- Shrinking of prefelt by performing special processing techniques, which results in an increase in strength and highlighting the texture of the material.
- Removing the wetting component. Layout patterns largely determine the future range of products.
Stages of work
The modern felting process has many techniques. Wet felting of wool clothes, a master class of one of the options, is presented in the following stages.
- Layers of wool are spread in a thin layer overlapping onto the oilcloth with the dimensions of the product marked. The wool is laid out in a checkerboard pattern: horizontally, then transversely. It is necessary to control the thickness of the layer; it should be the same in all areas. In addition, felt shrinkage should be taken into account, increasing the initial wool thickness by 2-3 times.
- Moisten the spread out wool with water from a spray bottle.
- The wetted workpiece should be covered with mesh material. It is convenient to use for this purpose. The layout is carefully moistened with a soap solution through a mosquito net, avoiding displacement of the pattern.
- Gently press the treated product onto the oilcloth with your hands, ensuring that the base is well saturated with soapy water; remove excess solution with a towel.
- The process of felting, namely intensive smoothing and friction of each section. Continue felting, carefully rubbing each section, gradually removing the mesh, turning the fabric over.
- The fabric is considered ready if, when pulling it upward, the entire layer is removed without separating the strips.
- Rinse the resulting felt in cool water until the soap suds are completely removed.
- Lay out the fabric and dry it in a horizontal position.
Wet felting of wool is completed. The product or canvas can be considered finished.

Dry felting option
The essence of the technique is to tangle and compact wool fibers with special needles with notches. Felting begins with processing the fibers with the thickest needle. During the process of compacting the felt fabric, the needle is replaced with a thinner one.
Those who are starting to felt their first product need to remember that the wool changes in volume during the process, decreasing by almost three times. Therefore, for felting, a beginning felter needs to take wool in a much larger volume.
The difference between wet and dry felting is the replacement of the soap solution with special needles, which are used to perform the felting procedure. Wool is not recommended for beginners: clothes and items require the use of a flat felt cloth. Experienced craftswomen use this type of felting to make voluminous accessories, jewelry and toys.
Many craftswomen have turned felting into an opportunity to have in their wardrobe not only warm, cozy clothes, but also accessories for them. In addition, for some, felting began to provide a good income for the family budget.
Tools and auxiliary materials
The dry method of folding wool fibers is unique and has its own characteristics. For dry felting, you will need special tools to perform the process of felting the wool fiber. These include:

- Special needles different sizes for dry felting, made of high-quality hardened steel, with high strength, sharpness of notches and durability. When working with wool, needles, thanks to the practical notches located in their lower part, capture the fibrous mass well and push it into the depth of the layer. This operation ensures that the fluffy layers are tangled, matting and compacting them.
- Level, smooth working surface.
- Foam or rubber backing.
- Accessories for decorating the finished product.
Stages of dry felting
Creating beautiful three-dimensional things will require a detailed study of such techniques as dry felting from wool. Clothes, a master class on how to make them - all this is described in detail by experienced felters. With their help, it is possible to manufacture products of any complexity.
Preliminary preparation is the basis of any work. Before you start felting, you should make a sketch or pattern of the future product:
- The wool, distributed according to the prepared template, must be pierced often and a lot with a serrated felting needle, achieving felting and compaction of the material.
- The resulting felt fabric must be constantly rotated, achieving uniform density, repeatedly treating each area with a needle.
- As you work, you can add new pieces of wool, creating the planned composition and ensuring it matches the pattern.
In the production of any items and toys, you can combine dry and wet felting, adding finishing elements such as lace, ruffles, beads, beads, braid and ribbons. This creates additional opportunities to obtain unique, creative items.

Dry felting requires a lot of time. However, after spending a little time studying the master class of a couple of small toys, you can start making a larger thing. The work will be crowned with success.

Each product made from wool fiber has certain nuances that require additional refinement and correction. During operation, sometimes things require repair, so craftswomen share their experience:
- Some rules should be applied to products in the manufacture of which two technologies are combined: the semi-finished product must be absolutely dry. This will avoid its deformation, tearing and breaking.
- It is better to start dry felting with blanks of fibers of greater thickness: carded, combed tape. fine wool Use for finishing the product.
- A thin needle must be pierced very often, to a shallow depth. Deep punctures will leave an unsightly mark on the surface of the product; rare punctures will create bumps on the surface of the felt.
- It will help to replace hands in wet felting on which the workpiece is laid out. The rug is rolled into a roll and rolled in different directions, achieving dense matting of the wool.
- In your arsenal of tools and equipment, towels will not be superfluous to collect excess soapy water.
- Plastic bags will be required for additional protection of the working surface, as well as for use as spacers between the elements of the product. This measure will prevent them from sticking together.
Felting is a very interesting, fascinating type of needlework, which is popular today. Unique, warm, cozy clothes are very comfortable to wear, caring for them does not require special procedures, since they practically do not get dirty. A regular clothes brush is enough to clean them. Washing and rinsing in cool water easily removes heavier stains.
IN Everyday life this type of needlework is also called felting or felting. Unique crafts made from felted wool are very popular, and buyers are very willing to purchase such crafts. Felting wool toys with your own hands is possible even for novice craftswomen and allows you to create unique products with your own hands. Before starting work, it is recommended that you familiarize yourself with master classes on felting lessons for beginners.
In contact with
What is needed for creativity
For making products by felting Special attention You should pay attention to the quality of the purchased wool and tools. For creativity you need purchase natural wool, which can be bought in all specialized stores for creativity.
In most cases, coarse camel or sheep wool is used to make toys by felting. In stores, such wool is called sliver - combed wool of a sheep without awns. Feather is used as a material for stuffing toys, and merino is used to decorate the product.
The felting technique involves the use of special tools, which can have different thicknesses and various shapes sections.
How to felt: basic techniques
Using the felting technique, unique handmade products, toys, accessories, and clothing can be made. Today there are several popular felting techniques. A detailed study of the master classes will allow you to make any level of complexity.
The following main techniques can be distinguished:
- dry felting;
- wet felting;
- felting using washing machine.
How to dry felting
Dry felting is the technique of entangling wool fibers together, resulting in felt. The following items are required for work:
- unspun wool, for which the use of carding is recommended;
- special needles with notches in the form of triangles or stars;
- a working surface, which can be a small piece of foam rubber during dry felting.
The manufacturing process includes stages of sequential application of wool fibers to give the item the required shapes and sizes. In some cases, as The basis for the product can be a synthetic padding polyester, on top of which wool fibers are laid.
When working with needles, you must be careful and careful, as these instruments are very sharp and can cause injury. The creation process begins with the use of a thick needle, followed by the use of a thin needle for more precise work. When working, the needle should always be positioned perpendicular to the product being manufactured.
The following are produced using the dry felting technique:
- three-dimensional crafts in the form of keychains, badges, toys;
- accessories in the form of wallets, straps;
- items of clothing, for example, hats, coats, felt boots.
How to wet felting
The wet felting technique involves working with wool on gauze and film using a soap solution or liquid soap. When using regular soap the solution is prepared as follows:
- a piece of soap is ground on a grater;
- the resulting shavings are filled with two liters hot water and mixes well;
- after two hours the solution should thicken and can be used for work.
It should be noted that the concentration of soap in the solution must be high, otherwise the wool fibers will not connect with each other and the craft will not work.
The essence of felting is by rubbing the material manually in different directions. The manufacturing process involves the following steps:
- an oilcloth is spread on a flat surface, on which gauze is spread;
- the base is laid out, the main background and design elements are made;
- after laying out the fibers, place a cloth on top, generously moistened with soapy water;
- After a certain time, excess liquid is removed using napkins.
An important point is that the fibers are laid out crosswise or in strips. In this case, there should be no holes or gaps in the canvas, and each layer should lie perpendicularly with the same thickness.
How to roll in the washing machine
This felting technique is considered the most in a simple way creating items from wool. To work you must have the following items:
- dense form for rolling;
- durable nylon tights;
- wool;
- washing machine.
The prepared workpiece is placed in a washing bag and loaded into the washing machine. Use a small amount when washing washing powder, and washing should be done on a wash cycle without soaking and drying. The optimal temperature is considered to be 50 0 C. The finished felted base is removed from the washing machine and after complete drying it can be used for creativity.
Felting wool: toys for beginners
Beginning craftswomen are recommended to begin learning the felting technique with a master class on making felt toys of the simplest models, which will allow them to learn the basics of creating products using this technique and avoid unnecessary waste and damage to materials. Using the felting technique you can make a wide variety of toys. Bulk felted toys are environmentally friendly for children, so making them using this technique is considered an ideal option for creating a children's toy with your own hands.
Master class: felting a panda bear using the dry felting technique for beginners
Manufacturing process necessary start with preparing the materials and tools necessary for work:
- wool of black and white or other desired colors;
- special needles for felting;
- eye beads;
- glue for attaching eyes.
To prevent scratching by needles, it is recommended to protect the work surface. For convenience, it is recommended to use foam rubber, on which basic manipulations with wool and needles are performed.
The manufacturing process is as follows:
If desired, the toy can be decorated with other elements in the form of a creature on the head, imitation beads on the neck and other accessories.
Master class: voluminous felted hare
Cute felted bunnies can, depending on their size, be used as a decorative pillow or as a children's toy. The technique of dry and wet felting is used in production. Color and size finished toy determined by the master himself depending on own desires and preferences.
The following tools and materials are required for work:

For the process of creating a toy, you need to choose a flat surface to work on. When working, a fairly large amount of water is used, so it is recommended to cover the surface with film beforehand.
The manufacturing process includes the stage of creating a blank and the stage of filling the base with padding polyester to give the toy the required volume. It should be noted that when using the wet felting technique, the size of the product decreases as it dries, therefore, taking this feature into account, the pattern should be made larger than the planned size of the final product.
Creating the base:

After this, it is necessary to repeat the cycle of turning the workpiece over with sequential application of dense layers of wool fibers. The total number of turns should be from 6 to 8 times. During manufacturing, you can add a few specks of a different color to make the future toy more interesting. appearance. It should be noted that during the process of applying layers, the fabric base must be inside the workpiece.
After laying the main layers You can start felting:

Adding volume:
- using wooden sticks, push the workpiece apart so that the toy can be filled with padding polyester;
- fill the internal space of the toy with padding polyester to give the desired volume;
- close the lower incision with wool fibers or using a special needle.
The final step will be the creation of eyes and decoration. The eyes can be felted from contrasting wool fibers colors or glue special ready-made parts in the form of button eyes.

We also recommend
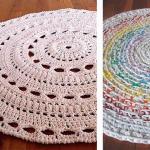 Do-it-yourself rugs from old things - turning waste into income
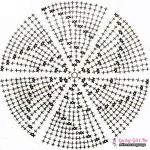 Summer crocheted hats with flowers - many patterns, ideas and designs
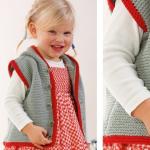 Sleeveless vest for girls crochet Crochet vest for 7 years
 How does a woman think? How do men think? This is the essence of a man’s calling - to be a breadwinner and provider.
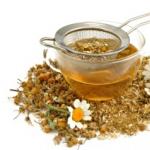 Ice cubes with chamomile for the face Rub ice cubes with chamomile on the face
 Sincere birthday greetings