Interesting crafts for March 8th preparatory group. Arranging lilies in a bouquet
A bunch of original crafts and do-it-yourself postcards for March 8 for mothers and grandmothers can be found in this section, where fellow educators share their ideas and clearly show the results. Make sure that other handmade souvenirs for mothers can be very bright, original and varied.
Contained in sections:
Includes sections:
Showing publications 1-10 of 2528.
All sections | Crafts for March 8th. Gifts for moms
The lesson is conducted in one stage. Tasks: -Develop in children a strong interest in visual arts. -Develop the ability to choose independently color scheme colors corresponding to the joyful festive mood. -Evoke a positive response to the results of your...
Creative workshop for March 8 “Gift for Mom” Creative workshop at 8 Martha« Gift for mom» . Target: - nurturing love and respect for mother; - development creative potential; - fostering a culture of behavior; - speech development. -Hello guys! Good afternoon We are opening our creative workshop « Gift for mom» . Oh how...
Crafts for March 8th. Gifts for mothers - Lesson notes on applique from colored crepe paper in the senior group “Gift for Mom”
Publication “Lesson notes on applique from colored crepe paper in...” Purpose: making an applique from colored crepe paper. Objectives: Educational: To introduce children to unconventional technology performing appliqué using the technique of twisting crepe paper. Improve the ability to arrange parts in a certain rhythm on cardboard...
 Image library "MAAM-pictures"
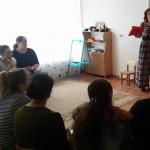
Master class “Mathematics with mom in the kitchen” for parents of children in the preparatory group“Master classes for parents” is one of the most effective forms working with families, which makes it possible to realize the need to establish mutual understanding between teachers and parents in the preschool environment, to exchange emotions, knowledge, experience so that the teacher does not...
Master class for mothers and children “For me, my best dad is always a hero! Making an order for the pope by February 23"“For me, a hero is always the most best dad my!" (making an order for the pope by February 23) Goal: To promote the harmonization of interaction between teachers, parents and children. Objectives: To introduce children to the tradition of celebrating Defender of the Fatherland Day. To develop children's ability...
 Dear Colleagues! In that academic year I worked in a group early age. Our kids are not very good at drawing yet. How to do with them beautiful gift for Mom? I suggest you do with them beautiful postcard using shaped hole punches. What you will need for work:...
Crafts for March 8th. Gifts for mothers - Master class “Gifts for mothers” in the younger group
 Why does the sun shine brighter on March 8th? Because our mothers are the best in the world! We congratulate all the grandmothers in the world on a happy holiday, on the spring holiday! In the second junior group, the guys and I started congratulating mothers and grandmothers literally from the doorstep! In the kindergarten hall...
 Making crafts with children. Master class "Sweet bouquet for your beloved mother." Teacher: Galina Frolova We decided to please our mothers with sweets and beautiful bouquet, made with your own hands. This bouquet can be given as a gift for March 8th and birthdays. To make it we need...
Master class “Postcard for Mom” using decoupage technique Decoupage with a child is a great way to develop your child's creative abilities. This activity will require very few materials, and most of the work will take a fairly short period of time. The term "decoupage" comes from the French...
 Today I want to offer you a master class on making greeting card"To my beloved mother." For work we need to take: white paper, colored paper or cardboard, ready-made templates, scissors, glue, pencil, felt-tip pens. Sequence of work: In advance...
A woman is pleased to receive flowers. However, most often this happens on birthdays and on the eighth of March. Particularly lucky women get lucky on their wedding anniversary. Moreover, the lucky girl must first and in advance remind herself of the surprise, write down the place of purchase and the exact cost of the bouquet, then there will definitely be an unexpected gift.
Everything is easier with children. The function of reminding and making a gift is taken on by caring teachers. There is no need to invent anything here. For example, mimosas and roses made from napkins look as if they were alive and look very cute and tender. In addition, so that another souvenir for your beloved mother does not gather dust on a shelf or in a drawer, you can make a photo frame from salt dough. The material used for manufacturing is absolutely safe, and the resulting result is very useful for home use.
A great idea for making cards for the younger group is a flower made from palms. Surely every mother painstakingly traced her child’s pen in notebooks and signed the date. And here are three sketches - the red palm at the top of the leaf is a bud, and the other two on the sides are the original petals. The postcard turns out to be very touching and original.
The long and cold winter is over. Now the sky is getting higher, the air is cleaner, and after months of boring monochrome, the first bright colors are finally appearing in nature. Spring has come and everyone desperately wants changes: the minimum is to buy new clothes for the wardrobe, the maximum is to plan a grandiose celebration for the International women's day for all family and friends. Unfortunately, you won’t wear a new dress every day, but the main thing is spring holiday flowers and women will still have to wait. Well, you can use your time profitably and prepare crafts for March 8th with your own hands for a child in kindergarten or at school, for a friend, beloved mother and grandmother. Bright and extraordinary products made from paper, napkins, fabrics, branches, cotton pads, threads will give the culprits bright emotions and bring into the house the effect of novelty and a light spring mood. Watch our master classes and create magic with your own hands!
Simple DIY crafts for March 8th in kindergarten (junior group)

Cheerful and bright flowers made of corrugated paper, combining Mexican colors and the shape of fluffy pompoms, will be an excellent option for a simple DIY craft for March 8th in the junior group of kindergarten. Under mother's strict guidance, kids can easily cope with a simple product. And our step-by-step master class with photos will help speed up and simplify the process. The very next morning you will be able to boast of a simple, but very beautiful craft for the holiday of March 8 in the younger group of your kindergarten.
Necessary materials for paper crafts for March 8th in the junior group of kindergarten
- corrugated paper different colors 30x50 cm – 7 pcs.
- thin wire
- scissors
- paper clips – 7 pcs.

Master class with step-by-step photos on simple crafts for kindergarten on March 8

Do-it-yourself children's crafts for March 8th in the senior group of kindergarten

A wonderful holiday - International Women's Day - gives us another opportunity to show our imagination and experiment with natural and improvised materials. We invite you to make a simple craft with your own hands by March 8th senior group kindergarten. To decorate it you will only need a couple of simple things that are always available in your home bins. But a ready-made children's craft for March 8 with your own hands will conquer everyone without exception.
Necessary materials for children's crafts in the senior group on March 8
- strong and thick wire
- yarn for knitting bright colors
- pliers
- scissors

Master class with step-by-step photos on DIY crafts for kindergarten for International Women's Day

Paper crafts for the March 8 holiday at school: step-by-step master class with photos

To create a bright and unique craft for the March 8 holiday at school, you don’t have to spend money on expensive auxiliary materials or master new complex techniques. Even a first grader can make a beautiful product from ordinary colored paper. A multi-colored panel made from primitive origami modules will decorate a school office, a children's room or a spring exhibition in a kindergarten. And by following our step-by-step master class, you will prepare the perfect paper crafts for March 8 without much difficulty.
Necessary materials for paper crafts for March 8 at school
- colored or tinted paper
- thick cardboard for the base
- stationery glue
- scissors
Instructions with step-by-step photos of simple paper crafts for the March 8 holiday at school

Ideal DIY spring crafts for mom on March 8

Flowering plants are truly magical. After all, just a couple of branches of hyacinths, mimosas or lilacs can improve the mood of a loved one on a sunny day on March 8th. If you have previously thought about how to combine a truly ideal flower arrangement, don't worry - we will be happy to help you. With our step-by-step master class you will create the perfect spring craft for March 8th for your beloved mother with your own hands.
Necessary materials for the perfect DIY craft for mom on March 8
- variety spring flowers
- floral sponge block
- small pruner

Master class on step-by-step spring crafts for mom on International Women's Day

Craft-amulet for grandmother on March 8th from cotton pads, fabric and scrap materials

If you haven’t yet figured out what to give your grandmother on March 8, we recommend making a craft-amulet from fabric, cotton pads, lace and other available materials. This type of folk art retains a sacred principle - rituals and traditions passed on from generation to generation. For an older woman, such a gift will be very valuable. Especially if, when creating it, you invest a piece of your soul, love and gratitude.
How to properly make a craft-amulet for grandmother on March 8 from cotton pads, fabrics and scrap materials, read on.
Materials for making a fabric talisman for your grandmother on March 8
- linen fabric 20x20 cm
- buckwheat
- different cuts cotton fabric for shirts and other things
- cotton lace
- linen threads
- red floss
- copper fittings
- scissors

Master class on creating DIY crafts for Grandma for International Women's Day

An interesting DIY craft for a girl on March 8th: a master class with step-by-step instructions

An unusual craft in the form of flowering branches will not only become a great gift on March 8th for mom, girlfriend or girlfriend, but will also complement the interior of the room with light freshness and stylish novelty. And if the branch is covered not with small flowers, but with wondrous butterflies, there will be no price for it at all. We invite you to take advantage of our next master class with step by step instructions to create the most interesting and unusual craft for March 8th for your beloved girl with your own hands.
Necessary materials for creating DIY crafts for March 8th for your beloved girl
- wooden stand or plate
- illustrations with butterflies
- branch
- scissors
- glue or glue gun
- glass cover
Master class on creating an interesting craft for your girlfriend for International Women's Day

Sometimes spring is in no hurry to delight with bright colors and sun glare. In this case, DIY crafts for March 8th will be a joy. Children and adults, for mother, grandmother or girlfriend, for school or kindergarten. All of them are original and unusual in their own way. Even simple craft made from paper, fabric or napkins can bring a lot of joy to a loved one and bring a little bit of spring into the house.
The child’s learning process must be inextricably linked with everyday life. That is why kindergartens select the most suitable topics for creative activities. So, in the first days of spring, do-it-yourself crafts for March 8th in kindergarten become relevant, children are actively preparing for Women's Day. They not only learn poems about grandmothers and mothers, rehearse a concert together with the teacher, but also do handicrafts.
Postcards, paintings, paper flowers and decorative little things for the home created by the hands of children carry a piece of a child’s soul, which is what is actually dear to close women. In this collection you will find interesting crafts for kindergarten for March 8, which children can make with their own hands.
Postcard “Funny Palms”
Children aged 3–4 years old do not paint well enough with a brush, but they can easily create wonderful pictures with the help of their fingers and palms. Invite your child to literally make a holiday card with my own hands. Undoubtedly, mother will also be pleased to receive such a creation, because a sheet with a child’s palm print is another valuable relic associated with the childhood of her beloved child.
To make a postcard you will need:
sheet of colored cardboard in A-4 format;
white paper measuring 13x18 cm;
blanks made of colored paper (leaves, vase);
narrow bow satin ribbon;
PVA glue;
Finger paint;
2 brushes (for paint and glue);
a clean cloth to remove excess PVA;
green marker.

Sequencing:
1. Bend a sheet of cardboard in half, clearly marking the fold line.
2. Glue on one of the colored sides White list so that there is a frame around it. Gently blot off excess glue.

4. Using a brush, apply paint thickly onto the child’s palm. Place your well-painted hand on a white background.

5. The resulting print will be a “flower”. Draw a line to it from the vase with a felt-tip pen - “stem”.

For older children, the task can be complicated: ask them to draw not one, but several flowers, using both their left and right palms. Instead of blanks, the children can be given templates, which they will have to independently attach to colored paper, trace along the outline with a simple pencil and cut out.
Difficulty level: for junior group.
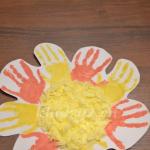
Many people associate touchingly delicate mimosa with its fluffy yellow balls and warm aroma with spring and the holiday of March 8th. Unfortunately, flowers tend to fade, but a painting with their image will always please the eye, especially if it was made native child with your own hands.
For the craft you need the following materials:
a sheet of brown cardboard in A-4 format;
white sheet measuring 19x27 cm;
a tube of PVA and a cloth for glue;
a little millet or corn grits;
green paint and thin brush;
a small piece of narrow tape.
Instructions on how to make a picture:
1. Before starting the lesson, the cereal must be washed and dried.
2. Glue a white sheet onto the cardboard so that it is in the center. The resulting brown fields will serve as a frame for the picture.
3. Using your finger, apply glue pointwise in 10–12 places in one corner, as if forming a mimosa inflorescence.
4. Sprinkle the leaf thickly with millet (corn). When the painting dries, shake off the remaining grain.

5. Make two more inflorescences in the same way.
6. Finally, use a brush to draw stems and leaves. Decorate the picture with a bow made of satin ribbon.

Working with cereals promotes the development of fine motor skills in a child and has a calming effect. If children are still difficult to navigate on a sheet of paper, in those places where you will need to apply glue, you can first put marks with a simple pencil. During classes with children of the younger group, the teacher finishes the greenery. The older guys design the picture themselves.
Difficulty level: for younger groups.
In the first days of spring, I really want to please my beloved mother with flowers, for example, “Tulips in an envelope.” In order for the children to successfully make a craft by March 8th with their own hands, the kindergarten teacher needs to prepare properly: make shaped envelopes from sheets of colored cardboard, blanks of tulip heads from pink, orange, yellow and red paper (3 for each craft), blanks leaves (2 pcs.) and stems (1 pc.) from green paper. For this activity you will also need glue, a brush and a cloth.

Progress:
1. First, children fold the right and left edges of the envelope along the marked lines.
2. In the middle part (top) they glue tulip flowers.
3. Then, focusing on the flower heads, glue the stem to the central tulip, and place the leaves on the sides of the stem.


Difficulty level: for younger groups.
Every mother is pleased to receive a bouquet of daisies from her son or daughter as a gift. And even if they only vaguely resemble real wildflowers, the child made them himself, with his own hands, with love and gave them from the bottom of his heart. You can beautifully decorate your home with such fantasy daisies, and for a child who is just beginning to master the art of modeling, this will be a sign that you appreciate his attention and work.

To make daisies, a child will need:
3 green cocktail straws;
20–25 dry pumpkin seeds;
plasticine, modeling board, glass.
Sequencing:
1. Take a small piece of yellow, pink, red or blue plasticine.
2. Warm it up in your hands and roll it into a ball, which you then slightly flatten.
3. Place the resulting disk on a cocktail straw.
4. This is the core of the flower, around the entire perimeter of which you need to insert 7-8 seeds.
5. Make two more daisies in the same way.

If desired, the teacher can supplement the resulting flowers with leaves cut from green sheet felt. Instead of plastic straws, you can use tree branches as stems for flowers, but before starting, they must be washed in a soapy solution and dried well. Otherwise, the plasticine will not stick to the branches due to dust and moisture.
To make the house feel like a holiday, it needs to be decorated. Both real and paper flowers are perfect for this purpose. Amazingly beautiful tulips, lilies and lotuses are collected from colored paper using the origami technique. Children, of course, are beyond the ability to make such complex designs, but here’s how to do it: flower bud maybe even a 4 year old.

For origami “blooming tulip” you will need:
a square sheet (preferably double-sided) of red, pink or yellow paper;
square sheet of green paper for the stem.
Origami is performed according to the following scheme:
1. First, the sheet intended for the bud is folded diagonally. Then lightly mark the middle of the bottom side of the resulting triangle. Now, focusing on the middle, bend the right corner to get a petal tooth on the left.

2. Do the same with the left corner of the triangle. The acute angle at the base of the bud is bent back. Having outlined the bottom line, the flower is unfolded to hide the corner.

3. As a result, a “pocket” is obtained at the base of the bud, into which the stem is subsequently inserted.

4. The next stage is creating the lower part of the tulip. The green sheet is folded diagonally, a line is marked and unfolded. Then they bend side edges tulip so that they coincide with the center line. The resulting workpiece is folded in half lengthwise and finally a transverse fold is made.


From paper tulips you can make a bouquet, compose a postcard composition. In general, origami classes develop children's accuracy and precision in performing actions. Thanks to this technique, kids get acquainted with geometric shapes, the concepts of “left”, “right”, “top”, “bottom”, “middle” and so on.
On our website you can see how to make one for schoolchildren.
By March 8, children in the middle group will be able to make such a craft with their own hands in kindergarten.
Variation on the origami theme – three-dimensional postcard"Flower Fan" To make it you will need white sheets of A-4 format, colored double-sided paper, felt-tip pens, scissors, PVA and a brush for applying glue.

Instructions on how to make a postcard:
1. To get the base, fold a sheet of green paper like an accordion, making fold lines every 1.5–2 cm.


5. Flowers are cut out and, lightly smeared with PVA, glued to the base. The postcard is ready.
Difficulty level: for intermediate group.
Any little fashionista will appreciate a bright, lightweight cardboard handbag. To make it, you need to take a sheet of multi-colored cardboard in A-4 format and two sheets of orange paper of the same size. In addition, you will need cardboard for handles and PVA glue.

First of all, the handles are glued to the base. Then the inside of the multi-colored cardboard is covered with orange paper so that the inside of the bag looks beautiful. The remaining orange leaf is cut in half and each part is folded like an accordion. These are the sides of the bag. Their edges need to be coated with glue and connected to the base. That's all - the bag is ready!

Beautiful beads made from pasta
Difficulty level: for intermediate group.
Both women and girls love to wear jewelry, especially those made with love by loved ones. Beads and bracelets made from painted pasta will be just such a pleasant gift for your mother or sister. During the lesson, in addition to pasta, you will need wool threads, gouache, nail polishes.
Instructions on how to make jewelry with your own hands:
1. First, gouache is diluted in containers with water. Pasta is immersed there for a short time. There is no need to overcook them, otherwise they will get soggy.
2. Then take out the pasta and place it on paper. When the products are dry, they are varnished for shine.

3. Next, you need to secure the pasta on a thread. To do this, the “tubes” are strung, and the “bows” in the center are wrapped several times with thread and tied. In the “wheels” the thread is pulled through two opposite holes.

4. To make the beads bright and unusual, it is advisable to alternate the pasta in color and shape. The ends of the thread of the finished decoration are tied together.

5. Multi-colored if desired pasta You can decorate headbands and hairpins. It turns out very original! 

Difficulty level: for intermediate group.
A charming paper basket in white and pink tones will undoubtedly find a place in the ladies' room. You can fold the same delicate paper flowers from napkins into it and, as a result, get an interesting spring composition.

What materials and tools are needed to make such a basket?
A large square of thick sheet of white paper.
Scissors.
PVA or glue stick.
: a handle made of white paper (its length should be the same as the side of the square), a pink strip for finishing the handle (slightly narrower and shorter than the handle itself), two side elements made of pink paper (pentahedrons with smaller sides than the basket), pink flower and white core.


Step-by-step instruction:
1. Preparatory stage. A square white sheet needs to be divided into 9 equal parts. To do this, each side is divided into three equal segments. Through the marked points draw barely noticeable lines with a pencil.

2. During the lesson, children first fold the sheet along the top horizontal line. Then you need to bend the bottom of the square and make cuts at the top and bottom to the resulting fold lines.


4. It turns out to be a box. To fix it, carefully glue the sides.


Using non-standard materials when creating crafts develops creative and imaginative thinking in children. During class non-traditional techniques Appliques include scraps of fabric, torn pieces of paper, napkins, dried plants, pasta, and cereals. You can make an original painting from cotton wool, foil, thread and coffee. It’s hard to imagine, but cotton pads and sticks make beautiful ones that look like real callas.

To create a painting with flowers you need:
paper plate;
a sheet of double-sided green paper;
glue, brush and cloth;
scissors;
3 green cocktail straws;
felt-tip pen or yellow marker;
3 cotton pads and the same number of ear sticks;
narrow ribbon.
To make an applique with calla lilies, you need:
1. Use a marker to color the edge of a cotton swab.
2. Then insert it into the straw so as to hide the uncolored part.
3. Place the tube with the edge where the stick is inserted on the cotton pad.
4. Lightly coat the edges of the disk with glue and connect them, forming a flower bud. Carefully remove excess glue with a cloth.
5. Make two more calla lilies in the same way.
6. Cut out a leaf for a flower from colored paper and wrap it around the callas. Secure the bouquet with a ribbon.
7. Glue the composition to the plate.

These calla lilies can not only decorate a plate, but also complement a postcard in the form of a vase or basket. Another option is to arrange flowers in a bouquet using decorative paper or mesh. Not only calla lilies are made from cotton pads, but also roses, daisies, dandelions, and carnations.
Difficulty level: for older group.
The originality of the card lies in the fact that it looks like a cup, inside of which there are words of congratulations and paper flowers. There are a lot of ideas for decorating such a craft: colored cardboard can be decorated with ribbons, buttons, pieces of lace and fabric, voluminous flowers and ready-made felt elements. The cup postcard can open in different directions. Inside there can be both flowers and a folding book.

To make such a craft for March 8, you need to print (or draw) a template, take a sheet of white paper, colored cardboard, glue, a brush and scissors.

1. First of all, you need to cut out all the elements necessary for the applique: a folding base in the form of a cup, a piece of white paper that will decorate the front side of the card, buds, petals, cores, stems and leaves.

2. First, glue all the details of the flowers.

3. While the products are drying, decorate the cup itself: carefully glue a white paper cutout to the front. Excess glue is removed with a cloth.

4. Now the blank cup is opened. Flowers are glued to the left side, making a bouquet of them.

5. When the card is completely dry, you can move on to the last step - write your congratulations.

Difficulty level: for older group.
Preschool children enjoy working with different materials: with foam chips, matches, shells and, of course, fabric. Working with colorful scraps develops color skills in children. Creative activities with soft and hard textiles are also necessary for the development of tactile perception. Since it is too early to pick up a needle at the age of 5–6 years, you can start creating with fabric using the papier-mâché technique.

A bright bowl made from pieces of fabric will not only be pleasant, but also a useful gift by March 8th. You can store threads, sweets, business cards and other small items in it. To make a gift for your mother or grandmother, you will need the following materials:
pieces of cotton fabric left over after sewing;
disposable deep plate;
hard brush;
PVA glue.
At the stage of preparation for the lesson, you need to cut all available fabric into strips 2–3 cm wide. Too long ribbons It is advisable to cut into pieces. The result should be small scraps that will be convenient and easy for children to work with. The glue is pre-diluted with water in a ratio of 1:2 or 1:3.
Already during the work, strips of fabric are immersed in an adhesive solution, taken out, slightly wrung out and glued to the upside down disposable plate in a chaotic manner. After the bowl is completely covered from the outside, you need to apply two more such layers. Next, the product is left to dry on the windowsill. After a day, when the fabric becomes dry, carefully remove the plastic plate from it. The resulting bowl is trimmed and, if desired, pasted around the edge with a textile strip.
Bouquet “Spring”
Difficulty level: for older group.
Bright flowers, lush greenery and fluttering butterflies - this paper bouquet definitely puts you in a spring mood and lifts your spirits. To create a holiday craft, you will need scissors, a sheet of green double-sided paper in A-4 format, colored paper, PVA glue, a simple pencil, a ruler, felt-tip pens and a stapler.

How to make a bouquet - instructions:
1. Fold a sheet of paper in half lengthwise. Place a ruler along the fold line and mark points with a pencil every two centimeters. Do the same on the opposite side. Use a pencil (barely noticeable) to line the sheet, not reaching 2 cm to the edge.

2. Make cuts along the marked lines. Then roll the sheet into a tube so that there are a couple of turns. Secure the edge with a stapler.

3. Fold sheets of colored paper in half. From the wrong side, draw flowers, butterflies, and core circles with a pencil. This must be done on the fold so that the resulting elements are symmetrical.

4. Cut out the parts. Glue the cores to the petals, and use a felt-tip pen to draw small details on the butterflies.


And finally, advice to parents. Remember that your grade matters the most to your child. When he sees that close people show interest and care for his crafts, his desire to create even more beauty with his own hands, both in kindergarten and at home, strengthens. In order not to kill your child’s faith in his own abilities, do not ridicule or criticize him under any circumstances for the flaws inherent in his age.
This master class may be useful for kindergarten teachers and parents of 4-5 year old children.
Catfish Valeria.
Age: 5 years
Supervisor: Pisareva Natalya Valerievna, teacher.
Purpose: as a greeting card for the holiday of March 8th. This craft can be done with a 4-5 year old child at home with their parents or in kindergarten with a teacher.
Target: making a postcard for the holiday “Blue Bells.
Tasks:
educational:
- teach techniques of “paper-plastic” technique;
developing:
- develop visual-figurative thinking, fine motor skills, cognitive interest;
educating:
- educate artistically - aesthetic taste, neatness.
Materials and tools:
Double-sided colored paper
Sketchbook
Scissors
Glue
Markers

Execution order:
1. Prepare colored paper, preferably red or orange color. If you have curly scissors, use them to trim the edges of the album sheet. If not, then you can regular scissors make wavy or zigzag edges. Glue the processed album sheet onto colored paper and bend the resulting blank in half.

2. From blue paper, or from blue paper, cut out several squares
3.5x3.5 cm. For one flower you need 3 squares. Glue these squares together in the form of “balls”. Coat the sides of the three “balls” with glue and connect them together. Then cut out several squares of the same color 2x2 cm and glue 2 squares on the wrong side of the workpiece. The result is a bell flower. For the sepal, cut out a 2x2 cm square of green color, cut it diagonally, make triangular cuts and glue it to the base of the flower. Make a few more flowers in the same way. In this master class, 3 bell flowers were made for one postcard.


3. Cut a strip 0.5 - 0.6 mm wide from green paper. and glue it in a zigzag pattern to the front of the card. This will be the stem. Glue flowers and leaves to it.

4. To decorate the inside of the postcard, invite the children to use their imagination and design the congratulations themselves.


The postcard is ready, we can congratulate our beloved mothers!
Things are moving towards March 8th and your kindergarten has announced a competition for the best craft"Do-it-yourself flowers." No problem. In this article you will be offered several options for making flowers with your own hands. This activity will be very interesting for your kids. In addition, this lesson will offer color options designed for different ages, starting from the youngest. It seems that your child will want to make such a flower not only for a competition in kindergarten, but also for his beloved mother, grandmother, sister, etc. And what could be nicer than a gift made with your own hands.
And so we move on to some options for making flowers and their brief description.
To make flowers, depending on the option chosen, you will need one of the following tools and materials:
- colored paper;
- glue;
- scissors;
- plasticine;
- ribbons;
- plastic bottles;
- cotton pads;
- juice tubes;
- paints, etc.
1. The first option involves making flowers from plasticine. This is a very simple craft that can be completed very quickly even with the smallest child. Made from plasticine Brown flagella roll down, from which a twig is formed. The twig is glued to a sheet of paper. Small circles are made from yellow plasticine and glued onto a branch, thereby forming flowers. Also, the inscription “Happy March 8th” is made from plasticine and glued to the bottom of a piece of paper.
2. The second option is to make flowers from ribbons. Flowers made from folded ribbons and petals, which are also made from ribbons, are glued onto a sheet of paper. To decorate the bouquet, a bow is glued, and foam balls are used for flowers.

3. The next version of flowers is proposed to be made from colored paper. A sheet of green colored paper is folded like an accordion and spreads out into a fan shape. Flowers, also made of colored paper, are glued onto it. These can be tulips, daisies, lilies of the valley. In general, any flowers that you have enough imagination for.

4. To make this color option you will need a plate with grooved edges, wool thread and colored paper. The thread is wrapped around the edges of the plate, without going into the middle, in the form of a cobweb. Flowers cut out of paper are glued to the center of the plate.

5. This option involves using the following materials to make flowers: juice tubes, flowers made of colored paper, part of an egg package painted in green color, flower leaves cut from colored paper. The tubes are inserted into the egg packaging, the leaves and the flowers themselves are put on the tubes. The upper part of the tube is cut in a circle into small strips, thereby forming the pistils and stamens of flowers and thereby preventing the flowers from falling from the tube.

6. In this version, you need to cut out a mug and flowers from colored paper, stick flowers in the mug and on the mug to decorate it.

7. This option also involves using colored paper. The inscription “Happy March 8th”, as well as flowers and leaves, are cut out of colored paper. At the same time, when cutting out letters and flower petals, the paper must be folded in half and not cut all the way. Then only one part of the letter and only half of the petal are glued to the paper, and the second part of the letter and petals are opened, thereby creating a three-dimensional picture.

8. This option for making flowers from colored paper is also suitable for little ones, because... it's quite simple. A rectangle is cut out of colored paper and folded in half. A square is cut out and glued to the bottom edge of the rectangle folded in half, but not in the fold area and only on three sides. The top edge of the square is not glued. Then circles of various diameters and colors are cut out, as well as strips of paper, which are flower stems. Flowers are formed and placed in a pocket formed by a glued square.

9. The next three options are also simple and involve the use of only colored paper, from which all the necessary elements are cut out (flower petals, complete flowers, stems and leaves, mugs, vases, etc.). Next, these elements are either glued onto a sheet of paper (photo 9, 11, 13, 15, 17, 18), or the composition is assembled from them (photo 10, 12, 14). When making a bouquet as in photo 12, take a sheet of green paper, fold it in half, roll it into a tube and cut it all the way around into thin strips from the fold of the sheet and not all the way to the end. Making flowers as in photo 13 involves making flowers directly from scrap materials such as buttons, parts of flowers from artificial flowers available at home, and cups from candy.


10. This option for making flowers involves the use plastic bottles. In this case, the flower itself is cut out from the bottom of the bottles, the neck serves as a stand, and the stem and leaves are cut directly from the rest of the bottle. The stem can also be made from a cocktail straw. Watercolor paints are used to give flowers a more colorful look.


11. Taken a plastic cup and decorated with colored paper. A flower is cut out of colored paper. A button is used for the center of the flower. The stem of the flower and the leaves that hang on the sides of the glass are cut out. The flower is placed in a glass and filled with whatever you have. This could be shavings, foam balls, etc.

12. A heart is cut out of thick paper and sewn around the edge with thread. Flowers in the form of roses are made from cotton pads and attached to paper or glued with a stapler. Stems are formed from green tissue by twisting the flagellum, petals are cut out and glued to the heart. A bow is made from packaging tape and the bouquet is decorated.

13. To make these flowers you will need ribbons. The stems and leaves of flowers are formed from green ribbons by cutting out narrow strips, twisting them and folding them into a flagellum. The flowers themselves are made from yellow ribbons by winding them into a ball and gluing them. Some fluff up, some stay that way.

If you find an error, please highlight a piece of text and click Ctrl+Enter.
We also recommend
 Round table with parents of the middle group “By playing, we develop” Parent meeting with parents of children
 Features of the structure of the bones of a newborn
 Birthday at the Zoo Birthday at the Zoo
 We sew a warm hat with earflaps
 Spring appliques for children Paper applique
 How to make a mask, Batman costume, fox costume for the holiday?