How to make a craft on the theme of May 1st. DIY spring crafts
Postcards and appliqués are the first thing that comes to mind and you’re probably already tired of them. It's worth trying less common options! For example, refrigerator magnets.
Nowadays it's fashionable to cover it with panels, so make sure the recipient has somewhere to hang the magnet. As a last resort - use a hood or a battery!
In the very simple version for May Day crafts you will need:
- Magnet (sold in stationery and art supplies),
- Double sided tape,
- Cardboard (white for details and colored for background, or can be painted),
- Paints,
- PVA glue,
- Scissors.
- Cut out a round base from cardboard - it looks more elegant and will not fray like a square one. If necessary, apply a background, decorate with sparkles or beads if desired.
- Come up with a picture and composition - for example, below is the inscription “Happy May 1st!”, above is a bouquet of balloons and small stars.
- Cut out the parts of the future magnet from the remaining cardboard, paint in required colors, dry for an hour and a half.
- Glue the pictures onto the round base and dry it a little more. Glue the magnet to the back side with double-sided tape.
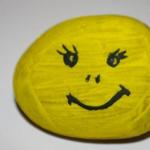
Crafts in the form of magnets can be made from anything - even painted acrylic paints a piece of glass, a saucer or a pebble. Only in this case you will have to buy a larger magnet and glue it with Moment glue so that the craft does not fall off the refrigerator.
Flower vase for May Day

Great gift for my grandmother, who still respects the May 1st holiday, a hand-decorated flower vase. You need:
- Regular glass vase or bank
- Semolina or other small grains,
- Alcohol,
- Acrylic paints,
- PVA glue,
- Colorless furniture varnish or nail polish.
- Lay oilcloth or newspaper on the table, sprinkle the cereal in an even layer. Instead of semolina, you can take, for example, fashionable couscous or quinoa.
- Degrease the vase or jar with alcohol or vodka and coat with glue.
- Roll the container over the cereal to completely cover it in an even layer. The location of the grains can be corrected with a toothpick or a needle.
- Draw a simple plot with paints (you can remember the hammer and sickle or use flowers), write a congratulation. Instead of paints, you can use fabric markers.
- Dry the craft for half an hour, then varnish and leave for another hour. To make it more elegant, you can take pearl or colored nail polish and apply it to the areas with the May Day design.
Beautiful crafts for you and happy Holidays!
IN in social networks A popular idea is to take some animated character and congratulate with inscriptions on his behalf. Most often, this character becomes Masha from the animated series “Masha and the Bear” or angry birds, whose job is to fly and scatter pigs.
Simple rhymes are in demand as inscriptions on postcards:
- “Glorious May Day: eat kebab and relax,”
- “May Day: mow and slaughter” (remember the coat of arms of the USSR - the hammer and sickle),
- endless variations with “pour”, “sing”, “wash down”, etc.

And also common phrases like:
- “Work is not a wolf, but the product of force and distance,”
- “Labor made a man out of a monkey. The main thing is that he doesn’t make a horse out of a man,”
- “The work won’t do itself, but the tea won’t drink itself.”
You can rename the holiday itself to the day of barbecue, hacienda or spring and rest.

A great theme for a postcard is May Day. IN Soviet time it was a continuation of the celebration of May 2, when people went to the dacha, to barbecue, or both there and there at once. Now this word is more associated with the May demonstration itself, and you can come up with a lot of rhymes for it: from “cooking” (kebabs) to “kraev-ka” (pour).

Soviet-style May Day cards are also very popular. You can take one of the many propaganda posters and come up with something to go with it. new inscription, or you can draw your own “poster”, inspired by these samples. For example, depict the outline of a recognizable worker who drinks something from a bottle, and sign: “Let every proletarian remember: what he himself did not drink, the enemy will drink!”
Beautiful cards for May Day

If we ignore the funny, then on Spring and Labor Day you can give any ordinary postcards with flowers, the sun and other spring things (or draw them yourself). The slogan “peace, labor, may” is somewhat outdated from Soviet times, but it may be nice for the older generation to remember.

The only thing is that you shouldn’t give postcards for May 1 with ready-made poems. Firstly, these “poems” are usually far from perfect. Secondly, a ready-made typographical congratulation will never replace even banal, but handwritten “happiness and health.”
May Day may not be the national holiday it used to be, but it’s still a great reason to create crafts with children. Let's do a little hard work on Spring and Labor Day!
Magnets for May 1
Postcards and appliqués are the first thing that comes to mind and you’re probably already tired of them. It's worth trying less common options! For example, refrigerator magnets.
Nowadays it's fashionable to cover it with panels, so make sure the recipient has somewhere to hang the magnet. As a last resort - use a hood or a battery!
In the simplest version of the May Day craft you will need:
- Magnet (sold in stationery and art supplies),
- Double sided tape,
- Cardboard (white for details and colored for background, or can be painted),
- Paints,
- PVA glue,
- Scissors.
- Cut out a round base from cardboard - it looks more elegant and will not fray like a square one. If necessary, apply a background, decorate with sparkles or beads if desired.
- Come up with a picture and composition - for example, below the inscription “Happy May 1st!”, above a bouquet of balloons and small stars.
- Cut out the parts of the future magnet from the remaining cardboard, paint it in the desired colors, and dry for an hour and a half.
- Glue the pictures onto the round base and dry it a little more. Glue the magnet to the back side with double-sided tape.
Crafts in the form of magnets can be made from anything - even paint a piece of glass, a saucer or a pebble with acrylic paints. Only in this case you will have to buy a larger magnet and glue it with Moment glue so that the craft does not fall off the refrigerator.
Flower vase for May Day
A great gift for a grandmother who still respects the May 1st holiday is a hand-decorated flower vase. You need:
- An ordinary glass vase or jar,
- Semolina or other small grains,
- Alcohol,
- Acrylic paints,
- PVA glue,
- Clear furniture varnish or nail polish.
- Lay oilcloth or newspaper on the table, sprinkle the cereal in an even layer. Instead of semolina, you can take, for example, fashionable couscous or quinoa.
- Degrease the vase or jar with alcohol or vodka and coat with glue.
- Roll the container over the cereal to completely cover it in an even layer. The location of the grains can be corrected with a toothpick or a needle.
- Draw a simple plot with paints (you can remember the hammer and sickle or use flowers), write a congratulation. Instead of paints, you can use fabric markers.
- Dry the craft for half an hour, then varnish and leave for another hour. To make it more elegant, you can take pearl or colored nail polish and apply it to the areas with the May Day design.
Have beautiful crafts and happy holidays!
Svetlana Karlashova
"Balloon"
The first day has arrived
May has arrived today.
My ball is knocking glass:
“Well then, let me out!”
And so I untied the thread.
Previously, the May Day holiday was called International Workers' Day. On this day, adults and children went to a demonstration. Adults carried banners, flags and flowers in their hands, and children had small flags and colorful balloons in their hands. Everyone was happy about spring and the warm rays of the sun.
It was customary to send congratulatory messages by mail to friends and relatives. postcards, wish them health and happiness. After 1990, International Workers' Day was renamed Spring and Labor Day.
To this wonderful spring holiday we did it with the kids postcard. Today Lenya helped me. And we offer you our Master Class.
For we will need postcards: colored paper, felt-tip pens, scissors, glue, a simple pencil, templates for a ball, dove, circle and cutting for carnations, white napkins.
Choose colored paper and trace the balls according to the template.


Cut out the circled balls.


Let's draw a circle on red paper.

Let's cut it out and fold it like this.


Let's outline felt-tip pen cloves and cut them out.


Let's trace and cut out the cutting.

For the background Lenya chose colored paper blue color. Using the template, we outline the dove in the lower right corner.

We place multi-colored balloons on the background and glue them.

White napkins were cut into small squares. We make balls out of them.

Lubricate the outline of the dove with glue.

Glue the balls and draw an eye for the dove.


Place and glue a carnation in the lower left corner. It will be a little bulky. This is what we got.


DIY holiday card. Master class with photos for primary school"May Day".
DIY crafts for May 1 in elementary school, grade 4
Panfilova Nadezhda Pavlovna, teacher primary classes MBOU "Razdolnenskaya school-gymnasium No. 2 named after L. Ryabika" Republic of Crimea
Master class for 4th grade children. Postcard "May Day"
Description: Workers' Solidarity Day, May 1, is a holiday celebrated not only in Europe, but also in Latin America and Asia. The first day of May is known under several names - International Workers' Day, Spring and Labor Day, Labor Day, Spring Day. The children made a holiday card to match the words: "Peace, May, Labor." The master class will be of interest to primary school teachers, educators, educators additional education, creative children.
Purpose: the postcard will become a good gift for the holiday of May 1.
Target: manufacturing greeting card for the holiday of May 1
Tasks:
- develop the eye, fine motor skills hands, creativity;
- expand your horizons;
- cultivate accuracy when working with scissors and glue;
- cultivate hard work and patriotic feelings.
Materials:
- colored paper and cardboard;
- glue, scissors;
- pencil, beads;
- templates.

Merry May, beloved May
festive curls everywhere,
sewed an outfit for my native land
from flowers and various herbs.
May Day winged
We glorify with song and labor!
(N. Zabila)

In Russia, this holiday was first celebrated on May 1, 1891. Since 1918 it became official. IN different years it was always accompanied by demonstrations, processions of workers, rallies, concerts and balloons.
Safety precautions when working with scissors:
- use scissors with rounded ends;
- do not walk with scissors;
- do not hold the scissors with the blades facing up;
- pass the scissors rings first;
- store scissors in a certain place.
Progress of the master class.
To make a holiday card we need cardboard dark blue. This is the background of the postcard.
Take a circle template and trace it on yellow paper.

This is the Sun. Glue it in the center of the sheet.

We trace the template of the number 1 and the letters of the word “May” on red paper and cut it out. We'll glue the letters on later.

Glue the number to the top of the sun.

Fold a strip of white paper like an accordion and draw small flower and cut.

Fold a strip of green paper like an accordion, draw a small leaf according to the template and cut it out. We cut out the green branch randomly.

The sun has rays. Cut out 14 sharp triangles.
Let's start decorating the sun with rays.


Cut out a twig from green paper. It will be below the figure.

The twig has leaves.

White flowers around the branch. Glue only the middle of the flower.


To decorate the stamens, take beads yellow color. Using a stick, carefully glue one or three at a time.


Raise the tips of the leaves and flowers.
We also recommend
 Presentation "Insurance pensions in the Russian Federation" - project, report
 How to deal with one and two?
 Autumn crafts made from natural materials: quickly and beautifully
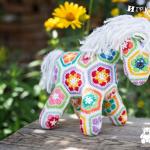 How to crochet a beautiful horse
 Details about knitting jacquard patterns using knitting needles according to patterns How to knit jacquard without broaches
 When is the best time to bathe an infant?