Sweater frosty pattern description on aspen. "Frosty pattern" women's jumper. With a step-by-step description of the Little Mermaid from Osinka
For a very long time I wanted to knit such a pullover. I spent quite some time sorting out the pattern and finally knitting it together. In my personal opinion, it turned out to be a very beautiful, very winter and quite stylish pullover with short sleeves (wear under a turtleneck).
I used Nako yarn (as on the hat - http://knitly.com/14799) 400 g, stocking and circular knitting needles No. 4.5, with elastic band No. 4. 
The diagram used is shown below (the diagram is not mine, found on the Internet). 
The pullover is based on a square napkin, which is knitted from the center. The diagram shows 1/4 of this napkin. 
Instructions for the diagram. 
To avoid a very tight ring in the center of the flower, I cast on 4 chain stitches and knitted the required number of stitches from them onto stocking needles. This makes the center of the flower look much neater. 
When the central flower was ready, I switched to circular ones. 
I separated the loops for the collar (I got 22 loops), this is for size 48. 
You should end up with a square. Separate the loops for the sleeves, sides, and bottom onto additional knitting needles. Knit the second part (let's say the front one, with a large neckline) and sew the side and shoulder parts loop into loop. 
Flower petals are knitted in the sleeves (I left 25 loops on the sleeves from the front and back), then 8 rows of 2*2 elastic. 
The front and back parts were also lengthened with stockinette stitch by 7 cm, and then the elastic was 2*2 20 rows. 
Finally, the collar is knitted with a 2*2 elastic band.
The pullover is ready!
Author tayra.
Every woman wants to have a unique and unrepeatable item in her wardrobe, something that cannot be bought in any boutique. That is why handmade has always been valued and will continue to be valued. It is this desire that makes us take up our knitting needles and spend days searching for a suitable pattern and the right material. In this article we would like to invite you to knit a frosty pattern with knitting needles.
This pattern captivates with its beauty and elegance. Using it, you can knit an excellent pullover with short or long sleeves, and when combined with a turtleneck in a contrasting color, you can further highlight our entire frosty pattern.
It may seem complicated to many, but it is not; you just need to correctly calculate the loops, following the diagram with a detailed description. And if you find it difficult to figure out the diagrams, then the detailed video attached below will help you figure it out. So, let's get to work.
Snow fairy tale
Before starting work, it is worth deciding on the choice of yarn that is best suited for our pattern. Since our pattern is quite dense, it is not recommended to use thick yarn, because it will look rough; here you need something light, airy, but not too thin. Angora or wool is best.
Also carefully select your knitting needles, so as not to make a mistake, it is best to knit a sample.

This pattern is very easy and understandable, but if you are a beginner, then you should pay attention to the fact that the main pattern is made by crossed loops. If this is something new for you and not very clear, then detailed photo tutorials are provided below.

Let's start knitting according to the pattern.
We will need:
- hook number 2 or 3;
- knitting needles No. 4 or 4.5-5 pcs.;
- knitting needles No. 5;
- yarn.
We start working with a sliding loop.

In this loop, use a hook to cast on 16 loops. Using knitting needles, pull out the loops from the hook loops and distribute all 16 loops onto 4 knitting needles.


Mark the beginning of the row and the end of the row using a marker.
Please note that the diagram shows only the front rows. We need to knit three rows in a circle with facial loops.

Thus, we have already knitted 4 rows (1st row – slip stitch and 3 rows of knit stitches). We switch to needles No. 5 and knit according to the pattern: crossed loop, 4 yarn overs, 2 crossed yarn overs, 4 yarn overs, crossed loop. We repeat this three more times.
On the 6th row we knit with purl loops, and we knit crossed loops with crossed ones. On the 7th row we knit all the loops. On the 8th row, purl all the stitches, according to the pattern. On the 9th row: 2 loops together with a tilt to the left, 1 knit, 2 yarn overs, 1 knit, 2 loops together with a tilt to the right. We continue to knit like this until the end of the row. On the 10th row, purl the loops, knit 2 loops together, remove 2 yarn overs, knit 1, purl 1. On the 11th row we knit. We continue to knit strictly according to this pattern until the 21st row.
On the 21st row: 2 loops together with a tilt to the left, 1 knit, 2 loops together with a tilt to the right, yo, 5 knit, yo, 2 loops together with a tilt to the left, 1 knit, 2 together with a tilt to the right, yo, 5 knit , yarn over We repeat the report 3 times. On the 22nd row we knit purl according to the pattern. On the 23rd: 3 loops together, 2 yarn overs, knit 7, yarn over, 3 loops together, yarn over, knit 7, yarn over. On the 24th stitch, purl 3 loops together, knit 1 and 2 yarn overs (1 purl, 1 knit).
On the 25th row: knit 1, knit 2 from one loop, knit 9, yarn over, knit 1, yarn over, knit 9. On the 26th row, purl the stitches according to the pattern. On the 27th row: from 1 loop, knit 2 and so on 3 times in a row, 2 loops together, with slants to the left, 8 knit loops, yo, 1 knit loop, yo, 2 loops together, with slants to the right and again knit three times from 1 loop 2. We knit the 28th row purl according to the pattern. On the 29th row: crossed loop, 2 yarn overs, 2 crossed loops, 2 yarn overs, 2 crossed loops, 2 yarn overs, 1 crossed loop, 2 loops together with a left bias, 17 knit loops, 2 loops together with a right bias. We knit the 30th row with purl loops according to the pattern. On the 31st row: crossed stitch, knit 1, yarn over 2, repeat until end of row.
No title"Frosty pattern" women's jumper. With a step-by-step description of the Little Mermaid from Osinka.
We need thread, 5 pcs sock knitting needles, a hook and knitting needles on a short line.
I will knit, 50g 70m. The thread is not thin. Knitting needles No. 5.
You need approximately 50g 70m, 80m, 90m, 100m. The pattern will be very visible.
1) And so. We crochet 16 loops into the sliding loop. Using 4.5 knitting needles, we pull the loops out of the hook loops onto the knitting needles (4 knitting needles on each with 4 loops = 16 loops). Attach a marker, if there is no marker then use a contrasting thread. This will be the beginning and end of the row. 

2) The diagram shows only the front rows and 1/4 of the circle. Knit 3 rows in the round, stop.
1.
Personally, I knit in the classic way. The front loop is behind the top lobule.
3) We knit further. And so, we knitted 4 rows (1 row, sliding loop and elongated loops, and 3 more rows).
Knitting needles No. 5. We knit the 5th row, look at the diagram. Front row. Crossed loop, 4 yarn overs, 2 double yarn overs, loops, 4 yarn overs, crossed. a loop. We repeat this 3 more times.
6th row. Purl row. Where is the cross. I advise you to knit the loop crossed (this is important), we knit 4 yarn overs, k1, p1, k1, p1. etc.
7th row. A row of faces. All face loops.
8th row. Purl row. All loops according to the pattern(s).


4) We knit further.
9-row. persons row. In the diagram, 2cm with a slant to the left, those who knit on the top lobe, remove from the knitting needle and turn the loops, return them to the left knitting needle, knit 2cm for the bottom slice., 1knit, 2 yarn overs, 1knit, 2cm with a slant to the right, for the upper lobules. We knit to the end of the row, strictly according to the pattern.
10-row. purl, row. This is IMPORTANT, the loops are knitted 2cm, remove the loop behind the knitting needle. So we knit in the round, where there are 2cm. Knit-knit, 2 yarn overs (k1, p1)
11th row. Persons row. According to the scheme
Knit up to 21 rows, I think everything will be clear. Make sure that the loops do not twist and are straight.
The pattern for the jumper was taken from such a napkin. Diagram for the pattern. 

5) And so we knit further.
Row 21, Knit row. We knit according to the pattern. 2vm with a tilt to the left, 1 knit, 2vm to the right, yarn over, 5 knit, yo, 2vm to the left, 1 knit, 2 ym to the right, yo, 5 knit, yo, and so on 3 more times.
Row 22, Purl, row according to pattern (circular row). DON'T FORGET where 2nd was, remove the thread behind the knitting needle.
Row 23, Knit, row. 3vm (slip 1 loop, knit 2 together, pull through the removed one), 2 yarn overs, knit 7, yarn over, 3 together, yarn over, knit 7, yarn over, (read the diagram in the round), another yarn over must be done, etc.
6) We knit further.
24 row. Circular purl. row. Where there was 3 stitches, we knit knit, 2 yarn overs, (k1, p1,) all the rest according to the pattern. Please note that we knit all the yarn overs between the petals.
25-row. Persons row, k1, from 1 loop knit 2, (1 for the top 1 for the bottom slice). K9, yarn over, k1, yarn over, k9, etc.

7)26-row. Circular purl row according to the pattern.
27 row. Persons row. from 1 loop 2, from 1 loop 2, from 1 loop 2. 2vm (left), 8 knits, yarn over, 1knit, yo, 8 knits, 2vm (right), according to the diagram, from 1 loop 2, from 1 loop 2. we start knitting from 1- 5 petals.

8)28-row. Circular purl, row according to the pattern. DON'T FORGET where the 2nd stitch was, remove the loop behind the knitting needle

9) For those who have already knitted everything, I’ll give you some advice: knit rows 47 and 48. They are not on the diagram, but the drawing looks better and more complete.
For those who knit row 29.
29 row. Faces, row. Sk stitch, 2 yarn overs, 2 yarn overs, 2 yarn overs, 2 yarn over loops, 2 yarn overs, 1 yarn over, 2 stitches (left), 17 knits, 2 yarn overs (right). etc.
30-row Circular purl row. We knit according to the pattern, but remember the tips. Where 2vm, remove the thread behind the knitting needle. 2 yarn overs (k1, p1), Where crossed we knit crossed.
31st row. Knit row Sk, k1, k2, etc.
Girls knit up to row 46 inclusive.
Select a closing option:
Option No. 1. Close along the side shoulder lines, leave loops for the sleeve, neckline, and waist.
Option No. 2. In the open loops, thread the thread (thick, with a needle) in a circle.
Both options, moisten or wet very much (it depends on the thread). Do not squeeze, but wrap in a towel and squeeze. Straighten it, give it a square shape. (on the table, floor)
Girls, that's it, we've finished our square. We knit the second half, DON’T FORGET who added rows, add in the same way.

This is what the pattern should look like at this point in knitting. 
QUESTIONS WHEN KNITTING:
---hi all!
I've been struggling with the "frosty pattern" for a week now. I've mastered 19 rows. 21 rows - just questions. There are not enough loops to cast on. After the 19th row, there are 12 loops left on the knitting needle, and to cast on the 21st row you need 20 loops. What did I do wrong?
Everyone writes that they can do everything so easily - it makes me so jealous... I’ve already changed the threads three times, unraveled the knitting five times... Why is it so hard for me?
Everyone in the family can't wait for this fight to end. Who will win: me or the pattern?
I can't figure out where I went wrong. Row 20 (this is like the wrong side of row 19) consists of 12 loops: slip 1, knit, knit, purl. persons 1 remove. 1 remove faces. persons Remove p.1. In the 21st row you already need 20 loops to cast on. So I don’t have them.
Girls, please help me
MY POWER IS NO LONGER!!!
ANSWER: Klenushka 2010, we made a mistake.
19- row 2 inm to the left., 1 knit., yo., 1 knit., 2 knit. to the right., yo., 3 knit., yo., 2 knit. ., yarn over etc.
20 row. Circular purl. row according to the drawing. Slip 1 stitch behind the needle, k3, slip 1, k5, slip 1, k3, slip 1, k5, etc.
Purl, no loops.
*****************************************************************************************************
Rusalok4ka, tell me, what do the curly brackets above row 45 mean in the diagram?
We don't pay attention to them.
******************************************************************************************************


12) We knit further. We knit an elastic band at the waist, collar or sleeve. First I knitted an elastic band at the waist, returning all the open loops to circular knitting needles. The loops we have are not enough for us. I did the following: knit in the round, row 1, k1, chain 1, knit 1, chain 1, etc., so I added half the stitches. . Row 2, knit 2, purl 2. Row 3, k2, slip yarn behind needle, purl 2. Row 4, knit 2, purl 2, etc. Where stitched, pull the loops out of the stitches. At the end of our elastic band, switch to 1*1, knit 2 rows, close with a needle and thread.

13) The collar also needs to be knitted in the round, and loops added as well. I knitted the sleeves in short rows. From the top of the sleeve collar, determine the center, from the center to the right by 5,6,7 loops, start knitting, gradually include the open loops in the work. We also need to add loops. I knitted as follows: k1, chain 1, knit 1, wag 1, and so on until the moment when you need to turn the yarn over.
I did the yarn over work, turn it, we knit 2 knits, purl 2, we reached the end (the beginning of our knitting), connect 2 loops, turn the yarn over work (open loops), girls, this work requires a lot of attention, so I’m writing to you and wondering if it’s clear or not, I’ve already knitted it It's easy for me.
!!! You must connect 2 loops at the same time, make increases in the form of an air loop, shorten rows, make broaches on the wrong side (for those who have made such an elastic band).
But it turns out to be a nice wing, knit quickly.


SUCCESSFUL PERFORMANCES:
1) Threads - Zerda from Lanoso.
2) A good collar. Kandy threads, Vitov needles 4 and 3.
3) Length 58 cm, consumption exactly 400 g of acrylic flora card, 230-100 g in 2 threads, knitting needles No. 4, elastic bands on the machine in 1 thread. 

4) Bingo threads, Italy 50g/80m, knitting needles No. 6, all knitted using open loops, I liked the threads, voluminous, soft, warm, they didn’t lose their appearance after washing. 
5) Merino Austermann yarn, 50 g - 125 m, back knitted
No title
"Frosty pattern" women's jumper. With a step-by-step description of the Little Mermaid from Osinka.
We need thread, 5 pcs sock knitting needles, a hook and knitting needles on a short line.
I will knit, 50g 70m. The thread is not thin. Knitting needles No. 5.
You need approximately 50g 70m, 80m, 90m, 100m. The pattern will be very visible.
1) And so. We crochet 16 loops into the sliding loop. Using 4.5 knitting needles, we pull the loops out of the hook loops onto the knitting needles (4 knitting needles on each with 4 loops = 16 loops). Attach a marker, if there is no marker then use a contrasting thread. This will be the beginning and end of the row.
2) The diagram shows only the front rows and 1/4 of the circle. Knit 3 rows in the round, stop.
1.
Personally, I knit in the classic way. The front loop is behind the top lobule.
3) We knit further. And so, we knitted 4 rows (1 row, sliding loop and elongated loops, and 3 more rows).
Knitting needles No. 5. We knit the 5th row, look at the diagram. Front row. Crossed loop, 4 yarn overs, 2 double yarn overs, loops, 4 yarn overs, crossed. a loop. We repeat this 3 more times.
6th row. Purl row. Where is the cross. I advise you to knit the loop crossed (this is important), we knit 4 yarn overs, k1, p1, k1, p1. etc.
7th row. A row of faces. All face loops.
8th row. Purl row. All loops according to the pattern(s).
4) We knit further.
9-row. persons row. In the diagram, 2cm with a slant to the left, those who knit on the top lobe, remove from the knitting needle and turn the loops, return them to the left knitting needle, knit 2cm for the bottom slice., 1knit, 2 yarn overs, 1knit, 2cm with a slant to the right, for the upper lobules. We knit to the end of the row, strictly according to the pattern.
10-row. purl, row. This is IMPORTANT, the loops are knitted 2cm, remove the loop behind the knitting needle. So we knit in the round, where there are 2cm. Knit-knit, 2 yarn overs (k1, p1)
11th row. Persons row. According to the scheme
Knit up to 21 rows, I think everything will be clear. Make sure that the loops do not twist and are straight.
The pattern for the jumper was taken from such a napkin. Diagram for the pattern.
5) And so we knit further.
Row 21, Knit row. We knit according to the pattern. 2vm with a tilt to the left, 1 knit, 2vm to the right, yarn over, 5 knit, yo, 2vm to the left, 1 knit, 2 ym to the right, yo, 5 knit, yo, and so on 3 more times.
Row 22, Purl, row according to pattern (circular row). DON'T FORGET where 2nd was, remove the thread behind the knitting needle.
Row 23, Knit, row. 3vm (slip 1 loop, knit 2 together, pull through the removed one), 2 yarn overs, knit 7, yarn over, 3 together, yarn over, knit 7, yarn over, (read the diagram in the round), another yarn over must be done, etc.
6) We knit further.
24 row. Circular purl. row. Where there was 3 stitches, we knit knit, 2 yarn overs, (k1, p1,) all the rest according to the pattern. Please note that we knit all the yarn overs between the petals.
25-row. Persons row, k1, from 1 loop knit 2, (1 for the top 1 for the bottom slice). K9, yarn over, k1, yarn over, k9, etc.
7)26-row. Circular purl row according to the pattern.
27 row. Persons row. from 1 loop 2, from 1 loop 2, from 1 loop 2. 2vm (left), 8 knits, yarn over, 1knit, yo, 8 knits, 2vm (right), according to the diagram, from 1 loop 2, from 1 loop 2. we start knitting from 1- 5 petals.
8)28-row. Circular purl, row according to the pattern. DON'T FORGET where the 2nd stitch was, remove the loop behind the knitting needle
9) For those who have already knitted everything, I’ll give you some advice: knit rows 47 and 48. They are not on the diagram, but the drawing looks better and more complete.
For those who knit row 29.
29 row. Faces, row. Sk stitch, 2 yarn overs, 2 yarn overs, 2 yarn overs, 2 yarn over loops, 2 yarn overs, 1 yarn over, 2 stitches (left), 17 knits, 2 yarn overs (right). etc.
30-row Circular purl row. We knit according to the pattern, but remember the tips. Where 2vm, remove the thread behind the knitting needle. 2 yarn overs (k1, p1), Where crossed we knit crossed.
31st row. Knit row Sk, k1, k2, etc.
Girls knit up to row 46 inclusive.
Select a closing option:
Option No. 1. Close along the side shoulder lines, leave loops for the sleeve, neckline, and waist.
Option No. 2. In the open loops, thread the thread (thick, with a needle) in a circle.
Both options, moisten or wet very much (it depends on the thread). Do not squeeze, but wrap in a towel and squeeze. Straighten it, give it a square shape. (on the table, floor)
Girls, that's it, we've finished our square. We knit the second half, DON’T FORGET who added rows, add in the same way.
This is what the pattern should look like at this point in knitting.
QUESTIONS WHEN KNITTING:
---hi all!
I've been struggling with the "frosty pattern" for a week now. I've mastered 19 rows. 21 rows - just questions. There are not enough loops to cast on. After the 19th row, there are 12 loops left on the knitting needle, and to cast on the 21st row you need 20 loops. What did I do wrong?
Everyone writes that they can do everything so easily - it makes me so jealous... I’ve already changed the threads three times, unraveled the knitting five times... Why is it so hard for me?
Everyone in the family can't wait for this fight to end. Who will win: me or the pattern?
I can't figure out where I went wrong. Row 20 (this is like the wrong side of row 19) consists of 12 loops: slip 1, knit, knit, purl. persons 1 remove. 1 remove faces. persons Remove p.1. In the 21st row you already need 20 loops to cast on. So I don’t have them.
Girls, please help me
MY POWER IS NO LONGER!!!
ANSWER: Klenushka 2010, we made a mistake.
19- row 2 inm to the left., 1 knit., yo., 1 knit., 2 knit. to the right., yo., 3 knit., yo., 2 knit. ., yarn over etc.
20 row. Circular purl. row according to the drawing. Slip 1 stitch behind the needle, k3, slip 1, k5, slip 1, k3, slip 1, k5, etc.
Purl, no loops.
*****************************************************************************************************
Rusalok4ka, tell me, what do the curly brackets above row 45 mean in the diagram?
We don't pay attention to them.
******************************************************************************************************
12) We knit further. We knit an elastic band at the waist, collar or sleeve. First I knitted an elastic band at the waist, returning all the open loops to circular knitting needles. The loops we have are not enough for us. I did the following: knit in the round, row 1, k1, chain 1, knit 1, chain 1, etc., so I added half the stitches. . Row 2, knit 2, purl 2. Row 3, k2, slip yarn behind needle, purl 2. Row 4, knit 2, purl 2, etc. Where stitched, pull the loops out of the stitches. At the end of our elastic band, switch to 1*1, knit 2 rows, close with a needle and thread.
13) The collar also needs to be knitted in the round, and loops added as well. I knitted the sleeves in short rows. From the top of the sleeve collar, determine the center, from the center to the right by 5,6,7 loops, start knitting, gradually include the open loops in the work. We also need to add loops. I knitted as follows: k1, chain 1, knit 1, wag 1, and so on until the moment when you need to turn the yarn over.
I did the yarn over work, turn it, we knit 2 knits, purl 2, we reached the end (the beginning of our knitting), connect 2 loops, turn the yarn over work (open loops), girls, this work requires a lot of attention, so I’m writing to you and wondering if it’s clear or not, I’ve already knitted it It's easy for me.
!!! You must connect 2 loops at the same time, make increases in the form of an air loop, shorten rows, make broaches on the wrong side (for those who have made such an elastic band).
But it turns out to be a nice wing, knit quickly.
SUCCESSFUL PERFORMANCES:
1) Threads - Zerda from Lanoso.
2) A good collar. Kandy threads, Vitov needles 4 and 3.
3) Length 58 cm, consumption exactly 400 g of acrylic flora card, 230-100 g in 2 threads, knitting needles No. 4, elastic bands on the machine in 1 thread.
4) Bingo threads, Italy 50g/80m, knitting needles No. 6, all knitted using open loops, I liked the threads, voluminous, soft, warm, they didn’t lose their appearance after washing.
5) Merino Austermann yarn, 50 g - 125 m, back stitch knitted... 

6) Lucky sleeve 
7) it took 5 skeins of angora and 3 muge. 
8) (almost 6 skeins of “Lux” from the Trinity factory, knitting needles 4.5 
9) I knitted it in three threads - one thread of Camelot mohair and two threads of Micro Schachenmayr nomotta Micro acrylic (I just came across it). 


SLEEVE 

1
10) It took almost exactly 400 g of Yarn Art Charizma in two threads (a trifle was left), knitting needles #5 
11)

12) Bamboo+cotton threads 50g/75m, knitting needles 4 and 4.5, it took a little less than 200g 

ORIGINAL DESCRIPTION 
13) RUGIADA merino extrafine thread 50g 125m. Italy. Knitting needles No. 4. Consumption 300g 

14)


15) Lanagold threads, it took about 220 g 
If you want to knit a beautiful product with a frosty pattern, then this article is just for you. In it you will learn how to knit such a pattern according to a pattern with a description. At first glance it may seem that this is very difficult to do, but this is not at all true. Even a beginner will be able to deal with frosty openwork and understand the entire working process.


To knit a small fabric with such a pattern, you will need knitting needles on a short fishing line number 5, a hook and any yarn that you have. Crochet one sliding buttonhole and cast on sixteen links. Then transfer the loops to four tools, 4 stitches respectively for each. Next, knit three stripes of faces. loops. Fifth person. R. is created according to the proposed scheme: a crossed loop, then four yarn overs, two crossed loops, four yarn overs and crossed again. Thus, repeat these steps three more times. The sixth row will be purl, it starts with a cross. p., four throws of thread, k1. p., 1 p. p., 1 persons. and 1 purl. n. In the seventh stripe there are all links of persons. The eighth line will be purl, but the links are knitted according to the pattern on the face. The basis of this fabric, which is knitted in a frosty pattern, is a square napkin. And you yourself decide what to create from it in the future.


Knitting continues. The ninth row will be faces. Tie two loops together, slanting to the left, then remove the links and turn them. Next, cast them on the left needle again and knit as follows: k1. etc., thread the thread twice, knit 1 again. p., 2 along with a tilt to the right side. Finish the strip using the diagram as a guide. In the tenth line you should do this: persons. p., knit with face, then you need to perform two stitches, knit 1. method, and the second purl. From the eleventh to the twentieth row, knit a frosty pattern of only faces. stripes.
Twenty-first r. there will be persons. Knit according to the pattern. Two joints with a tilt to the left side, 1 person. p., two with a slant to the right, nak., five faces. p., again you need to throw a thread, two together to the left, knit 1, two together to the right side, nak., five knits. and yarn over. Do this manipulation three times. In the new style, the ornament is made according to the pattern on the wrong side. The twenty-third strip will be purl, knit three joints, that is, remove 1, and make the other two with the face, stretching the removed thread through them, two throws of thread, seven knits, nac., three joints with a yarn over, seven knits. n. and again nak.


New circular purl. R. knits faces. in those places where 3 joint loops were previously made. All sketches that are made between the petals will be facial. The frosty knitting pattern continues, the twenty-fifth row is knitted like this: 1 l. p., then from one knit two, nine l. p., nak., 1 l. n., again yarn over and nine faces. n. Twenty-sixth circular r. will be done inside out, according to the drawing. Twenty-seventh r. begins by knitting two pieces from 1 stitch, do this three times, then two together with a tilt to the left, eight stitches. p., thread cast, 1 l. p., cast, eight l.p., 2 joint on the right side and finish the line by creating two things from 1 p. at once. Complete the next row according to the diagram. Thus, you need to knit forty-five stripes to get a full-fledged frosty pattern. The finished fabric can become the basis for a future pullover or blouse. If you knitted the pattern strictly according to the pattern, then you will get a square. Place new loops for the sleeves on an additional tool, and then make another similar square, just make the neckline a little larger - this will be the front part of the future jacket. Sew side and shoulder seams. The jacket can be made longer by making several rows of stockinette stitch and 2 by 2 rib stitch. Close off the loops in the usual way. Such an ornament can be an addition to other designs or the main one on the entire canvas.
We also recommend
 When is the best time to bathe an infant?
 How to cope with two children (practical tips) How to cope with two small children
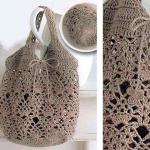 Crochet knitted bag from knitted yarn: master class
 "Frosty pattern" women's jumper
 How to learn to knit and crochet: detailed instructions for beginners
 What eyebrows are in fashion now?