How to knit Norwegian patterns and jacquard without broaches. Details about knitting jacquard patterns using knitting needles according to patterns How to knit jacquard without broaches
A frequent repeating pattern on fabrics and knitted fabrics is called “jacquard” in honor of the French weaver and inventor. The revolutionary nature of the device he invented for weaving mills was that the pattern was obtained not by printing, but by intertwining multi-colored threads.
Imitating a jacquard pattern using knitting needles has one annoying drawback. On the wrong side, so-called “broaches” of thread are formed. In broaches, especially if they are inside sleeves, children's socks or gloves, fingers get tangled when putting them on. Things become deformed, stretched, and lose their elegant appearance faster than usual.
There is an easier way to achieve a jacquard-like pattern. This type of knitting is sometimes called “lazy”. The wrong side of the canvas looks quite neat - without broaches:
How to knit jacquard without broaches and sagging thread? Here is another method that I found on the net today.
Video not mine, Uploaded by Dinozavrick on youtube
1.
2.
3.
4.
5.
6.
7.
8.
9.
10.
11.
12.
The essence of technology knitting jacquard pattern without long broaches on the wrong side is that when knitting a pattern, the free thread is intertwined with the working thread each time. You will appreciate the beauty of this technique if you decide to knit mittens, socks or leg warmers jacquard pattern. The reverse of the product will turn out neat, and your fingers will not get tangled in the broach threads.

1. Cast on 23 stitches + 2 edges with blue yarn. p. and knit 1 row (purl). p. Knit the last edge loop with yarn of two colors.

2. In the front row, remove the edge loop, there are 2 threads in the work.

3. According to the diagram, you first need to tie a loop with a light thread, it is closer to us, but you need to grab it from the other side. To do this, insert the knitting needle from right to left under the blue one, grab the light thread. Knit a knit stitch and tighten the threads.

4. The next loop needs to be knitted with a blue thread, it is located further from us.

5. Insert the knitting needle from left to right under the light one, grab the blue thread.

6. Knit a knit stitch and tighten the threads.

7. Knit further according to the pattern, and if you need to knit a thread that is closer to you, then use steps 3-4, if you need to knit a thread that is further from you, then use steps 5-6. Always knit edges with threads of two colors. As a result, a fabric without constrictions is formed on the wrong side.
I wanted to show this technique step by step, I immediately apologize for the poor quality of the drawings.
It is very convenient to knit jacquard patterns of varying complexity; the fabric does not shrink.
1. Cast on stitches and knit a purl row.

2. Front row. Do not be alarmed by the inconveniences when knitting, this is a matter of experience; after the principle of “fastening broaches” is understood, the knitting speed will increase.
I don’t want to show any specific pattern here, just a way to secure the broaches, so I tentatively knitted four loops.

3. I tied a thread of a different color (blue thread). Let's agree: we call the working thread the one we are currently knitting with, and not the working thread we are stretching.

4. I knit a loop with a blue thread, it is working, and green is not working.


6. Having knitted a loop with a working thread, the non-working thread turns out to be like a lead to the working one.


8. The thread was grabbed and knitted. The tie (green thread) is secured.

9. Insert the needle again under the non-working thread.

10. The loop was knitted, the non-working thread ended up on top.

11. Now, to secure it (not the working thread), we knit the next loop, but insert the knitting needle over the non-working thread.

12. On the wrong side, fixed broaches are obtained, reminiscent of purl loops. If you don’t want to fasten through one loop, then here’s an option - through three. We change the color, now green is the working thread, and blue is not the working thread. Knitted three faces. loops are green, you need to fasten the blue thread.

13. To do this, we also insert a knitting needle under the non-working thread and knit a loop.

14. Having knitted, the non-working thread ends up on top of the working thread. Let's assume that we then need to knit green: therefore, we leave the blue thread in place, without fastening it, we knit the remaining loops of the row, the edge one.

15. This is the wrong side of the sample. From left to right you can see how I first fastened through one loop (I fastened with a green non-working thread), and then through three (I fastened with a blue non-working thread).

16. Knitting the purl row - the principle of fastening is the same, but we only knit the purl loops. I knitted three loops with green thread, then, for example, the pattern requires a color change.

17. I swap the threads, now the working one is blue.

18. I knitted two loops (I show how to fasten a green broach through two loops, you can through any number of loops - it depends on your desire).

19. In this picture I show the process of securing the broach on the wrong side of the knitting. We grab the working thread (as a purl loop) as if from below the non-working thread and knit a loop.

20. This figure shows how the non-working thread (green) is laid down. Next, we insert the knitting needle over the non-working thread (this is not shown), grab the working one and purl the loop - the broach is secured.
Thus, the essence is to alternate inserting the knitting needle to capture the working thread, either under the non-working thread, or above it to secure it.

I want to say that there is nothing complicated. I wish you all good luck and creative success in knitting jacquard patterns!
Tell your friends about the article:
Read also:
Comments
1 2
1 #11 Anastasia 02/01/2013 05:05
I quote Zilfira:
Thank you very much for the clarification. It’s a pity that I just thought of looking for this thread today, I’ve already knitted a jacket for the child, but there are terrible and long broaches on the wrong side, I’ll have to sew something on the wrong side so that they don’t catch when dressing... Based on your principle, I’ll now knit a sweater with a snowman :)
There is no need to sew anything on, it will be cumbersome and God forbid it will rub again.
Try to secure it this way: place the hook under the bottom broach, grab the second one, pull it out a little (you get a loop), then the next one from above and so on 4-5 times, depending on the length of the broach. And also, be careful not to deform the drawing under strong tension.
And the last loop can already be carefully sewn on.
Or another option: 5 broaches, use a needle to intercept them in the middle together - it will look like a butterfly :)
1 #14 Anastasia
Jacquard patterns They have been used in knitting for a long time. Various ornaments and magnificent landscapes, cartoon characters and simply beautiful images can be embodied in a product even by a needlewoman who does not have much experience.
Jacquard is the use of two or more colors of thread in work. There are several options for knitting such patterns. Let's look at the most popular techniques that apply to almost any circuit.
The most important and integral step in preparing to knit a product of several colors is the choice of yarn. When working, you should use threads of the same quality and thickness. You should not choose threads that are subject to shedding. When washing the product, the design will lose its original appearance. The knitting needles are selected according to the thickness of the thread. If you choose tools of a larger size than the manufacturer of the yarn selected for knitting recommends, the knitted fabric will turn out loose. The purl broaches between the rows and fragments of the pattern will be visible through it.
Knitting a jacquard pattern with broaches
For the sample, a simple ornament using symmetrical geometric elements is proposed.

You need to cast on the stitches on the knitting needles in the usual way. Their number should be a multiple of the pattern repeat.

On the sample, immediately below, the execution of the pattern itself begins. Thus, starting from the first row, we introduce additional colored threads.


You should knit quite carefully. The slightest mistake in using one or another color of thread will lead to the curvature of the pattern. The broaches on the wrong side do not need to be made too tight.


The thread that is not involved in the work should lie flat on the wrong side of the fabric and should not pull the fabric itself.


When knitting any jacquard according to the pattern, it is worth considering that all odd rows in the pattern are front rows, and all even rows are purl rows. That is, the formation of the pattern occurs both from the face and from the inside of the product.
This method is often used for knitting mittens, hats, sweaters and scarves. It is best used where the stretches between the thread colors involved in the work do not amount to more than 10 loops. Mittens with jacquard patterns are unusual, but wearing them is quite inconvenient for small children. Fingers can cling to the threads that are pulled from the inside out. Jacquard scarves are best knitted double-sided, that is, make two identical fabrics and sew them together around the perimeter. Then the product will look great and be easy to use.
When working on sweaters and various blouses, it is best to use a seamless knitting method. With this type of work, side seams are eliminated and the fabric is knitted in one piece. This will help avoid unsightly joining seams.
Knitting a jacquard pattern without broaches
Knitting jacquard patterns without broaches is used most often when working on sweaters and other products with a relatively large fabric. It is especially important to use this method where the distance between the colors of the pattern is a large number of loops. Jacquard “zebra”, various birds, flowers and others are often isolated. That is, they have a color that is not used anywhere else in the product.
For example, consider a small arbitrary drawing that was made using exactly this method.
On the knitting needles you need to cast on loops from those colors of thread that need to be used in the first row of knitting. If only two colors are used and they alternate periodically in the pattern, then it is best to divide the skein of thread into several balls. The number of loops of a particular yarn color when casting on should also correspond to the number of loops of different colors in the first row of the pattern.

You need to knit with extreme care. The thread that you have finished working with should be left under the thread that is used to complete the next section.


This way, holes will not form in the canvas. It is especially important to observe this important point when performing strictly vertical stripes. Close the loops with this knitting method with the required thread colors in accordance with the pattern.


Schemes for jacquard patterns can be found in large quantities on the Internet. However, if you want to create a completely exclusive item, then you can come up with a pattern yourself. You can draw it on a regular notebook sheet in a cage. And for those who own a computer, there is an excellent option - programs for creating patterns of jacquard patterns.
We hope everything worked out for you.
Share your result with us and leave comments.
Today we will look at what many people like and what many are afraid of. His Majesty Jacquard. In essence, jacquard fabric knitted on knitting needles is a regular stockinette stitch, but using threads of different colors. Jacquard can be two-color (using threads of two colors) and multi-color (using threads of three or more colors) in one row. Very beautiful designs can be achieved if you use two threads with long, smooth color transitions. But today we will knit the simplest two-color jacquard.
Let's get started
I chose the simplest option as an example. Dark pattern on a light background.
Threads are 100% wool. 100gr = 300 meters. Knitting needles 2.0 The choice of knitting needle number is due to the fact that I do not knit very tightly. It is clear that before starting knitting you need to knit a sample. It is convenient if the product has small parts, for example, patch pockets. You can immediately knit a pocket, which will serve as a sample.
So. We knitted with a light thread as much as needed in the product. Let's start drawing.

According to the pattern, the first two rows (front and back) are knitted with a dark-colored thread. In order to avoid a “step” of color transition at the beginning of the row, we knit the first edge loop. If for some reason this is unacceptable, then in the last purl row of a light color we knit the last edge loop with a thread of a new dark color.

Next in the work there will be threads of two colors. To prevent tangles from getting tangled, you can use several techniques. Today we will look at one of them. We will alternate overlapping threads “towards ourselves” and “from ourselves”. IMPORTANT! The pattern thread (ours is dark) lies on top of the background thread. This makes it easier to regulate the thread tension in patterns where there are large distances between loops of the same color.
Dark thread on top of light thread.

We remove the first dark loop as an edge loop, knit a light thread, put a dark thread on top of the light thread, knit a loop with a dark thread.

Draw a light thread under a dark thread

We knit a loop with a light thread.

Again we throw a dark thread on top of a light one.

We knit.

We knit this way until the end of the front row. At the end of the row, we place a dark thread UNDER the light thread (so that the light thread lies on top and does not pull the pattern) and knit the edge loop with a dark thread.

Turn it over. The wrong side.

Remove the edge with a dark thread. From under the dark thread, we overlap the light one over the dark one and knit a loop. This way we avoid an unsightly “hole” between the loops.


This small vertical light broach is the section of thread that prevents an unsightly gap from forming between the loops.

We tie to the end of the row. Dark thread on top of light thread, light thread under dark thread. Before the last edge loop in the purl row, we place a dark thread under the light one and knit the edge with a dark thread.


This is what the front side looks like

Closer

We knit two rows (front and back) with a light thread.
To prevent the dark thread from sagging on the wrong side of the fabric, you can do it in two ways:
In the purl row, cross the threads so that the light thread lies on top of the dark thread (thus fixing the dark thread)

Or at the beginning of the front row, crossing the threads twice

We continue to knit the pattern. Dark thread on top of light thread, light thread under dark thread. Knitting several loops in one color, knitting the next loop(s) with another, straighten the loops on the right knitting needle. To avoid excessive tension and sagging of the threads. As you gain skill and knitting speed, the process of straightening the loops will become automatic.
We also recommend
 Presentation "Insurance pensions in the Russian Federation" - project, report
 How to deal with one and two?
 Autumn crafts made from natural materials: quickly and beautifully
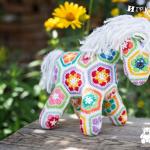 How to crochet a beautiful horse
 Details about knitting jacquard patterns using knitting needles according to patterns How to knit jacquard without broaches
 When is the best time to bathe an infant?