Cut out patterns from paper diagrams. Openwork paper cutting: patterns and recommendations for needlewomen
Anyone who sees for the first time products made in the form of carved lace from plain paper, is always surprised that such beauty is so easy to create with your own hands. Everyone can master openwork Schemes, which are taken as a basis, can be easily found in the specialized literature. Required Tools inexpensive and accessible.
Decor ideas
This interesting technique can be used to make postcards, panels, and interior decoration. The products are usually made from white or black paper, but other shades also look great. The interesting thing is that they do not only flat things. Volumetric openwork paper cutting looks very impressive. Schemes for such objects are also presented in the form of a contour drawing on a flat sheet, which is then folded along certain lines and glued into a three-dimensional part. So, in technology you can do the following:
- Postcards.
- Snowflakes.
- Window decorations.
- Napkins for the table.
- Volumetric decor based on a flat product or an assembled three-dimensional paper structure.
Having mastered simple options, you can make fabulously beautiful things.

Materials and tools
You will need the following to master openwork paper cutting:
- Diagrams and a printer to print them.
- Sheets of white (or other) color.
- The base on which you will cut (a special tablet, a regular board or a piece of thick cardboard).
- Small manicure scissors as an alternative to a knife or an addition to it.
The rest is optional and depends on how you will use the blanks:
- Glue onto a colored base - decorative cardboard and glue.
- Hang on the Christmas tree or in the space of the room - pendants (threads).
- Decorate the window - regular or
In fact, nothing complicated, special or expensive is needed. Regular office stationery. The main thing is patience, perseverance and the desire to make a masterpiece with your own hands.

Openwork paper cutting: diagrams, master class
Traditionally, patterns are created by cutting out part of the design on a sheet of paper folded in a specific sequence. One of the most common and familiar products is snowflakes, but they are not the only ones you can make. A napkin or mirror frame made according to the following pattern will look very impressive.

Work like this:

Openwork paper cutting: New Year's patterns
To decorate the interior with elements of this technique, you can use various decorations according to ready-made templates. Print them to the required scale (usually the blanks are designed for a standard A4 landscape sheet), cut out the pattern. There are a lot of preparations on the Internet, both directly festive and just winter themed.


- Entire landscapes and lacy plot scenes.
Start with simple diagrams.

Having mastered the principle and trained your hand, move on to more complex multi-object compositions.

How to make beautiful snowflakes
One of the most traditional and favorite ways to decorate a room for the New Year is to decorate with paper snowflakes. They are usually glued to windows, cabinet doors, and walls. Some people make garlands of them, hang them on threads or place them on the Christmas tree.

To make beautiful openwork snowflakes It is better to take ready-made diagrams from paper for cutting.

The main thing is to correctly fold the sheet of paper to apply the template. Any snowflake consists of a pattern repeating around its circumference. There are blanks for 1/6 and 1/12 parts. The second option with a narrower sector is obtained by additionally folding the workpiece for 1/6 of the part. You can fold the part on the basis of an already cut circle or any sheet that is first cut to a square and then folded or, conversely, the folds are made first, and then the shape of a sector of the circle is cut out.

So, you have learned in more detail what openwork paper cutting is. You can take ready-made diagrams for any product or use your imagination and develop your own exclusive item. Get creative. Create beautiful decor with your own hands.
Having seen products made in the form of carved lace from plain paper, you would never say that such beauty is not difficult to create with your own hands. Anyone can master openwork paper cutting, diagrams of which are also provided. This type of needlework is also called paper graphics, silhouette cutting, but the essence is the same, it is always a solid cut-out design on a plain background. There are two main directions: cutting with a knife and scissors. For beginners, creating paper patterns will require great patience, perseverance and desire.
This interesting technique can be used not only to create postcards and panels, but also to decorate the interior. Products are usually made from white or black paper, but other shades will look good. Openwork cutting made of paper can be either flat or voluminous. So, using the silhouette cutting technique, you can make such fabulous things: window decorations, snowflakes, cards, napkins and much more.

What materials and tools will you need to master openwork paper cutting? In fact, nothing special or expensive is needed. You will need:
- printed diagrams (invented independently or ready-made);
- sheets of white (or other) colors;
- breadboard (stationery) knife;
- a tablet, a regular board or a piece of thick cardboard on which you will cut;
- nail scissors.
As you can see, you will need regular office stationery.


Let's consider a master class on openwork paper cutting, which will help you master this interesting art.
When all the tools and materials are prepared, you can begin work. Most often, patterns are cut out on a sheet of paper that is folded in a certain way. Intricately patterned New Year's snowflakes Almost everyone carved them as a child. But in this way you can still make a frame for a mirror or a napkin for a table. A napkin or frame made like the one in the photo below will look very nice:

Step-by-step description of the work:
- Take a sheet of white paper and fold it.
- Using tracing paper, we transfer the outline of the pattern onto the base, tracing it twice.
- Cut out the pattern with scissors or a knife.
- Unfold the product very carefully and iron the folds through another sheet.
- We put openwork napkin onto colored cardboard or paper and glue it. Make sure that the glue does not leave any traces.
- If desired, you can laminate the product to make it last longer.

Decorating the house for the holiday
Easter is one of the most favorite holidays for both Orthodox and Catholics. Many housewives traditionally prepare for it - they paint eggs, bake Easter cakes, and decorate their home. We will help you in this matter. Using special templates you can make beautiful attributes and wonderful decorations for Easter. But you can show your imagination using the filigree cutting technique and come up with your own options.

One of the main symbols of this holiday is eggs. Housewives usually paint natural eggs or decorative ones, for example, made from wood. But you can easily make openwork eggs with your own hands. To do this, you just need to transfer the pattern using carbon paper or tracing paper onto drawing paper, cut it out and carefully glue it together. It is better to glue from the center, first to one end, then to the other. As you work, you need to let the glue dry before moving on to the next seam, otherwise it may come apart. Put ready eggs in a patterned basket, and you get a fabulous composition!


In this way you can also do Greeting Cards for Easter, decorate gift bags and boxes, decorate the windows. Protruding eggs are even used as a festive garland, connecting them together. Inspiration and imagination will help you create a unique Easter celebration.
For the New Year
Holiday New Year both children and adults love it. Everyone wants to create a home New Year's tale and plunge into the wonderful atmosphere of magic. Nowadays, New Year's decorations are not only balls for the Christmas tree and garlands, but also many other wonderful things for the festive decoration of your home. Our tips will help you prepare uniquely for this wonderful holiday. One of the most traditional ways to decorate a room is to decorate with paper snowflakes. They can be made, for example, like this.

They are usually glued to windows, cabinet doors, shelves, and walls. Some people make garlands out of them and place them on the Christmas tree.

To make beautiful openwork paper snowflakes, it is better to take ready-made patterns for cutting.

The main thing in the work is to correctly fold the sheet of paper to apply the template. Each snowflake consists of a pattern repeating around its circumference. The blanks are usually folded for 1/6 and 1/12 parts. You can fold the part based on an already cut circle or any sheet that first needs to be cut to a square and then folded, or, conversely, the folds are made first, and then the shape of a sector of the circle is cut out.
The art of paper cutting was presented to the world by Japanese and Chinese masters. Since ancient times, they began to use various templates for these purposes. In the culture of our peoples, this art became known as vytynanka. The ancient Slavs used it to make napkins and patterns that they used to decorate their homes. Such products were given magical powers. It was believed that vytynanki protect the house from misfortunes and attract joy and good luck. If you want to touch the art of your ancestors, then for this you will need stencils and letters for cutting out of paper. Templates for such blanks can be easily made with your own hands.
To learn this art, you need to properly prepare and select everything necessary materials and tools for openwork paper cutting. Schemes for vytynanka can be easily found on the Internet and printed. An ordinary, but not very thin, sheet of A4 paper is suitable for them. Those people who have artistic talent can draw a template themselves and make a unique and beautiful piece of furniture.
Before starting work, you need to clearly understand what you will need to make one product. a large number of time and patience. If you are not sure that you will be able to complete the work, then it is better to choose something that will require less time and effort.
To successfully master the art of vytynanka, you need to prepare the following devices and materials:
- stationery knife;
- small scissors with sharp and thin tips;
- templates (beginners who want to master openwork paper cutting should take the templates as simple as possible. Experienced craftsmen can experiment and take on more complex things);
- sheets of thick paper or cardboard desired color and size;
- board for work.
A stationery knife is the main tool of any craftsman. It is used to cut out the smallest details of a design or pattern. If you are new and using simple templates, then nail scissors will be enough for the job.

As you work, you should cut out large details of the image, gradually moving on to smaller and more complex ones. By combining various schemes, patterns, letters and numbers, experienced craftsmen achieve the optimal result, thus creating entire pictures.
Products cut out of paper are most often used to decorate offices, schools, kindergartens and apartments before the holidays. They help to fully convey its atmosphere and improve your mood. In silhouette cutting from templates, you can use various subjects and ideas. The most popular of them are:
- New Year's vytynanki (images of Santa Claus, openwork Christmas trees And Christmas decorations, snowflakes, New Year's landscapes). This kind of figurative work decorates the windows of residential premises, offices, as well as shop windows.
- Easter works (openwork Easter eggs, pictures of festive chickens and hares).
- Works dedicated to popular holidays (February 23, March 8, May 9, Valentine's Day, etc.).
- Products in the shape of birds and animals.
- Images of flowers and other plants. Often several flowers are made, which are combined with each other and decorated with holiday cards.
- Landscapes.
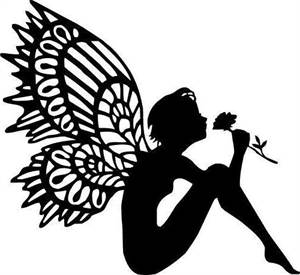
- Mythical creatures and fairy-tale people.
- Need to watch a few already finished works before mastering silhouette paper cutting yourself. It is better to choose ready-made diagrams with a minimum number of small parts.
- You need to choose pictures without unnecessary bends. They are the most difficult to cut and without proper experience in this matter, you can ruin the workpiece.
- It is best to cut out the smallest details of the image with a stationery knife or sharp blade. When performing this work, you need to be careful not to cut the table on which the craft is being made.
- Finished works are best framed. This way they look more impressive and will be noticeable to every guest.
- The finished craft can be glued onto thick paper or cardboard. This will give your work solidity and completeness.
Using the paper cutting technique, you can make countless crafts to decorate your apartment. The process of creating them is simple, but requires a certain investment of time, effort and patience. If you have all this, then you can safely get to work.
Napkin on the table
Before you start cutting out a napkin for the table, you should decide on its shape and size. Experienced craftsmen advise making crafts according to the shape of the table and taking into account the degree of filling with the pattern. To make a lace napkin you will need the following materials and tools:
- dense colored paper or cardboard;
- tracing paper and cardboard to create a template;
- glue;
- simple pencil;
- spoon.
Having prepared everything you need, you can start making the napkin. To do this you need to perform a number of steps:

This napkin is often used as a stand for a vase with flowers or a pot with a decorative tree.
Mirror decoration
The most ordinary mirror can be easily decorated with a protrusion. Properly made decorative elements will help turn a boring piece of furniture into an exclusive and original item. To do this you will need the following materials:
- metallic paper with a golden rumpled effect;
- thick paper or cardboard;
- tracing paper;
- scissors;
- simple pencil.
All materials are inexpensive and easily available. They can be easily found in any store that specializes in selling handicrafts. To decorate a mirror you need to do the following:
- The selected pattern is transferred using tracing paper to cardboard.
- Take a second sheet of paper and fold it three times. After this, it bends diagonally.
- The finished template is attached to a folded sheet and outlined with a simple pencil.
- After this, the design is separated from the template and cut out with scissors.
- The resulting image unfolds and smoothes out.
- The finished product is used to decorate the mirror around the entire perimeter.
You can decorate old photo frames in the same way.

To create a festive atmosphere in an ordinary room, you need to decorate it with various elements. holiday decor. For each celebration you can come up with your own original jewelry and diversify your interior.
New Year's snowflakes
The most popular and traditional New Year's decoration are snowflakes cut out of paper. They learn to do them starting from the very beginning. early age and improve their technique with experience. As a rule, such decorations are glued to walls, doors, and windows. Some people make garlands based on them and hang them from the ceiling or place them on the New Year tree.
Work order:
- A ready-made snowflake template can be found on the Internet and printed on a printer.
- Take a sheet of thick paper and fold it in half diagonally. The resulting triangle is also folded in half.
- Next, the workpiece is folded at an angle and the lower part is cut off to form a triangle.
- After this, the shape of a sector of the circle is cut out.
- The product unfolds and smoothes out.
Postcard for May 9
If you have veterans of the Great Patriotic War in your family Patriotic War, then a hand-made postcard would be a wonderful gift for them. You can involve your children in this work, thereby instilling in them an interest in history and respect for great heroes. To work, you need to buy or find the following materials and tools at home:
- a thick sheet of white paper;
- watercolor paints;
- a sheet of red paper;
- scissors;
- stationery knife;
- glue;
- brushes;
- markers.
The whole process of making crafts is simple, but requires a little accuracy and perseverance. It is important to depict all the symbols of Victory Day on the future postcard: the Eternal Flame, the carnation, the St. George’s ribbon.
Step-by-step description of making a cut-out postcard:

Artistic paper cutting - exciting process. With a minimum amount of materials used, beautiful original products are obtained. By correctly following all the recommendations, you can easily make a decoration or card that will appeal not only to you, but also to your family and friends.
Attention, TODAY only!
Cutting out shapes and figures from paper helps young children develop fine motor skills V game form!
How to teach a child paper cutting?
- First of all, your baby’s hands should be ready to learn the skill of cutting. The best exercise for a baby is squeezing water out of a simple sponge; it trains the necessary muscles.
- Then show your child how fun it is to tear old newspapers and pieces of paper into pieces - this will teach him to hold the paper in his hands without dropping it.
- Now you can learn paper cutting using special materials for children! Start by cutting out straight and wavy lines, then teach your child to cut out shapes before introducing pictures to cut out.
Important! Remember to take breaks if your child is tired or bored. Be sure to encourage your child verbally, praise him, and try to interfere less with the cutting process itself.
Safety when cutting from paper
Before you begin, show your child how to hold scissors correctly and talk to him about using scissors safely. The child must clearly understand that:
- You need to cut in the direction away from the body and fingers.
- You can't play and fool around when you have scissors in your hands.
At what age should you start learning to carve?
All children develop differently. The age limits below should be used as a guide, taking into account individual children's interests, temperament and attention span.
2 years: Children at this age will enjoy tearing paper into small pieces and cutting things out only by repeating after adults;
3 years: at this age you can try to cut out any shapes with your child, sitting next to him and continuously observing the process;
4 years: the child is able to cut out simple lines and shapes himself with a little help from an adult;
from 5 years and older: the child should easily cut out the pictures and even glue them onto paper, making appliqués.
Today I will talk about such a difficult at first glance type of creativity as paper cutting. This art supposedly originated in China and in the local language it sounds like "jiangzhi". In China it has several directions: "chuan-hua" or “window flowers” (emerged from the tradition of decorating the windows of houses for the spring holiday) and "si-hua" (holiday decorations, ritual objects and wishes for all occasions). Subsequently, the art of carving spread throughout the world, acquiring its own characteristics in each country.
Traditional Chinese work was done exclusively scissors, but now there is an easier way - cutting with a breadboard knife. This is what we will talk about. If you wish, you can also work with a regular stationery knife with a retractable blade, but this option is not very convenient when working with small parts.
I'll start with the materials you'll need for the job:
1. Paper. In fact, it can be absolutely anyone who is more comfortable in their work. I prefer smooth thick paper, about 200 g/m. Mine is cut from 220 or 240 gsm white smooth paper. For those in Moscow or St. Petersburg, I can recommend the store "World of Paper", also known as "Double V". On their website they also write that there are branches in Samara, Tver, Chelyabinsk, Novosibirsk, Krasnoyarsk, Krasnodar, Rostov-on-Don, Kyiv and Almaty. But I wasn’t there, I don’t know what or how. So: in this store you can choose paper for almost any application. In the hall there are racks with samples, which indicate the name, density, color, embossing and sheet size. Prices are indicated in catalogs on the tables. Before the holidays, prices there were much lower than in art stores; now, most likely, they have also risen, but in any case, it turns out to be somewhat more profitable and they usually have more choice. Well, if you just want to try the technique without spending extra money, you can always learn how to cut on regular Whatman paper.
2. Knives. They come in several types. The most regular breadboard knives They are a handle with a collet clamp that secures a replaceable blade. There are now a lot of companies producing such knives. I use a set of knives from an unknown manufacturer:
The small box contains three handles with blades, a number of additional blades on a magnetic strip and tweezers. Previously, I worked only with the thinnest knife, but after working with it for a long time, my fingers begin to hurt. Now I mostly work with a medium knife. It has a heavier handle, fits more comfortably in the hand and discomfort does not cause problems at work. I almost never use the largest knife; its handle is not very comfortable for me, but it all depends on personal preference.
In terms of prices: one simple knife is quite suitable for testing, now there is a huge selection, prices start from about 100 rubles. (information about Moscow, prices of art stores).
The second type of knives - prototype with hinged blade mount. In the photo he is black. This is an art knife from Mr. Painter. Overall, it’s a pretty convenient thing, but you need to get used to it to work with it. If before this you cut with a regular breadboard knife, you will have to adapt to the rotating head of this knife. But if you learn to work with it correctly, it can greatly facilitate the process - you will not need to constantly turn the blade; the hinge allows you to do this by changing the tilt of the handle. It is also worth noting that the blades of a hinged knife differ from conventional collet ones. They are narrower and smaller in size. I have not yet purchased additional blades; the set with this knife includes 10 additional blades. This is quite enough for the first time.
I bought mine at a wholesale store for 150 rubles, in retail stores it costs about 300 rubles. It can be found in hobby centers, less often in arts and crafts. stores
The third type of knives - knife on finger. They come with a hinged and static blade. I've heard a lot of good reviews about them, but I haven't worked with them myself yet.

Sometimes it is also necessary compass knife. A convenient thing for cutting out even circles, but do not forget that it leaves a dent or hole from the needle in the center of the circle.

3. Substrate. In order not to spoil your desktop, you need to get yourself a cutting mat. Best suited for these purposes special cutting mat. They are different sizes, from A6 to A1 exactly. I always have one A3 size on my desk. You can get by with just thick cardboard or a sheet of plastic, but this will greatly complicate the cutting process. Burrs may appear on the paper cut, and if the backing has been used for a long time, the knife blade may simply come off. And cutting is a process where it can be very difficult to correct mistakes, so it’s better to prepare and try to avoid them :)
I can’t say that they are usually very cheap, but if you are going to cut a lot, I highly recommend purchasing them. At prices: A6 - from 100 rub. (but they usually only come to order), A4 - from 200, A1 can reach more than 3000. A4-A3 is quite suitable for a start.

4. Pencil for drawing the contours of the drawing. It must be constantly sharpened finely. It is preferable to take an HB or B pencil; very hard ones can scratch the paper, while soft ones will leave marks that will be difficult to erase later. It’s convenient to use a mechanical pencil; you don’t have to constantly sharpen it.

I prefer to draw on the front side, without a preliminary sketch. The photo shows an example of a picture prepared for cutting. I shade some of the small details with a pencil so that it is clearer what needs to be cut out and it is more difficult to make a mistake. But if drawing straight away is not about you, then you can draw the picture on a rough piece of paper, and then transfer it to new leaf through a light table or using tracing paper. Or simply put the sketch on top of the finishing copy and press the contours with something hard. But last method Not every paper will hold up. I’ve also seen works in which they draw on the back of a clean paper. But here you should remember that the image must first be mirrored so that everything is correct in the final work. In general, it’s a good method, but I don’t use it, because when cutting, it’s more convenient for me to tilt the blade a little and cut the paper a little at an angle so that the cut looks more neat. But this is what anyone likes:) It’s up to you to decide.
5. Eraser. I erase all the rough lines at the end of the work, on the already cut out picture. Here it is better to use soft erasers like Milan or Factis. Do not forget that paper tends to wrinkle and tear, so you should work with the eraser very carefully on the cut-out picture so as not to damage the work. All eraser spools can be easily removed from the work with a wide, soft synthetic brush.
You can watch the work process in the video.
We also recommend
 Reviews on the use of peach oil for the face
 How to properly take water samples for analysis Rules for sampling drinking water for research
 What you can do for the New Year with your own hands from paper: photo
 How to make a bag from jeans with your own hands?
 How to create Irish lace, step-by-step instructions for beginners Irish lace yarn which is suitable
 Down with haphazard clutter—cleaning up your closet Lifehack for storing things