New Year's deer to draw and cut out. New Year's templates for cutting paper for windows
With the onset of cold weather, people wait for snow, and after it has fallen, they begin preparations for the most magical and beloved holiday. New Year is loved by everyone, and resembles a fairy tale that you don’t want to leave. In this connection, every home tries to dress as festively as possible. New Year's deer stencils for cutting, or in other words, templates, will help to attractively decorate any home.
It is the New Year’s deer stencils for cutting out that can be found on the windows of residential buildings. After all, every child knows that Grandfather Frost comes from the forest on a team of reindeer, otherwise he will not have time to distribute gifts to everyone for the holiday. Children really like images of such cute animals, so they often help their mothers glue such decorations to windows.


Animals are cut out of paper, on which their image is outlined with clear contours. Today, such crafts are often called vytynanki. Moreover, it does not have to be just one image, it can be anything. Deer, roosters, snowflakes, houses and so on.


New Year's crafts made by yourself and downloaded will look much more valuable than purchased decorations. In addition, it is not necessary to glue them only to the window. Vytynanka can be used to decorate a forest guest Christmas tree or to decorate a home.


A New Year's deer, if enlarged several times, can easily decorate any scene. Indeed, today they often hold theatrical performances, as well as other matinees in kindergartens or other institutions.


Using the desired template, you can decorate any establishments, for example, shops, cafes, offices and other institutions. If the stencil is made with the image of snowflakes, then it can be transferred to the window with different colors or cut out of paper and pasted with a soap solution.


Today, delicately made vytynankas are more popular than other boring New Year’s decorations. Undoubtedly, tinsel, garlands, as well as colored rain bring their charm. Although many household members make such crafts on their own. Of course, this is done in advance and often with the whole family using additionally prepared material.


To make jewelry you need to own a couple important rules. In most cases, these nuances relate specifically to the protrusion. When cutting out small parts, it is best to use a stationery knife, as it will help bring the product into shape. neat look. The contours of the image should be smooth and clear.


Auxiliary tools for crafts at home
- A stationery knife, if there are no hard-to-reach places to cut, then you can use scissors.
- A solid base, because it is not uncommon for a simple table to be cut, thereby ruining it. Experienced amateurs use cutting boards for such purposes.
- Glue, soap, water.
- Invisible threads for hanging items.
- An awl or a needle, depending on the density of the material from which the craft is prepared.
- Cardboard, sheets of white paper.
- Paints, gouache, multi-colored sparkles and beads, you can use another arsenal of accessories.
- A simple pencil and eraser.


Making crafts
It’s not uncommon to draw a template yourself, but this option is not suitable for everyone. Therefore, many using plain white Blank sheet paper, place it on a well-drawn silhouette of the stencil used and transfer the image with a pencil.


Some people look for a template on the Internet and then enlarge it on the screen. Then, attaching a sheet of paper to the monitor, they also transfer the image using a pencil and eraser. You can print the template using a printer, but the above options are for those who do not have the ability to print.


After the image is drawn and cut out, it can be used for decoration. Although there are some factors to consider. For example, a team of deer will look good on a window with a lot of space in front.


If the deer are made one at a time, then they can be beautifully decorated using Christmas glitter and hung on the Christmas tree. You can make a whole garland on which to hang a round dance of deer around the forest beauty.


For the garland, take long tinsel, onto which animals are glued one at an equal distance. You can carefully tie them on a thread by making small holes in the middle of the silhouette, through which you pull the thread and secure it to the tinsel. After the garland is ready, decorate the Christmas tree with it in a circle.


As mentioned above, children love to help their parents in New Year's crafts. Therefore, in order to captivate your child, you can make a beautiful large deer from cardboard yourself. The tools you will need are the same as before. The only thing you need to add is a large sheet of cardboard on which the silhouette of a deer will be applied.


The silhouette of a charming animal must be applied to the selected cardboard base. A simple pencil, an eraser and the owner’s imagination will help you do this. And don’t forget that deer sometimes have beautiful lush antlers, which definitely need to be applied. It is best to take a picture of the animal, put it in front of you and simply redraw it in an enlarged form.
On the eve of the holiday, careful preparations for the New Year begin. You need to think through every little detail, from choosing an outfit to decorating your home. New Year's figures cut out of paper on the windows will help add a fairy-tale atmosphere. This decor option is one of the most popular, as it requires virtually no costs and looks simply great.
Cutting paper figures: a brief history of openwork beauty
The common name “vytynanka” came to us from Ukraine. In Russia, decorative art is called “clippings” and has been known since ancient Slavic times. Our ancestors passed on the technique of carved paper patterns to new generations for several centuries. The first clay, bast, fabric and leather artifacts depicting figures on windows were found back in the 18th century. They belong to the Trypillian culture (5 - 3 thousand BC). But there is a lot of disagreement here, since the majority of historians believe that art is younger.
The technique of cutting figures from paper originated long before this in China - almost simultaneously with the invention of paper and primitive tools for its processing. The ancient inhabitants of the Celestial Empire carved gods and mythical creatures and hung them on windows and doors to scare away evil spirits or to make their homes more comfortable.
This technique came to us only in the mid-19th century from Poland and Ukraine. Almost 100 years earlier, the vytynanka “migrated” along with traders from Persia to Europe. Our ancestors gladly took up the “cuttings”, decorating with them not only windows for holidays, but also the iconostasis, stove, walls, etc. Over time, cuttings even began to be used to inform the person looking through the window about:
- illness of someone in the household;
- imminent wedding;
- pregnancy of the hostess;
- funerals, etc.
Now vytynankas are widely used during the holidays. We can say that each of us at school came across this art, cutting out snowflakes to decorate the classroom before the New Year. Especially paper figures popular in families with children. Young mothers create a fabulous atmosphere for their babies in the nursery or living room, developing in them a love of art and folk traditions, imagination and other personal qualities.
Today we will learn how to do original jewelry on A4 paper, and we will also try to download ready-made templates for cutting and print them on a printer.
DIY Vytynanka
To create a real winter fairy tale on the glass surface you will need the following materials and tools:
First you need to print out the blanks for cutting. If you do not have a copier, then enlarge the image to the required size, attach a sheet of paper to the monitor and draw a simple pencil along the contours.
We cut out the outer parts with scissors, and the inner or small ones with a stationery knife, after first placing the template on a flat wooden surface. Try not to leave black lines from the outline on the paper. The figures will show through on the window, so you need to remove the excess stroke.
White pictures will look more aesthetically pleasing, but if you want to diversify the composition, then some details can be decorated with pencils or paint. Gluing the cutouts is very easy. Dip the brush into warm water and rub the soap bar. This solution is applied to the workpiece, which must be immediately applied to the surface of the glass before it gets wet. We press the paper with a sponge and disperse the formed air bubbles with a soft cloth. To remove the protrusions, you need to wet them with warm water, wait 3 - 5 minutes so that they are well soaked and scrape them off with a knife. If you do this carefully, some of the figures can be used next year.
Important! The soap solution must be made thick. Otherwise, the paper may peel off from the glass in a couple of days.
We hope that this instruction will help you make a real New Year’s masterpiece with your own hands, as well as create festive atmosphere. And now, we offer a gallery of ready-made templates.
Download stencils for windows for the New Year 2018 for cutting
Dog
2018 is the year of the yellow earthen Dog. eastern calendar, so the most popular figurine in the New Year’s composition will be a shaggy pet. Be sure to add a dog to the window, and with him, bring good luck, prosperity and prosperity into your home.
Santa Claus, Snow Maiden and Snowman
These characters are traditional for any New Year's composition. They are able to create a fabulous atmosphere in a children's room. Such figures will become especially relevant if the children make the decorations themselves under your guidance.
 Download templates
Snowflakes, Christmas tree, toys
To create a New Year's composition you will need holiday paraphernalia. Therefore, we suggest downloading to your computer a gallery of templates with gifts, wreaths, candles, Christmas balls, bells, garlands, etc.
 Download stencil gallery
Numbers "2018"
And finally, you can download several stencils with numbers. They are suitable not only for decorating windows, but also walls, furniture, doors, etc.

The New Year is already knocking on the door, promising us many new impressions and amazing events. A silver hoof deer knocks its hoof on the winter snow, showering people with precious stones. Deer has always been one of the main symbols of the New Year and Christmas, along with Father Frost and the Snow Maiden. It is perfect for decorating an apartment for the New Year, creating a fabulous and kind atmosphere in it. Don't forget to congratulate your loved ones in an unusual way. Ours will help you with this.
 A New Year's deer stencil will help us make this decoration with our own hands. By choosing a successful stencil, we can create such a handsome man that our household will remember for at least the entire next year.

 If we are going to “let the deer into our home,” we must understand the meaning of the deer as a symbol. What will he bring us?
The New Year's deer is a symbol of rebirth, spirituality and fertility. It is associated with the sun, its rays and its rising, therefore it is a very favorable symbol.
In foreign cultures and religions, the proud artiodactyl has always acted as a symbol of goodness, strength and dignity. For our ancestors, it was a guide to the world of spirits.
The deer is a symbol of the New Year primarily because it is a hardy winter animal, excellent for winter transport. That is why we often cannot imagine Santa Claus or Father Frost without a reindeer sleigh. The deer has also firmly established itself as a print on winter sweaters, which we love to give to loved ones for the New Year. Look, more are already waiting for you.
Types of New Year's Deer crafts
 There are many ways to get your own New Year's deer:

Tools
 The basis for this type of paper art is stencils. These are paper templates where all the contours and lines are cut out. And therefore, the more of these same contours and cut out fragments, the more accurate and beautiful the drawing will be.
Accordingly, ordinary stationery scissors will not be suitable for more precise cutting. They can only cut out the outer contour or large fragments; for everything else, use nail scissors or a stationery knife.
The type of paper depends on the location of the figure. If the deer will be attached to window glass, then any thin paper will do - from office paper to colored paper and notebook sheets. If a deer goes, say, to an element hanging on a thread from the ceiling or on a Christmas tree, then it is better to use thick paper or cardboard.
Vytynanka - Deer in a frame of snow paper patterns
 The whole point of this stencil is in the frame. This pattern is perfect as a pattern on a mirror or wall.

1) Draw a vertical rectangular frame one centimeter wide.
2) Make curls from the frame, similar to frost patterns on the windows.
 3)
At the ends of the curls, draw snowflakes - large and small, with some patterns and others. Draw the patterns in as much detail as possible. Snowflakes are a delicate matter.
3)
At the ends of the curls, draw snowflakes - large and small, with some patterns and others. Draw the patterns in as much detail as possible. Snowflakes are a delicate matter.
 4)
Inside the frame we depict a standing deer. The tail is lowered, the stance is confident, the head is turned so that the outline of the nose is visible. Please pay attention Special attention animal horns. Below him lies a doe in the grass. The blades of grass hide almost her entire body, except for her neck and muzzle. Ears are raised alertly.
4)
Inside the frame we depict a standing deer. The tail is lowered, the stance is confident, the head is turned so that the outline of the nose is visible. Please pay attention Special attention animal horns. Below him lies a doe in the grass. The blades of grass hide almost her entire body, except for her neck and muzzle. Ears are raised alertly.
 5)
Cut out all the described elements.
5)
Cut out all the described elements.
Vytynanka - Deer in a Christmas ball
 The template for the Christmas tree toy is made of dense material.

1) We depict the outline of the ball - a thick ring with a fairly wide frame. At the top there is a ring for thread. It's also thick enough to hold the toy.
2) From the ball inward there are curls with detailed snowflakes.
 3)
Just to the left of center we depict a galloping deer. The forelimbs are bent in a jump, the hind limbs are thrown back slightly. We draw the deer's tail, its face and ears. Don't forget to draw the horns in detail.
3)
Just to the left of center we depict a galloping deer. The forelimbs are bent in a jump, the hind limbs are thrown back slightly. We draw the deer's tail, its face and ears. Don't forget to draw the horns in detail.
 4)
Cut out the elements described above.
4)
Cut out the elements described above.
Vytynanka - Reindeer Sleigh

1) The movement goes from left to right. There are four reindeer in the harness. Here they are only components, so we do not depict them in very detail. The front hooves are slightly bent and pointed downwards, the rear hooves push off. Horns like scallops. Here are all the details on the muzzles - a dotted eye and a curved line under it.
 Each subsequent deer is located higher. All animals are tied with harnesses.
2) We draw Santa Claus's sleigh. Two curved lines on the body. The runners of the sleigh go in a curl in front, from them to the body we draw connecting triangles.
 3)
We draw Santa Claus on a sleigh. He holds the harness. Draw the dotted eyes, beard and mustache. The hat with the pompom sticks up. There is a gift behind the grandfather, the slits will be on his ribbon.
3)
We draw Santa Claus on a sleigh. He holds the harness. Draw the dotted eyes, beard and mustache. The hat with the pompom sticks up. There is a gift behind the grandfather, the slits will be on his ribbon.
 4)
Cut it out. We also suggest that you make a very beautiful symbolic one that will help you do this very quickly and beautifully.
4)
Cut it out. We also suggest that you make a very beautiful symbolic one that will help you do this very quickly and beautifully.
Vytynanka - Patterned deer
 The peculiarity of this template is its pattern. Therefore, it will work well on thin paper as a drawing on a window.

1) We depict the outline of a deer standing with its front hoof raised. The thin tail is lowered, the hooves are depicted in detail, the sole is divided into two parts. The muzzle is turned to the side, the ears stick out. There are no details inside, the whole point is in the pattern.
 2)
Patterned curls curl inside the deer's body. Some are thicker, some are narrower. There are dots between them. We don’t draw patterns too close, as they will be difficult to cut out.
2)
Patterned curls curl inside the deer's body. Some are thicker, some are narrower. There are dots between them. We don’t draw patterns too close, as they will be difficult to cut out.
 3)
The deer's antlers, similar to the internal pattern, go in curls.
3)
The deer's antlers, similar to the internal pattern, go in curls.
 4)
Cut out the elements.
4)
Cut out the elements.
Horns - heart - probably the favorite pattern of all girls)
 Also perfect as a pattern for windows.

1) We depict a fawn. He is facing us. The limbs are spread apart, a small tail is barely visible from behind. The muzzle is slightly turned, the ears stick out to the sides. The fawn itself has nothing cut out except its outline.
 2)
The whole trick is in the horns. On the head we draw the outline of a huge heart.
2)
The whole trick is in the horns. On the head we draw the outline of a huge heart.
3) Inside the heart we depict trees with bare branches.
Choose any of the stencils and create a real fairy tale for yourself and your children.
Happy New Year! Have a good day))
Santa Claus stencils for windows for the New Year 2017 for cutting are convenient way decorate the windows for the holiday. Just print it out and use artificial snow or other decorative materials for window decoration. With stencils, the ornament will turn out neat and beautiful. In this article you will find Santa Claus stencils for cutting, methods of using them and tips for creating original compositions.
Benefits of using stencils
A Santa Claus stencil on a paper window can be used to create a variety of New Year's compositions. In addition, it can be used as New Year's coloring book for children, as well as for decorating walls and other surfaces in the house. Ready-made templates can be used not only to decorate windows, but also to master the technique of protruding. The finished jewelry looks very beautiful, but the work to create it is quite painstaking.
The main advantages of using Santa Claus stencils include:
- Versatility. Using one stencil you can make several designs on windows and other surfaces.
- Availability. You can buy stencils at a low price. In addition, templates can be made independently or downloaded on the Internet.
- Economical. If you print a stencil on thick cardboard, it can be used for several years.
- Individuality. If you use a Santa Claus stencil with deer, Snow Maiden and others New Year's characters, you can show your individuality by decorating your window so that it gives Christmas mood not only to your loved ones, but also to ordinary passers-by.
- Ease of use. Applying a design using stencils is extremely simple.
Here are some stencil options featuring Santa Claus that you can print and cut out.
Option #1
Option No. 2

Option #3

Option No. 4

Option #5

Option #6

Option No. 7

Option No. 8

Option No. 9

Option No. 10

Option No. 11

Option No. 12

Option No. 13

Option No. 14

Features of decorating windows using stencils
If previously the main material for decorating windows for the New Year was toothpaste, then in our time there is such a device as artificial snow in a can, which is much more convenient to work with. There are two methods of using stencils - gluing them to glass or using the negative technique. The negative technique involves attaching a stencil to glass and applying artificial snow around it.
Regardless of the choice of technique for using stencils, you should adhere to these recommendations:
- When applying artificial snow, keep the can at a sufficient distance from the window. This will make the pattern uniform and also prevent the formation of lumps.
- Think in advance about what stencils you will use. In this case, you will get a complete composition, and not a set of figures.
- If used for decoration toothpaste, you can wait until it dries and draw additional stripes on the branches. This will help make the drawing more alive.
- It is better to use either only stencils that stick to the window, or those that work on the negative principle. On one window they do not fit well with each other.
- To glue the stencils to the window, you should soak them in PVA glue and water, and then glue them to the glass. Remove any remaining liquid with a soft cloth.
- If toothpaste is used, it should be white and free of impurities.
Creating a New Year's drawing on a window using a stencil
If you want to decorate a window for the New Year, we recommend using a stencil of Santa Claus on a sleigh on the window, with which you can create unusual protrusions.
To create them you will need thin scissors, a stationery knife, and a wooden board. You need to find a template, download it, print it. Then remove excess areas using a utility knife. All that remains is to fix the template on the glass and draw the ornament using toothpaste, soap or artificial snow.
On this page you will find original stencils Santa Claus on windows for the New Year 2017, which can be printed and used to create a bright and fabulous atmosphere on the eve of the winter holidays.
Perhaps this is the first time many people are hearing this type of needlework, which is based on cutting out patterns or shapes from paper. New Year's vytynanki have been popular for a long time. New technology came to us from abroad. Soon it appeared in our country. Now the original ones are used for window decoration. Making them won't be difficult. It turns out very nice New Year's deer. To make the work easier, you are allowed to throw off ready-made deer stencils for the New Year for cutting.
Vytynanka - deer
The vytynankas, which depict deer, turn out to be unusually beautiful. Perhaps they are considered the main New Year's heroes. To create a product, you can take your own template or print it from the Internet. The picture can be supplemented with a sleigh. You can also make a lot of snowballs around.
This is a very interesting and exciting activity. A template is created from A4 paper. DIY jewelry is especially appreciated. To prevent the paper template from becoming wrinkled, it should be made of cardboard. And only then, put it on white paper and translate it. All that remains is to cut out and decorate the windows and walls with the image.

Vytynanki are an ideal handmade decoration. Toys and paintings made by parents together with their child bring real pleasure. A New Year's paper image will become your baby's favorite decoration of all the toys hanging on the Christmas tree.

Children are interested in everything, so handicrafts are not left out. Children love to help their parents with New Year's crafts. The whole family can gather around one table and create original crafts. Try making a beautiful deer out of paper. It is very important to prepare everything in advance necessary tools. You will also need a large sheet of cardboard on which the silhouette of a deer will be drawn.

Now you have to put the silhouette of the animal on the cardboard. If the image is small, you need to put it in front of you and redraw it only in larger sizes. When the picture is ready, the product must be carefully cut out. After which the craft should be handed over to the child, and he certainly knows where to place them.
With the approach of the beloved New Year holiday, the premises and city streets are transformed. No one remains indifferent, so they contribute to creating the appropriate atmosphere.
The easiest way is to decorate the windows in an apartment or house. Only a little effort will be required on your part. You just need to cut out thematic figures from the template and decorate the window openings with them.
Despite the simplicity of decoration, using stencils you can beautifully decorate any room. I have selected the most popular vytynanki.
If you like any of the options, you can download or immediately print ready-made stencils in A4 format at the end of the article. Just click on the appropriate button, which will open a new window with all the diagrams that are mentioned in today’s material.
In the halls of city apartments, window openings with three sashes are usually installed. Therefore, I suggest downloading several stencils, which will be enough for festive decoration the entire window. Below is one example of what this might look like.

Let me remind you that you can print all the templates by clicking on the button at the end of the article. The following options are offered for decorating the three doors.
Of course, one of the main attributes is snowflakes.


The granddaughter of Santa Claus will come in handy.


The bunny is a responsible assistant in preparing for the New Year.


Well, where are we without the main symbol? next year- pigs.


The forest beauty will be a wonderful decoration.

Download these templates, cut them out and use them as intended. Believe me, a festive atmosphere will immediately appear in the room.
Downloading sock templates for New Year's gifts
People of the older generation are accustomed to Santa Claus leaving gifts under the tree. But today it has become increasingly popular to hang up socks at night, in which gifts appear in the morning. Therefore, windows can be decorated with this attribute. Below are several diagrams that you can download or print immediately.

I offer several options from which you can choose a suitable design.


Socks are the most simple drawing, so if you have free time and desire, you can draw original figures yourself.
Templates for the New Year 2019 of paws and Christmas tree branches
For many years now, the evergreen forest beauty has been the main symbol of New Year's holidays. You can buy a Christmas tree or make it yourself. And stencils of the branches of this tree will help decorate window openings for the holiday.

Templates can be very simple and complex. I picked up a few good schemes for you.


Using these images you can create beautiful compositions on window openings. Try playing with interesting decorating ideas.
New Year's templates of galloping deer on the windows
Santa Claus needs to have time to deliver gifts to all the children. But he would not have time to do this if deer had not delivered him to any point on the planet. Therefore, the room can be decorated with paper drawings of these wonderful animals.

You can download the stencils you like to your computer and then print them. All that remains is to cut them out and stick them on the glass as decorations for the New Year.


If you take a creative approach to decorating a room, you can use all the templates harmoniously. You will need to tinker a little to get the glass beautifully decorated.
Options for openwork patterns for the New Year
Openwork stencils help create a colorful and festive atmosphere in the room. But preparing the images will require some effort. To do this, arm yourself with scissors and a stationery knife.

Choose any patterns and use them to decorate window openings.


If you want to decorate a room in an original way, then try creating your own drawings. It's not as difficult as it might seem. When you have a free minute, just try putting openwork patterns on paper.
New Year's mitten stencils for windows
Russian winters are so cold that you can’t do without mittens. Therefore, they have been associated with the New Year holidays for a long time. Mitten patterns will be a great addition to the composition on glass in window openings.

I offer several interesting options.


These stencils are very easy to cut. For variety, use multiple templates.
Angel compositions for window decoration
Another main character of the New Year holidays are angels. In addition, such drawings will be relevant at Christmas. Therefore, take note of the drawings or immediately print them out and stick them on the glass.

Choose angels and create entire compositions from them on window openings.


If you wish, you can not only cut out the pictures, but also decorate them as you wish. Don't be afraid to experiment, everything is in your hands.
Stencils of numbers and inscriptions Happy New Year
Except beautiful patterns, it’s time to stick Happy New Year 2019 greetings on the window. Therefore, I have prepared for you all the necessary letters and numbers to assemble the appropriate inscription.

Carefully cut out the letters and you can color them in a specific color.


I did not re-post the repeating letters and numbers; you will just have to print them in several copies. Cut out these templates and assemble a New Year's inscription on the window.
Download and print New Year's templates
All templates are available using the button below. Just click on it. A new window will open with a file containing all the stencils in the same order as in the article.

The article contains all the necessary drawings that will help you decorate window openings in the room and create festive mood. Decorating takes a little time.
Dear friends, today I continue the theme of decorating windows for the New Year. I will share with you the stencils that I especially like. I'll tell you how to do it using them New Year's drawings on the windows. Let's talk about whether it is possible to change the dimensions of a template in Word and Excel and what to do if you don’t have a printer at home, but you need to transfer the image to paper.
And, of course, we’ll look at the most painstaking work - cutting. Its result directly affects the beauty of the New Year's window. Well, let's understand all the intricacies of New Year's paper drawings, which are also called vytynankas.
Stencils of New Year's drawings for paper windows
How do you like this winter's tale from plain paper? The result is a wonderful composition. As you can see, it consists of several stencils: a forest clearing, deer, snowflakes, the moon and other little things.

I really like this New Year’s scene on the window, it’s simply mesmerizing.


And another stencil of the New Year's city.

If you make Santa Claus like this on a paper window, although he looks more like Santa Claus, it will be fun.

Here is another stencil of the main wizard of the New Year.

If you want to decorate a window with a drawing of Father Frost and the Snow Maiden, familiar to us from childhood, then take this template.

You can decorate the window with a New Year tree and a sleigh with gifts. Look how wonderful they are.


These patterns of festive balls, icicles and bells will look very elegant and gentle on the window.


I would like to present you with another template - this stencil, in my opinion, should turn out to be very interesting.

What do you think of this template? I think it will be the perfect New Year's drawing.


And, of course, what would it be without a Snowman and holiday candles. I think you will like these templates as much as I do.


New Year's stencils for windows made of paper
How to print
After you have decided on a template for a New Year's drawing, beginners may have a question: “How to print a New Year's stencil and how to make it larger if it turns out to be small.”
There's nothing complicated about it. I will offer you three options, and you give preference to the one that is convenient and easier for you.
Working in Word
In order to start working in Word, save the template you have chosen to your computer. Then open Word. Next, click “Insert” and “Drawing”. A window will appear in which you need to select your template.

As you can see, the drawing is small, it will be barely noticeable on the window. In Word you can stretch it to the size of a sheet. To do this, point the arrow at the picture and press the left mouse button. A frame will appear around it. By stretching it, the picture enlarges.
If the lines of your drawing come out pale, you can strengthen them. Again, move the arrow to the picture, press the left mouse button and when the frame appears, at the very top of the screen you will see the inscription “Format”. Click on it. We look for the word “Correction” in the same panel and click. A drop-down menu will open. In the “Sharpness Adjustment” section, select your template with an increase of 50%.

I've made the page smaller so you can see how I managed to stretch the image across the entire page.
Working in Excel
If you want to get a much larger picture, then you won't be able to do it without Excel. Let's go to this program. Just like in Word, click “Insert” and “Drawing”. In the window that appears, look for your template.

Move the arrow to the picture and click on the left mouse button. A frame will appear, with which you need to stretch the picture. In Excel, this can be done to very large scales, both downwards and to the side, only then the drawing will consist of several parts. The program itself will separate the drawing for printing. I got 8 sheets.

Translating the stencil using paper and pencil
If you don't have a printer at home, use the third method. By the way, it can be applied after working in Word and Excel, when the picture is enlarged.
We take any template that you like.
Point the arrow at the picture and press the right mouse button. A list appears from which you need to select “Open image”.

The image will open in a separate window. It will be small, but you can make it full screen. To do this, hold down the Ctrl button, and without releasing it, press “+” again until the picture fills the entire screen.

After this, take a blank sheet of paper and apply it to the screen. We arm ourselves with a pencil and redraw the picture. With the backlight from the monitor this will be easy to do.

How to cut paper stencils for windows
To cut out a stencil, you will need small scissors, a knife and some kind of wooden or plastic board so that the table does not get damaged while working with a sharp tool. The ideal knife for this is a wallpaper knife. It can be bought at any hardware store.
We cut out the main design with small scissors, but all the internal contours with a small knife. We do everything so that the black lines of the stencil are on the part that will be removed.
How to glue a paper stencil to a window
It seems that this is elementary, however, there are many but... Some glue with ordinary water or soapy water, while for others such stencils disappear. Why is this happening? It all depends on the window itself. If it is dry, then it is enough to moisten the stencil with a liquid soap composition or walk it over the glass and then stick it on. But the design will not always remain on glass that sweats. Therefore, to say: “Guys, stick like this and everything will be fine” is not entirely honest.
Each window needs individual approach. It is necessary to take into account, as I already said, whether it is crying or not. What temperature is in the room - cold or warm - this also has an effect. Here everything is individual, as they say at random - it holds, it doesn’t hold. All I can offer you is to tell you about all the different methods used for gluing paper stencils. I think one of these versions will definitely suit you.
- Soap composition or simply rub with well-soaked laundry soap.
- Transparent tape, but it leaves an imprint on the glass.
- Diluted toothpaste, but not very rare.
- Kefir, as strange as it may seem, people use this drink too, but it will also cause stains on the window and if you have a cat, the decoration will not last long, as you understand.
- Flour paste, which is prepared on the basis of flour and water. The consistency should be like sour cream. But again, there is the issue of stains on the glass during washing in the spring.
- Starch paste is diluted starch.
- Dry glue stick.
- Another gluing option is with regular milk.
- Sugar syrup - boil and then glue.
- Prepare the gelatin liquid as usual, but add a little more water than indicated in the recipe.
- Double-sided tape, it is hardly noticeable on the glass, it can be easily removed, but then you need to carefully wash off the traces.
- Men's shaving cream, dissolve in a small amount of water. The composition should not be liquid.
As you can see, everyone sticks differently, so make a choice, try it and then you will know exactly which method suits you.
My article about New Year's drawings on windows was quite lengthy. I hope you liked the cutting stencils and that the master class was interesting and understandable for you. I wish everyone good luck and, of course, patience, because in order to prepare such templates you need fortitude and inspiration.
I wish everyone happiness, Natalia Murga
We also recommend
 Graphite hair color is a fashionable gray hair color for those in love with the extraordinary!
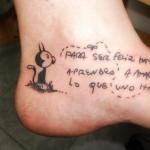 Spanish phrases for tattoos
 Elos rejuvenation technology: what it is and how it can help
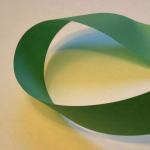 Mobius strip - an amazing discovery
 Congratulations to parents on their son's birthday Congratulations on the birth of their 7 year old son
 Scenarios for themed parties