How to make a three-dimensional deer for the New Year. DIY New Year's deer for a festive atmosphere
Summer has flown by, so I advise you to start thinking about decorating your home for the New Year today. I want to tell you how you can easily make a glowing New Year’s deer using improvised materials.
For work we will need: a coil of wire with a diameter of 1.2 mm (as thick as possible), tape, 2 garlands for 150 light bulbs, scissors, wire cutters (if the wire is thick).

We decide on the height of the deer (mine is 1.5 m) and make a frame.
Let's start with the torso. To do this, take the wire and cut off pieces of 10-15 cm and begin to fasten them together (as shown in the figure), first in the shape of irregular rhombuses, at a distance of 7 cm in width and 10-13 cm in length, to form an elongated cylinder. We make one end of the cylinder round, fixing all the ends of the wire together. This will be the back. We raise the second side, almost perpendicular to the body, making the neck and head from smaller parts of the wire - as we move away towards the top.
 Wire fastening
  Fixing wire ends (back)
 Then we make the frame of the limbs. The hind limbs have this structure. The thigh-wide part is a cylinder of 5 sides, smoothly turning into the lower leg - a cylinder of 4 sides. We make everything from the same parts of wire, but more tightly, at a distance of 7-3 cm, to give stability, since the main weight of the structure will fall on the 4 “legs” of the deer. For a more natural look, you can bend the shape slightly at the shin area. After making 4 “legs” of approximately the same height and size (the front “legs” are flat, i.e. without the femoral part), we attach them to the body in the same way.
The final stage will be deer antlers and a tail (optional). The horns are made from the same material, only we curl pieces of 20-25 cm into arbitrary shapes and connect them together so that they hold the shape you intended.

The frame is ready. Let's start with the lighting. We take a garland of white light bulbs and begin, as it were, to wrap the frame, gluing the garland with tape, make sure that the light bulbs are located along the line of the frame, otherwise the light will fall inside the structure, and the wire will overshadow it. Please note: 1) the plug from the garland, it should be located at the bottom of the structure; 2) make the curls of the garland at a distance of 10 cm no more often, otherwise the structure may not withstand it and will collapse from the weight, or use a larger wire diameter in advance.
This is how you can make a magnificent New Year’s deer with your own hands from small pieces of wire!
And Christmas? Who, in any weather, is in a hurry to deliver heavy sleighs with priceless cargo to every house? Of course, deer!
Without them, the house would not be filled with joy and the holiday would not become truly magical. Every child knows about this, so children have fun making figurines and drawing these funny helpers of Santa Claus and. A deer made with their own hands from paper or any other material becomes for them a symbol of a long-awaited miracle.
A beautiful DIY Christmas reindeer can be made from a toilet paper roll. You don’t even need to paint it - just glue on the paws, cardboard ears, horns, nose - pompom and eyes. Draw the muzzle with a black marker. And horns can be easily made by cutting out child’s handprints from a cardboard sheet.

Easy to turn into a fawn and a disposable cup. We cover it with brown paint, glue on toy eyes and a fluffy pompom nose, and cut two round holes in the bottom.


You can make a deer from modeling mass or clay. We simply roll two balls, one larger, the other smaller, and fasten them with a wooden stick. We make the legs and horns from a dry tree branch, and the nose from a nut.


And in order to draw a deer, you can use homemade sponge stamps. Cut out a triangle, two small rectangular pieces and one large rectangle.

The large rectangle print will become the body of the animal, the small ones will become its paws, and the triangular print will turn into the head.

We place the prints against the backdrop of a winter landscape. We glue toy eyes to the drawn head - they will bring ours to life. A Christmas reindeer depicted in this way turns out very neat and cute.


Deer from branches
We make holes in a large part of a birch branch using a drill. We insert small branches-legs there and fix them with glue.

We also make holes in the future head and insert the neck and horns there. We make holes and connect the head and body. Glue on the eyes and nose. Deer made from twigs - ready!

These cute kids will be able to give to their closest people, and this will make the holiday even more joyful and kind.
Soon New Year, and I need to do something interesting for the school exhibition, so my daughter and I started creating a fairy-tale deer))))
We found a sketch of a sleigh on the Internet and modified it a little to our taste. Prepared necessary tools, namely: scissors, cardboard, glue, plaster bandage, pencil, masking tape, wire, wire cutters or pliers, hot glue gun, corrugated paper, Whatman paper, Christmas decorations, and other New Year's attributes for decorating sleighs, burlap. And good mood, and also a little patience.

You need to print out a drawing of a sleigh on a sheet of paper, cut it out and trace the details of the sleigh on cardboard using a template. Then cut out the parts from cardboard: 2 side parts, and one rectangular strip for the bottom of the sleigh, and then glue them together with glue.

The design turns out to be not very strong, so to make the top of the cardboard rigid, we cover it with a plaster bandage; you don’t need to wet the bandage in water very much, otherwise the cardboard will get wet. We cover the entire structure and leave it to dry. At the same time, we begin to create our main character, Deer.

An image of a deer was printed on a sheet of paper, and we made a deer frame from rigid wire, fastening the wires together for rigidity. We immediately give the deer two front and two hind legs.

We get such a wonderful deer; we make its legs the same length so that it stands firmly on its feet. At the same time, we fasten all the legs together with thinner wire to strengthen the frame.

You need to put foam rubber or paper inside the frame to give volume to the deer’s body, and cover it all with masking tape on top.

We make deer antlers from two-core wire, cut it a little on both sides and glue them to the deer’s head with a hot gun, but you can attach them using wire. We give the antlers the necessary shape.

We have such a strange animal, but the most interesting thing is yet to come.

We begin to dress our deer in the skin, take the twine and wrap the deer’s figure with twine completely. The horns also need to be wrapped with twine so that the twine does not slip. I fixed it with hot glue from a gun, but you can also use instant glue for this. This is a labor-intensive and time-consuming task.

Our sleigh has dried up and we are returning to it again. On top there is a plaster bandage, I coated it with PVA glue, and glued the sleigh toilet paper, which was crumpled, thereby giving the sleigh an antique effect. When the paper was dry, I painted the sleigh with black acrylic paint, and left it to dry again, when the black paint was dry, I applied silver paint with a sponge, and it turned out to be a very interesting silver color with hints of black paint.

This is what our sled looks like when finished. Now I’ll tell you how I did it: I made a bag from burlap using a hot glue gun and put Christmas tree decorations and decorative gifts in it, I also fixed all the items with hot glue. I bought toys and decorative gifts at the Fix Price or Everything for 47 store, this store helped me out many times))) I glued artificial snow on top, for which thanks to Olechka Petrovnochka.

Let's not forget about our deer, and continue to wrap it with twine.

We dressed our deer in twine, glued on the eyes and nose. They decorated the horns with toys and gifts, and also decorated it with artificial snow. They attached a bell and a metal chain that connects the sleigh and the deer. Instead of a chain, you can use a cord.

We also make a clearing for our deer, for this we cut out two large circles from thick cardboard or an old box, and paste a sheet of Whatman paper on top of the circle. We glue these two circles together using glue, but to make the clearing three-dimensional, between these circles we make columns of 5-6 layers of cardboard glued together. We cover the sides of the circle with a strip of whatman paper of the required thickness, I had strips of 4.5 cm.

We decorated the clearing corrugated paper green, and covered with transparent fabric with the image of snowflakes, make snowdrifts in the clearing from cotton wool or syndepon. Glue the deer and sleigh to the clearing using glue, and decorate the entire clearing with artificial snow. We got such a fabulous deer, a couple of days off and he’s ready))))

Meet this fabulous deer))

This is such a big sleigh, pulled by our reindeer. And you can even see the snowdrifts.

There are so many lucky gifts for everyone that even the gifts on the horns couldn’t all fit in the sleigh)))

There are two Christmas trees growing in the clearing and the whole clearing is covered in snow and snowdrifts. And even the deer was covered in snow.

Details of the sleigh, close-up, and the Christmas tree is covered in snow.

View of the clearing from above.
Home decoration on new year holidays is always a favorite pastime for families with children. At such moments, the whole family gets together and transforms their home and, if possible, the garden into a small island of a fairy tale. And most the best way Creating decorations with your own hands will cheer up your loved ones, and even save significant money. Today, LED three-dimensional figures are actively gaining popularity, which are installed on the streets, in courtyards in front of private houses and in store windows for the New Year.
Such jewelry, of course, is quite expensive. It will be doubly pleasant to make LED figures for the New Year with your own hands. Our article today will tell you why such three-dimensional figures are needed and how to make them with your own hands.
The popularity of voluminous jewelry
New Year's figures are three-dimensional images of various animals, geometric shapes and people. This is a frame that is covered with LED products. This design is very easy to implement with your own hands, which allows you to make it yourself, but spend money on buying expensive jewelry in the store.
Volumetric New Year's figures that can depict a deer, a snowman, Santa Claus and other fairy-tale characters from our childhood came to us from the West, where they have long been used as street New Year's decorations.
Garden decoration with figures
Today such figures are found in many places:
- in shop windows;
- at New Year's exhibitions, fairs and sales;
- as decorations for parks, squares, squares;
- they are hung over the carriageway of main roads;
- as a private decoration of the backyard of private houses and cottages.
LED decorations appeared in our country relatively recently, and their popularity continues to grow, as evidenced by their increasing number in cities on the eve of the New Year.
At the same time, various volumetric compositions can be made from such figures. For example, Santa Claus's sleigh, which is pulled by reindeer. Typically, such structures can be found in the main squares of cities near the central Christmas tree.
Why use glowing figures
The growing popularity of LED figures, especially in shopping malls and entertainment centers, is explained by the following positive aspects:
- creating a festive atmosphere;
- attracting customers with bright illumination;

LED volumetric figures in mall
- decorative lighting for shop windows or thematic compositions;
- as an advertisement for products sold in a shopping center that are dedicated to the New Year celebration.
As you can see, such decorative elements will come in handy in the interior of shopping and entertainment centers. After all, they are usually placed in a façade or shop window, which makes them clearly visible from the street.
But even at home, using such figures will be a great way to increase the festive atmosphere in the house and lift the mood of the whole family.
It is worth noting that by making LED three-dimensional figures for the New Year, you can make them with your own hands exactly the way you want. After all, you can:
- Determine your figure size yourself. It is not always possible to select a street deer of the right size in the store;
- choose its type. For example, you can make a figurine of a Christmas tree, deer, snowman or any other fairy-tale character that your child likes, for example;

LED Shape Options
- select backlight light. Most often, New Year's purchased figures are illuminated with white or blue light. You will be free to make them the color you like best.
As a result, you can not only save significant money on purchasing a ready-made decorative decoration, but also make it fully meet your requirements. After all, it often happens that there is an offer, but nothing works for you.
It is also worth noting that New Year's glowing street figures can serve as a kind of antidepressant. Looking at their light, your mood improves and your sorrows go away.
Design features of figures
LED volumetric figures have two main components:
- frame, which is often made of metal elements that hold their shape well and can withstand various mechanical stress;

Structure of decoration
- luminous element (light source). As a rule, such New Year's decorations have an LED light source - duralight. It is a cord, inside of which LED elements are placed at equal distances from each other.
Note! The LED garland is placed throughout the frame, thus ensuring its uniform illumination.

Duralight
This design allows you to get a truly beautiful and completely safe decoration. Long-term and safe operation is ensured by the following:
- use of metal elements resistant to adverse factors environment(wind, glaciation, snowfall, etc.). At the same time, it will be quite difficult to damage such decoration;
- the use of a low-voltage light source minimizes the risk of electric shock if the integrity of the protective shells is violated. All LED products, including duralight, are characterized by high efficiency, long service life, as well as a wide operating temperature range (from – 40 to + 40 degrees). In order for the figures to work properly outdoors, you need to choose products that have a high class of moisture resistance;

Waterproof model
- the design turns out to be quite light, so you can not only place it on the ground or in a display case, but also hang it from the ceiling without the risk of it unexpectedly falling on your head.
It should be noted here that duralights used to create LED New Year’s figures can operate in two main modes:
- fixing Such cords glow continuously;
- chasing. Allows you to create various lighting effects.
You need to know about this nuance in advance if you decide to create similar New Year’s decorations for your garden or home with your own hands.
What you need for work
To make such a luminous one with your own hands New Year's decoration, you will need:
- copper wire, plastic pipes or plywood;
- fastenings for fixing the light source on the created structure. Typically, plastic clamps are used for these purposes;
- acrylic, if you further decorate your creation, giving it a similarity to ice;

Types of duralight
- duralight itself. What type of cord to choose is up to you. TO New Year theme blue or blue is best white version glow.
Now you have everything you need to make your own LED figure.
Step-by-step manufacturing instructions
To make LED light figures yourself, you need:
- select and prepare a sketch. This is where such work always begins. Here you can use both ready-made sketches and use your own imagination to create completely new designs;
Note! When choosing a sketch, you need to evaluate its complexity. If you are new to handmade and working with lighting installations, then it is best to start with the simplest forms.

Variant of deer sketch
- You need to make a pattern based on the selected sketch. To make it, you can use a piece of plywood. You will need to put nails on it in those places where you plan to bend the LED cord. This way you will get a kind of three-dimensional figure. You can also use copper wire, by bending which you can make either a figurine of a deer or a snowman;
Note! Metal structures or acrylic transparent pipes can be used as material for the patterns.

Finished pattern
- Now you need to apply duralight to the prepared pattern. According to the sketch or pattern, we bend the LED cord in those places where it is necessary. To secure the bend, you can use ordinary plastic zip ties;
- duralight must be fixed along the entire length of the base (pattern).
As a result of all the operations performed, you will receive a beautiful glowing figure.

Finished figure
Now all you have to do is connect your homemade sculpture to a power source. But here it is necessary to remember that duralight is an LED product and must be connected to a power source only through a converter - a power supply. This is due to the fact that all LED products are low-voltage (12 or 24 V), so they cannot be powered from a standard 220 V network. Otherwise, the LEDs will simply burn out.
As you can see, making your own LED New Year's figure Almost any person who attended labor lessons at school can create a deer or even Santa Claus.
To make the decoration more decorative, it can be wrapped in acrylic. In this case, the homemade deer will seem to be carved out of ice.
Conclusion
Using inexpensive materials, you can create your own New Year's Eve three-dimensional figure, which will glow at night with festive lights. The key to success here will be your desire to do something with your own hands for the New Year, as well as enough time to give your pattern perfect shape. Using step by step instructions, as well as your imagination, your creation will be unique and many times superior to all similar purchased products.
 Pros and cons of LED lighting for an apartment
Gorgeous decoration New Year's garden or yard (or, if you prefer, a balcony) - a magical deer, shining with countless lights.
Of course, today buying such a deer is as easy as shelling pears, you just have to contact a landscape design company. If they don’t do it themselves, they will definitely tell you that you can buy such a miracle. But!
Glowing garden crafts of this type are very easy to make with your own hands.
Materials for the glowing deer
Frame for topiary. Sold by landscape companies and gardening stores for artistic trimming of plants. Like this:

Oh how magnificent garden figures you can decorate your garden! But - this is in the summer. By the way, if you buy, for example, a topiary frame for a glowing New Year’s deer, then in the summer you can use it for its intended purpose and grow a stunning green figure for the garden. By the way, if you look at the garden crafts, photos of which, you will instantly have an incredible number of ideas. It turns out that a complex shape is not at all necessary to truly impress.
LED Strip Light. LED strip lighting is widely used today in interiors, especially for suspended or suspended ceilings, niches, cabinets, etc.

How to make a glowing deer
And then everything is simple: we mount the tape on the topiary frame - if we can. If we don’t know how, we invite someone who is more or less versed in such matters. Option: we deliver the frame to a company that produces LED lights of various types and ask them to “magic” the deer. For a small fee, they will install this tape for you and tell you how to connect the deer to the network. Don’t be afraid: your deer won’t eat a lot of electricity, even if it shines all holidays long: the LEDs are powered not by 220 W, but by 24 W or even 12 W. In this connection, you will need a simple voltage converter.
By the way, the magical New Year's deer is not the only option for luminous figures. Such garden crafts can also be in the form of other animals: elephants, giraffes, dogs, lions, turtles, etc.
We also recommend
 Graphite hair color is a fashionable gray hair color for those in love with the extraordinary!
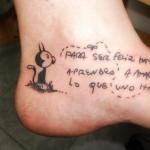 Spanish phrases for tattoos
 Elos rejuvenation technology: what it is and how it can help
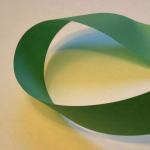 Mobius strip - an amazing discovery
 Congratulations to parents on their son's birthday Congratulations on the birth of their 7 year old son
 Scenarios for themed parties