Master class on making an applique from autumn leaves “Peacock. Autumn craft: peacock made of bright leaves Underwater autumn world
Children's applications from leaves and paintings from leaves with their own hands, photo. Part 2.
Continuation. The first part of the article with children's applications and paintings from leaves on the themes "Autumn", " Autumn nature", "Compositions from autumn leaves", "Plants", etc. see.
Paintings and applications from leaves "Animals"
This part of the article contains photographs of children's paintings and applications made from leaves on the theme “Animals from autumn leaves”: owls, peacocks and other birds, hedgehogs, fish, etc.
Paintings and applications from leaves "Birds: owls, peacocks, cockerel, swan, firebird"
Svetlana, 2 years 3 months, “Favorite little animals” (2) - applique made of leaves with an owl, a bird, a mouse.
Favorite animals

Irina, 7 years old, “Wise Owl” (13).
Wise Owl

Ksenia, 5 years old, and Tanya, 3.9 years old, “Owl” (34).
Owl

Makhova Daria, 8 years old, “Golden Cockerel” (5). The work was done for a school competition under the guidance of my grandmother.
The Golden Cockerel

Melnik Svetlana, 5.5 years old, "Swan on the pond" (11). The work was done for a kindergarten.
Swan on the pond

Mikhail, 9 years old, "Peacock" (14, 55). For the first version of this craft, Misha wanted to create bat, but then changed it into a peacock.
Peacock (two options)


Alexandra, 9 years old, Anastasia, 6 years old and Margarita, 4 years old, teamwork- applique "Firebird" (18).
Firebird

Paintings and applications from leaves "Hedgehogs"
Maria, 10 years old, “Hedgehog” (7).
Hedgehog

Misha, 3 g, Kaluga, "B" autumn forest"(30). Applique with a tree, a hedgehog and a squirrel.
In the autumn forest

Efimova Maria, 3.5 years old, “Hedgehog” (49).
Hedgehog

Ismagilova Liana Arturovna, 7 years old, p. Aktanysh, Aktanysh district, “Hedgehog in the forest” (59) (and also an owl and a turtle).
Hedgehog in the forest

Paintings and applications from leaves "Different animals"
Georgy, 5 years 10 months, “Wolf” (15).
Wolf

Herman, 3 years 11 months, “Butterfly” (17) and “Frog” (32).
Butterfly

Frog

Irina, 7 years old and Nastya, 2 years old “Cheerful Bunny” (23).
Cheerful bunny

Curly Kolya, 3 years 10 months, “Calf Elk in the Forest” (48).
Elk calf in the forest

Anastasia, 2 years 3 months, “Lion” (52).
a lion

Akhmetzyanova Adilya Rilevna, 7 years old, p. Aktanysh Aktanysh district, “The Little Humpbacked Horse” (58).
The Little Humpbacked Horse

Paintings and applications from leaves "Fish, underwater world"
Irina, 7 years old, “Imaginary Fish” (21) and “Playful Fishes” (22)
Imaginary fish

Playful fish

Alexander, 5 years old, " gold fish" (25).
gold fish

Mikhail, 7 years old, “Beautiful Fish” (26).
Beautiful fish

Senkina Anastasia, 4 years 11 months, “Underwater autumn world” (28).
Underwater autumn world

Irina, 6 years old, “Beautiful Fish” (40).
Beautiful fish

Ksenia, 5 years old, and Tanya, 3.9 years old" Undersea world" (53).
Undersea world

Paintings and applications from leaves "Fleet"
Georgy, 5 years 10 months, painting from leaves “Sailboat” (33) and painting on sheets “Submarine” (43).
sailboat

Submarine

I suggest looking at other articles from the “Autumn Crafts” section.
Alexandra Lebedeva
For this we will need crafts:
Dry leaves
Plasticine
dry branch
Hot glue gun.
So, let's begin. To start, we cut out a semicircle from cardboard for the tail. Next we cover it with leaves on both sides, this looks like So:

As a result, our ponytail turned out to be magnificent and bright:

To decorate the tail, we decided to decorate it with rhinestones, which is what the child did while I started working on the body peacock.

For the torso medium will do or big shot which I cut off the top for easy gluing with tail:


For wings peacock take small leaves and glue them on the sides of the cone “body”

We also glue the branches as a neck and legs:

An acorn was glued to the neck - this will be the head. For the eyes we used small round rhinestones. You can use a feather for the tuft, but we didn’t have one, so we decided to stick on small leaves that we found in the yard while we were collecting branches.

Put peacock We decided on a cardboard base, sticking the legs into a piece of plasticine.

Since the child was noticeably tired, we decided not to improvise anymore and covered the stand with artificial materials which they found in their craft chest.
We put peacock on a stand and admire its colors and originality.

Thank you for your attention.
Publications on the topic:
Winter is in full swing and the guys and I continue to make crafts, the themes of which are inspired by Winter Beauty. This time we made a Snowman - an athlete.
Educational field: "Artistic - aesthetic development" Purpose of the work: Learn to sculpt a character after reading the book - Cheburashka.
I present to your attention step by step production crafts made from natural materials. We will need: wool threads green, thin.
The mysterious princess Autumn will take tired nature into her hands, dress her in golden outfits and drench her in long rains. Autumn will calm those who are out of breath.
There are many fairy tales in the world, Children love them with all their hearts. It's autumn time and brought us fairy tales. Beautiful autumn has arrived. The foliage has colored.
Autumn is not only a time for harvest, but also a time for collecting natural materials. From cones, dry twigs, green moss, dry autumn leaves, etc.
In autumn the most best materials for creativity - those that nature itself gave us: acorns, leaves, twigs, needles, moss, grass, dried flowers... Everything that comes to hand while walking in the forest or park will be useful for making DIY crafts with children! So we dialed maple leaves, moss (when we went to buy cranberries), twirled it in our hands... Nothing comes to mind... We looked at it on the Internet, what can be made from maple leaves. We liked it most applique "Peacock". Son 4 and a half years, and he easily made the craft practically himself. I helped at difficult stages: cutting out the peacock figurine, aligning the leaf while gluing, securing the tuft on the head more firmly. And, of course, it suggested the sequence of actions. It is important for a child to see a model in front of him, so we put a smartphone with a picture in front of him.
What can be made from maple leaves: “Peacock” applique
We did not make a detailed step-by-step master class, because the application is simple and understandable at first glance. Here we provide a sample picture, a list of materials and short description. And if you get creative and use natural materials at hand, you can end up with something incredible!
Materials: cardboard, colored paper, scissors, glue, plasticine, maple leaf, moss, grass.
Brief description of how to make the “Peacock” applique: We used a sheet of cardboard as a base. Then we rolled 4 small balls of plasticine and used them to stick a maple leaf to the cardboard (we tried it with PVA glue - it didn’t stick well). From colored paper cut out a peacock figurine and glued it onto a sheet (with glue). Larger yellow balls and smaller red balls were rolled out of plasticine. They decorated the peacock's tail. Again, a nose and an eye were made from plasticine. Moss was used as a tuft. Our blades of grass were also swamp, forest, dense, like wire. We also secured them with plasticine.


One of our favorite riddles (trick riddle):
The tail is a fan, there is a crown on the head,
There is no bird more beautiful than...
(If you guessed who we are talking about, write in the comment 😉)
What other crafts can be made from maple leaves with children 4 - 5 years old?
Lots of options! We will definitely do something else and share the result with you. In the meantime, we suggest you look at what options for crafts made from dry maple leaves are presented in open Internet sources.
Making crafts with your children is fun and interesting! This can turn into a whole series of events: preparing and collecting material, jointly inventing a craft, its production and exhibition.
As a traditional autumn craft, we suggest making a bright, easy-to-make and funny composition from leaves and colored paper - “Cheerful Peacock”.
Difficulty: easy.
Cost: cheap.
Running time: 30 minutes.
You will need:
- a sheet of white or colored cardboard (black is taken as a sample) colored cardboard),
- scissors,
- a simple pencil (pen, felt-tip pen),
- small pieces of yellow and orange colored paper,
- PVA glue,
- any bright autumn leaves that are not large in size.
We make a craft from natural materials “Jolly Peacock”:
Together with the children we go to the park for a walk and collect bright and beautiful leaves from trees and bushes. They should be colorful and small in size.
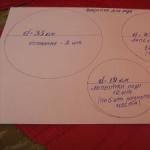
Draw two circles on a sheet of colored paper. If there is no compass, we do this using a stencil or any object with a round bottom, for example, a glass or bottle. We cut out the Peacock's head - a small circle, and the body - a large circle. It is better to make them different in color.
Now let's compose the composition of the Peacock. We attach a body from colored paper and make a fluffy tail from autumn leaves.

We move the leaves a little higher, trying not to disturb the composition. We do not move the circle-body yet. Above it we apply arcs with PVA glue. This is where we will glue the first row of autumn leaves. Now move the yellow circle lower. Below we apply several more rows of glue - for the leaves and body of the Peacock.
In the first row, which will be at the top of the cardboard sheet, we glue larger leaves.

Add PVA glue to the bottom of the leaves and glue the next row of leaves. They should contrast with the leaves of the other row and not merge with the neighboring ones. Then again add PVA glue to the bottom of the leaves and glue the third - last layer of autumn leaves. It is better to choose the smallest and most colorful specimens.

We coat a large yellow circle of colored paper with glue and glue it, moving the upper part to the end of the leaves so that their lower part is hidden under this circle. Now we glue the Peacock's head. Draw the eyes. We make the beak of our funny bird from the sharp part of an autumn leaf, cutting it off, and glue it with PVA glue.

You can play around a little more and make funny paws: sticking up (glue only the top part), crooked, drawn, folded like an accordion from colored paper, made from a piece of lace or rope. Here is freedom for creativity!

Now comes the most important and intriguing part - we call everyone and arrange a real exhibition of autumn crafts!
We also recommend
 Four beautiful DIY hair ties - master classes for fashionistas and their mothers Homemade hair ties
 Sometimes you really need to be supported...
 Several options for knitting a beret for beginners
 Men's dark gray noble vest
 We sew cool pillows: step-by-step master classes
 We sew a simple nightgown for beginners: everyone can do it!