Crafts from CDs for the New Year: we make decorations from old CDs. New Year's ball from old disks Ball from CD disks with your own
Materials:
6 CDs, thin wire 2m, screwdriver, thin drill, wire cutters, glue gun, garland 6-7m 
Download the template 
We mark the disks. 
Drill holes according to the markings. 
Now we connect the disks with a wire (we do this on fabric so that the disk is less scratched). We try to twist it more tightly so that the ball does not move around later. I first do everything from the inside (although if you do it from the outside, then it’s not visible anyway, but I don’t like it that way), the last three knots have to be knitted from the outside, and the tip is carefully bent inward. 
The base is ready. 
Now comes the fun part! We warm up the pistol. We think in advance about how to arrange the colors on the ball. This time I took 6 different colors. On the old one I have three colors and I made them in pairs. Whoever likes it. The gun has warmed up, place scissors and garlands nearby. I glue at 10 points - where the wire is and between. From experience, it’s more convenient for me to smear and glue two points at a time, maybe you’re more dexterous and can get three or four at once)))) 

We make sure that everything matches the intended color combination, otherwise you can get carried away)))) 
When we glue everything around the perimeter, we begin to work on the centers. You can do it like mine, in a contrasting color, or the same color, or you can take small Christmas balls and glue them into the center 
We make a rope (a string, wrap it in a garland, or several strings) and solemnly take it to show our children, husbands, parents. With a wide satisfied smile, we listen to their oohs and aahs, and praise ourselves - beloved))))) 
If you have already tried all the previous options, then it’s time to do unusual craft from old CDs. You probably have a dozen unnecessary disks lying around that you would hate to throw away and no longer need to use. Came them finest hour! Use your imagination, take note of our master classes and go ahead to create new masterpieces!
Let's start with, perhaps, the simplest thing - decorating an old disk with ordinary stained glass paint. In terms of production, this craft is quite simple, but you can’t tell from the outside. You will need stained glass paints and imagination. You can draw both abstract ornaments or mandalas, and real plot paintings. By the way, if you don’t have stained glass paints, a regular marker will do just fine. You can download templates for drawing mandalas from the link below.
A little more complicated will be a New Year's craft made from disks, decorated with appliqués. The simplest option is an applique made of colored paper.

If your children love the animated film “Smeshariki,” then it’s time to use their old CDs to make their favorite characters. All you need is to find out from your child which character he likes best, cut out Smesharik templates from paper and glue them onto the disk. New Year's craft Smeshariki is ready! You can draw templates for the application yourself, or you can download them from us for all the cartoon characters.

#4 Christmas tree decoration from old CDs: DIY Christmas crafts from CDs
From an ordinary disk you can make a rather unusual one Christmas tree toy, which looks like a ball, only this ball is flat. To make such a craft you will need: an old disk, dark acrylic paint(if not, gouache will do), a pencil and a fountain pen or flat-head screwdriver.

If there are a lot of disks, then you may well think about creating a New Year's garland. With the right lighting, the garland will shimmer with all the colors of the rainbow, reminiscent of snow glistening in the sun. By the way, such a garland makes the house warm and sunny!

Not enough disks for New Year's garland, but did you like the idea? See more ideas:
Perfect as could be round form suitable for snowmen. The technique for making snowmen from disks may be different, but you should be satisfied with the result. By the way, such a craft is quite suitable for a competition for school or kindergarten.

Want to make your own disco ball for decoration? Then you will need a blank for the ball (plastic, glass, foam), an old disk, scissors and glue.

Want more ideas Christmas balls? Then look:
You will need: an old CD, pine cones, glue, an aluminum candle stand, beads, glitter or varnish for decoration.

On a regular disc you can recreate New Year's landscapes using the decoupage technique. The disc decoupage process is standard, the result is amazing!

If, in addition to old disks, there are pieces of felt lying around the house, then you can make these cool snowmen. Well, will any of the guests guess that it is based on an ordinary unnecessary disk?

See more ideas New Year's decorations from felt:
A great idea for a New Year's craft from old CDs would be to decorate an ordinary mirror or photo frame. The disk needs to be cut into pieces, and then the surface should be decorated with these pieces. You can keep it for yourself, or you can do it original gift someone close to you.

If you were once a big fan of CDs, and everyone was, now is the time to give them a second life. What good are discs that just sit on a shelf collecting dust? You can now find the song or movie you need on the Internet. But to do it unusual Christmas tree only once a year!

Still thinking about what to give your friend for New Year? Best gift one that is made by hand. Give to a loved one bracelet self made, which she will definitely appreciate! Well, if you have already chosen a gift for your friend, you can keep this decoration for yourself!

If you want to new year party shine the most dazzlingly, then it’s time to think about the New Year’s outfit. You can decorate a regular collar with pieces of an unnecessary disk. Looks very cool!

An owl would be a great idea for a New Year's craft made from old CDs. To create a night guard, you can use pieces of felt, colored paper, several disks and other available materials. Turn on your imagination and start creating.


Help us improve: if you notice an error, select a fragment and click Ctrl+Enter.
Disco ball - original craft, which is perfect for a house party. This mirror ball will add style, desired dynamics and flavor to a disco or party. The disco ball works from the mains. When turned on, the ball rotates and bunnies begin to run around the room from the light source directed at it. Any holiday will become more fun and interesting with the use of a disco ball. The disco ball is made from available material.
How to make a disco ball with your own hands
1. For work you will need the following materials and tools: 30 pieces DVD discs(preferably double-sided) for a ball with a diameter of 30 cm, balloon selected size, PVA glue, Moment glue, newspapers, hardware (screw with a ring, two nuts and two washers), brush for applying PVA glue, scissors, ruler, awl, felt-tip pen.
2. Mirrors for the ball will be cut from DVD discs. To do this, mark the disk into squares with a side of 10 mm. We mark along the ruler with a felt-tip pen, then mark the disk along the marked lines with an awl. Using scissors, cut the disk into squares. The discs will be cut better with scissors and will not crack if you hold the discs in hot water a few seconds (determined empirically).
3. The size of the ball depends on desire and capabilities. Let's take it balloon(necessarily round) and inflate it to a diameter of 30 cm.
4. The base of the ball is made using papier-mâché technology; this has already been done on the website. Cut small pieces of newsprint into arbitrary shapes. We glue pieces of newspaper with our own hands using PVA glue to the ball and to adjacent pieces of paper. Dry the first layer. And so we glue five layers of paper.
5. Do not rush to deflate the balloon after the fifth layer. Dry the applied layers to such a state that the glued sphere will represent a durable object (determined by tapping with a ringing response).
6. Deflate the ball. We screw two nuts onto the screw with the ring; there should be two washers between the nuts. Make the distance between the nuts 2-3 cm.
7. We fix the screw into the hole from the balloon (see photo). If necessary, a small cut is made to insert the lower nut and washer inside.
The screw is secured
8. Relative to the suspension, mark the equator of the ball.
9. Glue the mirror squares in stripes from the equator to the poles using Moment glue or Liquid Nails glue.
10. The motor drive is purchased ready-made or made on the basis of a motor with a gearbox with a large gear ratio (for example, a motor from a microwave oven table, other similar motors with a gearbox). This design uses a motor with a gearbox from an opening drive artificial flower(2 rps). The gear motor is placed in a housing made of an aluminum mug and attached to the ceiling with self-tapping screws.
11. We hang the mirror ball on the engine and direct the light at it. As a light source, it is necessary to use incandescent lamps - regular or halogen; it is also acceptable to use powerful LED light sources.
Make your own disco ball! Blog material kindly provided
Kondratyev Sergey
Belebey
Republic of Bashkortostan
We very rarely make crafts from CDs, this is due to the fact that they are quite difficult and not a universal material. It is difficult to come up with a master class with discs, and then successfully implement it, and even one that everyone will like. But I still decided to create a small craft that will be interesting to many and will be needed for the holidays to decorate their homes. I'll tell you how to make a ball out of CDs with your own hands. The master class is not easy, so it is not suitable for children; mostly men do this, but sometimes women too. A similar ball of disks can be hung on or next to it on a cornice; in a word, such a craft will certainly decorate your holiday and lift your spirits.
Material for creating a ball from disks:
- CDs.
— A drill with a very thin drill bit.
- Wire cutters.
- Glue gun.
- Wire.
— Rain (New Year’s decoration).
— Marker.
— Paper template.
We have prepared everything we need.


We place the paper blank on the disk and mark each vertex with a marker on the disk.

Drill holes at the marks. Do everything evenly and clearly so that all the discs come together.

We connect the disks to each other using wire, just like on a homemade product. We wrap it tightly so that our ball does not fall apart later. First we make two parts, each with one disk in the center and five more surrounding it.

We combine the two halves of the ball and also fasten them with wire.

When the main work with the disks is done, let's start decorating the ball. I chose the appropriate rain color for each disc. Use a hot glue gun to glue the rain onto the disks.

It looks very nice. First, we glue rain onto the edges of the discs.

Distribute the colors so that they match each other.

At the end, we decorate the middle of each disk, take a small piece of rain and glue it into the central hole. By color scheme use your own imagination, either the same color or a different one for variety.

So original, brilliant and beautiful ball We got it, and we made it with our own hands.

And if you want to keep your kids busy with similar crafts, then teach them how to create them. And also try yourself with new materials, for example, create or. Good luck sharing!
I always wondered, is it possible to make a disco ball with your own hands? I tried it and it turned out that it is possible. In order to make a disco ball with your own hands, we will need a balloon, newspaper, water, paste, CDs and glue.
1. We make the base for the disco ball using the technique. Place pieces of newspaper soaked in water in one layer onto the balloon, inflated to the required size. It is better to tear the newspaper, this way the edges will be held together better. Try not to tear the newspaper into large pieces, so the surface will be smoother.
2. On the first layer of newspaper with water, apply a layer of newspaper pieces soaked in paste. Then several more layers like this for strength. 4-5 layers will be enough. Leave the ball to dry in a warm place. When it dries, it will be quite tough and durable. Use a needle to burst the ball inside the papier-mâché, and thread a thread or fishing line to hang it later.

3. Cut the disks into medium-sized squares. Scissors for cutting should be sharp, they can even be pre-sharpened. We begin to glue the squares onto the dry ball in a circle starting from the largest diameter. It is permissible to glue the remaining fragments onto the upper part. We use any glue suitable for such work. I use the glue that is used to glue ceiling tiles.

4. The ball is ready. All that remains is to hang it.

Making a disco ball with your own hands is quite labor-intensive work. Firstly, cutting disco into squares is quite difficult. Secondly, sticking small particles onto the ball requires perseverance and accuracy. But the result is a brilliant iridescent ball that will be a harmonious addition to the New Year's interior.
We also recommend
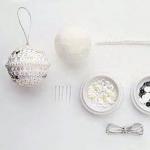 Decorating a foam ball with sequins
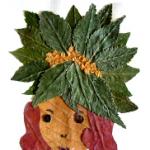 Crafts from dry leaves: applications “Fish” Crafts from leaves fish
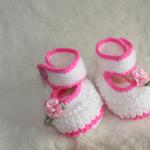 How to properly knit booties for newborns: diagrams and descriptions
 Good Baba Yaga from a plastic bottle and tights (MK) Make Baba Yaga with your own hands from
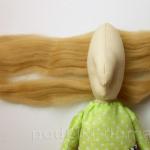
 How to sew a gnome from an old sweater
 Congratulations on Labor Day, May 1st, funny