What is the name of the type of needlework made from scraps? ✂️ Beautiful, easy and affordable: patchwork sewing in patchwork style with templates and diagrams
Pychwork is a popular type of needlework that combines elements of embroidery, appliqué, and knitting, the roots of which go back thousands of years. Previously, it was common among the lower strata of the population as a way to save fabric by using leftovers from cutting items. In this it is akin to rap, which previously existed in the status of African folk songs. Today, even some wealthy men take up handicrafts as a hobby.

History of patchwork
Creating new things from old waste fabric was popular as far back as 1000 BC. The first handicraft in this style that has come down to us is an Egyptian rug, sewn from different parts of animal skins.
Fantastic stories are associated with patchwork bedspreads, which would seem like fables to the modern average person. Patchwork is an amazing way to bring the past of three thousand years ago to the present day.
In the West
England is considered the birthplace of the modern patchwork trend. Elegant plaids made from pieces of multi-colored fabrics have decorated English homes since the beginning of the eighteenth century.
The main reason for using scraps of fabric in needlework, rather than whole material, was the state ban on the import of chintz from colonial India in order to preserve its own manufactories.
The need for invention is cunning, the people came out of the situation and in crisis conditions used pieces of fabric that had previously been thrown away or burned.
In the East
The largest Buddhist temple complex, Qianfodong, with an area of more than forty thousand square meters, hides many secrets and mysteries. An archaeologist from Great Britain named Stein discovered an unusual carpet made from multi-colored and uneven pieces at the beginning of the twentieth century.
The monks told the story of the relic. Pilgrims who came to worship their deities left sacrifices and their own clothes in the caves. The ministers decided to perpetuate a reminder of how many people revered traditional culture in the old days, and with their own hands they created a carpet from the clothes of pilgrims who came to worship the Tibetan shrine.
In Russia
Domostroy describes in detail the methods for storing leftover fabric and their further use. Before the division of the Eastern Christian Church into old and new, there was a tradition of using patchwork armchairs depicting angelic ranks during services.
The most colorful were the rugs with the faces of higher powers: seraphim, cherubim, dominions. Handicrafts depicting principles, archangels, and angels were sewn laconic and simplified.
Patchwork came to the masses in Russia only later. Since the mid-nineteenth century, chintz began to be used for sewing clothes instead of good-quality homespun fabric. There were a lot of scraps left, and housewives enjoyed sewing household items and interior decorations.
Depending on the territorial distribution, the peculiarities of the creation technique, or due to the differences in the materials from which things are made, a direction such as patchwork is divided into several types. Here are the main ones.
Classic (traditional)
This use of pieces of fabric is characterized by stitching together parts of similar shapes and sizes. The product should not be variegated; repeating only two colors is allowed.
Examples of patterns for English conservative patchwork:
- arrangement of squares in a checkerboard pattern;
- symmetrical triangles.
Crazy

The themes depicted on the product, created using this technique, are quite diverse:
- scenery;
- vegetation;
- ornament;
- disorderly fastening of material.
The author can choose the shape and number of colors and patterns on the fabric independently, focusing on his own aesthetic perception.
Knitted
You can make a blanket not only from fabric scraps, but also by using thread parts. With the help of knitting, parts are created from yarn of any color and structure, crocheted or knitted. Square, polygonal, round or diamond-shaped pieces are stitched and tied together in a certain sequence.
Knitting is often used to create household items - a blanket, a pillow, wall decoration, a cape. The hook is used to decorate Nice dress, boots or napkins for the nightstand.
To obtain a product of a certain size, it is necessary to calculate the width and number of parts in advance.
Oriental
The shapes of the flaps vary quite a bit when using this style of sewing:
- squares;
- triangles;
- arched pieces;
- wavy details.
You can decorate or connect patches when creating this model using the following elements:
- ribbons;
- beads;
- rhinestones;
- lightning;
- brooches
Japanese
This style leads in terms of uniqueness and originality. National characteristics put their imprints on this type of patchwork. Fabric colors are not limited to a certain quantity, but must correspond to the selected shade range. The depicted landscapes and plants are created using pieces of different shapes.
Due to cultural characteristics and a catastrophic lack of space, Japanese residents eat and sleep in the same room. In order not to take up space with sofas, they lay mattresses on the floor.
For long-term use, futons were decorated with themed patches when holes formed. Thus, the ordinary turned over time into a work of art.
Differences between Japanese patchwork:
- a special stitch is used to combine several fabrics at once;
- this technique is interspersed with standard techniques;
- exclusively natural motifs are depicted on household items;
- the needle is directed away from itself, forward. This technique is called sashiko.
Quilting
This is a patchwork with a 3D function, or American patchwork. The features of quilting include the presence of a group of different stitches and the multi-layered, three-dimensional nature of the created model.
Historically, the desire for a large number of levels is due to the fact that when settlers explored the new continent in its northern part, there was a continuous need for the use of woolen quilts.
Experienced housewives patched blankets with their own old clothes. Later this became a tradition. Craftswomen living in the neighborhood or men who came home from work were invited to create quilts on long winter evenings.
Became extremely popular patchwork style creating blankets and other household items since the early twentieth century. The world does not stand still, and patchwork has changed over the years and developed into certain trends.
Several sewing techniques from pieces differ according to the shape of the selected parts.

A simple and classic way to create a product from scraps is to use a square template when cutting out the parts. This patchwork is great for beginners, as it is difficult to make mistakes when calculating. The parts can be made quite large.
Triangles
The magic triangle is an element that is reflected in the cultures of different peoples. This circumstance is associated with the frequent use of geometric figures in many types of art. Handicraft, as the creation of a fundamentally new element, refers to creative activity.
In patchwork, rectangular, isosceles, and equilateral types of triangles are most often used.
Lyapochika
One of the features of this style is the splendor of the created structure. An imperial carpet with a five-centimeter pile is not much superior to a fabric woven using the Lyapochika technique.
The pretentious name hides the chic effect of working in this style. When viewing the corresponding photos, it becomes clear how the conventional technique differs from this one.
The difficulty lies in sequentially sewing short rectangular pieces together with twisting the ends to achieve the effect of additional volume and interlacing the bases in order to fix the part.
Honeycomb
When using this technique, the practiced geometric figure is a six-sided polygon in which all sides are equal. After the individual parts have been cut out and cut out according to the template, each of them needs to be stitched to the main one, like petals, and then sewn together and so on until the desired size is achieved.
The main thing is to remember that you need to leave a seam allowance and take this into account in your calculations.
Watercolor
Next, you should mix the fabrics in such a way that you can visually detect the overall whole picture, but in fact you would not have to compare the details according to the drawing. This way you can sew a wreath or a heart on canvas from large flowers.
Chess
It is created using pairs of fabrics of different colors, contrasting with each other. The simplest approach to using this technique is to first stitch together two identical wide strips.
After receiving a canvas consisting of a pair of colors, it is necessary to cut it into longitudinal parts and turn over every second part. The chess structure is ready!
You can get into trouble if you incorrectly calculate the width of the squares or do not leave seam allowance. You must purchase a transparent ruler and a calculator!
New patterns and how to create them yourself
With detailed study and testing of some techniques on one’s own experience, the need arises to move forward. You can come up with the shape of the part yourself.
To do this you need:
- draw a picture on paper divided into small cells and divide it into triangles, squares, rhombuses, rectangles, trapezoids;
- cut strictly along the lines;
- Using the created templates, cut out the fabric parts with seam allowances and lay them out with the wrong side up;
- sew the patches.
As a result of such a creative approach, you can get not only an interesting unique interior detail, but also create a real work of art.

You will need:
- several types of fabric;
- lining material;
- good scissors;
- strong threads;
- templates;
- excellent mood and desire to create a masterpiece.
The main stages of work are as follows.
- It is better to cut the blanks from fairly dense but pliable cardboard, after adding a few millimeters for the allowance.
- Trace the patterns onto the fabric and cut out with sharp scissors.
- Place the finished patterns on a wide tabletop.
- In accordance with the diagram, sew the parts on a machine, ironing them step by step.
- Place the resulting product on the lining material, possibly using an adhesive base.
Patchwork in the interior
If patchwork had no practical application, then this type of needlework would have been doomed to failure several centuries ago. Fortunately for modern craftswomen, using the patchwork technique you can repair and decorate almost all interior items in the house.
Furniture
You can decorate using patchwork in several ways.
- Change the upholstery. The matter is costly and very complicated. Requiring professional help.
- Sew a cover. It’s also not easy, but it’s possible to accomplish what you’ve planned without involving outsiders.
- Decorate pillows in pillowcases. Even a beginner can solve such a problem.
Wall decor
Compositions depicting nature, flowers or in the impressionist style, along with familiar paintings made on canvas with standard paints, will dispel melancholy and warm the soul.
Fabric on the walls in the form of a framed canvas looks great in the living room, bedroom or children's room.
Floor decor
In Russia, due to the climate and centuries-old traditions, it is customary to lay carpets. Such customs exist in other states, but are not mandatory. In our country, houses without carpets are extremely rare.
An interesting rug made using the lyapochika technique will brighten up the most conservative interior and, without a doubt, warm your feet.
Other ideas
Cup coasters, decorative mittens – pot holders and other useful little things created using patchwork are suitable for the kitchen area.
In the nursery, in addition to the canvas on the wall, soft pillows with animal images or matching blankets with cheerful colors, draped over an armchair, bed or sofa, will organically fit into the interior.
Conclusion
Patchwork is a symbol of the continuity of generations, through which the fruits of manual and creative labor are created. Many monks engage in this work with the goal of knowing themselves and making the world a better place.
The main thing that needs to be observed when doing work from scraps is to follow the pattern and remember the result that will be obtained in the course of painstaking work.
Mother of two children. I have been running a house for more than 7 years - this is my main job. I like to experiment, I try all the time various means, ways, techniques that can make our lives easier, more modern, richer. I love my family.
Patchwork appeared in Rus' much later than other types of needlework. The energy of things is an important aspect of maintaining a home. Every experienced housewife knows that everyday life can be not only a stumbling block on which a love boat breaks. More precisely, a smart housewife knows how to make sure that everyday life never becomes this stone, but on the contrary, it is faithful assistant in maintaining the warmth of the home.
Look at the photos of really cozy houses - how many objects there are, things made with your own hands. There are so many things that can be called family heirlooms, where handicraft patterns have been passed down from one generation to the next. And not only the diagrams - the type of needlework itself underwent, as they would say now, rebranding, and found fans among descendants. And patchwork, or patchwork, a technique that became so.

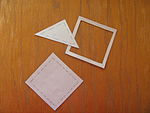
The appearance of each original masterpiece from pieces of fabric is preceded by hard work and painstaking work with diagrams
History of patchwork
Patchwork is a needlework technique that is based on joining pieces of fabric together. From strips of fabric, squares, circles you can create a new product, interesting, original, original.
It is generally accepted that the first mention of patchwork occurred in the 11th century. This particular name had not yet been pronounced; it cannot be said that there were any specific patterns, but the art of joining fabrics was mentioned exactly then.
Art scholars are inclined to believe that patchwork developed in parallel in several countries. And although, most likely, this was exactly the case, the occurrence of patchwork has its own “culprit”. England is considered the progenitor of this technique. Although quite soon patchwork began to develop in other European countries, also in Australia and Russia.

Curtains, potholders and even original tablecloths can decorate the kitchen
By the way, before moving on to the history of patchwork in Russia, it is worth mentioning what the translation of this word means.
Patchwork – translation from English:
- Mash;
- Motley;
- Yeralash;
- Variegated mixture;
- Patchwork;
- Mosaic;
- Sewn from scraps.
Related article: Stairs to the second floor: 30 photos of design options
Automatic translation may also produce concepts such as “blanket of bright rags” or “patchwork.” It is clear that such a translation is associated with today’s perception of the concept.

A crazy quilt is only seemingly simple and improvised: crazy patchwork patterns are even more difficult to master
History of patchwork in Russia
Significant, meaningful references to patchwork in Russia occur only in the 19th century. And they are connected with the fact that it was at that time that expensive overseas chintz appeared on sale. Today this is cheap fabric for us, but then it was a discovery. But such an innovation led, as often happens, to progress - the production of calico by machine developed rapidly, and inexpensive cotton fabric began to spread everywhere.
If in ancient times, one might say cynically, this was handicraft out of poverty, then today things in the patchwork style are an indicator good taste and the opportunity to decorate your home with truly valuable hand-made textiles.
That is industrial production in the textile sector and contributed to the development of this needlework technique. Patchwork patterns began to decorate chintz sundresses and shirts, patterns became more and more sophisticated, and thrifty housewives began to use even the smallest pieces of chintz. They were used to make blankets, bedspreads, pillows, curtains and rugs.
Patchwork and patchwork in Russia (video)
Types of patchwork
Patchwork style is a capacious concept today. Patchwork lessons are given everywhere, Internet courses are also becoming popular, they are repeated and copied best schemes. In modern Russia, patchwork sewing is very popular.
It is not surprising that technology began to be divided into different types.
Types of patchwork:
- Traditional patchwork. Colorful bedspreads made from bright shreds are the main example of this type of sewing.
- Knitted patchwork. The scraps are connected to each other with a contrasting thread using a crochet hook.
- Crazy patchwork. Sewing from irregular shapes of patches, curved stripes and various applications. This work is preceded by quite complex diagrams on paper, but once you look at the photo, the result is impressive.
- Japanese patchwork. This technology uses stitching, and the fabrics used are mainly silk and its like. The shreds are cut geometrically correct.
- Quilting. The translation of this word means “quilted fabric.” The stitching helps create machine-stitched patterns, and a layer of synthetic padding is laid between the two pieces of fabric. Such a bedspread, of course, looks more impressive than just a patchwork fabric. And the reason for this is not only the high-quality stitch, but also the interfacing.
Related article: Organization of office premises

Quilting products are much more difficult to work with, but they also look more respectable
Well, there are even more patchwork techniques than types. From “quick squares” to “log cabin”. The variety of patterns that can be laid out from scraps is enormous, so the number of techniques in the patchwork style is increasing, the diagrams and lessons on working in this technique are growing, and the number of photos in the gallery of works is only increasing.
Knitted patchwork on knitting needles (video master class)
Patchwork style: basic concepts
If everything is more or less clear about the history of its origin, then where to start learning patchwork? And is it better to read them on paper, that is, in special books, or turn to Internet sources?
The method of acquiring knowledge is not so important. Of course, online lessons have a slight advantage, because such a circumstance as the rapid change of up-to-date information cannot be ignored.
Basic concepts of patchwork:
- Stitch. Stitching can be either manual or machine. Machine quilting can be done quickly, but... hand stitch definitely wins in sophistication. Both stitches obey the rule - the stitch goes only from the middle to the edges. The more often you stitch, the denser the fabric will be as a result. Stitching is often used to emphasize the contour of a particular part. To learn how to quilt in an interesting and elegant way, you should study quilting lessons.
- Borough style. Translated from Japanese, “boro” means rags, flaw. Has it become clear yet? Yes it Japanese style needlework, which is in tune with the usual Slavic patchwork sewing. Boro style is far from the most elegant way of patching clothes. Of course, the origins of the borough are still in the same poverty. And many people don’t like this style precisely because there is some kind of negligence in it. But that same casualness endeared him to Boro fans, and Boro became a fan all over the world. In the photo you can see how many different things can be made using the boro technique. The schemes in Boro are not complicated, and lessons on mastering the technique can be found without much difficulty.
- Sewing from stripes. In order to sew from strips, you need to have on hand not only good exact diagrams and photos of various samples, but also enough patience. Sometimes you have to make templates on paper, cut out a lot of stripes different lengths, constantly look at original photo(if there clear example). Today, making lunch mats from strips is becoming popular. Lunch mats are soft stands for tea or a tureen, which are made from strips of various lengths and widths; edging of the strips is required. You can cut the fabric in advance so that you have ready-made blocks for sewing from strips.
- Patchwork on paper. Sewing on paper is a patchwork with greater precision in stitching small parts. To sew blocks on paper, the paper needs to be prepared. Or ready-made diagrams print it from the Internet, or draw it yourself. Sewing on paper is not the most economical when it comes to fabric consumption.
Related article: How to apply liquid wallpaper on drywall: learning how to prepare and apply

Patchwork from strips is not the simplest pattern
Detailed lessons, of course, will help you understand all the nuances and subtleties of patchwork craftsmanship.
Modern interior and patchwork - new in patchwork
Patchwork in the interior is extremely fashionable today. The presence of bright stripes here and there for many interiors is considered the best way show your colorfulness.
Features of using patchwork in the interior:
- Mainly combined with country or Russian style rustic style, which has more and more fans;
- The classic interior will be complemented by furniture incorporating a patchwork style, for example, a brown sofa with white and orange fragments;
- A lot of things using the patchwork technique in one room is bad taste, just accents and nothing more;
- In the kitchen, patchwork is appropriate in the form of covers for stools, sofa cushions, dish towels, decorative napkins and, of course, curtains;
- The tiles on the kitchen backsplash can be laid out in a patchwork style;
- In the bedroom, a patchwork carpet or bedspread can become the semantic center;
- In the living room, patchwork can affect the color of the furniture and the compositional decor of the walls.
There will definitely be a place for patchwork in a child’s room - pillows, rugs, blankets, bedspreads, capes.
Patchwork and quilting in the interior (video)
Patchwork style decor is not only fashionable, but also durable. Things sewn so skillfully and carefully really last quite a long time. And such things are remembered for a lifetime, passed on to future generations, and warm with their warmth for decades. And today, baby blankets made from scraps for a newborn have become one of the most desired gifts.
Examples of patchwork sewing patterns (photos)

Starting out is never easy. You also need to learn patchwork sewing. Not everything works out right away: your hands don’t obey, your eye fails. This is what the experience of the masters is for. Having mastered video lessons, photo materials and a master class with their tips and secrets, you can safely bring to life any idea - from making a simple pot holder to a new sofa upholstery.
Patchwork is very popular today - a handicraft in which colored scraps of fabric are assembled into a whole product with a planned pattern based on the principle of a mosaic. The result of this exciting process there may be a recognizable image of some objects, geometric patterns or fancy patterns. Ideas for patchwork can be taken from photo and video lessons, as well as master classes.
Initially, the patches were sewn together to save material, and the patchwork had very specific tasks. Now the patchwork technique is the desire to create beauty while enjoying this magical action. Quilted bedspreads, decorative panels, blankets and pillows, oven mitts, updated furniture, clothes are pleasing to the eye.

Basicspatchworksewing:
- AccuracyAndaccuracy. The patchwork technique is not a complicated technology, but realizing the idea, as in MK, is not always easy. The guarantee of success in patchwork is accuracy and precision. Patterns for potholders or blankets must be precise and very neatly sewn. The fabric requires pre-treatment (decatation). It needs to be soaked or washed, dried and ironed, sorted by color.
- JobWithiron. The iron is an important tool in patchwork. During work, the seams must be ironed; when decatching fabrics, they must also be ironed. Ready potholders or bags are steamed from the front side and always in one direction. The seams also need to be pressed in one direction. Then they will not crumble and will be durable. Seam allowances are smoothed from the inside out so that no marks remain on the front side. In complex blocks where seams meet in different directions, the allowances of each next row are ironed in a different direction. On the front side, iron at the intersection points of the seams. If the strips are too long, they should be placed on the ironing board not horizontally, but vertically - they will not wrinkle or stretch. Fabric that is too thick is moistened and steamed. The fabric is ironed lengthwise at a temperature appropriate to the type of fabric.
- Secretssewing. Carelessly sewn fragments of a future potholder or napkin, uneven seams, even a slight discrepancy in sizes will destroy patchwork sewing for beginners. Therefore, the flaps must be sewn in very precisely. Beginning craftswomen will be helped by templates in the form of a frame, which are made on graph paper with a seam line printed on the fabric. Before starting a huge project, it is recommended to sew a sample block. It will help you check the cutting accuracy and adjust the operation of the sewing machine. It is easy to see all the errors on the sample - this will save both time and effort.

In general, the patchwork technique should be taken seriously, considering everything color combinations even for potholders - after all, they, like sloppy work, can ruin the thing and discourage you from mastering such an exciting handicraft.
Master class: block of squares (video)
Where to start patchwork sewing
To begin with, they collect all the scraps of fabric, sort them by texture and color, and begin to create a pattern. You can do the opposite: come up with a pattern or find it on MK, photos and videos, and then cut blanks from purchased fabrics.

The second step is to create a sketch of an oven mitt, pillow or napkin. It is better for beginning needlewomen to use ready-made patterns from magazines or MKs from the Internet.
The process of joining shreds into a whole canvas:
- Sewing the parts of a potholder or blanket;
- Connecting blocks into one whole;
- Sewing the lining
In addition to sewing, there is also knitted patchwork, where the flaps are connected to each other using crochet and contrasting thread.
In addition to threads, fabric and machines, the patchwork technique uses:
- Roller cutter or scissors;
- Pins, needles;
- Sewing machine;
- Pencil or chalk;
- Cardboard or soft plastic;
- Crochet hook.
In handicraft stores you can find patchwork kits - with pattern diagrams, MK.


Patchwork: patterns, templates
You can create diagrams and templates yourself or take ready-made patterns from the Internet, books or magazines. Templates are cut along the contour of the part, taking into account seam allowances. The material for production can be cardboard, thick paper, plastic. For accuracy, you can glue graph paper onto the cardboard, and then cut out the shape of the intended size. When making curved blanks, longitudinal cuts-notches must be made on the outer contour of the template - it is convenient to mark seams along them when connecting the flaps.
Photo and video tutorials on patchwork sewing offer diagrams, templates and MK
Cutting rules
The most convenient templates are frames. The inner part must correspond to the finished size of the fragment, the outer part takes into account seam allowances. The width of such a frame is the size of the allowances. When making a pattern, the frame must be circled twice and cut only along the outer contour. The inner outline will show the seam line. The pattern is transferred to the fabric with chalk or soap; any pen leaves marks on the front side. Cutting is done only along the grain thread, so that subsequently the sewn parts do not stretch or warp. Cut out the flaps regular scissors or a special cutter. A roller cutter makes the process much easier by cutting long strips that are easy to cut into smaller pieces. You can't do without a cutter when the templates are curved.
Pattern selection
INtechnologypatchworkexists 3 typeproducts:
- Canvas, stitchedfromscraps, where the parts assemble the seam into a seam. The shape of the patches can be regular, geometric (traditional sewing) or arbitrary (crazy patchwork). Watch video lessons.
- Quiltedproducts(quilting) are sewn from a whole cloth, the pattern on which is created using stitches.
- Application– pieces of other fabrics are beautifully placed on the base, sewn and quilted.

Patchwork technique for beginners
The pattern can be created based on one repeating figure, for which paper templates are cut out for each part and a flap is basted to it. The seam allowance is folded over the edge and basted again. This is a traditional English technique.
The block technique is more modern: pieces of triangular or square-shaped fabric are sewn into blocks, creating a geometric pattern. A simple block can be made from a small number of large parts. This kind of work takes less effort and time. It is often used by video lessons and MK.
The strip patchwork technique is also known. It differs from the previous version in that the fragments are collected into strips, then they are combined into a canvas. The block technique is convenient because the flaps are sewn together directly on a machine.
In crazy patchwork, the flaps are sewn on according to the applique type: individual flaps of arbitrary shape are beautifully placed on the canvas and sewn. Potholders, blankets, covers come out in two layers.
Patchwork: video lessons for beginners
Patchwork: master class for beginners
Objects create special comfort in the interior self made, in particular, beautiful and comfortable pillows. Let's try to sew a decorative pillowcase with a voluminous "Rose" application using MK. You can take any scraps for work, the main thing is that they match well in color. Don't forget to prepare the fabric - wash it, iron it.
Master class “Pillow with applique”
Step by stepinstructions.
- It’s convenient to start by preparing squares. Their number and size determine the size of the pillow.
- Then you need to cut a circle out of the fabric. In the middle, put a piece of fabric and some filler for volume (cotton wool, padding polyester). Secure in a circle using a machine stitch. The middle is ready.
- Fold the squares from the flaps diagonally, as in the photo, sew around the middle piece in a circle - 3-5 pieces.
- For the next round you need to prepare large squares of the corresponding color. Continue until the end of the intended flower size.
- The sewn petals must be trimmed in a circle.
- The finished roses are beautifully distributed on a pillowcase and secured to the product with a zig-zag seam and a wide, dense stitch. The rosette has the appearance of a three-dimensional applique.
- If desired, the bouquet can be supplemented with leaves cut from scraps suitable color. Look at the photo for a step-by-step master class. The blanket in MK is made using the “crazy patchwork” technique (you can watch video tutorials), and it consists of 30x30 cm squares. For a single blanket you need 24 pieces, for a double blanket – 36. Let’s say the pattern will be made up of 4 types of fabric.

Master class “Patchwork for beginners – blanket”
Tools and materials:
- 1 m of fabric of each color (width 220 cm) - 6 or 9 squares 45x45 cm;
- For the lining - 170 cm or 220 cm (the margin at the bottom goes away after the blanket is quilted);
- Sintepon of similar sizes;

Step-by-step instructions for MK:
- Cut into squares and stack, alternating colors.
- Cut this layer cake diagonally or randomly. It is convenient to cut with a roller knife.
- Take the part from above and move it down under a stack of similar elements. In a cut stack there will be 1 piece of the 1st color on top and 1 piece of the 2nd color.
- Machine sew all the squares along the cut line.
- On an ironing board, carefully press the seams to one side or press them flat.
- Fold the blanks into a neat stack in the same order - squares of the 1st and 2nd tones on top.
- Using a ruler and a knife, cut the entire stack again along any line (you can cross the first seam).
- Move one of the top fragments down under the stack. Sew and press, remembering to fold in order - now it’s better to match the seams.
- The operation is repeated until the last detail. The optimal number of seams is 6-10 horizontally and vertically.
- After ironing the seams, you need to trim the squares to get a figure with a side of 32 cm.
- You can assemble the blanket in different ways: first assemble the front part, then quilt it with padding polyester and lining. It's difficult on a typewriter. Or quilt each square separately, cutting padding and lining.
- Gather the quilted squares together, trim and cover the seams with narrow tape or strips of fabric. It is convenient to assemble according to the scheme: ribbons of 4-6 squares, then sew the strips.
- Along the edge of the blanket, you also need to trim it with an edging made of plain fabric or pieces of rags, as in the MK photo.
Congratulations on your new look!
Quilt technique (video)
Having learned basic concepts about this type of needlework such as patchwork and mastered the simplest skills of putting fabric “puzzles” together into a single whole, you can create creative household items or interior decor from different scraps.
Patchwork: beautiful and easy for beginners (photo)


Patchwork – English name patchwork, which was popular back in the old days with our grandmothers. Previously, the pieces were simply sewn together in a chaotic order, but gradually they began to invent beautiful diagrams and, with the help of which novice needlewomen can easily understand basic sewing techniques. Today, in our review, the craftswomen from the site’s editorial team will share their experience, tell you how to select materials, and photo tutorials will help bring any idea to life: from decoration to clothing.
Using the sewing technique, you can create real beauty from scraps and scraps of different fabrics: quilts, potholders, the main thing is to choose the right fabric and draw a diagram of the future product.
Fabric selection
In patchwork, the material plays the main role; it is important to choose beautiful combinations that will. The huge variety of shades and textures makes choosing quite difficult. The following must be taken into account:
- For the front side, you should purchase fabric intended for patchwork. It has undergone heat treatment and will not shrink or fade in the finished product;
- For the reverse side, simple and inexpensive fabrics, such as poplin or calico, are suitable.
Sewing from patchwork should begin, first of all, with your supplies: both new fabrics and used ones, but in good condition, are suitable for patchwork. Almost any material is suitable for needlework:
- cotton;
- gabardine;
- tweed.
If the product will be subject to loads, you can additionally place it on lining fabric and padding polyester.
patchwork fabric


Choosing a template, the basics of drawing up patchwork patterns and patterns
The second important step in patchwork creativity is choosing a pattern; for beginning craftswomen, it’s best to first look for ready-made templates on the Internet with detailed descriptions. To cut blanks of the same shape, you can use special layouts. We must not forget about seam allowances; cut out pieces with a margin.
Important! Dense fabric is not cut out with a margin, since excess fabric will bulge unsightly. The blanks are sewn end to end with the lining, and the pieces are stitched together with a zigzag.


Patchwork sewing techniques
There are several basic techniques for joining patchwork pieces.
| Connection technique | Description |
| Blanks of a certain shape are sewn onto a piece of fabric. This technique is often used for blankets and potholders. |
| A certain pattern or design is laid out from square-shaped blanks. |
| Here, rectangles are taken as a basis, which can be stitched diagonally, vertically or horizontally. |
| For this technique, it is better for beginning craftswomen to use isosceles or equilateral figures. |
| The blanks are laid out on the cut in a chaotic order, organza is laid on top, then again a layer of shreds and organza. All layers must be ironed and stitched. |
| This is an abstract drawing without a specific shape. |
| A Japanese technique that imitates darning with colored pieces of fabric and stitching. |
| Rectangular patches are sewn onto the prepared base. |
 Traditional


Patchwork patchwork technique for beginners: basic techniques for performing different patterns
Let's start learning the patchwork technique from the very beginning. simple circuits with step-by-step photo descriptions of all actions. Over time, craftswomen will be able to move on to more complex patterns.
Do-it-yourself patchworking for beginners: the principle of sewing the “Mill” pattern
We suggest sewing a blanket according to the “Mill” pattern using the magic triangle technique.
Step-by-step photo description of patchwork techniques for beginners
The blanket will consist of several blocks; for one block we will need 2 squares of colored and plain fabric.
| Illustration | Description of action |
 | Place colored and plain squares facing inward and mark diagonally. |
 | Sew the fabric at a distance of 6 mm on each side of the diagonal. |
 | Cut the stitched square diagonally. Sew and cut the second two squares in the same way. |
 | seams, open the squares and iron again. |
 | Cut off any protruding parts and prepare the block for stitching. |
 | Sew squares 1,2 and 3,4 together vertically |
 | Unfold the squares and iron, directing the seams in opposite directions. |
 | Sew two pieces together, the seams should be in the middle and directed in different directions. Then iron. |
 | You can sew a strip between the blocks, thus connecting all the parts into one. |
Patchworking master class for beginners: sewing a pattern according to the “Rose” pattern
Using this pattern, you can sew not only a rose flower, but also use the pattern for sewing any item. The work is quite painstaking, but the result will exceed all expectations.

For the pattern, it is necessary to select material whose edges do not fray. Be sure to take into account seam allowances of at least 0.5 cm.
The operating procedure is as follows.
- Sewing begins from the middle of the pattern, gradually moving in a spiral.
- The scraps need to be taken in pairs, sewn together, then sewn to a common piece. The result should be a square.
- After you have sewn a few squares, you can begin the overall assembly. For this, additional stripes are used.

Master classes on patchworking for beginners: we sew our own products from old jeans
You can sew unique products from old jeans; durable fabric is suitable for seats and decorative pillows. Our selection of ideas with diagrams and descriptions will help give a second life to your favorite things.
Model 1 – cosmetic bag
To make it you will need denim and lining fabric.

The operating procedure is as follows.
- Cut out a diagram from paper and cut it into elements.
- Cut blanks from jeans, not forgetting about seam allowances. It is better to use fabric of different colors.
- Sew the parts on a machine.
- Sew on the lining fabric; for this you need to use the same pattern.

Model 2 – decorative pillow
To decorate the pillow, you can use thermal appliqué, or cut out and decorate a fragment with a pocket. To work you will need:
- jeans in two shades;
- companion fabric;
- threads for fabric and stitching;
- braid;
- lace beads.
Step-by-step instruction.
| Illustration | Description of action |
 | Cut out a piece of jeans with a pocket, cut a second piece from fabric without a pocket and decorate it with embroidery. |
 | Cut strips of different widths from jeans, fabric and lace. |
 | It is necessary to decorate dark fabrics with lace; the design cannot be disassembled, as it will then be difficult to reproduce the analogue. |
 | You need to sew the parts from the middle, placing them facing each other. Iron all seams immediately. |
 | Braid and lace are stitched on both sides. |
 | All seams must be stitched and ironed. In the same order, sew all the parts from the center to the edge in a spiral. Then repeat all the same steps with the second side of the pillow. |
 | Fold the pieces face inward, measure and cut off the excess. |
 | Sew the halves together, leaving 10 cm for turning inside out, stuff with padding and sew with a hidden seam. |
 | Children will definitely like this pillow. |
You can watch the master class in more detail in the video:
Model 3 – skirt
A great idea is to sew a skirt from jeans; an asymmetrical model will look unusual. The operating procedure is as follows.
- Cut off the top of the jeans at a distance of 15-18 cm, cut the rest of the jeans in any order.
- Draw up a diagram of an a-line skirt according to your personal measurements, and sew the patches according to the template.
- Process the scraps for the bottom of the skirt using an overlocker. There is no need to tuck the bottom, this will make the skirt look more interesting.

Step-by-step photo descriptions of sewing patchwork quilts with your own hands in patchwork style
Taking advantage various techniques sewing in a patchwork style, it will be easy for beginners to make a blanket from scraps or a bedspread with their own hands, both for an adult. To add volume between the front and lining fabrics, padding polyester or other filler is additionally used.
Model 1 – master class on patchwork sewing of the “Chaotic squares” pattern
To make a beautiful bright blanket for a child 3-12 years old measuring 110x140 cm, we will need:
- fabric of different colors;
- lining fabric;
- bias binding 4.5 cm wide;
- padding polyester
The operating procedure is as follows.
| Illustration | Description of action |
 | Cut 208 squares 10x10 cm |
 | Sew squares of different colors in pairs, facing inwards, the distance from the edge is 0.75 cm. |
 | Open the squares and sew another row of scraps to the right edge. Block of squares – 13×16 patches. |
 | On the wrong side, all seams are in the same direction. |
 | Sew all squares vertically. |
 | Iron all seams from the inside out in the same direction. |
 | Lay the lining fabric, padding polyester on it and a blank of squares on top. The layers must be larger than the main workpiece. Secure all seams vertically with pins. |
 | Sew the pinned vertical seams exactly in the middle, then stitch them in a perpendicular direction. |
 | Sew the workpiece along the edge with an indentation of 0.5 cm, after which you can cut off the protruding parts of the lining and padding polyester. |
 | Sew the bias tape from the wrong side strictly along the side seam, having previously turned the edge 1 cm. You need to stop sewing 0.5 cm before the edge. |
 | Fold the binding into a square at the beginning of the edge and stitch. Turn the workpiece over, turn the binding up 0.5 cm and stitch along the front side. |
 | Using this principle, you can sew a blanket of any size. |
A more detailed master class for beginners on how to sew a blanket from scraps can be seen in the video:
Model 2 – blanket “Magic circles”
For such a blanket you will need blanks in the form of squares with a side of at least 21 cm; you need to cut a semicircle inside. In such a scheme, it is important to choose beautiful combinations of fabrics that should not be repeated in one block.

After sewing and ironing the squares for the front side of the blanket, you need to place the blank on the padding polyester and the backing fabric, baste, quilt along the seams and along the edge of the product.
Model 3 – double-sided blanket
To sew a double-sided patchwork quilt with your own hands, beginners need to prepare the fabric and cut out squares of at least 23 cm in size according to the pattern for a finished product of 1.5 × 2.3 m. In addition, you will need padding polyester as insulation.
The operating procedure is as follows.
- Place two squares with the right sides facing inward and sew, not forgetting the 1.5 cm seam allowance.
- Sew 7 squares in the same way. You will need 10 such blanks.
- Iron all the scraps from the wrong side.
- Sew all the strips together and iron everything.
- Sew the wrong side in the same way; instead, you can use lining fabric of a suitable color.
- Place one blank on the table with the wrong side up, a layer of synthetic padding on it, then another blank face up.
- Secure the workpieces with pins and sew exactly along the seams, first vertically, then horizontally.
- Sew on bias tape.

Japanese patchwork for beginners: diagrams and step-by-step description of work
Japanese patchwork is considered one of the most difficult. There are patterns whose details are stitched and quilted only by hand. This is a whole philosophy of the culture of an eastern country: not to rush anywhere and do everything very carefully and slowly. We invite you to try your hand at this technique.
Model 1 – cosmetic bag
First of all, let's make a cosmetic bag. For this we need:
- printed cotton fabric and lining material;
- adhesive-based non-woven fabric;
- padding polyester;
- lightning;
- floss and thread;
- lace and buttons for decoration.

The work progress is as follows.
- Cut out all the parts according to the diagram, not forgetting the 0.6 cm seam allowance.
- Sew the parts together and iron.
- Cut back wall cosmetic bags and sew to the front blank.
- Cut one rectangle from non-woven fabric and thin padding polyester. They should be larger in size than a cosmetic bag.
- Glue the interlining to the wrong side of the cosmetic bag.
- Cut out the doll's details.
- Cut out the lining according to the pattern.
- Sew the blank and padding polyester together.
- Quilt the blank, sew on the doll parts.
- Sew on the lining and sew in the zipper.

Model 2 – decorative blanks for a patchwork quilt
The main difference between Japanese patchwork is the stitch in which the needle goes only forward. Previously, this technique was used to sew patches to clothes, but today it is the most popular type of needlework. Designers use it in
Patchwork
Patchwork(Also patchwork, from English patchwork) - a type of needlework in which, according to the mosaic principle, a whole product is sewn together from multi-colored and variegated pieces of fabric (shreds) with a certain pattern. In the process of work, a canvas is created with a new color scheme, pattern, and sometimes texture. Modern craftsmen also create three-dimensional compositions using the patchwork technique. In Russia, the patchwork technique has long been used, in particular for the manufacture of quilts (patchwork quilts) and other products.
Story
Assembling cloth from scraps, appliqué from fabric, and quilted products have long existed independently of each other among many peoples of the world. There is a famous Egyptian ornament created from pieces of gazelle leather around 980 BC. e., in one of the museums in Tokyo a suit sewn around the same time with decorations made from scraps is exhibited. In 1920, a carpet was found in the Cave of a Thousand Buddhas, assembled around the 9th century from many pieces of pilgrims’ clothing. In the 16th century, colorful fabrics of various patterns from Indian cotton began to arrive in England. A blanket decorated with embroidery or printed material was considered fashionable decoration home interior. Sewing from rags appeared as a result of a shortage of calico, which arose due to the ban on the sale of Indian fabrics in England in 1712. Thus, the government intended to preserve domestic factories that produced wool and silk fabrics. Calico came to England through smuggling and its price rose sharply. The scraps remaining after cutting chintz clothes were not thrown away, but were used to create other products. Large fragments were used to decorate wool or linen fabrics using the appliqué technique. The smallest remains were sewn together to form a single fabric.
Traditional American sawtooth pattern.

Assembling the “Grandma’s Garden” patchwork (“Honeycomb”, “Hexagon”).
In the 70s of the 20th century in America, interest in patchwork was revived. Quilt clubs have become popular, specialized stores offer the buyer everything necessary materials for this type of arts and crafts, a wide range of thematic books and magazines. In 1971, Yves Saint Laurent created a model decorated with patchwork, anticipating a new trend in fashion - a passion for folk romanticism.
In Rus', a thrifty attitude towards fabric, both produced at home (until the 18th century, homespun linen was mainly used in the country) and purchased, has long been widespread. "Domostroy" contains detailed instructions cutting dresses, sorting and storing scraps and mending finished garments. Sewing from rags became widespread in the second half of the 19th century with the appearance of foreign chintz on sale. Unlike homespun fabrics, the width of which was about 40 cm, factory-produced fabrics had a width of 75-80 cm, and when cutting clothes from them, a large number of scraps. Applique appeared later: since English calicoes were expensive in Russia, it was considered inappropriate to cover one fabric with another. Patchwork reached its peak at the end of the century, when the production of cheap cotton printed fabrics was established and sewing machines appeared. Things created among peasants had an exclusively practical function. However, the artistic preferences of local residents were always introduced into the methods of assembling the canvas and the color scheme of the products. Were created original techniques voluminous patchwork: “lyapakami” (or “lyapachikha”: unprocessed multi-colored strips sewn onto a base), “corners” (the fabric was folded at an angle and sewn onto the base), “terry”, “rosan” (“round timber” or outside Russia - “yo-yo” - square or round flaps were pulled together along a basting made around the circumference, the resulting volumetric parts were sewn onto the base in one layer or overlapped). At the beginning of the 20th century, patchwork along with collage attracted the attention of avant-garde and futurist artists who were searching for new means of expression. After the revolution, this type of sewing was not included in the list of state-supported types of decorative and applied arts. Later, patchwork became a sign of poverty, a reminder of the periods of war and devastation experienced by the country. Interest in this type of decorative and applied art was revived in the 90s of the 20th century, and its study began at the same time. It has become not only a widespread hobby, but also an independent genre of decorative art. In Russia, every two years (since 1997) the festival “ Patchwork mosaic Russia", where the works of masters are demonstrated.
Materials and tools
One of the most difficult moments in the patchwork technique is achieving a harmonious, balanced color scheme works. To overcome this difficulty, some beginning craftsmen use a color wheel. Currently, there are specialized computer programs that allow you to calculate the range of a future product.
Tools
The fabric is cut with scissors or a wheel cutter on a special lining; the latter option is convenient and provides greater cutting accuracy.
Fabrics. Preparation and cutting
The most widely used fabrics in patchwork sewing are cotton. They are cheap, easy to cut, do not slip when sewing, hold folds laid by hand and are an ideal material for beginners. The disadvantages of cotton fabrics are shedding and shrinkage when washed. Linen is easy to sew, shrinks less, is durable, and is a popular material for linings or backgrounds. Linen fabrics wrinkle a lot and are difficult to iron. Thanks to its delicate texture, natural shine, and bright colors, silk looks very advantageous in products. However, it shrinks greatly when washed and exposed to high temperatures, difficult to cut and sew, the edges of the cuts are crumbling. Wool is rarely used in the assembly of patchwork fabric, but nevertheless it has a number of advantages: hygroscopic, warm fabric is suitable for making bedspreads, pillows, and clothing. The edges of thick woolen fabrics do not fray, wool products hold their shape well. Pieces of wool can be joined end to end using a zigzag machine stitch. Artificial and mixed fabrics look elegant, they do not wrinkle and wash well, but they can accumulate moisture. Viscose fabrics are difficult to sew: due to the moving structure, the fabric slides, besides, it wrinkles a lot and shrinks when washed, viscose must be starched. Fabrics (cotton, silk, linen) painted or dyed by hand look interesting.
Cardboard templates
If the product is intended to be used in everyday life, it is necessary to decate the fabric - wet it (wash without using detergents), and then dry and iron. If the sewing is made only from new fabric and it is supposed to be stored in a place protected from dust (for example, under glass), decatification can be omitted, preserving the factory impregnation and the original brightness of the colors. Before work, in order to avoid distortion of the fabrics, all edges are cut off. It is not recommended to tear the fabric; this will lead to unraveling of the edges of the finished product, since the internal seams are not sewn during patchwork.
The key to success in assembling a patchwork fabric is high precision cutting. Cutting is carried out using templates, which are the simplest geometric shapes, made of cardboard with marked cut and seam lines or transparent plastic: they allow you to see the design. There are metal patchwork templates on sale with slots for marking the stitching line. Add 5 mm for seams ( cotton fabrics) up to 1 cm or more (fabrics that fray easily). When laying out patterns on fabric, the direction of the grain thread is taken into account. For quadrangular parts, the lobe must coincide with one of the sides; for triangles and hexagons, it must be perpendicular to the base.
Assembly of the canvas

Block with the “Mill” pattern.

Manual assembly with fabric stretched onto a cardboard template

Product made using the bargello technique.
Assembling the fabric in patchwork proceeds from small parts to larger ones. By sequentially stitching together parts, blocks of patterns are created, from which the product is sewn together. Patchwork can be sewn by hand or by machine. For manual assembly, a part is marked on the wrong side of the fabric using a template; two parts, folded with their right sides aligned with the marking lines, are basted or pinned and sewn with a fine basting seam (B. Staub-Wachsmuth suggests using 4 stitches “forward with a needle” to perform one “ quilting stitch"). The thread is carefully secured at the beginning and end of the seam line. When sewing a seam on sewing machine after two parts are stitched, without cutting the thread, they proceed to connecting subsequent pairs of parts (the so-called “flag” or “chain” sewing). When the sewing is completed, the threads of the resulting chain are cut. Another type of assembly is manual, using fabric stretched over a cardboard template, used for blocks of the “Grandma’s Garden” type. On cardboard blanks (when assembling " Grandmother's garden» hexagons are used) the flaps, cut taking into account seam allowances, are stretched and fastened with several stitches. The fabric blanks are folded with their right sides inward and sewn manually with a hidden seam.
One of the simplest and quick ways assembling the fabric is sewing in stripes. Strips of fabric are cut out along the grain using a template and sequentially attached to the base. The base is cotton or linen fabric, paper (removed after sewing), interlining. To avoid skewing of the fabric, the strips are sewn together, changing the direction each time (for example, the first and second - from top to bottom, the second and third - from bottom to top, and so on). Seam allowances are pressed to the darker side of the fabric if possible. Pressing the seams to one side adds strength to the product. The technique is based on assembling the canvas in strips bargello: The stitched strips are cut crosswise and then reassembled into an offset web. This technique, when using harmoniously selected fabrics of different shades of the same color, set off by contrasting ones, creates the effect of a smooth transition.
To facilitate and speed up the assembly process, a non-adhesive interlining for patchwork with a marked mesh is available geometric shapes(squares or triangles).
When assembling blocks with rounded parts (“ Wedding ring", "The Drunkard's Path", "Time and Energy") on the parts to be joined, the edges are gathered, the midpoints are determined and chipped off, and their angles are combined. The part with the recess is carefully fitted and connected with pins to the part with a convex cut. When stitching on a machine, the part with a convex cut is located on top.
When assembling “Stained Glass”, fragments of the patchwork fabric are sewn end to end, the seams are masked with braid, tape, and narrow strips of fabric. IN classic version In this assembly, the contours of the figures are framed with a material that contrasts with the main image.
Patchwork samples


see also
Notes
Literature
- O. V. Zaitseva. Patchwork: A Practical Guide M.; St. Petersburg, AST; Astrel-SPb, 2007, ISBN 978-5-972-51052-8.
- Yu. Ivanova. Game of patches by Vera Shcherbakova. - M.: Culture and traditions. 2007. ISBN 5-864-44126-0.
- B. Staub-Wachsmuth. Patchwork and quilt. Patchwork sewing. Profizdat. 2007.
We also recommend
 Fashionable men's winter jackets: warmth and style
 How to choose the right mascara Methods of applying mascara depending on the type of eyelashes
 Areas of application of industrial diamonds How diamonds are used in agriculture
 For the first time in history, a princess was arrested in Saudi Arabia.
 The choice of Ani Lorak cosmetics and the secret of evening makeup from the star
 Hair salon games for girls