DIY hat for the Snow Maiden made from paper. Do-it-yourself kokoshnik for the Snow Maiden: a lightweight children's model with and without a rim
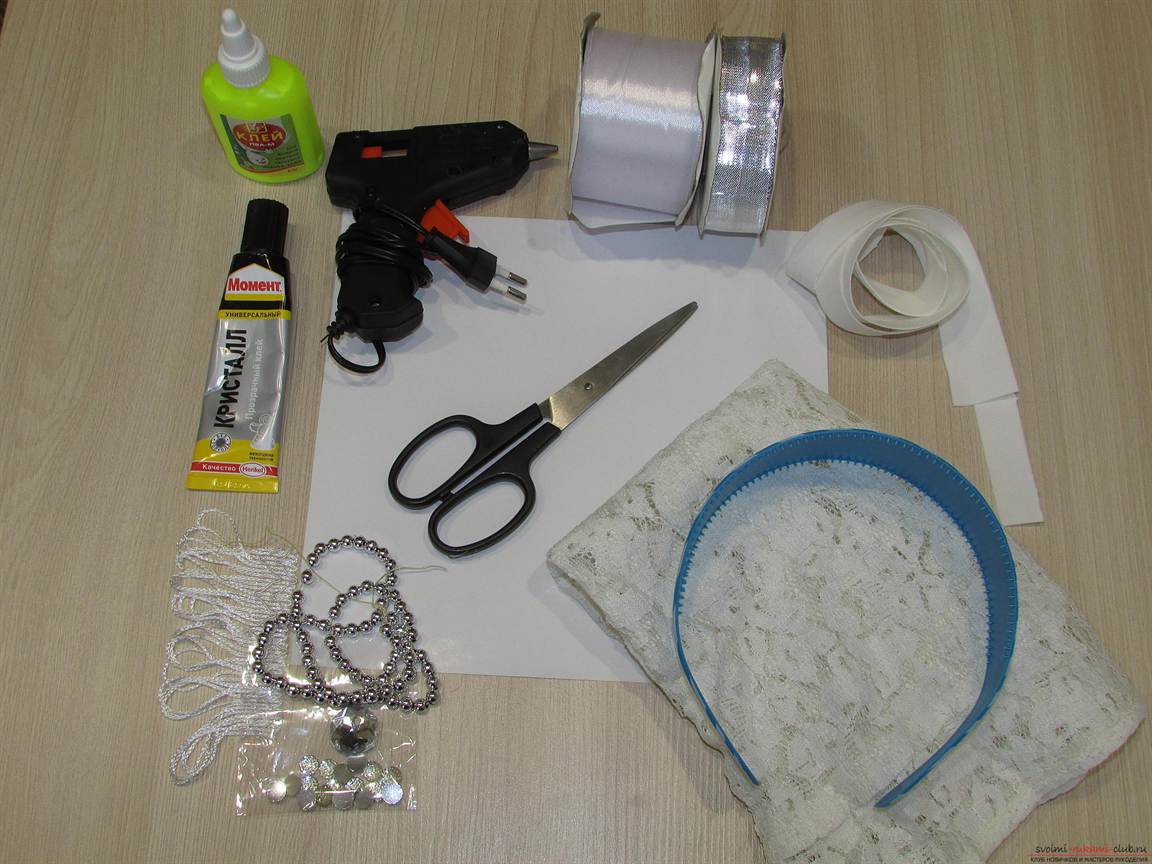
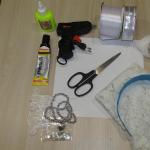
The time has come for children's New Year's parties. Princesses, snowflakes, Christmas trees, Malvinas, and of course, Snow Maidens will spin in a cheerful round dance. Some people buy costumes, rent them or from friends, while others lovingly make a costume for their own child. Yes, yes, I’m talking now about you, dear needlewomen, who did not ignore my master class. Today I propose to make a crown for the Snow Maiden in the form of a kokoshnik with your own hands. Not every Snow Maiden costume can boast of a beautiful headdress, but it is in this that the Snow Maiden appears before us in Russian fairy tales. In order not to deviate from tradition, I also decided to make an elegant kokoshnik instead of a hat for my Snow Maiden. To create a New Year's headdress we will need:
- cardboard and newspaper,
- scissors,
- PVA glue, “Moment Crystal”,
- heat gun,
- bezel,
- white foamiran,
- guipure,
- beads on a string,
- fringe,
- tinsel,
- satin ribbons (white 5cm wide, silver – 2.5cm),
- beads, rhinestones, cabochons for decoration,
- candle or lighter.
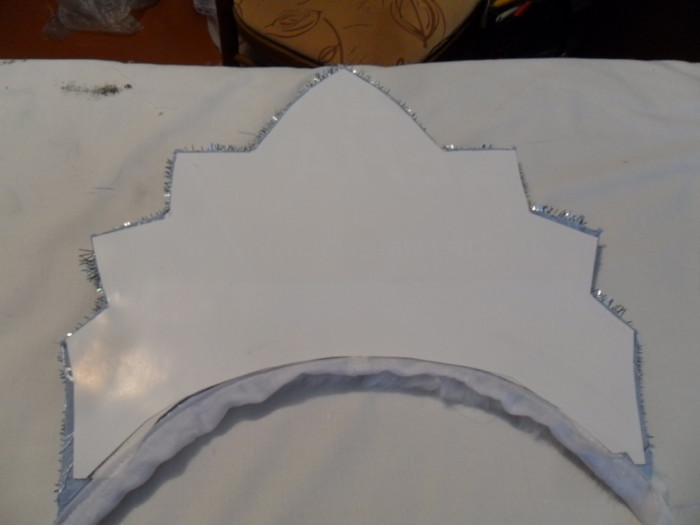
We begin work by modeling the shape of the kokoshnik. To do this, fold the newspaper in half and draw the outline of the headdress. I chose the traditional five petal shape. We cut out a hole inside for the head and adjust it to the desired size, trying it on the model. Keep in mind that the kokoshnik will be attached to the headband, so make the inner cutout slightly larger than the head. Or try it on immediately with the headband on. The pattern of the future kokoshnik is ready. We transfer the outline onto white cardboard, leaving a margin of 1 cm for attaching to the rim. We cut the stock left for future fastening into teeth. Take white guipure and glue it to the cardboard with PVA glue. First from the outside, bending part of the guipure back, then from the inside. Now the basis for creativity is ready. It will be easy to glue beads, petals, and rhinestones to such a kokoshnik. To make the top edge of the kokoshnik look aesthetically pleasing, we sew a thread of beads to it. I suggest sewing it on, since there is little hope for glue; it can fail at the most inopportune moment. We glue the fringe along the bottom of the kokoshnik using a heat gun. Now we can place our kokoshnik on the base - the rim. We take strips of white foamiran approximately 1.5 cm wide and wrap the rim, securing in places with hot glue. This way our headband will be soft enough for the head, and the kokoshnik will stick well to it. We turn the teeth of the kokoshnik alternately towards ourselves and away from ourselves and glue the kokoshnik onto the rim. So that the attachment points are not visible, we decorate them with white tinsel. The Snow Maiden's kokoshnik should look elegant. We will decorate it with petals using the kanzashi technique. Satin ribbons look beautiful in New Year's costumes; their shine adds a festive feel. To make the petals, we need to cut the satin ribbon into squares: white with a side of 5 cm and silver with a side of 2.5 cm. I decided not to take the blue ribbon during the work process. First, bend the square diagonally. Then we bend the resulting triangle in half. And fold it in half again. Cut off the tip a little and scorch it over the candle, pressing it with tweezers or your fingers. The tip should stick together tightly. We also cut off the lower part of the petal a little at an angle of 30° and scorch it. When working, all cuts of the satin ribbon must be scorched so that the product does not unravel and looks aesthetically pleasing. The petal is ready. We proceed in this way with all the squares. Using Moment Crystal glue, glue the silver petals inside the white ones. And glue silver beads to the remaining white ones. We begin to decorate the kokoshnik with petals. I placed a large half-flower in the center, with two small ones on the sides. This is what happened. Try to glue the petals in a checkerboard pattern so that each next row seems to be buried between the petals of the previous row. The final touch is to decorate the centers with beads and cabochons. We got such a wonderful kokoshnik. Using the same principle, you can make a sudarushka kokoshnik. Success in creative work!
Who doesn’t know Santa Claus’s faithful companion, Snegurochka? It came to us from folklore through the centuries. Her image symbolizes purity, lightness, tenderness, kindness. It is not for nothing that Snegurochka usually serves as an intermediary between children and her grandfather. Every girl at least once dreamed of attending a holiday dressed as a snowy granddaughter. And, like any Russian beauty, Father Frost’s assistant is often depicted wearing a kokoshnik. We offer you several simple ways to make a kokoshnik for the Snow Maiden with your own hands and make your daughter happy or make your childhood dream come true.
Diversity on a common basis
Creating an original kokoshnik does not require any special skills. All you need is a standard basis and the indefatigable imagination of the craftswoman.
For the template you will need:
- paper (regular newspaper will do);
- a simple plastic hoop (preferably wide so that it doesn’t put pressure during the holiday);
- tape from 2 cm;
- glue (PVA, Moment Crystal, glue gun. Choose any to your taste);
- cardboard. Its thickness depends on the materials with which you want to decorate the kokoshnik. Many people perfectly adapt a candy box as a base;
- blue fabric/guipure, possible with winter patterns (if you use non-colored cardboard);
- narrow ribbon (1 cm);
- scissors;
- pencil;
- materials for decoration (beads, rhinestones, tinsel, beads, etc.).
General steps
First of all, you need to decide on the shape and size of the kokoshnik. These could be flower petals, the edges of a snowflake, a classic dome - whatever your imagination tells you.
It is better not to make the workpiece too large, as it will end up on the child’s head or your own.


To make the product symmetrical, fold the paper in half and cut out the main part of the kokoshnik.

If it is more convenient for you to use a hoop, then attach it to the middle of the workpiece and circle it. Then step back 2 cm from the drawn line and draw another one, parallel to the previous one. Using it we cut out the core of the kokoshnik, and then cut the “teeth” 2 cm long. The result is a template for the headdress. All that remains is to trace it on cardboard and cut it out.
If you used colored cardboard, you can immediately proceed to the next step. Otherwise, the workpiece should be covered with cloth. Cut out two pieces from it according to the shape of the template, with one piece being 1 cm larger. Glue the craft on both sides, let it dry, bend the allowances of the part and glue it too. Now the first part of the product is ready.

Headdress with hoop
Wrap the headband with a narrow ribbon (1 cm), securing in places with glue.

Then bend the “teeth” of the craft and attach the kokoshnik to the inside of the rim.

Mark the petals with a pencil as in the picture and cut them.
Starting from the center, glue the edges of the petals together, slightly tilting the entire structure back. It is more convenient to perform this procedure if the kokoshnik is worn on the owner’s head.

Now the fun part is decorating the headdress. Give free rein to your imagination here. You can lay out snowflakes with rhinestones, place tinsel around the office, hang fringe. The main thing is that it is bright and festive. You can see examples in the photo.


To finish the job, so that the headdress does not fall off at a crucial moment, sew a ribbon of 2 cm or wider to tie at the back of the head. That's it, the original kokoshnik for the girl is ready!
Option with ribbon
You can do just fine without a hoop. Just immediately after the “general steps” move on to decorating. We assure you, it will turn out no worse! Such a kokoshnik will be more universal and suitable for any head.
A little advice - take the ribbons for tying as wide as possible and, to hold the headdress tighter, use bobby pins.

Kokoshnik with a braid
We offer a master class on an improved version of the Snow Maiden’s headdress. For this we will need additional materials:
- white satin;
- synthetic hair braid;
- braid;
- elastic band.
After you have made the first part of the product (see “general steps”), you need to cut out the forehead cap. To do this, measure the distance from the base of the kokoshnik to the middle of the forehead and the length of the rim. To make the forehead fit better, make a groove in the center. Decorate the outer edge with patterned braid.

Glue the part to the rim and edge of the kokoshnik.
Sew the braid onto a piece of fabric used earlier and secure it to the back of the product.
On a note! Please note that when wearing a headdress, artificial hair should start at the base of the neck.

Cut out a semi-oval from satin for the occipital cap. To do this, measure the distance between the ears and from the base of the kokoshnik to the shoulders. Fold the long edge of the piece and insert the elastic.
A crown or kokoshnik for the Snow Maiden is the completion of the fairy-tale image of the snowy beauty and Santa Claus' assistant. You can, of course, get by with a hat, but a hand-made kokoshnik will turn its owner into a unique and charming snow queen! You can make a beautiful kokoshnik for the Snow Maiden by spending a minimum of money. Using my detailed master class and step-by-step photos, you will get the job done quickly.
To make a crown you will need:
- blue satin fabric measuring 35 by 30 cm,
- satin ribbon 2 - 5 cm wide, 1.5 m long (you can sew an organza ribbon),
- candy box,
- poster size 80 by 40 cm (whatman paper can be used),
- tools: scissors, pencil, transparent superglue,
- all sorts of things for decoration: sequins, snowflakes, tinsel.
How to make a kokoshnik for the Snow Maiden with your own hands
Fold the poster in half and draw half of the future crown. You can draw the outline yourself or print it from the Internet.

Cut out 2 identical pieces. They should look like in the photo.

Unfold the candy box and glue the top and bottom of the box together, making double cardboard.

Glue the paper pattern to the cardboard, cut it along the contour.
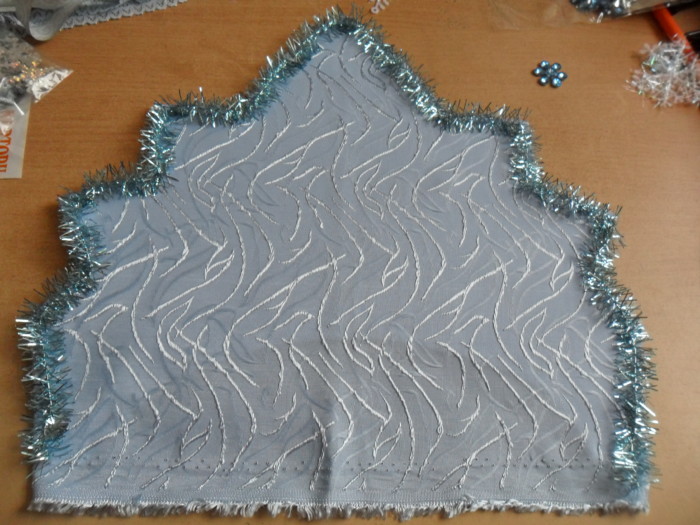
Apply glue to the cardboard outline of the pattern and glue the fabric chosen for the craft to it. Let it dry.

Cut out the outline of the kokoshnik on the fabric, leaving an allowance as in the photo.

Apply superglue to the edge of the cardboard pattern and glue the fabric allowance to the inside.

We turn it over and we get such a beautiful base.

Now, how to decorate the kokoshnik for the Snow Maiden. Showing your imagination, this can be done easily and simply. This is what we will do now step by step.
Lay tinsel along the outer contour of the kokoshnik and secure with a stapler.
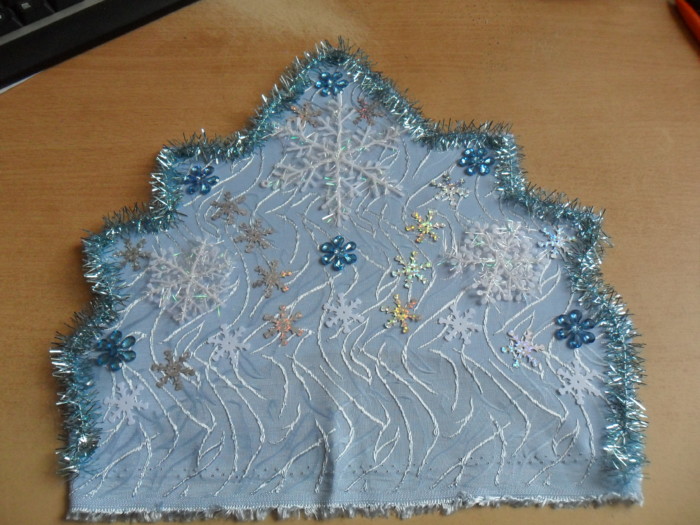
Place a large snowflake in the center, two smaller ones at the edges, and then decorate with what you have: snowflakes, rhinestones, sequins. Glue everything well with superglue. You can see in the photo how I managed to decorate it.
Cut the fabric on the kokoshnik along the contour of the head and sew on a ribbon tie. It can be sewn from organza or used ready-made.

Cover the reverse side with the second part, cut out at the beginning from whatman paper or a poster.
Glue a piece of fur or tinsel along the line of sewing the ribbon to the crown.

The beautiful kokoshnik crown for the Snow Maiden is ready!

This kokoshnik is suitable for the Snow Maiden of any age and will stay well on her head.
Each nationality has its own national costumes, the details of which can immediately determine a person’s ethnicity. A headband with feathers will indicate an Indian, a wide-brimmed sombrero will indicate a Mexican or Spaniard, a wreath with numerous bright ones will indicate a Ukrainian fashionista of past centuries, and a kokoshnik decorated with beads will indicate a majestic Russian beauty.
A few words about the headdress
In our article we will talk about how to make the Snow Maiden’s kokoshnik yourself for the New Year’s carnival. But first, let's say a few words about the very subject of women's national costume. You rarely hear the word “kokoshnik” these days. It has been successfully replaced by the more familiar “crown”. Although it is not entirely accurate, it quite correctly reflects the essence of the subject. The Snow Maiden's kokoshnik really looks like a crown, shaped like a crescent or a large fan, or less often a shield, wrapped around the head. The name is associated, according to linguists, with the ancient Russian word “kokosh”. This is what our ancestors said to the clucking hens and hatched chicks. Consequently, the Snow Maiden’s kokoshnik is an adornment for an adult girl who is about to get married.
Form of dress

Elegant, rich “crowns” were supposed to draw the attention of guys to potential brides. A fan or comb was attached to a cap worn directly on the head. It could be deep, covering low the forehead, ears and the back of the head - depending on how it was customary in a particular area to braid and style girls’ braids: wrap them around the head, let them down over the shoulders or wrap them over the ears. So the Snow Maiden’s kokoshnik can also be designed so that it is convenient to put on and wear during the carnival.
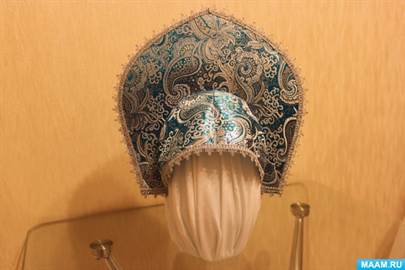
As for the decor, here you are given complete freedom of action. Pearl-like beads are suitable for decorating a headdress, because we most often see their openwork weaving with a mesh on museum exhibits. And pearl threads hanging down on the cheeks, rhinestones, pieces of brocade, foil, Christmas tree rain (everything that shimmers, sparkles, sparkles) will definitely suit you. And even flowers made of lace. The Snow Maiden's kokoshnik is often complemented with a light cobweb shawl, which also corresponds to the ancient Russian traditions of wearing this headdress. Or with silk ribbons, with the help of which it is secured to the head.
Necessary materials
In the old days, craftsmen used special metal tapes, thick paper and fabric, cardboard, and other materials to make headwear. You need to stock up on them too. Instead of metal strips, it will do. When you are planning how to make a kokoshnik for the Snow Maiden, select several pieces of wire of different lengths. Why aluminum? This wire is both strong enough to hold its shape and flexible (it can be bent in the most intricate ways). In addition, you will need pieces of foam rubber, universal glue, threads, plain and wrapping paper, scissors, a simple pencil, and an eraser.
Kokoshnik for girls: initial preparations

How to make a kokoshnik for the Snow Maiden, given that it will be worn by a girl aged 5 to 10-11 years? In this case, the headdress is easy and simple, and what else does a beginner in the field of design need? Having already mastered your hand, next year you will make a more complex kokoshnik for the Snow Maiden.
Let's start the master class with choosing a style. From ordinary cardboard, or corrugated cardboard, cut out a shield-crown in the form of a crescent of medium height. If your daughter likes a pointed kokoshnik, give the piece a dome shape. Make a semicircular cutout for the head of the appropriate size. To ensure that the decoration does not put pressure on the skin and does not cause inconvenience, and also holds well, stick strips of foam rubber along this cutout on the front and back sides of the kokoshnik. They can be disguised either with Christmas tree rain, or with wrapping paper or other accessories.
Kokoshnik for girls: the final stage

So you have the basis for the kokoshnik for the Snow Maiden. The master class for beginners continues. Your task is to decorate the headdress, making it as elegant as possible. Cover it with light blue or white silk. Sew small snowflakes bought in a store or embroider with beads, small pearl beads or transparent bugles. As an option, lace stripes are suitable. the photo of which you see above includes a headdress of exactly this type. Looks nice, right? And the last step: sew on 2 blue or white ribbons and tie them in a bow under the hair. Now dress up your daughter and hurry to the carnival!
Outfit Details

What elements does the Snow Maiden's costume consist of? Photos of reproductions from folk tales and New Year's cards presented in the article will help you remember the details of the outfit of Santa Claus's granddaughter. The snow girl wears a straight long dress or the color of the fabric is all shades of blue, white, or maybe soft turquoise. The dress should be trimmed with fur. On top is a brocade or fur coat to the middle of the thighs, matching the dress. Muff or mittens. And boots. For a girl, of course, a knee-length dress, light leggings or tights are more suitable. The clothes must be embroidered with sequins. Instead of a kokoshnik, a crown cap is put on the head.
Kokoshnik on the rim

It is very convenient and simple to make the Snow Maiden’s kokoshnik (photo attached) for a carnival costume, using a regular one as a basis. It should be wide enough and not move off the head. Plastic or steel will do. Make a fan-shaped base from aluminum wire. It may look like half a snowflake. Secure the workpiece to the rim. Connect thin foam rubber or hemming fabric to the frame using paper clips or sew with heavy threads and large stitches. Cover it with a shiny fabric: silk, brocade, satin, organza (whatever is available). Even white or blue satin will do, because the Snow Maiden’s costume with a kokoshnik will still require additional decorations. And it is more convenient to attach a pearl mesh and beads to the crown on the rim.
Decor options

How else is the kokoshnik decorated? Buy more white pearl-like beads of different sizes. Having measured the length of the forehead and leaving 5-7 centimeters in reserve, prepare 5 pieces of strong thread and string beads on them, securing the ends. Sew one, leaving gaps, to the kokoshnik. Attach the second string of beads to the first, hemming it in a checkerboard pattern. The third to the second, etc. You should end up with a mesh that resembles a pattern of fish scales. It is placed on the forehead of the Snow Maiden. Approximately at the level of the temples, attach more rows of beads to the kokoshnik - they should go down along the face and can reach the line or even even the neck. True, this type of attire is more suitable for a teenage girl. If you are preparing an outfit for a little girl, do this: discard the beads, trim the lower base of the kokoshnik with a bright blue ribbon. And cut several pieces from it, for example, 6, 10-15 cm long. Make small pompom balls from pieces of light fur or thread. Sew them to one of the edges of the cut ribbons. And connect the second edges with the kokoshnik where the lower beads were supposed to be attached for the older Snow Maiden. Original, stylish, comfortable and charming - that’s what we can say about your outfit!
During the New Year's party for children, parents have to seriously rack their brains over what kind of original costume to come up with for their child. Of course, many carnival outfits are sold in stores, but many parents rightly believe that it is much cheaper to make a costume yourself using materials found at home. How many wonderful outfits were made from fabrics lying around in the back of closets! After reading this article, you will learn two ways to make a kokoshnik quickly and easily with your own hands from the most ordinary cardboard, so that your little Russian beauty looks simply beautiful at the matinee.
So, you, like most parents, have decided to sew a costume for your daughter for the matinee yourself, all that remains is to decide which look to choose for your little beauty. It just so happens that girls at New Year's parties are usually dressed up as princesses, snowflakes and fairies. The costumes are certainly beautiful, but their ideas are quite banal. Much more interesting is the Snow Maiden costume, which can be much prettier and more interesting than the costume of any princess. Of course, the image of the granddaughter of Santa Claus will be incomplete without such a wonderful headdress as a kokoshnik.
We make a kokoshnik with our own hands from cardboard to complement the costume
So, you have already sewed a beautiful dress or fur coat, which is the main part of the costume for your daughter for the New Year's party. All that remains is to prepare the headdress, without which it is impossible to imagine the beautiful Snow Maiden - kokoshnik. So, to create the Snow Maiden’s kokoshnik you will need to acquire the following materials:
- Newspaper or plain thin paper of the desired size
- Fabric matching the color of the dress or fur coat
- Thread and needle
- Cardboard
- Beads, beads, ribbons and everything else suitable for decorating a kokoshnik
- Scissors
- Ruler
- Pencil
- Organza to match your suit color
So, let's start our master class on a kokoshnik, made with your own hands from ordinary cardboard for children. Before starting work, it is necessary to take measurements from the child’s head. Measurements must be made along the red lines shown in the figure below.
The size and shape of the kokoshnik is a matter of taste, but one should certainly take into account that if the child is still quite small, then a headdress that is too large may look ridiculous and will not fit well on the head. If suddenly you can’t decide what kind of kokoshnik to make for a doll or for your daughter, look at the selection of photos attached below.


After we have taken measurements and decided on the shape of the future product, we need to prepare a template. It is most convenient to cut it out of a newspaper folded in half so that the kokoshnik turns out symmetrical. For the master class, a rather simple, but no less beautiful form of kokoshnik was chosen.
Using a cardboard template, we cut out the base for our kokoshnik.
From the prepared fabric, using the resulting template, we make a pattern, not forgetting to leave small allowances for the seams. We lay the fabric on the cardboard and, bending the allowances, sew the edges along the perimeter from the inside. If you are going to make a kokoshnik of a very complex shape, you can do without allowances and simply glue the fabric to the cardboard.
We do all this from the outside of the product, bending the allowances inward and connecting them with a seam over the edge or a hidden seam. Again: if the shape of the kokoshnik you have chosen is too complex, with an abundance of corners and details, then just carefully glue the fabric to the cardboard. 
We decorate the front side of our product. For the Snow Maiden costume, it is better to choose silver, blue or dark blue jewelry: beads, sparkles, various beautiful shiny “stones” made of plastic, rhinestones, if desired, you can decorate the edge of the kokoshnik with tinsel.
Using the template, we make a pattern from organza that matches the color of your suit, without making a cutout for the head.
We put organza on the inside of the kokoshnik and sew it on, bending the allowances and leaving the lower part free. That is, we sew only the side parts so that we can stick our head into the kokoshnik. 
We bend the lower part of the organza, insert an elastic band there and sew it on so that the kokoshnik rests securely on the head.
If desired, you can sew ribbons to the finished kokoshnik: satin or organza. When decorating, feel free to experiment and use different decorations: beads, glass beads, lace, ribbons. You can purchase special paints for painting on fabric and decorate your kokoshnik with fancy patterns. You can watch other ways to create a kokoshnik from cardboard in the selection of videos below. We hope that the New Year tree will be memorable for your child, and that your little Snow Maiden or Russian beauty will be the most beautiful there!
Video on the topic of the article
The lesson on creating a kokoshnik from cardboard has come to an end, and at the end of the article we are attaching a number of video lessons on this topic.
We also recommend
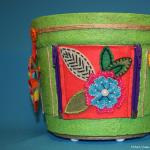 Tulips and felt roses
 Do-it-yourself kokoshnik for the Snow Maiden: a lightweight children's model with and without a rim
 Presentation "Insurance pensions in the Russian Federation" - project, report
 How to deal with one and two?
 Autumn crafts made from natural materials: quickly and beautifully
 How to crochet a beautiful horse