How to make a penguin from plastic bottles step by step. Postcard (playcast) “Crafts from Plastic Bottles: Big and Little Penguins
Used as consumables useless plastic bottles for crafts, we are making a contribution to saving environment. And since the penguin is made from plastic bottles with his own hands. To prove what has been said, we would like to present ideas on how to make something relevant for your home with your own hands. winter season crafts suitable for decorating home and garden, which will organically fit into any design - a charming penguin. Below are two various options implementation of the idea. You can choose the type of penguin you like from plastic bottle, or try to implement both options. Your children can be involved in the manufacturing process, which will bring tremendous positive emotions to both parties. Don't worry, the work is very easy, there is no need for special skills or abilities. Interested? Then welcome to the photo master class on how to make penguin crafts from plastic bottles with your own hands! Also, if you like this article, we have more on the topic for your garden.
You will need the following materials for the penguin:
- two 2 liter plastic bottles
- paints black, yellow, white
- paint brush
- braid
- pompon
- thermal hot glue gun
Step-by-step instructions with attached photos
- Gently rinse bottles, removing labels
- Cut the bottles in the middle, use the bottoms

- To create the base - the body of the future penguin from a plastic bottle, combine two cut parts of the bottles into one, see photo. The bottom of the bottle on both sides acts as the head and legs of our penguin. You can optionally fix the bottles with glue, but you can do without it, since the bottles fit quite tightly to each other.

- Paint the penguin's future body with basic white paint. In our case, aerosol paint was used. Once the paint has dried, use black paint to paint the penguin's toe, which will give the piece a more defined outline. Keep in mind that the so-called widow's toe should be parallel to the penguin's lower legs. Draw the penguin's hat in the desired color, in our case we chose blue.

- Draw eyes and a beak for a penguin made from a plastic bottle, which will give our craft made from plastic bottles a finished look. The paint must dry.

- Tie a ribbon on the penguin's belt, which will act as a scarf and will also disguise the junction of the plastic bottles. Glue the pompom to the top of the hat using a hot glue gun. A charming penguin made from plastic bottles with your own hands is ready!

Another method and instructions with photos
You will need the following materials for the penguin:
- sticky tape/scotch tape
- colored paper
- plastic bottle
- scissors
- PVA glue
Step-by-step instruction with a photo of a plastic penguin:

We showed you two options for how to make a penguin from a plastic bottle with your own hands. Using this example as a basis, you can create any compositions, limited only by the flight of your imagination, for yourself, friends, family and loved ones. Gifts made with your own hands carry love and warmth coming from the soul, they warm you with warmth, so they are always received with a bang!
Video of a penguin from a plastic bottle
Elena Werner
For we need manufacturing: two plastic bottles, tape, glue, gouache ( black-white, brushes, a stationery knife and of course desire and imagination.
There are many examples on the Internet making such a penguin, but for us he will be a “girl” in a beautiful skirt, for which you will need a satin ribbon, thread and a needle.

First we need to cut off the lower parts from plastic bottles, one smaller and the other larger.

These parts can be connected to each other using glue or tape.

Then paint with white gouache, you can use white acrylic paint.
Using a black marker, draw a “tummy” penguin.

It will remain white, and paint everything else black.

Now our imagination has turned on) Manufacturing skirts from satin ribbon. It can be easily put on like an apron and tied at the back penguin. Since this is a girl, let's attach a bow to her. We came up with the idea of making the eyes from foamiran on an adhesive base; you could draw them or use ready-made eyes, which can be bought in “Everything for Creativity” stores.


After manufacturing, the thought had already occurred to me that I could make a rope and hang this wonderful penguin on the Christmas tree.
And from the upper parts bottles turned out to be a crocodile. Green, kind - crocodile.
It turned out to be blowing penguin and crocodile. So different and so cute.

Publications on the topic:
For making flowers from waste material I needed: a stationery knife, an empty plastic bottle, a brush, scissors, acrylic.
Master class for parents and children on making a New Year's toy "Santa Claus" Master class for parents and children on making a New Year's toy "Santa Claus" New Year- a magical holiday, a special favorite! WITH.
Master class from plasticine and plastic bottle "Dymkovo toy". MK with step by step photos on production Dymkovo toys from plasticine.
 Master class: DIY New Year's toy - “Christmas tree”. New Year's toys made from yogurt cups.
The long-awaited summer has arrived and preparations for the summer season are in full swing. health work. The theme of the site design is Grandma's.
 After the publication of “Miracles from Waste Material,” some colleagues wrote in reviews that they liked the cat made from a plastic bottle.
 Master class on making New Year's toys « Road sign on New Year's tree» Prepared by teacher Ryzhova Maria Valerievna Materials.
To create a northern atmosphere, you can build a stone slide and paint it White color and place crafts at the foot of the mountain and at the top.
You can place them near flower beds, near a decorative pond, or simply plant them near the path or near the house.
You can glue the craft onto a wooden stand and cover it with crushed foam at the feet, imitating snow. So the penguin will hold on more firmly in windy weather, and it will feel like it is in the snow.
Wherever you place the craft, it will decorate any place.
Materials and tools
For the penguin figure you will need the following:
- plastic bottles (2 pieces for one penguin);
- scissors;
- glue;
- paints;
- cardboard;
- pencil;
- compass (if you know how to draw even circles, you can do without it);
- black marker;
- Knitting thread.
Do you want to get rid of weeds in your area? Do this with .
You can color the blank acrylic paints using a brush, or from a balloon. Whatever paint you have, use it. For coloring you will need white, black, orange or yellow paint. And a couple more flowers to decorate the hat.
If you want to decorate a penguin, you need to stock up on rhinestones, beads and a ribbon or a thin piece of material that will serve as a scarf.
Manufacturing instructions
To create a penguin figurine, follow these steps:

- When everything is glued together, you can start painting. Paint the entire craft white. All subsequent colors will look brighter on white paint. Leave until completely dry.

Color the shapes white
- Using a black marker, draw the outline of the belly and muzzle. Draw eyes - two circles.
- Use orange paint to paint the penguin's mouth and beak.

Draw the eyes and beak of a penguin
- Take black paint and paint everything except what is inside the outline, and do not touch the top, it will serve as a cap. Then you will need to paint it with bright paint.
- Choose the paint colors that suit you best and paint the top. You can paint the entire top with one color, for example, blue, and draw a pattern (circles, stripes, diamonds) with yellow or white. This will make a fun hat.

This is how we color the penguin figure
- Now you need to make a pompom for the hat. Draw a large circle on the cardboard and cut it out. Draw another small circle inside it so that the walls are thick and cut it out. You should get a wide ring. In the same way, cut out another ring.
- Place them together and gradually wrap them tightly with knitting threads. The threads will need to be constantly moved towards each other so that there are no gaps. This will make the pompom more voluminous.
- When the rings are completely wrapped, you need to take scissors and cut between the circles. Not in the inner circle, but in the outer circle. Move a few skeins together so you can slide the scissors through and carefully start cutting in a circle.
- When the top circle is cut, take the ball and cut a short thread. Insert this thread between the cardboards. Now you need to tie it in a knot and tighten it.
- Remove the cardboard circles, tie a couple more knots and cut the thread shorter so that it does not stick out and spoil the overall appearance. Straighten the knitting threads - the pompom is ready.

Preparing pompoms for penguins
- Glue the pom pom to the center of the hat.

Glue the pompoms and your penguin is ready
The penguin is ready, you can decorate the hat with rhinestones and tie a scarf around your neck.
Instructions for making a penguin from a plastic milk bottle
You can make a penguin with arms and legs from a plastic milk bottle.
This DIY penguin made from plastic bottles also does not require much time or specific skills. For it you will need a milk bottle, the same set of paints, a marker, colored cardboard, glue and scissors.
Read about planting, care and treatment for verbena diseases.Armed necessary materials, you can start creating a penguin with arms and legs:
- Take a 1 liter milk bottle, turn it upside down and paint it similar to the previous penguin. First, paint the entire bottle with white paint, then use a marker to draw an outline of the belly and head, and color everything outside the outline, including the lid. There is no need to leave anything for the hat. It is important that the bottle must be upside down, where the cap is, there will be legs.
- While the penguin is drying, take cardboard and draw blanks for the legs on it. It’s good if the cardboard is black, if not, then paint it with black paint. You should also draw a beak and legs (paws) on cardboard and paint them yellow or orange.
- When the blanks are ready, glue them to the body: arms on the sides, legs on the lid, beak on the muzzle.
- Draw eyes with marker or paint.

We continue to contribute to preserving the environment by using discarded plastic bottles as materials for crafts. This time we offer you the idea of making a charming penguin with your own hands to create a beautiful winter decoration at home, in the garden or in the country.
Below are two options for implementing the idea for your consideration. You can choose either of them or both at once, depending on your desire. If there are children, they will become excellent helpers in the process of making products from plastic bottles, since it is very simple work, which does not require special skills and abilities (especially option 2).
You are ready? – Then go ahead to the photo master class!
How to make a penguin from plastic bottles - option 1
Necessary materials:
- 2 empty bottles from under water or drinks with a volume of 2 liters;
- Paints;
- Paint brush;
- Braid;
- Pompon;
- Hot glue gun.
Instructions with photos:
1. Wash the bottles thoroughly and remove all labels.
2. Cut both bottles in half and leave the bottom parts.
3. To make the body, connect the lower parts of the bottles by inserting one inside the second, as shown in the photo. The bases of the bottles (one at the top, the other at the bottom) will act as the head and legs of the future penguin.
4. At this stage, you can add glue for fixation, but our bottles fit together quite tightly and we decided to do without it.
5. Apply a base coat to the penguin's body (we used white spray paint as a base coat on the entire body). After the base coat has dried, paint the body black, drawing a widow's toe on the penguin's forehead.
Make sure that the lines of the widow's toe are parallel to the two lower edges of the base of the bottle, which will be used as legs. Choose a color for the penguin's hat and paint the top base of the bottle as shown in the photo. Add facial features - eyes and beak.
6. Leave the penguin to dry completely.
7. Tie a piece of ribbon around the penguin's body like a scarf and glue a pom pom to the top of the hat using a hot glue gun. The baby is ready!
Video: how to make a penguin from a plastic bottle with your own hands
How to make a penguin from plastic bottles - option 2
Necessary materials:
- Adhesive tape/Scotch tape;
- Colored paper;
- Plastic bottle;
- Scissors;
- PVA glue.
Instructions with photos:
1. To make the penguin's body, wrap black paper around a previously stripped plastic bottle. Cut an oval out of white paper and glue it to the front of the bottle as a belly.
2. To make a scarf, cut a long strip of paper Pink colour and glue it around the upper torso. Then cut two more long strips, make cuts at the ends to form a fringe and glue them as the ends of the scarf.
3. Cut out two wings from black paper and glue them to the back of the penguin's body.
4. To make the head, cut out a circle from black paper and a smaller circle made of white paper. Cut out eyes from black paper and a beak from orange paper and glue them onto the white circle. Glue the white circle onto the black circle in the center.
5. Cut out a hat from pink paper and glue it onto the penguin’s head. Glue the penguin's head to the front of the body above the scarf line.
6. Cut out two paws from orange paper and glue them to the base of the bottle, as shown in the photo.
The work is done!
So, you have two funny penguins. Using Additional materials and your own imagination, you can create a beautiful winter composition on the windowsill, under the New Year tree, in the area near the house or in some other place that will please the eye and lift the spirits of the whole family on long winter evenings.
We also recommend
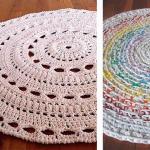 Do-it-yourself rugs from old things - turning waste into income
 Summer crocheted hats with flowers - many patterns, ideas and designs
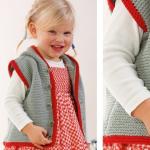 Sleeveless vest for girls crochet Crochet vest for 7 years
 How does a woman think? How do men think? This is the essence of a man’s calling - to be a breadwinner and provider.
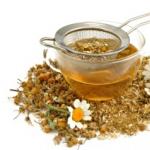 Ice cubes with chamomile for the face Rub ice cubes with chamomile on the face
 Sincere birthday greetings