How to remove acrylic nails at home. What products and tools are needed to remove acrylic nails? Step by step procedure
When the time comes to part with a flawless artificial manicure, many women hope to do it themselves without visiting a salon. And this is quite real. The main thing is to follow some rules and thenmarigold will shine again.
What you need to know before removing nail extensions at home
You can start with the fact that common man, not experts, all the troubles of removing artificial turf may take up to 2 hours. And haste is unacceptable.
After all, harm a living nail plate, especially if you hastily clean off the acrylic or gel coating - it’s very simple. But restoring it will require time and effort.
When approaching a manicure that is no longer needed, you should focus patience, accuracy and diligence on the task ahead. And at this stage, regardless of the type of coating, the progress and details of the preparation will be exactly the same.
You just need to shorten the tips (plastic plates fixed to your own nails). This is done using nail scissors or tweezers; it is very convenient to use a miniature tool called a “cutter”, designed specifically for correcting artificial nails.
It is important not to cut the synthetic plate too short, at the root, and not to apply too much force, so that cracks do not form through it in the natural nail.
In addition, work on creating, correcting and removing artificial nails, as a rule, is accompanied by a certain amount of dust and flying fragments, so experts recommend doing all this wearing a mask (the kind worn during a flu epidemic) and special safety glasses (clean plastic ).
How to remove acrylic nail extensions at home
Removal of this coating is usually carried out in a strictly defined order:
- Using a 100/150 grit abrasive file, remove the topcoat from the entire surface of the nails so that you can apply certain chemicals to the acrylic. chemical reactions.
- Wet the cotton swabs well with a special acrylic remover or just nail polish remover containing acetone.
- Secure the wet pieces on your nails using small squares of foil (for hairdressing or culinary purposes), wrapping your fingertips like “thimbles.” The foil can be replaced with special silicone nail caps.
- After 20-40 minutes, release your fingers - the acrylic should change, looking like something jelly-like. If there is no effect, reapply fresh cotton wool and close your fingers for another 10-15 minutes.
- It is necessary to work quickly with the finally softened coating - under the influence of air, acrylic very soon begins to harden.
- Using a pusher or an orange stick, carefully remove the acrylic layer, lifting it in the direction from the cuticle to the edge of the plate.
- Remove any remaining coating by wiping with a cotton pad soaked in the previously used product.
How to remove extended nails (gel) at home
Working with this type of coating also requires a certain sequence:
- Start filing the surface of the gel nail with an 80/100 grit file.
- To make it easier to control the progress of work, keep a brush (brush) or at least a piece of cloth on hand to brush away the resulting dust.
- After some time, when the coating has noticeably diminished, change the nail file setting to 150/180 and continue to delicately grind off the artificial manicure.
- Here it is very important to grasp the edge of a critical approach to your own nail plate. At the end of the procedure, work with the remaining coating with special care.
It is worth noting that the files for the entire procedure should not be made of metal or glass, but of plastic, perhaps (the most “delicate”) wood.
And the directions of their movements should ideally lie from the cuticle to the edge of the nail and always strictly in one direction, since waving the nail file in all directions causes the plate to heat up.
What to do after removing extended nails at home
Firstly, this will give them a much more aesthetic appearance, and secondly, it will allow you to remove the smallest particles of the coating, even invisible to the eye.
But the main thing to remember is that nail plates devoid of synthetic decorations, after the extended nails have been removed at home, are sensitive and vulnerable.
And if a high-quality coating lasts on them for 2-3 weeks, then it is recommended to give them a break from this beauty for the same period of time. You can choose regular varnishes.
But the first 4-7 days your nails really need rest. Maximum - caring, healing nail polish. But before that, they must, figuratively speaking, “breathe.”
No coverings. Only, consisting in particular of the following:
- baths with sea salt;
- baths with decoctions medicinal herbs(chamomile - classic);
- paraffin wrap.
Separately, it is worth mentioning the use of essential and cosmetic oils.
Olive, grape seed, jojoba and almond are classified as basic.
Essential ones, added a few drops at a time (and for the most complete effect, it is better in assortment, and not one at a time for 1 treatment session), are selected according to their properties. Eg:
- lemon, bergamot and tea tree - for strengthening;
- tea tree - to protect against fungal diseases;
- patchouli, cedar and ylang-ylang - from delamination;
- grapefruit - for whiteness;
- sage, geranium, rosemary - for hydration and growth.
Sometimes sealing damaged, weakened nails with natural beeswax brings good results.
Plus, of course, using store-bought care products and creams will be beneficial.
It is also undesirable at this time to expose your nails to aggressive agents and environments, so household chores (washing dishes, cleaning the floor, washing by hand) and even more so anything in the garden (dacha) should be done strictly with gloves.
Extended nails are an ideal option for girls whom nature has endowed with fragile, thin and brittle plates. However, sooner or later, there comes a time when the hands need rest and recovery. To do this, it is advisable to sign up for the procedure with an experienced specialist. If, for a number of reasons, this is not possible, you need to know how to properly remove acrylic nails at home in order to minimize the harm from this manipulation and not aggravate the condition of natural nails.
Pros and cons of acrylic
Like any artificial material, acrylic has positive and negative characteristics.

Its main advantages are:
- high strength and elasticity;
- extended nails look very natural;
- does not deform under influence external factors and temperature changes;
- preserves the natural shape of the nails, does not injure the plate and protects from negative factors environment and household chemicals;
- the ability to create any design;
- when restoring an acrylic nail, there is no need for re-extension;
- Salon coating removal is very easy and quick.
The main disadvantages include a rather unpleasant, persistent odor, lack of oxygen access to the natural nail and a high probability of an allergic reaction.
Removal with acetone
To remove the coating, you can use a professional solution, which is sold in specialized stores. If this is not possible, there is alternative method using liquid to remove varnish.

In order for the procedure to be as effective as possible, you need to study in detail how to properly remove acrylic nails at home with acetone:
- Carefully cut off the overgrown edge of the nail with tweezers. Extreme caution should be exercised as particles of the material may break off and get into your eyes during operation. In addition, there is a risk of damaging the skin under the plate. Under no circumstances should you try to tear off an artificial nail. The fact is that during extension, the acrylic composition is literally absorbed and combined with the structure of the plate. In addition to the terrible pain, the tearing process traumatizes the natural nail, and many months of recovery will be required;
- file the surface with a coarse abrasive file to improve the penetration of acetone liquid into the acrylic;

- moisten a quarter of a cotton pad with acetone, place the marigold on top and wrap it in foil to reduce the intensity of evaporation;
- repeat the manipulation on all remaining fingers, hold for about fifteen minutes. After the specified time, the acrylic will become softer and more pliable;
- remove extended nails by filing them with a fine abrasive nail file.

After completing the procedure, you need to paint your natural nails pharmaceutical products, aimed at restoring, moisturizing and nourishing the plates.
Non-acetone method
It is better not to use the method of removing artificial plates described above for young ladies with dry, thin skin prone to allergies. In addition, inhalation of vapors of this substance by particularly sensitive individuals can cause mild poisoning. Such girls should familiarize themselves with how to remove acrylic nails at home without acetone.
One of the most effective ways, is to soak your fingers in nail polish remover that does not contain acetone:
- Pour the selected product into a small bowl or bowl. Its volume should be enough to completely cover artificial nails;
- lubricate the tips of your fingers and cuticles with Vaseline and place them in a bowl with the solution;
- after about twenty minutes, the acrylic material will begin to soften and dissolve;
- alternately remove your fingers from the liquid and scrape off the remaining acrylic using an orange stick. The treated nail should be thoroughly dried with a towel. If the artificial material does not come off well, the finger must be returned to the solution and kept for a few more minutes. The stick must be used carefully, otherwise the surface of the plate will be damaged;
- repeat the manipulation with each nail;
- after complete removal of the acrylic coating, the handles should be washed with warm water and dried with a towel;
- Polish your nails with a soft buff, getting rid of the slightest particles of artificial material;
- Apply a moisturizer to your hands to restore moisture balance.

In the video below, provided detailed instructions How to remove acrylic nails at home.
Even the most careful and careful removal of artificial nails requires a course of recovery and rehabilitation. Thinned, weakened, dried out and fragile plates require special care, which will trigger natural regeneration processes and restore their strength and glossy shine.

Strengthening varnishes are highly effective, but they must be used according to a certain scheme. On the first and second days, you need to apply the product to the nails in two layers, on the third day, the varnish needs to be removed. On the fourth day, the scheme must be repeated. The entire course of treatment takes about one and a half months and depends on the degree of damage to the plates.
Indispensable in the restoration process are nourishing masks and baths. The easiest way: dissolve 50 grams of sea salt in 200 milliliters of warm water and add 5 milliliters of iodine. You need to soak your nails in the resulting nutritional cocktail for about a quarter of an hour. After the procedure, your hands should be lubricated with moisturizer.

Another recipe for intensive recovery: heat a small amount of olive oil, add five drops of freshly squeezed lemon juice, rub well into the plates and cuticles, put on thin gloves and leave overnight.
Don't forget about a balanced diet. The daily menu must be enriched with products containing calcium, zinc, vitamins B, C, A and E. You can also drink a course pharmaceutical drugs, the effect of which is aimed at strengthening the nail plates.
The article answers possible questions from those who are removing extended nails at home for the first time. Before you begin removing gel or acrylic nails, it’s worth finding out what and how to do, evaluating the result, analyzing the pros and cons of existing methods.
Removing extended nails does not require special knowledge, skills, tools, or materials. The process is quite simple and does not require the participation of a specialist.
IMPORTANT : Before you start removing artificially extended nails, remember what material the master used. The removal methods for gel and acrylic are different!
Nail Remover Tools
To remove gel nails tools needed:
Nail clippers or crankcase;
a rough nail file (abrasiveness (grit) - 80/80, 80/100) or a manicure router.


To remove acrylic mass from the nail plate you will need:
Manicure nail clippers or cutter (tips cutter);
acrylic remover or any acetone-based product (acetone);
cotton sponges;
aluminum foil, cut into squares 8x8 cm. Number of squares - 10 pcs;
pusher, orange stick or flosser.


How to remove gel nails yourself? Removal instructions
IMPORTANT : Gel overlays do not soften under the influence of solvents! They need to be cut down. It may take 5-10 minutes to treat one nail plate.
1. To reduce the area of cutting, nails must be shortened with nail clippers or a nail clipper. This must be done very carefully so that the gel does not crack or injure the natural nail plate.

IMPORTANT : When shortening artificial nails, be extremely careful. When removed, the free edges of artificial nails can shoot off, injuring the eyes. To protect yourself, place your hands in a clear plastic bag or use safety glasses.

If the gel layer is thick enough, first cut it down to the desired thickness as shown in the diagram.

2. Using a coarse file with large grain or a manicure router, file off the gel material from the nail.
IMPORTANT: To remove the gel, glass files, a metal tool with a notch, European stone, or a buff are not used.
IMPORTANT: When cutting, a lot of dust is generated. It is worth taking care to protect the respiratory tract.
Rules for filing the gel coating (for filing):
start with your left hand (for right-handers);
hold the nail file between your middle and thumb;
pressure on the file is applied with the index finger;
Protect your fingers in contact with the file with adhesive tape. Fingers will not slip and get injured;
the finger from which the gel is cut is held or fixed;
From time to time, the removal of the gel must be controlled so as not to damage the natural nail plate.
IMPORTANT: A 0.5 mm thick layer of gel should remain on the original nail plate.
3. After removing the nails, polish the nail plate with a buff or polishing file. Before starting sanding, it is recommended to apply olive oil to the nail.
IMPORTANT: While polishing the nail, move the tool in one direction so that the nail does not heat up.


How to remove acrylic nails without consequences? Removal instructions
Method I. Using nail remover or acetone-based product.
1. Remove the free edge of the base with nail clippers or a carpenter.
2. When adding extensions, acrylic overlays are coated with a special compound that needs to be cut off, otherwise it will prevent the base material from softening during the removal process.
3. Apply a sponge soaked in acrylic remover or acetone-based nail polish remover to each nail. The sponge can be cut to the size of your nail.

4. Secure the sponges to the nail plates by tightly wrapping them with foil. This prevents the liquid from evaporating and retains the heat necessary for the chemical reaction to begin.
5. Remove the foil with sponges after 30-40 minutes. If the acrylic continues to hold, repeat the procedure (10 min.)


6. Remove any remaining coating using a pusher or an orange stick.

7. Polish your nails with a polishing file or buff. Apply healing varnish.


Method II. Sawing off the acrylic layer.
The process is identical to removing gel nails.
Method III. Using dental floss.
1. Using a pusher or wooden stick, lift the entire lower edge of the acrylic plate (from the cuticle).

2. Place dental floss under the bottom edge of the nail.
3. Slowly and carefully advance the thread while slightly lifting the acrylic plate.
4. After removing the artificial coating, the natural nail plates are polished.
IMPORTANT: Regardless of the method of removing artificial nails, the natural nail plate requires close attention and care during the recovery period.


Cuticle oil: effect on nails
In the process of removing artificial coating, in addition to the native nail, the cuticle also suffers. The skin around the nail plate dries out and cracks.
Cuticle oil is a nourishing agent that
moisturizes,
saturates with vitamins,
prevents peeling of the skin around the nail,
activates the growth of the nail plate,
improves blood circulation.
Cuticle oil is used every evening until the nails are completely restored. The product is rubbed into each nail in turn. Remains on hands until completely absorbed. The nail restoration process takes several weeks.
You can make your own cuticle oil. The basis of any product for the care of the nail plate and surrounding skin is essential oils. To eliminate thinning and splitting of the nail plate, bergamot, patchouli, and ylang-ylang are used. General strengthening of nails will be ensured by the use of lemon, eucalyptus, chamomile, lavender, rosemary, thyme, tea tree. An alternative to essential oils can be 5-6 drops lemon juice.


Use essential oils in combination (2-3 types). This will speed up the recovery process.
Add a few drops of your favorite essential oils to vegetable oil (olive, hemp). The required amount of vegetable oil is 25-30 ml. Vegetable oils You can mix, for example, 15 ml of grape seed oil and 10 ml of jojoba.
It is advisable to add 1 capsule of vitamin E to the oil mixture.


Ekaterina, 25 years old, Rostov-on-Don
A friend uses foil with already fixed sponge squares to remove the acrylic coating. Very comfortably.
Anna, 30 years old, Moscow
At the dacha I had to remove the gel myself. The process is quite labor-intensive. Requires attention, strength, patience. But everything went well!
If you can’t get to the master, you can work hard.
Anastasia, 22 years old, Pavlovsky Posad
I removed acrylic nails using an acetone bath (on the advice of a friend). Horror! The pungent smell of acetone and dry hand skin.
The next experiment was with sponges and foil. Simple and accessible. The main thing is not to forget to cut off the top coating from the acrylic.
The layers came off quickly, the nails practically did not need restoration.
An interesting method with dental floss - you need to try it!
Video: Removing acrylic
Video: How to remove extended nails at home
Video: How to properly remove artificial nails with a router
Marina Ignatieva
Reading time: 9 minutes
A A
When the time comes to remove nails after extensions, many girls resort to the services of professionals. But if you don’t have time to visit beauty salons, you can do it at home.
Find out how to remove nails correctly at home without damaging your natural nails. Watch the video of how the masters remove extended nails.
These tips will help you remove extended nails without the help of professionals, preserving the beauty and health of your natural nails.
Products and tools for removing gel nails
It is very difficult to remove; for this you must have enough time, special materials and tools.
To remove gel nails you will need

How to remove gel nails - detailed instructions

Video instruction: How to remove gel nails correctly
What products and tools are needed to remove acrylic nails?
To remove acrylic nails, you will need:

Video instruction: How to remove acrylic nails correctly
Nails after removal of extensions - care and restoration
Even if you carefully and carefully removed your nail extensions, they will still need care and restoration. Various procedures and baths will come to your aid.
- Hot manicure
Using a hot manicure, you can restore damaged nails after extensions. Once in the nutritious hot composition, the nail becomes permeable, which allows it to be enriched with essential vitamins and minerals. The composition will quickly penetrate the nail, restoring it. - Paraffin baths
Such baths nourish the nail well, restoring the water balance. This procedure is recommended to be performed immediately after removing extended nails. Afterwards, paraffin baths are recommended to be used once every 2 – 3 weeks.
During paraffin baths, hands are first cleaned and lubricated with a special cream. Afterwards, hands are dipped into cosmetic paraffin heated to a certain temperature. After the bath, hands are wrapped in cellophane and warm mittens are put on. After 20 minutes, the paraffin is removed and a nourishing cream is applied. Paraffin baths not only strengthen and restore nails, but also nourish the skin of the hands well. - Biogel
If after extensions your nails split, it will be effective to seal them in biogel. After nail extensions, the free edge of natural nails becomes soft, which can be strengthened with biogel. Biogel has a flexible structure, which after application creates the effect of a natural nail. Biogel covers the entire nail with a thin layer, sealing the free edge. When natural nails grow, the biogel is polished so that the border between the natural and artificial nails is not visible.
Biogel protects the natural nail from mechanical damage, scratches and cracks. - Massage
To strengthen your nails, it is recommended to massage the nail plate using a special solution. Use a circular motion to rub the vitamin solution or cream into your nails every evening. It is better to trim the free edge of the nail, as it is damaged anyway.
At first, it is better not to cover your nails with decorative nail polishes; make an exception only for medicinal varnishes. Avoid getting acetone, formaldehyde and other aggressive liquids on the nail plate. - Masks and baths
Experts recommend regularly making nail masks after extensions that contain lemon juice, sea buckthorn oil, sea salt, essential oils, vitamins A and E. Rubbing lemon juice into the nail helps whiten it and prevents the appearance of yellowness on the nails. Sea salt baths will help strengthen your nails. Sea buckthorn oil perfectly restores the nail structure, which is necessary for damaged nails. - Rubbing in essential oils (pine, bergamot, chamomile, etc.) also perfectly restores and nourishes nails, preventing them from splitting.
-
Don't forget that beauty starts from within. For better growth nails, include in your diet more foods containing calcium, selenium, silicon and vitamins. IN Everyday life protect your nails from aggressive influence environment. Be sure to wear gloves when washing dishes, and apply a protective coating to your nails when swimming.
We hope that our tips will help you remove extended nails at home and restore their health after removal
.
Good luck!
Every woman strives to look well-groomed and attractive, so neat manicure– this is not just a whim, but a necessary attribute beautiful image. And even if your “native” marigolds are not a source of pride, then competently done acrylic extensions will correct all defects and make female hands more well-groomed and beautiful. Naturally, extended nails are not durable, so over time you have to part with them for a while and let the “native” nail plate rest. It is clear that the procedure for removing acrylic nails, as well as extensions, should ideally be performed by a manicurist. However, if you don’t have time to visit a manicure salon or you simply want to save money on this procedure, then we will be happy to tell you how to remove acrylic nails yourself, at home.
Note that when removing acrylic from the nail plate, it is very important to carry out the procedure in strict sequence and not to rush. After all, it is precisely when the artificial material is removed incorrectly, and not when worn acrylic manicure, nails are injured. So, if you want to learn how to properly perform the procedure for removing acrylic nails at home, then let’s not hesitate and get started.
How to remove acrylic nails at home: necessary tools
Let's start with the fact that for the procedure of removing acrylic nails we will need the following tools:
- alcohol or antiseptic for cleaning hands and tools;
- a disposable napkin or small towel on the table;
- scissors or tweezers, a file with an abrasiveness of 100 units;
- nail polish remover with acetone;
- food foil;
- orange stick;
- files with abrasiveness 180-400 units;
- nail polisher;
- cuticle oil.
Step-by-step instruction
Step one
First, treat your hands and tools with an antiseptic to prevent infection.
Step two
Using tweezers or nail scissors, remove the length of the free edge of the nail to approximately 2.5 mm. If these tools are not available, you can use a 100 unit saw and cut the length of the plate.
Step three
Moisten cotton pad in acetone, apply to the nail and wrap your finger in foil, pressing it firmly to the nail plate. Do the same step with all fingers and leave for 15 minutes.
Step four
After 15 minutes, starting with the little finger, remove the foil and remove the softened acrylic with an orange stick, working on each finger in turn.
Important! If the acrylic does not come off completely the first time, wrap your finger in foil again and hold for another 5 minutes.
Step five
After all the acrylic has been removed, treat the nail plate with a file with an abrasiveness of 240 units, that is, polish it.
Step six
Treat your nails with heated vegetable or regular cosmetic oil for the cuticle, rubbing it in with massage movements.
Step seven
After the oil massage, polish each nail again with a chamois or soft polishing file, as if “sealing” the result. Note that this procedure not only provides beautiful view nails, but also reduces delamination of the nail plate.
That's all! Now you know how to remove acrylic nails at home and save on the services of a manicurist!
Good luck and great results!
We also recommend
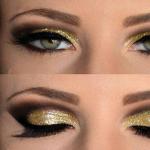 How to do golden makeup
 Ultrasound of the mammary glands, when to do it and how many times?
 How to increase pensions for working and non-working pensioners: methods, step-by-step instructions Distribution of funded pension payments
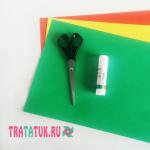 DIY paper Christmas ball for the Christmas tree
 Application from corrugated cardboard How to make corrugated cardboard by hand
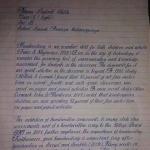 How to learn to write beautifully and make your handwriting perfect?