Knitted keychain. DIY men's keychain made from paracord
There are often situations in life when you need or just want to give some non-binding little thing. Well, for example, a friend is sick - and you want to cheer her up. Or people from friends came to visit...
A DIY embroidered keychain is amazing, isn't it? Individuality, which is so lacking these days, can be expressed even with the help of such a small thing. Do you want to know how to embroider such a useful...
DIY keychains are cute, charming little things that bring a little joy into our lives. Interesting ornaments, unusual solutions, bright patterns, stylish little things - all these are trivial little things that can become...
A DIY keychain for a man is a great gift. It looks interesting, and no one has canceled its utilitarian function. Kids can make a similar surprise for dad if their mom or grandma helps them. Today we...
Original Halloween souvenirs definitely attract attention. They are especially relevant now, when there is very little time left before the holiday. Beaded jewelry and souvenirs are especially good. They are small and made...
A homemade pumpkin will serve as a wonderful handmade gift for Halloween and will create a mysterious holiday mood. Why not make a beaded pumpkin? This pumpkin can become earrings, a brooch or a keychain. Our today...
So, autumn is in full swing, and this is not a reason to be upset. Many craftswomen look with pleasure towards autumn, because it has a special beauty that is reflected in their works. Bright colors of leaves and berries, golden...
Do you know that translated from French the word “keychain” (breloque) means nothing more than an amulet? Initially, keychains served as amulets - small guardians of happiness, health, success, and good luck. From the time of...
A keychain is a pendant that is attached to a watch or bracelet. Also, the keychain can be attached to a bunch of keys, a backpack or bag, etc. Recently, it has been fashionable to use the image of an owl absolutely everywhere - hats, backpacks, toys, clothes. And we will crochet the owl keychain.
Small crocheted owls
This work is not at all difficult; the birds are born easily and quickly. This keychain is suitable for both adults and children. Also, it can be used as a gift.
For work we need:
- leftover yarn of different colors;
- hook;
- some felt in pastel colors;
- black beads;
- needle and orange thread to represent the beak;
- thread or chain for hanging.
Legend which will appear in the text:
- Art. without nac. – single crochet;
- increase - perform 2 single crochets in one loop;
- decrease - perform 2 loops together, like 1 single crochet;
- *…* N times – repeat the pattern between the stars several times;
- () – the total number of loops in a row or circle is indicated in brackets.
We start knitting an owl keychain from the head and body. The direction of execution is bottom-up.
1st row: perform 6 tbsp. without nak in amigurumi ring (6)
2 rows: in each loop we increase 6 times (12)
3 p.: repeat * 1 tbsp. without ac., increase* 6 times (18)
4 p.: repeat *2 tbsp. without ac., increase* 6 times (24)
5 r.: repeat * 3 st st., increase * 6 times (30)
6 p.: perform 30 tbsp. without nac. (thirty)
7 p.: repeat *3 tbsp. no pressure, decrease*6 times (24)
From 8 to 10 p.m.: perform 24 tbsp without changes. without nac. (24)
RUR 11: repeat *2 tbsp. no pressure, decrease* 6 times (18)
12 rubles: repeat * 1 tbsp. no pressure, decrease* 6 times (12)
Now let's move on to assembling the small amigurumi. We fill the owl with filler, and sew the edges with a connecting stitch. Then we move on to decoration. We cut out small circles-eyes from felt and sew them to the product along with beads-pupils. We embroider the beak with orange thread. All that remains is to attach the thread or chain and the keychain is ready.
Owl – keychain OWL: video master class
Flat keychain, crocheted
Now let’s make not a three-dimensional toy, but a flat owl. It is also attractive and easy to do.
What we need:
- leftover yarn of different colors;
- hook;
- ring for fastening
We start crocheting again from the body and head.
1r. – dial 2 air.p. and knit 2 stitches. without nac. (6)
2 r. – perform an increase in each st. without nac. (12)
3 rubles – repeat *st.k.without nak., increase* 6 times (18)
4r. – unfold the product and perform 8 treble stitches.
5 rub. – we knit in the following sequence: 1 chain stitch. lifting, 1 st. without nac., (1 treble with nac. + 1 treble with 2 nac. + 1 treble with nac.) in 1 loop, 1 half-stitch. with nak, 1 connection tbsp., 1 half tbsp. with nak., (1 treble with nak. + 1 treble with 2 nak. + 1 treble with nak.) in 1 loop, 1 treble. without nac. Then we tie around the entire edge.
To knit an eye we make 2 air. p., and then 6 st. without nac. We cut out the pupils from the wind. To finish the work, we embroider the beak and glue the eyes to the main product. The keychain is ready.
How to knit an Owl keychain: video MK for beginners
Master class on crocheting a cute owl
A cute owl can serve as a keychain, a pincushion, or just a small toy. It can be done in the classic version or as a funny winking bird.
For work we need:
- leftover yarn of different colors;
- hook;
- sewing needle and thread;
- needle with a large eye;
- filler.
We start work, traditionally, with the body and head. We crochet 6 air loops, and then:
1r. – 4 columns. b/n, 3 in 1, on the other side 3 columns. b/n, increase (12);
2 rub. – we make an increase, 3 pillars. b/n, increase 3 times, 3 columns. b/n, increase 2 times (18);
3 rubles – increase, 4 columns. without n., (increase, 1 column b/n) - 3 times, 3 columns. b/n, (increase, 1 column b/n) – 2 times (24);
4r. – approx., 5 columns. b/n, (approx. 2 columns. b/n) – 3 times, 3 columns. b/n, (approx., 2 columns b/n) – 2 times (30);
5 rub. – 14 pillars b/n, approx., 14 columns. b/n, approx. (32);
6-13r. – no changes (32);
14 rub. – 14 pillars b/n, decrease, 14 columns. b/n, decreasing (thirty);
15 rub. – 5 columns. b/n, decrease, 14 columns. b/n, decrease, 6 columns. b/n (28);
16 rub. – 13 tbsp. b/n, decrease, 11 tbsp. b/n, decreasing (26);
17 rub. – 3 tbsp. b/n, decrease, 13 tbsp. b/n, decrease, 6 st.b/n (24);
18 rub. – repeat (4 tables to b/n, decreasing) – 4 times (20);
19 rub. – 1 row without changes + 1 tbsp. b/n;
Next, we put the filler into the product and connect the upper part with a connecting post. Then, we make 5 connecting posts, a chain of 41 air loops and connect it to the product with a connecting post. We finish the row with single crochets.
Let's move on to making the wings.
Right wing.
1r. - 6 pillars in the ring. b/n, conn. Art.;
2 rub. – 4 ch, 1 dc2n, 2 dc2n, 1 dc2n, 2 dc, 2 pst, 1 sc, 3 sc (12);
3 rubles – change the color of the thread and make a chain of 4 ch. Then we perform the 4th column. b/n and at the top of the wing we knit: 1 pst, 1 dc, 1 pst. After that, we make 2 stitches in each loop without naikda. Fasten the working thread and leave a tail for sewing.
Left wing.
1r. – we make 6 pillars in the ring. b/n (6);
2 rub. – 2sc, 1 sc, 2 pst, 2 dc, 1 dc2n, 2 dc2n (12);
3 rubles – we attach a different color of thread to 1 sc, and then knit 2 sc in each column. At the top of the wing we perform: 1 pst, 1 dc, 1 pst. In the last dc2n we make 4 sc.
Let's move on to making the eyes.
For one part you need to cast on 4 air loops and close them in a ring. Then, on the first row we knit 3 chain stitches + 11 double crochet stitches. In the second row we increase and knit 12 single crochet stitches. The working thread must be secured and a tail left for sewing.
We knit the pupils. We make 7 single crochet stitches into the ring, after which we fasten the thread and leave it for later sewing.
Ears. We cut the threads of all colors used in knitting to a length of 6-7 cm and attach them to the main product as a fringe.
Let's move on to assembly. We sew wings on both sides of the owl. To do this, we count 5 rows, and start sewing on the 6th. We do this behind the back walls of the posts along the edge marked with beads.
We connect the eyes to each other. Highlights can be made with regular sewing thread. We also sew them onto the back walls of the stitches.
Now we embroider the beak, as shown in the photo.


Today I propose to crochet a small keychain using patterns from a Japanese magazine. It can be hung on your phone, bag, iPad case, wallet, or used as a doll toy like my daughter did. So I didn't get the keychain.
Let's start by choosing a hook and thread. Take the remaining threads of three shades and a little brown. Although you can knit a single color ice cream, such as pink. Then you will only need pink and brown threads. I found balls of cotton thread. I chose a hook No. 1.7 for them.
How to choose a hook for threads
In crochet courses we were taught to do this. We take the thread with which we are going to knit the product, fold it in half and twist it lightly. Not tight. How thick these threads twisted together are, this is the thickness you need for the hook. And also, if you are knitting multi-colored ice cream, then all three colors should be the same thickness. Otherwise it won't be pretty.
To fill the ice cream, you will need some cotton wool, synthetic polyester or synthetic padding, whatever you have on hand.
Description of crocheting a keychain - ice cream
Original photos of keychains, choose which one you would like to knit:

- interesting selection for the site!!!
- Sides for women's and adult models, without children's.
The scheme is the same for everyone, they only differ in different colors.
I will knit a three-color keychain:

Look up the loop symbols for Japanese magazines. In principle, they are no different from ours:
The keychain consists of two parts: ice cream and a stick, which are then sewn together. The stick is not stuffed with anything.
I started knitting with a stick. Take a brown thread and a hook. Make an “amigurumi ring” and knit 6 tbsp into it. b/n. See the legend for how to knit an amigurumi ring. Tighten the loose tail of the ring so that there is no hole and knit another 4-5 rows of 6 sts. b/n. As shown in the diagram. Close the knitting and leave a tail to sew the stick to the ice cream.
Let's start knitting the ice cream itself.
Cast on a chain of 5 chains. loops +1 air. p. rise and knit according to the pattern: in the second loop of the chain, immediately knit 2 single crochets (increase), etc.
In the first row we knit 15 tbsp. b/n. We make 1 ch. rise and knit in the second row similarly to 20 tbsp. b/n.
In the third row, single crochets are knitted behind the back wall of the stitches of the previous row (see symbols). Next knit according to the pattern. Don't forget to change the thread color after the 6th and 10th rows. When rows 12-13 are knitted, fill the ice cream with synthetic fluff or something hard. Knit the last row and bind off the stitches.


You will need:
1. Any leftover yarn, I have leftover yarn from Zhdins Yarnart: yellow, blue, milky, pistachio, orange, black.
2. Hook for your yarn, I have No. 2
3.Sewing threads and needle
4. Needle with a large eye
5.Filler
Abbreviations:
Sc – single crochet
Dc - double crochet
СС – connecting post
Ss2n – double crochet stitch
Pst - half column
V.p. - air loop
Pr - increase (from 1 sc, knit 2 sc)
Dec - decrease (from 2 sc, knit 1 sc)
Begin:
Body-head of an owl:
6 v.p.
1 r: 4 sbn, 3 in 1, on the other side 3 sbn, inc (12 sbn)
2 r: inc, 3 sbn, inc*3, 3 sbn, inc*2 (18 sbn)
3 r: inc, 4 sbn, (inc, 1 sbn)*3, 3 sbn, (inc, 1 sbn)*2 (24 sbn)
4 r: inc, 5 sbn, (inc, 2 sbn)*3, 3 sbn, (inc, 2 sbn)*2 (30 sbn)
5 r: 14 sbn, inc, 14 sbn, inc (32 sbn)
6-13 r: 8 rows without changes (32 sc)
14 r: 14 sbn, dec, 14 sbn, dec (30 sbn)
15 r: 6 sbn, dec, 14 sbn, dec, 6 sbn (28 sbn)
16 r: 13 sbn, dec, 11 sbn, dec (26 sbn)
17 r: 3 sbn, dec, 13 sbn, dec, 6 sbn (24 sbn)
18 r: 4 sbn, dec, 4 sbn, dec, 4 sbn, dec, 4 sbn, dec (20 sbn)
19 r: 1 row without changes (20 sbn) + 1 sbn for shifting to align the line of the bottom and top.
RUR 20: Fill with filler and SS join the top. Make 5 ss and knit a chain of 41 ch, connect ss with 6 sc and so on until the end of the row.
Fasten the thread, cut and hide.

Wings (2 parts):
Right wing:
1 r: in the ring 6 sbn (6 sbn) SS
2 r: 4 ch. and 1 ss2n; 2 ss2n; 1 ss2n and 1 ssn; 1 dc and 1 pst; 1 pst and 1 sc; 2 sc (12)

3 p: change thread. In a chain of 4 ch. we knit 4 sc, at the top of the wing we knit: 1 pst, 1 dc, 1 pst. Then we knit 2 sc in each loop.
Fasten the thread and leave for sewing.

Left wing:
1 r: in the ring 6 sbn (6 sbn)
2 r: 2 sc; 1 sc and 1 pst; 1 pst and 1 dc; 1 dc and 1 dc2n; 2 ss2n; 2 ss2n (12)

3 r: change thread, fasten in 1 sc. We knit 2 sc in each column, at the top of the wing we knit: 1 pst, 1 dc, 1 pst. In the last dc2n we knit 4 sc.

Owl eyes (2 parts):
4 v.p. close in a ring.
1 r: 3 vp, 11 dc (12 dc)
2 r: inc*12 sbn (24 sbn)
Fasten the thread and leave for sewing.

Pupil (2 parts):
1p: 7 sc in the ring, fasten the thread and leave for sewing.

Ears (2 parts):
Cut all the used threads into the owl, about 6-7 cm long, trim off the excess. Tie the ears like fringe.
We also recommend
 Fashionable bob haircut options according to face type: choose yours, photo See women's bob haircuts
 Charming and attractive DIY Cockerels!
 Crafts from threads: do-it-yourself magical toys
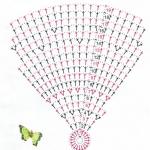 Napkins with voluminous crochet butterflies
 Four beautiful DIY hair ties - master classes for fashionistas and their mothers Homemade hair ties
 Sometimes you really need to be supported...