How to turn a long dress into a short one. How to shorten a long dress Trim a long dress
I can’t call myself such a fan of sewing, but every woman should be able to sew the simplest skirt, much less sew up a hole or sew on a button.
However, sometimes you have to work hard on the product. My headache- these are stitches on thick areas of the product. For example, when working with denim items.
It can also be problematic tame the dress or too long skirt when you want to do it quickly and without the help of a studio.
How to sew on a machine
Experienced dressmakers know special tricks with which these everyday moments cease to be a problem.
We have prepared 10 for you useful life hacks, with which sewing will become interesting, exciting, and most importantly, simple.
1.If you don’t like doing monotonous work, a real challenge for you will be to mark exactly the seam allowances on the fabric. To make this process easier, the best solution would be to make a template like this.
2. When you're home alone, and something you recently bought is too much long dress you definitely want to wear it tomorrow, exactly measure out the part that needs to be shortened, this simple method will help you. In the doorway, fix a rope or thick thread at the desired height, rubbing it thickly with chalk. To the marked line you need to add a hem allowance, the width of which will depend on the method of processing the bottom.

3. To make stitching on thick areas of fabric easier, place cardboard under the back of the foot and neck with ease and pleasure.

4. And this is another simple and convenient trick. Take some thin elastic bands and use them as stitching guides.

5. I really like this one convenient way outline the pattern immediately with seam allowances. To do this, wrap two pencils with tape and feel free to get to work. And if the allowance should be wider, add another pencil with the lead facing up in the middle of the design.

6. Correctly and accurately prepared binding is the key to convenient and quick edging of the entire product. Creating bias tape for many craftswomen was, is and remains one of the most difficult problems. I suggest you make such a template from paper, and working with the processing of this “terrible beast” will become easier and simpler.

7. Here’s an idea for a template for even allowances for hemming the bottom of the product. Very convenient and not difficult at all!

8. Another clever trick to make pinning easier air loops. The basis is again a paper template.

9. If there are no pins at home, ordinary clothespins or hairpins will replace them.

10. How do you like this method of processing loops on knitwear? Very convenient, isn't it?

As you can see, there are such subtleties and wisdom in sewing that are sometimes difficult to reach on your own, and here they really help out advice from experienced dressmakers. Feel free to adopt these simple tricks, and the issue of sewing and repairing your favorite clothes will no longer be a problem for you.
 Most women at least once in their lives have a question: how to shorten a dress? There can be many reasons for this. Here are some of them.
- On a thinner figure, the item fits looser, making it longer.
- An outdated model can be revived by making it shorter.
- Boring length of the product.
- Change of style.
If you have chosen a dress to shorten and made a firm decision to modify it, you need to know the main points, using which you will get an excellent result. This is especially true when you need to shorten quickly. We'll tell you how to turn a long dress into a short one.
Materials and tools for shortening a dress
Before you begin, you should prepare the tools and materials that will be needed for shortening.
- Spool threads that match the color of the dress and match the fabric. For example, for chiffon dress It is better to use thin synthetic threads with glitter.
- Sewing machine.
- Overlock.
- Ruler, square.
- Flexible meter.
- Chalk on the fabric or you can replace it with a thin piece of soap. Take into account the color of the fabric, since the mark left by the chalk may not be visible. You can use a special water-soluble marker.
Important! The line from a water-soluble marker can only be washed off with cold water. If you wet it hot, the mark will remain.
- Sharp scissors.
- Pins with heads for lining the bottom.
- Needles.
- Special adhesive tape (for certain cases).
How to properly shorten a dress made from different fabrics
Once everything is selected, you can start working.
Length Determination 
First of all, you need to decide on the length.
- Put on the dress, make a mark for the future edge, and pin it with a pin.
- After removing the dress, fold the edge along the mark and secure it along the length of the entire hem.
- Try on the outfit again to make sure it is the right length. Then remove and mark the line with chalk so that it runs 1 - 2 cm below the desired edge. This is hem reserve.
Important! This procedure must be carried out regardless of what fabric the dress is made of.
- Cut the fabric along the marked line.
Slice processing
Lightweight natural fabrics
The easiest way to process the bottom of a dress is made of light fabrics (cotton, thin linen, etc.). It is necessary to make a hem and perform a machine stitch or overlock processing.
Dense heavy fabrics 
If the fabric is thick enough, such as suiting or jersey, then You can sew trouser tape or bias tape along the bottom edge.
- Attachment is carried out on the front side. Then fold the hem inward and gently steam with an iron. Better procedure pass through damp gauze or thin cloth. This will prevent the dress material from sticking to the iron. The bottom can be reinforced by sewing a straight seam, or you may not need to perform this action.
Knitwear, silk 
A knitted dress requires special finishing on the bottom. This will allow you to avoid stretching the seam lengthwise. Processing is carried out either with a cover (flat) seam or with an overlock stitch.
- Overlock processing quite simple. The only condition is that you need an overlocker. The product is cut 0.5 cm below the desired mark. Then a stitch is made along the edge, without any folds. It is better to use a medium stitch width for knitwear; for chiffon and silky fabrics, use a narrow stitch with frequent stitches.
- Cover stitch needs an additional 2.5 cm hem. Along the bottom edge of the hem, the seam is processed using an overlocker. Then a hem is made along the marked line. And along the wrong side, a second seam is made, spaced 1 cm from the edge of the product. Then, stepping back the width of the foot (0.5–0.7 cm) from the edge upward, the second seam is sewn. After this, carefully iron through a damp cloth or using a steamer.
Processing a dress with decor at the bottom
If there is a need to sew braid or lace to the bottom edge, then Start cutting off excess fabric. Then the edges are processed and the lace is sewn on the front side., placing it on the fabric of the dress.
How to shorten a dress at the waist 
For skirts or dress hems, where there is decoration with stones at the bottom of the product or pleats, shortening is done along the seam at the waist. The work is performed according to the following algorithm.
- Steam the belt or skirt.
- Measure the length at the waist on the cut piece, so that you can then combine it with the seam or waistband.
- Taking into account the seam allowances, markings are made.
- Trim off the excess.
- Try on the waist of a dress or the belt of a skirt.
- From bigger size subtract the smaller one and divide the result by two. The resulting number is the centimeters that need to be subtracted along the side seams. Otherwise, you won’t be able to match the top with the bottom of a dress or a skirt with a belt.
- After aligning the seams, parts of the product are ground down.
Universal method
The cut edge of the product is folded 1 cm and attached with a straight seam along the front side, departing from the edge by 0.5–0.7 cm.
T-shirts, dresses, and pullovers purchased in a store are hemmed using a cover stitching machine. You can buy such a household assistant, but not everyone can afford it.
In one of the master classes we talked about. Today you will learn how to properly hem the bottom of knitwear without the help of a cover machine.
The hem of the bottom and sleeves of knitwear can be hemmed using a sewing machine or an overlocker.
On an overlocker, this can be done using a special foot for blind stitching. For details, see the video tutorial "".
A hidden seam made on a machine or overlocker will be practically invisible on voluminous, knitwear with a relief pattern and printed fabrics.But if you want, on the contrary, to make the hem seam noticeable, you can highlight it using double or triple decorative stitching. Moreover, it is fast, beautiful and reliable, since the stitching is durable. The optimal stitch width for this hem is 2.5 mm.
Hand blind stitch
Finish the bottom of the garment and the sleeves with an overlocker.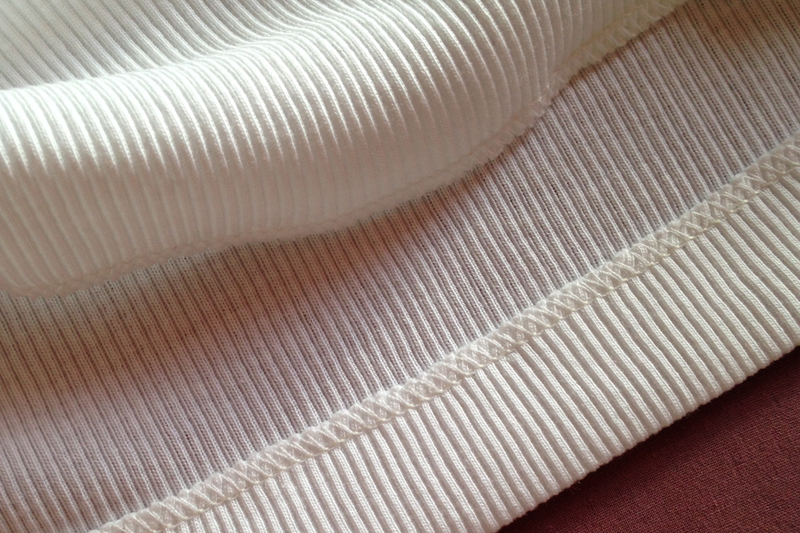
Turn the hem allowance to the wrong side and press. Hem with a cross stitch "goat". To do this, grab with a needle one or two threads of the fabric from above and below from the cut of the allowance (edge of the overlock stitch). Make sure that the stitches do not go to the right side of the fabric. The distance between the grips should be no more than 1 cm. Before finishing the stitching and securing the thread, slightly stretch the fabric.

The finishing seam “goat” is most often used to hem the hem allowance for items made of thin, delicate, silk and elastic fabrics.
Machine blind stitch

Turn the hem allowance to the right side so that on the wrong side the cut of the allowance protrudes 0.7 cm. Set a blind stitch on the sewing machine and adjust the stitch width so that the needle only slightly catches the fabric on the fold. Try it on a scrap piece.

Then stitch along the exposed edge of the hem allowance. The optimal stitch length is 1 mm.
Finish stitch or double needle stitch
Finish the bottom of the garment and the sleeves with an overlocker. Turn the hem allowance to the wrong side and press.
Stitch with a double or even triple needle. Using these needles allows you to maintain the elasticity of the finished seam.

If you are sewing from thick or low-stretch knitwear, you can sew one or two or three parallel straight lines with one needle.
The raw edge should be cut close to the stitching on the wrong side.
- On knitwear The hem is ironed by raising and lowering the iron to prevent stretching of the fabric.
- If the stitching comes together or is uneven, adjust the thread tension and release the pressure of the presser foot on the fabric.
- To ensure that the needle on the right side hits exactly the edge of the seam allowance, place a basting stitch along it with contrasting threads.
Of course, you can contact the studio for help. But if you decide to hem it yourself, we bring to your attention this article, in which we will look at how to hem the bottom of a dress made of fabric various types using a sewing machine and without resorting to its help, and also consider the advantages and disadvantages different methods.
The result will be a shortened hem and a suitable length of the product, and possibly a completely new look.
Using adhesive tape
This method is one of the easiest; it can be used even when you have absolutely no knowledge of any sewing technique. The adhesive tape itself comes in different widths, so you can find it in the same size as you want the width of the hem to be.
Glue it on the wrong side, iron it on the side of the paper tape, moving about a centimeter away from the edge of the folded fabric. After this, you need to remove the protective film from the paper, bend the hem to the desired length and iron again.
The excess fabric must then be carefully cut off. The seam will not be visible.
If the dress material is heavy textile, you will need two inserts.
Advantages of the method:
- The tape is suitable for fixing the hems of skirts, trousers, and coats.
- In fact, it is convenient and quick, and you can easily secure any hem.
Flaws:
- Professionals do not recommend using this option for securing the hem, believing that it increases the stiffness of the fabric, which will affect the appearance finished product. Since the glue has the property of hardening.
- The web is printed onto the face of the skirt fabric.
- Low quality cobwebs quickly lose their stickiness after just a few washes.
We offer you a two-minute video on how to properly glue the tape:
There are options for finishing the hem with and without a hem.
Processing without bending
Overlock processing
A fairly simple method that does not require the use of complex techniques is finishing the edge with an overlocker. A similar stitch can be made with thread in a completely different color. Even in this version it will look quite beautiful.
Processing the cut with a zigzag seam or a roller overlock, which produces an even hem, is perfect for a dress made of thin fabric and if the hem is “torn”.
There is no need to bend the edge of the material. After finishing, it is necessary to cut off the threads that stick out. The seam comes out even better if you do a zigzag stitch, stepping back from the edge, and then carefully trim off the excess material.
How contrasting colors look on light fabric when processing with overlock you can see in this video:
Using bias tape
An excellent hem can be achieved using bias tape. For thin material, it needs to be stitched like an edging. The bias tape (you can use a ready-made version) must be folded in half and ironed, then a piece of fabric is placed in the middle and stitched.
This option can be used to finish the inside seams of fabric that frays easily.
To hem such a thick fabric, you will need a hem of half a centimeter. The bottom of the dress and the trim need to be folded face down, then stitched along the bottom. Next, the binding is turned inside out, ironed and stitched along its top. This hem option can be used when the length of the skirt does not allow for a standard hem.
The process can be seen clearly in the video:
Finishing the edge with a hem
The typical hem size is 3-4 cm, for thin fabric this variable may be smaller. Perfect for creating straight line You can use a sheet of paper with horizontal lines drawn at the required distance.
Afterwards, you need to bend the hem to the required width and iron it with an iron. The result will be a perfect line, plus the hem will not be printed on the face of the fabric.

If the dress has a flared skirt, then folding will be more difficult. To facilitate this process, you need to lay a couple of parallel lines along the bottom of the dress. After the bottom line is slightly gathered, the material needs to be folded inside out along the line of the top line, pinned and smoothed.
This technique requires some skill. In the professional version, a hidden machine stitch is appropriate.
A simplified method is to topstitch the folded edge twice.
With a thin hem, such a stitch can be made with a special hewing foot. For fabrics made of thin material, as well as for dresses with a flared skirt, it would be advisable to process the edge with an overlock, and then stitch it 2 mm above the ironed fold line
To prevent the top edge from sagging, when folding wide, you should make a couple of lines that will be parallel.
Using the “Moscow seam”
Performed using a sewing machine on the wrong side. The initial hem is 2 mm and is fixed with a stitch. Then wrap it again, approximately 0.3-0.4 cm and then with a finishing stitch by 0.2. This way, you won’t need to overcast the edges of the hem of the skirt and this will prevent the fabric from fraying when it is washed.
This is a rather difficult option for finishing the edge of a dress, but it is a godsend when hemming a circle skirt and other options cut on the bias. It will help you master it next video:
How to hem a dress by hand using a blind stitch
If you decide to hem the dress by hand, it is better to use a blind stitch in one thread. The thread must be chosen in the same tone as the material, and the needle must match the thickness of the thread. It is advisable to start with the seam.
If it is not there, then you can start working by choosing any place.
The beginning of the blind seam is the puncture of the top hem. When the thread is pulled out completely, you need to pierce the hem at a distance of 0.5 cm from the previous puncture, hook the needle thin thread material and pull the working thread under it, pushing it out again to the wrong side.
Next, pierce the upper part of the hem, on the same parallel with the previous puncture on the hem, and again pulling the working thread under one thread of the fabric. Thus, you need to go over the entire hem.

Hand hemming is most suitable for dresses made of suiting or woolen material, for those fabrics in which needle punctures will not be noticeable on the face of the hem.
When choosing a thread, you should also pay attention to its color - it must completely match the color of the dress material. Preference should be given thin thread and a needle of appropriate size. Hemming is done in one thread.
If your prom dress is a little longer than ideal, the problem can be solved by hemming the hem a little. On most dresses, the initial hem is often large and noticeable, so try adding a hem or blind stitch to make the garment look more flattering.
Steps
Hem
- It must be kept in mind that the wearer of this dress will also wear shoes on prom. Due to the height of the heels, the length of the product will also change.
- Another person must pin the hem together. If you try to do this yourself while you are wearing a dress, it may skew the length of the garment, resulting in a hem measurement that is either too short or too long.
-
Trim the original hem. Take sharp scissors and cut off the excess fabric from the bottom of the dress. You need to trim enough fabric so that you have about 6mm extra left after the hem is finished.
- The hem seam itself will be about 3mm.
- If you can't trim the old hem when the fabric is pinned, mark the new hem with a pencil and remove the pins before trimming the excess fabric.
-
Remove the bottom seam. Use a seam ripper and remove approximately 2.5cm of stitching from the hem side seams.
- These side seams are too bulky and almost impossible to thread through the presser foot of a sewing machine. For this reason, it is highly recommended to remove them before making a new hem.
-
Using your hands, make a small hem along the entire edge line of the product and pierce it with a needle. Place it in the sewing machine and carefully lower the sewing needle, holding the hem there.
- The hem seam should be about 3mm. Fold the fabric under so that the seam is hidden on the inside of the hem and the selvage (edge of the fabric) is hidden under the folded hem.
-
Secure the seam with the presser foot of the sewing machine. Hold the needle down and snap the presser foot closed.
- Something to keep in mind is that if you don't have a presser foot that snaps into place and you need to screw it on, you'll need to do this before you insert the needle into your hem.
-
Sew a few stitches. Slowly sew about five stitches on the machine. All you have to do is start stitching the seam and press it down.
Using your fingers, guide the unhemmed edge of the piece into the curved insert on the front of the presser foot.
- Make sure the needle is in the down position at this time.
- This insert will guide the unhemmed edge of the product during sewing, folding it and bringing it to the stitching site. As a result, you don't have to manually roll up the rest of the edge; the machine will do it for you.
-
Sew along the rest of the edge slowly. Continue stitching the hem along the entire length of the product. The presser foot will do most of the work, but you must manually pull the fabric slowly, carefully and correctly into the curved insert on the front of the presser foot.
- The edge of the fabric should be parallel to the edge of the presser foot, and the edge of the hem should be parallel to the right side of the presser foot.
- If you work in parts, you need to start the process all over again with each new section.
-
Return the bottom seam. Once the hem is done, the side seams should be pinned and sewn together with a straight stitch.
-
Try the product on. The owner of the product should try it on to see how the new hem looks. After this the process is over.
- Please note that this is the recommended method for hemming. Because the bottom of many prom dresses not straight, but flared, the length of the product along the entire circumference is uneven. The initial hem may cause wrinkles because there is so much fabric being hemmed. When using this technique, as little fabric as possible is hemmed, therefore the risk of gathering is minimal.
Machine blind stitch
-
Measure out a new hem and remove the old one. The one who plans to wear this product must try it on, the second must measure how much material needs to be hemmed from the edge. After that, trim off the excess fabric with sharp scissors. Leave a 2.5 cm allowance from the edge for processing. The dress must be tried on together with prom shoes. The height of the heels matters when determining how the hem of the dress should be.
- You can measure the length of the hem using a tape measure and cut that way, but if you want a straighter hem, you'll have to mark the desired seam using sewing pins or a pencil around the entire circumference of the piece.
- Fold over and press the raw edge. Fold the raw edge of the product inward and hide it on the wrong side of the product. You need to wrap about 6 mm of fabric. Press the new crease with a hot iron.
-
You may need to turn the garment inside out to ensure that the hem is evenly folded and pressed.
- There is no need to use sewing pins to secure the hem at this stage.
- Fold and press the remaining part. Fold the remaining 1.8cm of fabric in the same direction as the original fold. Press the folded edge of the product with a hot iron.
-
The raw edge that you folded over earlier should be hidden inside the second fold. Again, make sure that the folded fabric is hidden throughout the entire interior surface of the product.
- At this stage it is recommended to pin the new hem. Insert pins along the hem so that the heads are on the inside of the piece, away from the edge of the hem.
- Attach the presser foot to the sewing machine. Screw the foot according to the directions on your sewing machine. This presser foot is needed to finish making the hem on the machine.
-
Your sewing machine should be designed to make blind stitches. Read the instructions that come with it to determine how to do this.
- Fold the edges of the hem and place under the machine. Place the product on the wrong side. The folded edge should be placed towards the outside of the presser foot. Fold the edge over, leaving a narrow edge showing.
-
Fold the edges of the hem and place under the machine. Place the product on the wrong side. The folded edge should be placed towards the outside of the presser foot. Fold the edge over, leaving a narrow edge showing.
- The heads of the pins will no longer be visible, but they will be facing out from under the fabric towards the sewing machine.
-
Sew along the folded edge of the fabric. Move the fabric under the presser foot and place the presser foot flange on the new edge. When the needle comes down, make sure it sews up the remaining hem and sticks out the back of the fabric. Sew along the entire length of the edge until finished.
- Most seams will break at the edge, and every third seam or so will end up in the fabric.
- The flange is the middle section of the presser foot and is often made darker or painted a different color to make it stand out. This part of the foot acts as a guide for the blind seam.
-
Try on the dress. When finished, unroll the border and straighten the seam, carefully pulling out the hemming stitches so that the fabric remains as straight as possible. Use a hot iron to smooth out the gathers and try on the dress to make sure the new hem looks great. This completes the process.
- A blind stitch will hide more sewing thread than a regular stitch for proms and other evening dresses this option is better. If the hem of the garment is too flared, or if you have hemmed the fabric too much, you may notice ruching along the hem.
Hand blind stitch
-
Measure out a new hem and trim off any excess fabric. The one who plans to wear this product should try it on, and the second one, using a tape measure, measure how much fabric needs to be hemmed. Then use sharp scissors to trim off the excess fabric.
- Make sure the dress wearer is wearing prom shoes when you take measurements. The height of your heels can make a big difference.
- It will be easier for you to trim away excess fabric if the dress is removed.
- To make the seam even, it is recommended to mark the intended hem with straight sewing pins or a pencil.
- Leave about 1.25 cm of excess fabric beyond the length of the intended hem.
Measure and pin the new hem. Whoever wears the dress must wear it. The second person should fold the hem of the dress to the desired length so that there is excess fabric on the back of the garment. Pin the hem along the entire circumference of the product and check the length.