Weaving from newspaper bread bins. Breadbox made from newspaper tubes
Weaving a bread box from newspaper tubes– the process is fascinating, but labor-intensive. But the result is worth it! Our MK describes in detail the technique of weaving an oval bread box from newspaper tubes. So let's get started.
We will need:
- newspapers;
- wooden skewer;
- glue;
- oval metal shape;
- paint, varnish (optional).
- Before you start weaving a bread box, you need to make several dozen tubes from newspapers. To do this, divide the newspaper into separate sheets, then wind each sheet, starting from the corner, onto a wooden skewer. Lubricate the corner on the last turn with glue, wait until it dries, and carefully remove the skewer. Nothing complicated, but the process is quite monotonous.
- Now we lay six tubes horizontally and eight vertically. We crosswise weave eight tubes in pairs, and begin to weave them in a circle, forming the bottom of the bread box. If the tube is not long enough, lengthen it by gluing another tube to the end. To make it easier to work with, attach the tubes with clothespins to a cardboard backing. After the eighth to tenth turn, you can transfer the product to a metal mold, attaching it with clothespins. Continue weaving to the edge of the mold.
- When the height of the sides is as you planned, secure the ends of the tubes by threading them into the loops formed by adjacent tubes. Weave the lid of the bread box in the same way. But its dimensions should be slightly smaller than the size of the bread box itself. If desired, decorate the lid with a handle. To give the new bread box more attractive appearance, you can paint it and then cover it with clear varnish. The color of natural wood looks especially impressive. This treatment will extend the life of the paper product. In addition, the process of cleaning the bread bin from crumbs will be greatly simplified.
 |
 |
 |
 |
 |
 |
 |
 |
 |
 |
 |
 |
Every home has one useful thing like a bread box. But few people know that you can make it yourself using newspaper tubes.
To create such beauty you will need perseverance and a minimum of materials. This work is suitable for both experienced and novice craftsmen. This bread box is made in the form of a round plate with a lid. It can be any color. Each craftswoman chooses for herself more convenient way weaving and invents his own devices. This master class will show how simple, interesting and exciting it is. Since the bread box is made from newspaper tubes, it’s worth figuring out how to make them.
How to weave tubes from newspapers
- Take newspaper sheets. One sheet is folded in half lengthwise and cut. The resulting two parts are also folded lengthwise and cut. You get four long strips of newspaper.
- Then take the same sheet, fold it in half crosswise and cut it. The resulting two parts are folded in half again and cut. You get four parts, which are folded in half again and cut. The strips are shorter because they were cut across.
- It is most convenient to cut with a knife or use a stationery knife.
- At this stage you can start twisting the tubes. First, take a long strip. It is screwed onto the knitting needle from the corner. After the newspaper strip is completely woven onto the knitting needle, there remains a small corner on which you need to drop a drop of glue to fix the tube so that it does not unravel.
- The spoke is removed. It turns out to be a neat tube made from newspaper.
- Take a short strip. Weaving begins using the same principle as with a long strip.
- The width of the tube depends on the width of the strip from which the tube is woven.
- The length of the tubes can be adjusted using a simple technique. To do this, the edge of one tube is flattened and threaded inside the second tube. The result is one long tube. The connection point is hidden between the posts.
- Coloring can be of any color. To do this, you will need a special longitudinal container or a longitudinal cardboard box covered with a bag. Wood stain is poured into a container, and the tubes are lowered into it. You need to work with gloves. You can paint with a brush, but then it will take more time. All tubes are painted according to this principle and laid out to dry.
- You can also paint the tubes with acrylic paint.

How to make a bread box from newspaper tubes
- To begin with, it is convenient to weave a lid, and then a plate. Because if you weave a plate and then fit a lid under it, it will be much more difficult.
- A template is cut out of newspaper or cardboard in the shape of an oval 9.5 cm wide.
- 5 mm wide newspaper tubes are prepared.
- 4.5 cm is deposited from both edges of the length and width of the template oval.
- The prepared tubes are taken and placed on the workpiece perpendicular to the main tube at a distance of 1.5 cm, which is located in the center along the entire length. They should alternately overlap one another, forming a weave. To prevent them from falling out, they can be secured with glue to the main tube. Then it will be more convenient to braid. In order to get an even oval, you need to add one tube at a time during the weaving process.
- It is more convenient to work with pre-painted tubes. Because when they are not painted, they have a slightly loose structure, which makes the work much more difficult.
- The entire template is braided and the workpiece is applied to the container that will be braided.
- As you weave the lid of the bread box, it will be placed on the mold, tied with an elastic band and take on the desired shape.
- After the work comes to an end, you need to make a bend. For bending, additional tubes are glued. Bending begins with bending three tubes into one and three tubes into one. And so on in a circle. It is advisable that they lie down without twisting.
- The edges of all tubes on the bend should be made round. They are hidden inside using a knitting needle. The lid is ready.
- A blank for the bread box plate is made according to the width of the lid shape. To do this, just trace it with a pencil on a newspaper or cardboard.
- The bread box plate is braided using the same principle.
- Using the same container as for the bread box lid, make a rim on the plate. All edges on the side are processed with the same hem as on the lid.

Types of bread bins made from newspaper tubes
Such bread bins gained wide popularity and were loved by many housewives. There are also many options for their execution. They can be different shapes and volume. The most practical is oval shape. A more spacious bread box without an inner side, but with an outer side. The leader in capacity is the rectangular shape.
Bread bins can also be classified by bottom. It can be completely wicker, or it can have a bottom made of cardboard, which is then braided with tubes.
There are many photos where you can clearly see what the sides might be like. They can be external and internal. For design use either acrylic paints, or decoupage technique. Such a bread box will become not only a useful item in everyday life, but also a good gift for relatives and friends.
Video on the topic of the article
2. I wove the bottom according to MK Maria http://stranamasterov.ru/node/924724?c=favorite_a, although I made a mistake at the start. But not scary :))

3.
She raised the racks: under three and up, then immediately made a bend in the rod. It is better to straighten the sides. When priming, it was necessary to lay a flat board with a load. Then, I think there would be no gap between the lid and the bottom.

4.
Now let's do some math :). We measure the width of the inner part of the bottom, divide in half and add 1 centimeter. We get the radius of our arc. We calculate the circumference: L= 2 * pi * per radius. then divide by 4, we get the width of the canvas. I have 21 cm. I wove two parts. Left long tails on the sides. The fixed part was woven in length slightly less than the length of the inner part of the bottom, since a little more would be added when weaving the sides. The movable upper part is woven 6-7 rows longer than the lower part, for free movement. You can weave it on a machine, I wove it on cardboard and secured it with double-sided tape.

5.
Now we need to bend it along the radius. At first I wanted to make a shape in the form of a cylinder with this radius, but something went wrong. The result was this design.

6.
On the cardboard we draw a circle with the radius we need and around it a square with a side of 6 centimeters more, three on each side. We cut out and build the same structure as in the previous photo. The circle can be used in subsequent braids.

7.
We prime it with PVA glue and water and lay it out to dry. To avoid creases from the ribs, you can put thin cardboard between the mold and the weaving.

8.
We are waiting, we dried one. We also dry the other one.

9.
Dried up. We measure the radius on the outer tubes, bend them at a right angle and dry them.

10.
I tried on the next tubes and cut them off with a corner, then coated them with glue and dried them.

11.
It didn't turn out very nice. Then I covered it with thin cardboard, covered all the ugliness and made it rigid in this part. Braided the sidewall.

12.
The upper part is movable. I decided to make axles from bottle caps. I made rings and glued the stands in the same way as the previous one. Subsequently I also sealed it with thin cardboard. Braided the sides.

13.
All parts are ready, let's start assembling. The lower part was glued to the bottom with PVA glue. Yes, here it is, after priming and after braiding the parts, it started to work. It's askew. But after gluing it to the bottom everything was level. Since the moving part also moved and in order for it to fit exactly, after applying the varnish I dried it on top. I laid cardboard for the gap.

14.
Well, actually, it’s drying. I also attached it to the side with clothespins. Tightened it up a little.

15.
Cut from plastic bottle washer, smeared the end of the plug with Moment assembly glue. I inserted a self-tapping screw into the pre-marked hole and screwed it into the plug.

16.
OK it's all over Now. After reassembly, the lid began to move again. I sprinkled it with water and put a small weight on top, everything was level. I'll have to varnish it again.

Yeah, it’s very hard to explain in words. I’m embarrassed. I’ll be glad if it’s useful to someone.”
Are you still used to storing bread in plastic bags or paper wrappers? Perhaps you should think about a special container - a bread box. Arriving at the store, we see the same modern assortment, almost using the same template. Do you want something special? Then a wicker bread box made from newspaper tubes is exactly what you need.


Let's get started
First of all, for work you will need old newspapers or magazines, knitting needles of various diameters, PVA glue, acrylic varnish, various paints for painting finished products or individual tubes, a spray bottle with water to moisten dry strips, brushes of different widths.
To twist a tube, you need to place the knitting needle on a piece of newspaper sheet at an angle of about 30 degrees, bend the corner and gradually, turning the knitting needle, wind the newspaper onto it.


At the end, the remaining corner must be moistened with glue and pressed to the end of the tube so that it does not unwind.

In order to make a long tube, you just need to connect several smaller ones together with glue, inserting them one into the other. Paper straws very convenient to paint in a small rectangular plastic tray with liquid or immerse in a bottle with a fairly wide neck. You can also paint using ordinary brushes, having previously covered the surface on which the tubes are laid out with oilcloth or cling film.
At first it may seem that weaving requires some special skills, but in fact everything is quite simple. The master class presented below with step by step photos will help you understand the essence of the process.
To make a bread box, you need to stock up on the following materials and tools:
- one hundred and fifty-one twisted magazine tubes;
- eight newspaper tubes;
- PVA glue";
- paper scissors;
- two thick cardboard pieces with dimensions 20 by 28 and 18 by 26 centimeters;
- sheets of thick paper - 2 pieces;
- fabric rectangle with embroidery satin ribbons or other decor - as desired. Its dimensions are 24 by 32 centimeters;
- a piece of padding polyester folded in three layers - its length should be 28 centimeters and its width 20;
- paper napkins with colored patterns;
- glue "Cosmofen".
The corners of the cardboard rectangle can be cut or rounded, depending on the desired shape of the bread box. On a cardboard base measuring 20 by 28 centimeters we place twenty-eight tubes from magazines. The distance between them should be the same. The entire surface and ends of the tubes should be covered with PVA glue and a sheet of thick white paper should be attached on top. Then the cardboard base needs to be turned over with the bottom side up.

We take the first separate magazine tube, fold it in half and intertwine it between the base tubes through one, lifting them perpendicular to the base. We attach the beginning of the next one to the end of the working tube and so on. Thus, to form the walls of the bread box, we will need to weave fourteen such rows in a circle.

At the end of weaving, the tail of the tube must be trimmed, glued to the underside and left to dry, securing it with a clothespin.

We bend the ends of the vertical tubes of the base diagonally at an angle and thread them through the walls of the bread box between the seventh and sixth wicker rows.


For strength, we lubricate the entire part of the bread box with glue, and trim the protruding tails of the tubes on the inside.
The lid of the product is woven according to the same principle as the lower part, but this time the base will be a piece of cardboard 18 by 26 centimeters, on which thirty magazine tubes need to be secured.

First you need to make two rows of weaving in a horizontal plane, and then bend the warp tubes perpendicular to the base downwards.

For a more accurate match of the parts during the weaving process, the lid is applied to the base, comparing the shape. After seven rows of regular weave, the tubes are woven in a rope style, resulting in a neat edge.

To do this, another one is added to each working tube, and the vertical tubes are braided with pairs of horizontal tubes alternately. The remaining ends are trimmed and tucked inside the edge weave.

After this, the bread box can be painted to match the color of the wood and varnished. We glue the padding polyester onto the lid using Cosmofen glue. Embroidered fabric is placed on top of the padding polyester, the edges are folded inwards and everything is also glued together along the edges.


An indispensable item in any home is a bread box with a lid, which can be woven from newspaper tubes. I really wanted to inspire you today to create a bread box) I think that I will succeed, since in this publication you will see works and master classes from the best masters your business - from Love Vologda from Vologda and from Ričardas from Lithuania, as well as ideas from the Internet. Below I am attaching links to the authors’ pages, but for now I invite you to admire what skillful hands can do and what can be done from old, unwanted newspapers you read. To complete the topic of bread bins with lids today, I am posting two master classes on weaving oval and round shape. Good luck in your creativity and enjoy watching!
Oval bread box from Ričardas. Length - 40 cm, width - 25 cm, height without handle - 16 cm
We weave a rope with two tubes:


I start on the form that I use to weave my baskets - this is how multifunctional a form can be

When I start weaving, I almost never know what pattern I will make, what colors I will choose, everything somehow turns out spontaneously..., and now... and so, when I have woven several rows with light tubes, I outline two tubes with dark brown ones and I start for the third, and so on for several rows 

I wove the bottom of the first and last row with a rope from 4 tubes and simply bent the risers as always... This time I did without catfish, but what can I say, I wrapped the handle with catfish... and there is a wire in the handle, so I could make the shape This one also happened by accident... I just glued the handle with hot glue.. 

Round bread box from Lyubov Vologda. Diameter of the plate - base 32 cm, height of the structure 36 cm

Have you been thinking for a long time about how to braid such a round thing? basketball It turned out to be too small, so I inflated a big ball, inserted it into the basin - and off we went! First I wove on the bed and standing, because on the table it all started under the ceiling :-))))


When it started to narrow, I wove about 5 cm and took out the ball, of course I deflated it first, otherwise I wouldn’t have been able to take it out. I closed the edge very simply, this photo shows the first stage

This is the second stage. Now all the tubes are inside the cap 

I trimmed the tip 3-4 cm, PVA, folded and 
I glued it so that the edge of the glue was covered with the next tube. It turned out to be a very tight and pretty braid. 
The plate was woven like a regular round bottom and closed in the same way as the cap itself. 

We also recommend
 Graphite hair color is a fashionable gray hair color for those in love with the extraordinary!
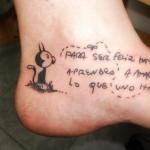 Spanish phrases for tattoos
 Elos rejuvenation technology: what it is and how it can help
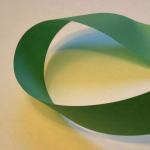 Mobius strip - an amazing discovery
 Congratulations to parents on their son's birthday Congratulations on the birth of their 7 year old son
 Scenarios for themed parties