Crochet scarf - diagrams, MK, description for beginners. Crochet shawl and bactus - for a real lady Crochet kerchief diagram and description for beginners
The arsenal of a modern woman contains the experience of past centuries. It contains many unusual and exciting ideas for every taste. A separate chapter can highlight the topic of scarves and shawls. Knitted clothing appeared in the middle of the 18th century. This is an old story, but it still remains in demand by women all over the world. In the 15th century Indian women They began to throw large scarves over their shoulders. The fashion for scarves came to Europe in the 18th century. It was at this time that manufactories began producing fashionable textile accessories.
It goes very nicely with a formal, romantic dress, trousers, top or skirt. It makes a woman look romantic. Shawls draped over the shoulders on top of a coat, jacket, raincoat or fur coat look stylish. And if you secure it with a brooch or decorative pin, the woman will feel special.
Variety of shawls
Today, the number of ways to knit a product amazes the human imagination. When choosing a knitting option, many women get lost in the patterns. This inspires creativity even among inexperienced craftswomen who are little familiar with crochet. But don’t be upset, because on the Internet you can find not a complex design based on execution technology, but a cute shawl.
A note for beginning craftswomen...
Women who are picking up a crochet hook for the first time should not try complex knitting patterns. You should first pay attention to knitting patterns for beginners. Crocheting has its benefits. For work, the craftswoman uses only one loop when crocheting, but when knitting, several loops come into play, which need to be monitored.
Very interesting products are obtained from individual motifs. This will make the work of a novice craftswoman easier. A beautiful and simple shawl is made from them. If an error is found in the motif, it can be easily corrected, you just have to undo a few rows. Small motifs are connected to each other to form a shawl.
You should pay attention to fillet patterns. The simplicity of the scheme allows you to create real masterpieces. An easy option for beginner knitters is to knit a shawl from a corner. Using simple diagrams and descriptions, it is easy to understand the technology of web expansion.
A simple diagram and description of a crocheted shawl
Experienced craftsmen advise starting to knit a shawl with simple triangles; the product can easily be made in different colors. To do this, after 6-7 rows you need to insert a thread of a different color.
When finished, the shawl measures 94-95 cm.
Materials and tools:
- Alpaca skeins ─ 10 pcs;
- yarn beige colour─ 200 g;
- light green yarn ─ 150 g;
- yarn yellow color─ 100 g;
- yarn white─ 50g;
- hook No. 5.
When knitting a product in two threads, the density is ─ 10 cm 7 rows.
Legend:
─ air loop;
Ɨ ─ single crochet.
Knitting pattern for a mixed shawl
Every 6 rows the color of the thread changes:
- We start knitting with beige thread in 2 folds;
- then we move on to 1 beige thread and 1 light green thread;
- Continue knitting with 2 yellow threads;
- then connect 1 yellow thread to 1 beige thread;
- 2 beige threads;
- 1 beige thread and 1 white thread;
- 2 threads of light green color.
When changing threads, you do not need to tie them into a knot, but rather put them one on top of the other.
Shawl knitting technology
From 6 v.p. form a circle. The last v.p. enter in 1 v.p. column b/n. A simple pattern M1 showed the knitting method in an accessible form. You just need to follow the alternation of colors. At the end of knitting there is no need to cut the thread, as it will be needed to tie the product. We tie the edge of the shawl in the following way:
- * 4 v.p. + 1 treble s/n in 1 vp*;
- repeat from *-*;
- We knit the corners of the shawl like this: 1 tbsp. s/n + 1 v.p. +1 st. s/n, 1 v.p. + 1 tbsp. s/n to the previous vp;
- continue knitting from *-* to the next corner;
- we finish 1 st. b/n in the corner of the product;
- cut and fasten the thread.
How to quickly and easily crochet a scarf
You should not think that large-volume knitted products have complex manufacturing technology. Don't be afraid, but try to carefully examine the pattern diagram and knit a small sample. This will give you confidence in your work. Any thread is suitable for a scarf. Their choice depends on what season the scarf will be worn.
Knitting a scarf using a simple pattern
The simple diagram provided will allow you to easily turn your desire into reality.
The finished scarf measures 102x107 cm. To make it you will need two colors of thread. You can choose any color. It depends on the preferences of the owner of the scarf. In our case, Moina yarn was used.
Yarn composition:
- viscose 54%;
- polyamide 32%;
- silk 14%;
- density 190/50 g.
To make a scarf you will need 100 g of yellow yarn, 50 g of green yarn and a hook size ─ No. 5.
Legend:
- ─ air loop (v.p.);
ǀ ─ single crochet (st. b/n);
Ɨ ─ double crochet (st. s/n);
ǂ ─ double crochet stitch (st. s/2n);
Ɨ ǂ ─ in the base loop there is a double crochet, one chain stitch and two double crochets (1 dc, ch, 2 dc).
Knitting the main pattern
Start work by dialing 5 v. p. (4 v. p. instead of one st. s/2n + 1 v. p. of the first row of the pattern). Follow the diagram strictly. Don’t forget to add 2 ch from the left edge. for expansion.
- Knit once from rows 1 to 24.
- Next we repeat from rows 13 to 24;
Don't forget to add 2 loops along the left edge. Let's add 6 times. This will lead to 12 additional loops and the appearance of the first rapport. Observe alternating colors ─ knit 12 rows with yellow yarn, and 6 rows with green. The direction of knitting is shown by the arrow in the diagram.
Crochet pattern for a simple scarf

Easy shawl patterns
Knitted shawl always female image adds romance and mystery. It's always cozy and warm with her. Even an inexperienced craftswoman who has recently “acquainted” with crochet can create a masterpiece with her own hands. Knitting a shawl is not only useful for state of mind, but also gives pleasure, introduces new patterns, teaches how to read diagrams and develops skills in work.
Shawls knitted with correctly selected color scheme, turn into real masterpieces.
Crochet diamond shawl for beginners
In order not to overload your abilities with a large number of chain stitches, professionals recommend starting to knit a shawl from motifs. Small elements when assembled will make the product stylish and elegant.
Using this pattern, you can knit not only a scarf, but also a blanket, bag, pillow and other products.
To make a scarf measuring 100 x 44 cm, you will need 125 g of yarn in five colors (25 g in one skein) and a No. 2 hook. 5.
Work execution technology
- Dial 5 v. n. and connecting loop art. b/n make a ring.
- According to pattern A, knit from 1st to 3rd circular row.
- Start knitting a circular row from 3 ins. n. instead of st. s/n.
- Finish the row of connecting c. n. or art. s/n.
To make a shawl you need to knit 28 squares and 8 halves.
Knitting halves of a rhombus
- Dial 5 v. p. and connect into a ring st. b/n.
- Knit according to pattern B 1-3 rounds. At the beginning of each row, knit 3 sts. n. instead of st. s/n or from 4th century. n. instead of st. s/2n.
The craftswoman chooses colors according to at will. According to the proposed scheme, all the elements are collected together and fastened with thread in the color of the shawl.
You can make tassels from the remaining threads. To do this, cut the yarn 30 cm long, fold it in half and tighten it into the product with a loop.

Patterns for an openwork shawl
We knit openwork “pineapple” patterns for shawls according to the patterns presented in this collection. Even a novice craftswoman will find a simple pattern for her future. knitted product.


Turkish shawl. Detailed instructions for crocheting
To make a Turkish shawl you will need 2 skeins of cream-colored Angora Gold Pullu yarn No. 01 and a hook No. 5.
Manufacturing technology of the “Turkish shawl”
Scheme No. 1
- Dial 3 v. p. and double double crochet.
- As the number of rows increases, the number of cells increases ─ 2, 3, 5, 7, 9.
- There will be 12 cells in 10 rows.
- In the 11th row we repeat knitting from 1 square with a half-column s/n.
- After the 12th row with 2 squares, we collect a chain of 12 v. p., knit in a half-column in row 10 between 3 and 4 squares (13), return back in half-columns b/n (14).
- Knit rows 15 and 16.
- We dial 12 v. p., knit it in a half-column into the middle of the previous chain (17).
- We dial again 12 v. p. (18), knit in a half-column in row 10 between 5 and 6 squares.
- We return using semi-columns b/n (19). We stop in the middle of the upper chain.
- We dial 12 v. p. (21), knit into the middle of the lower chain, tie the resulting new chain with 20 elongated loops.
- Let's return st. b/n (23) and finish the corner (24).
Scheme No. 2
- Row 1 consists of 8 cells;
- The elongated 20 loops are alternately connected to each other using 3 v. item (1).
- 20th century p. connects to the 11th cell in the 10th row.
- We return, tying 3 in. P.
- Do the 3rd row again, tie 3 ins. P.
- The last loop is connected to the 12th cell in the 10th row.
- We tie the last chain (arch) with flowers: 4 times 3 times. p. and p/s b/n. We knit the whole row like this.
- 10 flower is connected to the elongated loops of the next motif.
- Repeat the pattern until the end of knitting the shawl.

How to crochet a shawl from a corner
A popular and simple way to knit a shawl is the corner crochet technique. Baktus snoods can also be knitted and crocheted from the corner. For corner knitting, the minimum number of loops is cast on. And the uniform addition of side air loops leads to expansion of the product. The size of the shawl is selected individually. When performing work, you need to take into account the weight of one skein of yarn. Since the weight of the entire product depends on the weight of the yarn.
The shawl is knitted with geometric patterns from the corner

Work execution technology
- Knitting a shawl begins with a set of 4 stitches. P.
- At the base of the 1st century. p. we knit 3 s/n. The future shawl has formed a corner.
- 3rd century n. (lifting).
- We knit 3 tbsp back to the top of the last stitch of the previous row. s/n.
- An addition occurs at the beginning of the row.
- Dial 9 v. p. Finish row 3 tbsp. s/n in 1 column of the previous row.
- We complete the row by adding loops.
- We begin to knit the first square. 3rd century p. (lifting), 3 tbsp. s/n.
- 5th century p., art. b/n in the arch of the previous row, 5th century. p., add 4 tbsp. s/n.
- We continue to knit and add loops symmetrically.
We knit until we reach the desired length of the shawl. We tie the product with simple single crochets or attach tassels.


Semicircular knitted product

The shawl is knitted in a pineapple pattern and has five semicircular tiers. To make it you will need 400-500 m of fine yarn and a No. 4 hook.
Product manufacturing technology
- Dial 6 v. p. and connect into a ring.
- Since the product consists of semicircular strips, there will be 3 “pineapples” in the first tier, 6 in the second, 12 in the third, 24 in the fourth.
- The diameter of the shawl on the 4th stripe is 46 cm.
- In the fifth stripe, “pineapples” are not doubled.
- In the fourth tier in the 15th row, not 5, but 3 groups of 2 stitches are knitted. s/n, v. p., 2 tbsp. s/n.
- In the 5th tier, knitting is repeated as in the 4th tier.
- On the 26th row, knitting “pineapples” ends.
- Knit groups of 2 tbsp. s/n, v. p., 2 tbsp. s/n.
- Finish the shawl by tying st. b/n and next to the “crawfish step”.
Knitting pattern for a semicircular shawl

Video on the topic
Fashion is fickle - it comes and goes. But there are things that remain forever in our wardrobe, which are not influenced by either time or fashion - this is an openwork crocheted shawl. Even simple clothes, if you throw a beautiful shawl over it, openwork bactus, a triangular scarf, a headscarf - it will look completely different - more feminine, a little more mysterious. Crocheting a shawl is an activity for a real lady. You won’t surprise anyone with simple shawls these days. And we will tell you how to crochet a very beautiful shawl, knit a headscarf, scarf, and also how to crochet bactus. Schemes and descriptions are attached.
Simple crochet shawl, shawl crocheted floral pattern. Such openwork scarf can be worn over outerwear, or wrap it around your throat in cold weather. The openwork crochet scarf measures 90 cm/90 cm. Crochet a shawl - useful activity for several evenings. Approximate yarn consumption (50% wool, 50% acrylic) is 400-450 grams. We will crochet with a thickness of 2 mm. Knitting density: 1 square has a side of 9 cm.

Designations:
- VP - air loop.
- PBN(SS) - semi-column b/n (connecting article).
- RLS - column b/n.
- 2 CH - closed together.
- 3 CH - closed together.
We start knitting a square with a chain of 6 VPs. On this chain we further knit in this way:
1st row: 1 VP for 1 RLS and 11 RLS in a circle, close the circle with 1 RLS (SS) in the VP of the beginning of the row.
2nd row: (15 ch, 1 sc (ss) in next sc) - repeat 12 times.
3rd row: 1 PBN (SS) in each of the 1st 7 loops of the first arch of 15 VP; 3 VP for 1 VP, 2 VP, 4 VP and 3 VP in the first arch of 15 VP; (4 VP, 1 sc in the next arch) - repeat 2 times, 4 VP; * 3 dc, 4 VP and 3 dc in the next arch, (4 VP, 1 sc in the next arch) - repeat 2 times, 4 VP *, repeat from * to * 3 times in total; finish 1 pbn (ss) in the third ch of the beginning of the row.
4th row: we start with an arch of 4 VP: 2 PBN (SS); 3 VP for 1 CH, 2 CH, 4 VP, 3 CH in the first arch; 4 VP, 1 sc in the next arch of 4 VP, 3 dc in the next arch of 4 VP, 1 sc in the next arch of 4 VP; * 3 dc, 4 VP and 3 dc in the next arch of 4 VP, 1 sc in the next arch of 4 VP, 3 CH in the next. arch of 4 VP, 1 RLS in the next. arch of 4 VP*; repeat from * to * 3 times in total; then we finish 1 pbn (ss) in the third ch of the beginning of the row and finish the square.
Then we make 100 such squares. We collect all the squares and combine them, as in the assembly diagram. We make 10 stripes from 10 squares, and then connect 10 strips. You can decorate the shawl with fringe. We have finished crocheting a shawl with patterns.

Crochet shawl for beginners, quickly and beautifully - nothing is impossible. The bactus pattern is simple, even if you are not very good at crocheting, it will not be difficult for you to crochet a bactus shawl. The bactus scarf has 3 sides. Its dimensions are: 150 cm/54 cm/54 cm. 150 cm is the size of the base of the bactus. For knitting, yarn is used (50% acrylic, 30% polyamide, 20% wool, 50 g/300 m) - 2 skeins. Hook 3 mm thick. The openwork scarf is crocheted in a fancy pattern. We knit the harness according to the description. Knitting density: 2 motifs with a fantasy pattern: 11 cm/10 cm = 10 rows.

Designations:
- VP - air loop.
- PBN (SS) - half single crochet (connecting stitch).
- RLS - single crochet.
- CH - double crochet.
- C2H - double crochet stitch.
- C3H - double crochet stitch.
How to knit a scarf? We start knitting a scarf with a crochet pattern from 1 ch, knit it with a fantasy pattern, adding on both sides as shown in the adding pattern: 13 times for one motif in 4 p. When you reach a height of 54 cm (54 rows from the beginning of knitting), you should have 27 motifs. We are finishing the main work, all that remains is to tie the bactus.
Tying: * 3 sc in the arch from the VP of the previous row, 5 VP, 1 PBN (SS) in the last sc *, repeat from * to *. We make a crochet tie on three sides of the scarf.

Bosnian baktus crochet is a type of knitting where the scarf is crocheted at the back walls. This interesting view knitting came from Bosnia. Knitting in appearance resembles woven fabric; this technique is also called Slip Stitch Crochet. The patterns of a crocheted scarf crocheted using this technique resemble tight loops - these are connecting posts (blind loops). By combining connecting posts and air loops in different ways, you can get an interesting neck piece. We invite you to crochet a bactus pattern with your own hands. Next, we will crochet bactus master class.

The connecting stitch is knitted like this:

Baktus ties in all the time back wall. We knit in front and back cases only on the same wall - on the back.

To work you will need:
- Wool blend yarn (45% wool, 55% acrylic) 380 m/100 g. - 1.5 skeins.
- Hook 2.5 mm thick.
In Bosnian knitting, each even row is knitted with connecting stitches.
1st row: at the beginning we make 4 air loops, then 2 dc in the first loop of the chain, 3 ch.
2nd row: connecting posts. In the second ch from the hook, tie a sl st behind the back wall of the loop. So knit the entire row.
Next, knit according to the pattern, alternating a row of DC and a row of SS - 2 times, a row of the fillet wall: * 1 DC, 1VP * - repeat, then 1 row of connecting posts (SS). At the end of each row, do not forget to knit the outer loop. Having knitted to the middle of the bactus, approximately 65-70 cm from the beginning, knit 1 row of dc without increments, then a row of dc, and 1 row of dc. Then knit the rows not completely, as if making decreases. Don’t forget to tie 3 VPs at the edge for the fringe. Check the second part of the scarf with the first so that they are symmetrical. After 140 cm from the beginning, we complete the knitting. Tie edge 1 next to sc, 1 next to crawfish step.
An interesting small shawl can be knitted from leftover yarn. The crocheting pattern for a shawl is not at all complicated; blankets, pillows, bags, etc. are knitted with such squares. The size of the scarf is 100 cm/44 cm without tassels. 100-150 g is enough for a scarf. yarn.

To work you will need:
- Yarn (wool with cashmere 120 m./25 g.) 25 g. five colors.
- Hook 2.5 mm.
Knitting density: diamond = 12.5 cm/11 cm.
The crocheting pattern for a scarf is easy to knit. First, we perform a chain of 5 VPs, closing the chain with 1 connection. st. (connection of a column) into a ring. Next we knit according to pattern A from the first to the third circular row. Start each round row with 3 VPs instead of the 1st stitch. s/n (double crochet), also complete 1 st/s/n, 1 p/s or 1 connection. Art.

First, we make a chain of 5 VPs, closing it with 1 connecting column into a ring. We knit according to pattern B from the 1st to the 3rd circular row, starting each row with 3 VP instead of the 1st double crochet, or with 4 VP instead of the 1st double crochet.


The scarf is knitted from 28 whole rhombuses and 8 halves; we choose the colors randomly, but so that they match. Arrange diamonds and halves. Connect all the rhombuses by tying one to the other with a crochet hook - in the last crochet. row, instead of VP, we perform a connecting column in the next VP. We make tassels for the shawl from pieces of thread of different colors, pieces 30 cm long. We attach the tassels to the scarf.
The crocheted bactus shawl will come in handy in any bad weather. The shawl is decorated with trim and a knitting pattern is given for it. At the end we decorate the shawl with laces and tassels. Bactus dimensions: 100 cm/47 cm. Knitting density: 9.5 cm/9.5 cm - square.

To work you will need:
- Half-wool yarn (50% acrylic, 50% wool), 200 m./50 grams.
- Hook 3 mm thick.
Designations
- Air loop - VP.
- Single crochet - sc.
- Half single crochet (joint stitch) PBN (SS).
- Double crochet stitch - C2H.
- Closed together - 3CH.

How to knit 2 dc, closed together, and 3 dc, closed together.


Explanations
First, you need to make a chain of 8 VP, then close 1 PBN (SS) in the first VP in a circle.
1st row: 3 VP + 2 DC closed together = 3 CH closed together, * 3 VP, 3 DC closed together, 1 VP, 3 DC closed in v.*, repeat from * to * 3 times, 3 VP, 3 DC closed vm., 1 VP, and 1 PBN (SS) closed vm. in the third VP of the beginning of the row.
2nd row: 1 pn (ss) to start with an arch, 3 dc closed together, * 3 ch, 3 dc closed together, 2 ch, 3 dc, 2 ch, 3 dc closed together * repeat from * to * 3 times. 3 ch, 3 dc closed together, 2 ch, 3 dc, 2 ch, end row 1 pbn (ss) in the third ch of the beginning of the row.
3rd row: 1 pbn (ss) start from the arch, 3 dc closed together, * 3 ch, 3 dc closed vm., 2 ch, 7 dc, 2 ch, 3 dc closed vm. * repeat from * to * 3 times. 3 VP, 3 DC closed in, 2 VP, 7 SN, 2 VP, end row 1 PBN (SS) in the third VP of the beginning of the row.
4th row: 1 pbn (ss) to start with the arch, 3 dc closed together, * 3 ch, 3 dc closed vm., 2 ch, 11 dc, 2 ch, 3 dc closed vm. * repeat from * to * 3 times. 3 VP, 3 SN closed in, 2 VP, 11 SN, 2 VP, end row 1 PBN (SS) in the third VP of the beginning of the row.
5th row: 1 pbn (ss), 3 dc closed together, * 3 ch, 3 dc closed together, 2 ch, 15 dc, 2 ch, 3 dc closed vm. * repeat from * to * 3 times and 3 ch, 3 dc closed v., 2 ch, 15 dc, 2 ch, finish row 1 pbn (ss) in the third ch of the beginning of the row.
6th row: 1 PBN (SS), 3 DC closed together, * 3 VP, 3 DC closed in, 2 VP, 19 DC, 2 VP, 3 DC closed in. * repeat from * to * 3 times and 3 ch, 3 dc closed v, 2 ch, 19 dc, 2 ch, end row 1 pbn (ss) in the third ch of the beginning of the row, and stop.
We make 21 such squares.
Triangle execution diagram
We start with a chain of 8 VPs, close 1 PBN (SS) in the first VP in a circular manner.
1st r.: 4 VP for S2H, * 1 VP, 3 CH closed vm. * repeat from * to * 2 times, 3 VP, 3 CH closed vm., 1 VP, 3 CH closed vm., 1 VP, 1 C2H.
2nd r.: 4 VP for C2H, 1 VP, * 3 CH closed together, 2 VP, 3 CH, 2 VP, 3 CH closed together * 3 VP, then repeat from * to * 1 time and 1 VP, 1 S2H.
3rd r.: 4 VP for S2H, 1 VP, * 3 CH closed vm., 2 VP, 7 CH, 2 VP, 3 CH closed together *, 3 VP, then repeat * up to * 1 time and 1 VP, 1 C2H.
4th r.: 4 VP for S2H, 1 VP, * 3 SN closed vm., 2 VP, 11 SN, 2 VP, 3 SN closed together *, 3 VP, then repeat from * to * 1 time and 1 VP , 1 C2H.
5th row: 4 VP for C2H, 1 VP, * 3 CH closed together, 2 VP, 15 CH, 2 VP, 3 CH closed together *, 3 VP, then repeat from * to * 1 time and 1 VP, 1 C2H.
6th row: 4 VP for C2H, 1 VP, * 3 CH closed together, 2 VP, 19 CH, 2 VP, 3 CH closed together *, 3 VP, then repeat * up to * 1 time and 1 VP, 1 C2H, then stop work.
We make 7 such triangles.
We fold the squares and triangles according to the assembly diagram. Make one row of sc around the shawl. Sew all the squares and triangles together with a large eye needle. Next, we do the tying.

On the short sides of the triangle we do the finishing in this way:
1 sc (ss) in 1 sc, * 12 ch, 1 sc (ss) in the sixth of these 12 loops to form a small ring, in the last one make: * 1 sc, 2 ch, 2 dc and 2 ch *; repeat from * to * 3 times, end with 1 sc, then 1 sc (ss) in the 5th of 12 ch, 4 ch, skip 3 sc, 1 sc (ss) in the next loop: * 5 ch, skip 1 st. , 1 pn (ss) in the next loop * repeat from * to * 3 times, repeat from * to *.
On the large side of the shawl, do: * 1 sc (ss), 5 ch, skip 1 sc, always repeat from * to *, end with 1 sc (ss).
We make “bumps”. We cast on 4 VP, close in the round 1 PBN (SS) in the first loop.
1st row: 3 ch for 1 dc and 11 dc, pierce with a hook in the round = 12 dc, end with 1 pbn (ss) in the third ch of the beginning of the row.
2nd row: 1 VP for 1 sc and 1 sc in each of 11 sc = 12 sc. We finish 1 pbn (ss) in the first ch of the beginning of the row.
3rd, 4th and 5th r.: 1 VP for 1 RLS and 1 RLS in each of the 11 RLS. = 12 RLS.
We finish rows 1 PBN (SS) in the first VP of the beginning of the row, stop working.
We stuff it, thread it through the loop of the last row, and tighten it until a small ball is formed.
We make 8 cm tassels from 26 threads bent in half, fix 2 tassels on a cord of two 4 cm threads and 1 tassel on a cord of two 8 cm threads. That's all the crocheted scarves, the latest model is a beautiful shawl from a German designer.
We bring to your attention the most beautiful patterns for crochet shawls.

While summer is not over yet, I bring to your attention several options for crocheted scarf patterns. According to some patterns, I crocheted scarves for my daughter, and saved some for the future.
1. The simplest scarf model for beginners to crochet.

I knitted this scarf for my daughter’s doll. But it will look great on a baby too. I have several photos of the process. I apologize in advance for the quality of the photo. The camera distorted the colors.
If you know how to make double crochets and double crochets, you will definitely be able to master this simple scarf.
Crochet pattern for a simple scarf.

1. So, we make a loop and knit 4 air loops.  Then we make a yarn over and insert the hook into the first air loop. We knit a double crochet.
2. Turn the knitting. We cast on 4 air loops and make a double crochet into the column from which we began to knit the air loops. We cast on another air loop and make a double crochet in the third loop from the base bottom row. Then we knit another chain loop and make a double crochet in the same loop as the previous double crochet.
3. Turn the knitting and continue knitting according to the pattern. 
4. We knit our fabric to the required length. We knit the last row completely with double crochets. 
5. The edge of the scarf can be tied with double crochets in the form of fans.
6. You can sew ribbons to the edges of the scarf, or you can add knitted ties or sew on an elastic band, and also add decoration.
2. Crochet scarf using the fillet technique “Hearts”.


Crochet scarf pattern.

In my scarf, I did not knit all the rows. And here is another version of a scarf with hearts.

3. Crochet scarf with fans.
Unfortunately, I couldn’t find a photo of my work, so I’ll show you what this scarf looks like using a photo of needlewoman Severyanka. Very simple circuit, but the work looks very nice.
Crochet scarf pattern.
Here are a few more patterns for crocheted scarves with fans.


Crocheted scarves do not have to be worn only on the head. They can look great on the neck as an effective addition to a summer or mid-season look. Therefore, do not doubt that an interesting knitted scarf will definitely cause admiring glances from others.
What do you need
Knitting a scarf is easier than any other headdress. After all, what is a scarf? It is an isosceles triangle. You just need to decide on the size of the scarf, its pattern, color and purpose. So, it is important to understand who will wear the product. A children's scarf crocheted will differ in style from scarves for adult girls.
It is also important to take into account the composition of the thread from which it will be knitted. It is important that the skin has the opportunity to breathe. This is especially true in hot weather. If you are knitting a summer scarf, it is better to choose a pattern that is loose in structure. The ideal solution would be an openwork scarf. Then you won’t feel hot, but the headscarf will also fulfill its intended purpose – protect you from the sun. There are a lot of drawings and patterns for knitted scarves on the Internet and in special periodicals for needlewomen.
It is better to have a tool for work, that is, a hook, made of steel. Hooks made of other metals can oxidize and damage appearance headscarves. Plastic hook breaks easily, which can also complicate the work process.
Headscarf pattern for women


This pattern is suitable for implementation for those who are just getting acquainted with crochet. At the same time, the finished product will turn out to be quite attractive.
For the product, it is better to choose soft, thin yarn.
The average number of loops for a regular scarf for an adult is 175-195 loops and 155-175 for children.
But keep in mind that for the selected pattern, the number of stitches cast on must be a multiple of 10 + 1.
The first row is knitted with a single crochet, after which all subsequent rows are worked according to the pattern.
Don't forget to decrease stitches on each row on both sides.
Headscarf pattern for girls


A children's scarf is knitted according to the same principle.
You can add fun accents to the finished product in the form of beads and ribbons or knitted openwork flowers.
One of the most simple ways For a beginning craftswoman, putting her knowledge into practice is not particularly difficult. As a rule, they are triangular canvases made (see figure below):
- from base to top (from AB to D);
- from top to base (from D to AB);
- in different directions from the center of the base (from C to A D and B D);
- from the end (from A D to B).
Read more about crocheting scarves below.

There are models in which the front part is made in the form of a rectangle, and the back part is made in the form of a triangle.

The scarves may have decorative trim or fringe around the perimeter.
What do you need to crochet a scarf?
Depending on the density of the chosen pattern and the composition of the yarn used, the scarf can be intended for the summer or autumn-spring season.
Cotton or rayon are ideal for protecting your head and hair from sun damage.
Thanks to the free air ventilation and the hygroscopicity of the yarn, it is not possible for such a scarf to overheat.
Using for work fine wool or mohair, you can knit a warm demi-season model that will protect from wind and dampness.
At the same time, the same patterns are used to create both warm and summer scarves.


When crocheting a scarf, the pattern should be drawn up based on only one measurement taken from the circumference of the head. It is very convenient if the model has ties at the ends. In this case, its front part should be equal to or slightly less than the measurement taken.
Various patterns for crocheting headscarves
In order to knit a scarf, starting from the forehead, you must first make a chain of air loops with a length corresponding to the circumference of the head.
Next, making decreases from the left and right edges of the fabric, knit until 2-5 loops remain. To do this, at the beginning of the row, after the lifting loops, the first column is performed not in the first base loop, but in the second or third.
At the end of the row you also need to leave the last 1-2 stitches undone.


There is another way to knit a scarf in the direction from its base to the top, but without a long initial chain. In the diagrams of such models you can see that work begins with a ring of 3-5 air. loop.
After the first circular row, knitting continues in turning rows. If the rows are made according to a semicircle pattern, then the scarf will turn out to be round in shape.
In the event that the product is from central ring If two right angles diverge, you will get a regular triangular canvas.


You can also start crocheting a scarf from the top. Making uniform increases, the product is knitted to the required size.
To gradually expand the fabric at the beginning and end of the row, you need to knit 2 stitches from the first and last loops of the base.
New loops are gradually introduced into the work so that the pattern is not disrupted.


Crocheting a scarf, the patterns for which are fillet mesh, it is very convenient to start from the end. To do this, you need to knit a chain of air. loops, which in length will be equal to the side or leg of the triangular scarf, and then make decreases on only one side of the fabric.
Thus, smooth edge the product will become the second leg, and the beveled edge will become the base, that is, the hypotenuse. In order not to make a mistake with the size of the scarf, it is recommended to first make a pattern on paper and check it while working.


Crocheting a scarf (patterns)
In order to give the scarf a finished and more delicate look, it can be decorated with a binding. The decorative border can be made around the entire perimeter of the product or only at the ends.
The simplest option is to make several additional rows along the edge of the scarf using simple single stitches or “crawfish step”.
The pattern can be created independently, using various combinations of “picots”, chains of air. P., lush columns or double crochets, knitted into one base loop.
In addition, tablecloths or napkins are suitable for decorative borders.

Similar articles:
You can make many beautiful and interesting things for your home with your own hands. Knitting is an activity that calms your nerves and lifts your spirits. Knitted...
Beautiful table setting plays a big role during the holidays, especially New Year's. You can see the decoration of a feast using the example of bright attributes...
We also recommend
 Graphite hair color is a fashionable gray hair color for those in love with the extraordinary!
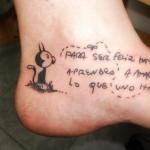 Spanish phrases for tattoos
 Elos rejuvenation technology: what it is and how it can help
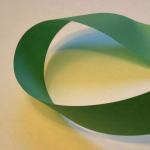 Mobius strip - an amazing discovery
 Congratulations to parents on their son's birthday Congratulations on the birth of their 7 year old son
 Scenarios for themed parties