Hardware pedicure at home: technique. Hardware pedicure step by step Hardware pedicure step by step
With the onset of spring, a whole line forms in front of the doors of the beauty salon. Every fashionista who takes care of her feet wants to get them in order before wearing open shoes. And many resort to hardware pedicure. What is it and how to complete it step by step?

Advantages and disadvantages
This type of procedure has many advantages:
- The gel, which is used to soften the stratum corneum, acts gently without touching living cells, so the risk of injuring the skin is zero. In addition, this product has a disinfectant effect;
- The use of various attachments allows you to treat the skin even in the most inaccessible places;
- Massage is an undoubted positive addition to the procedure;
- After the procedure, the skin grows much slower than with a classic trim pedicure;
- This type of procedure can be done for both women and men. In addition, many doctors recommend hardware pedicure as a preventive measure for foot diseases with diabetes.


Like any other procedure, hardware pedicure has its disadvantages, which include:
- High price. In order to pamper your feet with a hardware pedicure, you will have to shell out a considerable amount of money;
- The opportunity to get an appointment with a non-professional. With this outcome, be prepared that within a few days you will have to visit the beauty salon again;
- If the feet are in a neglected state, then one procedure will not be enough. You will have to come to the salon 5-10 times.


Tools used
The pedicure apparatus is presented in the form of a small instrument and a long handle, with the help of which the procedure is actually performed. The handles are equipped with attachments that come in the kit.
Only specialists who have undergone special training and have a medical education are allowed to work with the device.
Process
Hardware pedicure includes several stages of the procedure, here is its order:
- The master disinfects all instruments in front of the client;
- Next, the client’s feet are disinfected. Special means are used for this;
- A gel is applied to the skin of the feet to soften the skin. Keep the mixture on your feet for 10-15 minutes;
- The stratum corneum is removed using grinding attachments and cutters;
- All calluses and corns are removed using cutters;
- The cuticle is polished, the nail plate is polished;
- The skin is smoothed by grinding;
- A rich cream and essential oils are applied to the skin of the feet;
- A foot massage is performed;
- If required, apply varnish to the nails.
Contraindications

Hardware pedicure has such contraindications as:
- Pregnancy period. The fact is that various chemicals are used to soften the skin, which can harm the fetus;
- For any diseases of the kidneys or liver. The reason, again, is the chemicals contained in the products;
- Individual intolerance to individual components.
Home pedicure
If you don’t have extra time to go to the salon, then the procedure can be performed at home.
In order to carry out the procedure, we need to prepare:
- A product intended for skin disinfection;
- A device with the necessary set of attachments;
- A stick (orange), which is intended for the cuticle;
- Ointment intended for the treatment of calluses and cracks;
- Foot mask with paraffin;
- A liquid designed to remove varnish from nails, as well as a degreaser.


Before starting the procedure, you should carefully study the instructions. Step by step process:
- First of all, you need to wash your feet and remove nail polish;
- Wipe the foot with the prepared disinfectant. This stage will get rid of dirt;
- The cuticle needs to be softened. This step is necessary in order to remove the stratum corneum;
- Remove dead skin layer;
- Correct the cuticle using a small attachment. If you are not comfortable, you can use a stick;
- Adjust the length using a cutter;
- Sand the surface of the nail;
- Remove all calluses and corns;
- Degrease nails and apply varnish.
This procedure should be done no more than once every 21 days.
Hardware pedicure is a procedure that is very popular among girls. Its enormous success can be explained by the fact that the results after the procedure last for a long period of time.
Hardware pedicure: video tutorial
To be beautiful and well-groomed, it is not enough to have beautiful makeup, hair and manicure. Our legs attract attention no less, so it’s worth taking care of their aesthetics. Many women have already tried hardware pedicure. You will learn what this is from this article. The procedure is also called a “dry” manicure, since it does not require soaking your feet in a bath, which will please people suffering from diabetes and circulatory disorders. Many people liked professional hardware pedicure, but there are also those who did not appreciate the technique. Probably, it all depends on the professionalism of the nail service technician, but we’ll talk about comments at the end of the article. First, let's find out what it is - a hardware pedicure.
Originally from Germany
Many will be happy to learn that machines for this procedure first appeared in Germany. Many people know how meticulous Germans are about their appearance and hygiene, and, of course, convenience is important to them.
What is a hardware pedicure? This is a high-tech and relatively new procedure aimed at caring for the skin and nails of the feet. It is based on the use of a cosmetology device with many attachments. A machine for a hardware pedicure removes dead skin cells more efficiently, easily and safely. With its help you can get rid of problems such as ingrown toenails, cracked feet and old calluses.
Execution technique
Hardware pedicure (what it is is described above), as we have already written, is done without first soaking the feet. But it is still necessary to soften the skin, and for this purpose special solutions are used that are endowed with keratolytic properties. They only affect dead cells and do not touch healthy ones, so there is no need to worry about their safety.
First of all, the client is seated in a comfortable pedicure chair, the skin is softened, and then they begin to polish it using a device with various attachments. The pedicure set has all the necessary cutters to remove corns and rough skin between the toes and on their tips. Attachments with different diameters and abrasiveness, as well as the presence of several speeds, allow the master to work, taking into account all the individual characteristics of the client’s skin, to grind the relief more smoothly and efficiently.
What problems, other than corns, can be dealt with using a hardware pedicure?

One device will eliminate all foot problems
A quality pedicure is not just about shaping the nail plate. After leaving the salon, you should feel like your legs have been reborn. If the master did not pay attention to problems such as cracks and calluses, then he is not a professional. So, what can the miracle machine help you cope with?
- Cracks in the feet are a most unpleasant problem that causes a lot of inconvenience. If the skin is too deep, the master will first remove the protruding, uneven edges with scissors, and then begin sanding with a nozzle with the necessary abrasiveness. At the end of the procedure, the heels are lubricated with a special cream, which will refresh, relieve discomfort and help with speedy healing.
- An ingrown toenail can be eliminated easily and painlessly using a hardware pedicure. First of all, a special cream is applied to the ingrown edge, which will soften it. In order not to thin the ingrown corners, the skin is treated with a bur, after which the ingrown nail is painlessly and easily removed using forceps.
- Overgrown nail plates can cause severe pain when pressing on the soft part of the finger, so it is necessary to deal with the problem. The master will initially remove the thickening using a special nozzle, and then polish the edges with a white stone.

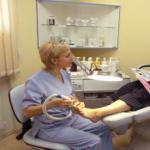
Hall equipment
The office of a nail technician who provides hardware pedicure services resembles a dentist’s office. The set for hardware pedicure includes vacuum cleaners, spray bottles, and UV cabinets with many tools and attachments. The cutters should be available in large quantities to make the procedure more painless, comfortable, safe and hygienic. The master's office must be equipped with a specialized pedicure chair, on which the client can not only sit, but also lie comfortably during the entire procedure.
Benefits of the procedure
Like any technique, this one has its positive and negative sides. Why is a hardware pedicure better than a classic one?
- the procedure is performed without the use of water, so it is safer and more hygienic, and the risk of fungal diseases is significantly reduced;
- therapeutic effect that allows you to fight various foot diseases: mycosis, calluses, hyperkeratosis, plantar warts, hyperhidrosis, thickening of the nail plates, ingrown nails, cracked heels;
- Hardware pedicure is not traumatic, unlike a regular one, so the risk of contracting any disease is minimized.

Flaws
And this seemingly ideal technique has its drawbacks; four of them have been identified:
- The main disadvantage is the cost of the procedure, because it uses expensive equipment, special disinfectant sprays, emollients and creams that accelerate healing.
- If the legs are in a neglected state, then one procedure will not be enough. Some women have to undergo five or even seven procedures to achieve the desired result.
- In order to receive a quality service, expensive professional equipment is not enough; the professionalism of the master is also important. If the procedure is carried out by a self-taught amateur, then instead of benefit it will only bring harm, so ask for a certificate of his training when visiting the salon.
- The method should not be used by people who have thin nail plates.

Cutters for hardware pedicure
For procedures of this type of service, a large number of attachments and cutters are used, each with its own purpose:
- Diamond tips are used to process the free edges of nails and skin. Needle-shaped, spherical, and small-diameter nozzles are designed for processing cuticles and side ridges. A larger diameter of the nozzle is necessary to eliminate calluses, corns and other skin defects.
- The hardness is determined by the colored notches and the color of the nozzle. The darker the nozzle, the harder: blue - hard, yellow, green and red - softer. Two black stripes on the nozzle indicate that it is very hard.
- Beginners are recommended to use ceramic attachments. They are softer and therefore safer. But it is worth noting that they wear out much faster than diamond ones.
- Ceramic cutters are made from corundum, which has the property of being restored. They process nails, polish the skin, eliminate cracks and corns.
- Grit of ceramic cutters: 100 microns - pink and blue, 200 - white, 400 - black. The latter are called artificial pumice and are used to polish the roughest skin of the heels.
- Silicon carbide is the most effective for removing rough skin. They are made in the form of caps and are disposable. Three-phase processing is recommended: 80 units - basic removal, 150 - for grinding, 320 - final polishing.
- Silicone nozzles are used for polishing nails, acrylic and other soft surfaces.
Now you know what cutters and attachments are needed to make a high-quality hardware pedicure. The training we have described below is relevant for home use. To become a real professional, you need to enroll in the appropriate courses.
Before we post step-by-step instructions, let’s figure out how to choose a pedicure machine.

Professional device
If you are not a professional and are purchasing a machine only for personal home use, then home equipment will do; it will also come in handy when learning professional pedicure. Such a device has a small number of revolutions (from 1500 to 5000 per minute) and low power. It is very convenient for storage, has small dimensions and weight. When working, take breaks every 15 minutes to ensure your equipment lasts longer.
The professional unit differs in size, speed (from 30,000 rpm) and power. It has a built-in vacuum cleaner for collecting sawdust, a foot pedal, protection against overheating and accidental activation without tools.

Hardware pedicure at home
If you have a personal pedicure machine, you will need the following materials:
- nozzles;
- disinfectant;
- softeners for foot skin and cuticles;
- means for rapid healing;
- orange stick;
- ointment with essential oils for cracked feet;
- foot mask containing paraffin;
- nail degreaser.
Let's start the procedure:
- Remove polish and degrease nails.
- Disinfect your feet.
- Treat feet and cuticles with a softener.
- Remove rough skin from your feet and toes using a special attachment. Using another attachment, treat the area near the nails.
- Adjust the cuticle with a small nozzle; for greater convenience, you can use an orange stick.
- Using a fine or medium abrasive nozzle, give your nails the shape and desired length. Clean the plate with the brush attachment.
- Use a rubber pad to sand the plate.
- After sanding your heels, make a paraffin mask and wrap your feet in polyethylene. Remove after twenty minutes.
- Your pedicure is ready!
Hardware pedicure: price, reviews
As we have already written, the procedure is not cheap - from 1600 for women and from 1900 for men. Reviews from many girls say that the result is worth it! Most women liked both the process and the effect of the procedure; they write that their legs have never looked so good. Some received unqualified professionals, and clients did not get the desired result. If you encounter unprofessionalism, demand a refund. Don't forget to inquire about certificates!
Knowing how to do a hardware pedicure, you can perform an excellent cosmetic procedure at home. For absolutely any girl, pedicure is a mandatory procedure that helps make her legs smooth and seductive.
How to do a hardware type of nail treatment
Many people wonder how to do a hardware pedicure at home without resorting to the help of cosmetologists. To be able to perform this procedure yourself, you need to purchase a special device. When performing a procedure using this device, your feet are not steamed with water. To make the skin on your fingers and feet much softer and more tender, you need to apply a certain lotion or rich cream to your feet. It is advisable to use high-quality cosmetics from well-known companies for the procedure.
The product used to soften the skin of the feet also has an antiseptic effect. When it is softened, it is necessary to treat the feet using certain attachments for the existing apparatus.
Each device for performing foot treatment is equipped with certain attachments. They are used for polishing feet and removing cuticles.
Cuticles near the fingers are treated using a small tip, and rough, dead particles around the nail are removed using a round tip, which is slightly larger in size than a cuticle remover.
 If you need to adjust the length of the nail, you should use special clippers. When everything is ready, you need to sand the nail plate well using a special attachment made using white stone. You need to work with this attachment very carefully, because there is a high probability of injury.
At the end of the cosmetic treatment, it is recommended to apply a certain nourishing mask to your feet or do an exfoliating peeling. In addition, it is worth periodically making foot masks that contain paraffin. When performing the mask, apply a thick layer of a product containing paraffin to your feet and wear thick, warm socks.
Read also: Pedicure trim
The technique for performing hardware-type procedures is quite simple; it can be done at home two or three times a week.
The more often the procedure is performed, the faster you can notice a positive result. Your feet will become healthier faster, and the skin of your feet will be very soft, like a baby’s.
Return to contents
How to carry out the procedure, taking into account all the nuances
Knowing how to properly do a hardware pedicure, it is quite possible to perform this procedure yourself, thereby saving time and money.
To perform the procedure, you need to have the following tools and devices:
- the device itself with certain attachments;
- softener for feet and cuticles;
- a stick made from orange wood for cuticles;
- mask with added paraffin;
- disinfectant;
- nail degreasing agent;
- nail polish remover.
 Performing a hardware pedicure step by step guarantees a good result and the correctness of the entire procedure.
You should start a “foot manicure” only after carefully studying the device itself, because otherwise you may get injured.
There is absolutely no need to steam your feet, just apply a certain product to them, preferably with a disinfectant effect. To make it easier to remove the cuticle, you need to treat it with a softener.
When everything is ready, you need to remove dead skin from the heels and cuticles using equipment with various attachments.
Separately, it is worth treating calluses and cracked heels, using certain products with an exfoliating effect.
1. To prevent infection, we apply a broad-spectrum disinfectant to the hands of the technician and the feet of the client.
2. To soften the keratinized skin, apply a special product to the skin of the foot for 10 minutes.
3. While the keratinized layers of the skin are softening, we treat the area cuticles and the skin around the nail with special attachments ( see below).
4. We perform nail shape modeling and polishing nail plate (see below ). To significantly correct the length of the nail, we can use nail clippers.
5. Use a napkin to remove any remaining softener.
6. We remove the keratinized layer of skin, corns and calluses from the feet and fingers using the device using various attachments ( see below). There is no uniform procedure for performing a hardware pedicure. You can start the procedure from both the foot and the toes. You can treat both legs at once or one at a time.
7. We apply a decorative or medicinal coating to the nails.
8. Apply to nails softening oil.
The skin of the feet should be treated with the device by constantly moving the handle of the device, never stopping in one place and pressing, otherwise the client will experience a burning sensation. Nozzles are used, starting with coarse-grained ones, gradually moving to fine-grained ones and polishers. For foot treatment, in hardware pedicure, carbide nozzles are used (for hardened, old corns) and sand (one-time) nozzles of varying abrasiveness.
Prices for attachments depend on their durability. The more expensive the nozzle, the longer it can be used, and cheap ones quickly wear out. However, according to some craftsmen, inexpensive disposable (sand) nozzles made in China are practically not inferior to expensive European ones.
Treatment of fingers in hardware pedicure.
Treatment of the nail plate.
|
Special cylindrical cutter for free edge . In order to avoid damage to nearby tissues, this attachment is coated with sapphire exclusively at the end. |
||

|
Diamond cutter, truncated cone. Multifunctional nozzle. One application is processing free edge of the nail. | |

|
Cylindrical cutter with longitudinal perforated serrations made of stainless steel. Perfectly solves the problem of gryphosis. Can be used to process the free edge. | |

|
Brush (brush) to clean the free edge. | |
Cuticle treatment. |
||
 |
Spherical diamond bur. Convenient and safe to use. | |
 |
Only-clean cutter - a special cutter made of tool steel with a polygonal working surface for removing ptegirium. She can work as if she were dry. nail plate , and after applying the remover cuticles | |
 |
Corundum cutter for polishing cuticles. Depending on the abrasiveness, it is used both in the cuticle area and for grinding the skin of the periungual space. | |
 |
Brush (brush) for polishing the cuticle after treatment with the only-clean nozzle. Apply cuticle remover before use. | |
Treatment of nail folds. |
||
 |
Carbide needle cutter with fine cross cut- a good helper in the fight against hard rollers. This cutter is suitable for making cuts during the treatment of an ingrown toenail. |
|
 |
Diamond cutter with a truncated cone with a rounded end of varying abrasiveness. The choice of cutter abrasiveness depends on the condition of the skin. The rougher the skin, the larger the abrasive on its working part. The photo shows medium abrasive. | |
|
|
Pear-shaped sapphire cutter. Works delicately on the skin, including the cuticle area. The abrasive of the sapphire head is medium or fine. | |
Treatment of calluses on toes. |
||
 |
MonAlit diamond cutter - tornado. This cutter is manufactured using a unique technology, forming a monolithic structure consisting almost entirely of diamond grain. This cutter gently grinds the skin without injuring it, forming an ideal, smooth surface, while the skin DOES NOT HEAT! This attachment is indispensable when working with diabetic feet. | |
 |
Steel cutter, truncated cone, perforated. This cutter, despite its menacing appearance, can be safely used to speed up work. | |
 |
To work with core calluses you must have burs of different diameters(from 1mm to 3mm). When drilling the callus canal, we change the burs, starting with a larger one, gradually moving to a bur of a small diameter. | The foot is treated with a nozzle with a rubber base and replaceable caps of various diameters. The amount of abrasiveness of the caps depends on the condition of the feet. The photo shows a base with a diameter of 13 mm with an abrasive cap 080 (large abrasive). Possible options for abrasiveness of caps: 060 - super large, 080 - large, 150 - average, 240 or 320 - small. |
 |
Nozzle with a rubber base with a diameter of 5 mm with a cap of 080 coarse abrasiveness. | |
 |
Very convenient nozzle for pedicure ! Base with a diameter of 11mm with interchangeable caps: 060-super-large, 080-large, 150-medium, 280-small. The surface area processed in one pass is larger than that of a base with a diameter of 13 mm. | |
| Carbide cutter with coarse, medium and fine cross-cut teeth. | ||
 |
Carbide cutter with very large(blue ring), large(green ring), or small(red ring)cross O th by cutting teeth coated with titanium nitride. The finer the cut, the smoother the processed surface becomes. | |
 |
Steel cutter with longitudinal perforated notches. Used when working with hyperkeratosis. | |
 |
Carbide cutter, truncated cone with rounded end and coarse cross-cut. Effectively fights calluses. Black ring- extra-large cross-cut teeth. |
|
 |
Carbide cutter with special spiral cutting. The cutting features are designed for effective work on legs and skin. | |
 |
Carbide pear-shaped cutter. Helps remove flaking. Recommended for diabetic feet. This nozzle can be used in two directions: a) lift the flaky skin in one direction, b) changing direction, gently cut. |
|
 |
Diamond cutter MonAlit (sintered diamond) - tornado gently grinds the skin without heating it. Ideal for working with diabetic feet and treating interdigital areas. | |
 |
Bullet-shaped silicone carbide grinder to create a perfectly smooth surface. The color of the nozzle depends on the abrasiveness of the grain. | |
Removing corns. |
||
|
|
This cutter is recommended only for experienced craftsmen! A hollow cutter with a sharp edge is designed to loosen corns. To do this, a “notch” is performed. |
|
 |
The reversible carbide cutter with cross cutting easily removes loose callus. | |
 |
The stainless steel cutter also easily removes loose callus. | |
Removal of core calluses. |
||
 |
The carbide nozzle removes the keratinized layer of corns, opening access to the core of the callus. | |
 |
A hollow cutter processes the core callus. | |
 |
Using a perforated spherical bur, we drill out the callus. | |
 |
Using a bud-shaped diamond cutter, we grind the edges of the callus.
Diamond cutter grit: large- green ring, average- blue ring. |
|
Treatment of foot cracks. |
||
 |
We use a cylindrical cutter with longitudinal perforated notches to work with hyperkeratosis. | |
 |
A rubber nozzle with replaceable caps is perfect for preparing the foot when treating cracks. The amount of abrasiveness depends on the condition of the calluses. The photo shows a large abrasive, base size 13mm. | |
 |
The nozzle with an 11mm rubber base and replaceable caps effectively removes the stratum corneum to gain access to cracks. On the picture 150 - medium abrasive. |
|
 |
Nozzle with a rubber base with a diameter of 5 mm with replaceable caps. The thinner the skin, the less abrasive should be. | |
 |
Using a truncated cone diamond cutter, we begin work directly on the cracks. In our work we use the upper and lower edges of the nozzle. | |
 |
Needle fissure cutter Made of stainless steel, multifunctional. In this case, we use it when processing the edges of a crack on the heel. | |
 |
The diamond bud cutter is perfect for safely and effectively treating cracks. This cutter is especially suitable for novice craftsmen. | |
 |
U diamond bud cutter With a cross-cut, you can use all planes in your work. | |
 |
Using a cylindrical cutter we grind the edges of the crack. | |
 |
A sintered diamond cutter is effective and convenient for grinding crack edges. | |
 |
A carbide cutter with a medium cross-shaped cut sands the skin well at high speed (about 20 thousand rpm). | |
 |
An alternative option for grinding is a diamond cutter with a rounded end. We select the grain size of the cutter depending on the condition of the skin. | |
 |
The final grinding and polishing is carried out using nozzles made of silicone carbide alloy or silicone without abrasive. | |
 |
Silicone nozzle for polishing skin and nails. |


– one of the popular and safe foot care procedures. The effectiveness of this method of treating feet is extremely high. Using a hardware pedicure, corns, calluses, microcracks are removed, the problem of ingrown toenails is solved, and diabetic and fungal feet are treated. Let us consider in detail the technology for performing hardware pedicure.

Hardware pedicure. Fraser.
Technology for performing hardware pedicure.
- We treat the client's foot with sterilium (skin antiseptic) and wipe it dry with a disposable towel.
- If necessary, remove the length of the nails.
- We apply a keratolytic agent to the foot - with a brush we apply a thin layer of the gel-like preparation Callus Remover (foot skin softener). The softener acts on the foot for 5 – 10 minutes. Keratolytic promotes rapid exfoliation of dead cells from the surface of the foot. Foot softeners most often contain lactic or grape acid - the most commonly used keratolytics. They are also used for hyperkeratosis, which not only exfoliates dead skin cells, but also has an anti-inflammatory and antioxidant effect on the foot.
- Carrying out the procedure hardware pedicure, it is not recommended to pre-soak your feet in water, as the skin absorbs liquid and swells, and in this case you will have to spend additional effort on processing. It is enough to take a hygienic bath for 5 - 6 minutes with a water temperature of up to 36 degrees - the feet will not have time to steam, and the master will work on dry but clean surfaces.
- To protect your eyes and respiratory organs, we wear a mask with a protective screen.
- Use a disposable towel to remove any remaining foot softener. If there is hyperkeratosis (strong growths), leave the product on the foot longer.

- We put the largest (coarsest) disposable cap with an abrasiveness of 60/60 on a round-cylindrical rubber holder and process the foot at a speed of 10 - 12 thousand revolutions with a machine milling machine. It is known from practice that disposable caps are processed more efficiently than stone nozzles and speed up the work process.
- The next stage of hardware pedicure technology is polishing the skin of the foot. We change the disposable cap to a fine-grained one (100/100) and treat the foot at 10 - 12 thousand revolutions. At this stage it is necessary to thoroughly polish the leather. If this is not done well enough, after 1 - 2 days it will look like a fringe due to uneven filing of the layers. You need to work carefully so as not to saw through the skin of your feet. At the end of this stage, the skin should be a healthy pink color with a slight yellow tint.
- We remove the remains of the foot softener - this can be done with a simple spray bottle of warm water. After spraying, wipe with a disposable towel.
- We process the fingers and the skin between them - the next step hardware pedicure techniques. In the places located between the toes, many sweat glands are concentrated, as a result, these places are subject to heavy pollution and require no less care. We apply the foot softener to the skin between the toes, place a ceramic nozzle in the form of a truncated cone with a blue color (it has a medium grain size) and work with a milling cutter at a speed of 5 - 10 thousand revolutions per minute.

Hardware pedicure. The ceramic nozzle is medium-grained.
Hardware pedicure. The ceramic nozzle is finely shaped.
Then we take the same attachment, but pink (red) in color (this is a fine-grained polishing attachment), and work with a milling cutter at the same speed. Remove any remaining foot softener using a spray bottle of warm water and wipe with a disposable towel.
- We treat the cuticle and periungual ridges with Cuticle remover. Using the same fine-grained pink ceramic nozzle, we grind the periungual ridges with a milling cutter at a speed of 5 - 10 thousand revolutions.
- When performing a hardware pedicure, we do not push back or trim the cuticle. The processing is carried out using a diamond cutter in the shape of a small ball.

The milling cutter speed for this procedure should be about 5 – 6 thousand revolutions. Use a cutter to move along the cuticle from side to side without pressing on it. This is an important point, since it is very delicate and easy to injure, damage the nail matrix and leave grooves on it. When working with a router, you do not need to file down the cuticle, but make it even and smooth. We remove the remaining softening agent using spraying and disposable towels.
- The final stage hardware pedicure technologies– polishing nails. Apply cuticle oil to the cuticle, nails and periungual ridges using rubbing movements. Then we put on the polishing felt attachment and polish the nails until they shine.

Rotation speed – 5 thousand revolutions. Cuticle oil has a bactericidal, softening and healing effect, and in addition it slows down the growth of the cuticle. The client can use cuticle oils daily at home.
- At the end of the procedure, apply a non-greasy cream using rubbing movements in the direction from the toes to the heel, while simultaneously performing a light massage.

Hardware pedicure. Technology.
Using professional technology hardware pedicure, nail service professionals receive undeniable advantages over the classic method of treating feet, including significant time savings and effective care.
We also recommend
 How to live with an ugly appearance?
 Letter Y (And short) in poems, stories, proverbs All about the letter Y short
 Natural ingredients to protect hair health
 Hardware pedicure step by step Hardware pedicure step by step
 We sew wallets and handbags with a clasp: templates and master classes
 How to greet your husband home from work?