Paper airplane folding diagram step by step. A cardboard plane that can fly: a master class with step-by-step photos and video lessons
Making a paper airplane that flies well is easy. You need to follow the step-by-step instructions and smooth out all the bend lines well.
- Every person has childhood memories associated with making paper airplanes. We loved making them with our own hands and then launching them up
- Many children have a craving for creativity. If they make airplanes on their own, this will help develop the baby’s fingers.
- The child will learn to concentrate, think creatively and use imagination. For children's, you can arrange a competition between children to see who can make an airplane the fastest.
Important: Working with paper is a pleasure - it is soft and pliable. A model with regular and even curves will be able to fly high and will keep its shape for a long time.
How to make a paper airplane, step by step instructions?
Such a paper “flight machine” can be made from any paper: printed A4, notebook page or even newspaper.
Important: Try to learn how to make simple layouts first, and then move on to complex ones. Kids love to do origami, so they will be happy to help.
So, if your little one comes to you with the question: “how to make an airplane out of paper?”, prepare a small piece of paper and follow the following steps. Step-by-step instruction:
1. Place the paper piece with the smaller side facing you
2. Fold the sheet exactly along the center line and make a mark in the center. There will be a bend, no need to smooth it out
3. Open the piece of paper and fold it so that the top corner touches the center
4. Do all this with another corner of the sheet
5. Open the sheet again. Now fold the corners, but so that they do not touch the center
6. Now fold the smaller corner. It will serve as a holding element for all the corners folded earlier
7. At the last stage, bend the resulting product along the center line - the triangular part will be visible from the outside. Fold the sides towards the center. That's it - the plane is ready
How to make a cool paper airplane?

 Cool paper airplane "Glider"
 After you have learned how to make classic paper layouts, you can try folding something unusual and complex. The Glider airplane will maneuver high and far.
So, how to make a cool paper airplane? Step-by-step instruction:
1. Take a piece of paper and fold it in half
2. Then open it to its original position and place it with the fold facing up. Fold the corners of the paper inward to create a mark in the middle of the sheet. Now the triangles will be even, and this will help make a layout with good flying qualities
3. Draw a visual line in the center and make a bend in this place. It will work out sharp nose IR products
4. Fold the spout so that it extends a couple of millimeters beyond the edges of the corner bends.
5. Fold the product in the center so that the back side is inside
6. Bend the wings - they can be made small or, conversely, hollow. Experiment with the width as you wish. That's it - the plane is ready
Make a military plane out of paper?

The layout of the “Hawk” model is a little more complicated. But you have already learned how to make simple models, which means you will be able to fold this paper sample.
Step-by-step instructions on how to make a military aircraft out of paper:
1. Prepare a piece of paper and place it on the table with the smaller edge facing you
2. Fold along the center line. Fold the top corner. The top of the paper sheet should coincide with the side. Do the same with the second corner element
3. The piece should look like a cross. Press its side elements to the center line of the paper and iron all the formed lines. Fold the upper right corner so that it is flush with the top of the sheet. There should be 1 centimeter left from the fold to the midline. Repeat the same with the other side
4. The result is “horns” that need to be folded in half, and the excess paper should be folded inside
5. The bottom corner is turned in the opposite direction from you. Make a fold line to the point where the “horns” emerge
6. Fold the airplane in half - it's ready. Paint it with paints and you will get a real military fighter
Important: You can make other models of military aircraft using the drawings presented below.

How to make a light airplane out of paper?
If your child constantly asks to make a paper airplane, teach him to fold it using the origami technique on his own. The diagram below will help you make a light paper airplane.
Tip: Follow the drawn instructions with your child. He will love making these airplanes, especially from colored paper.


How to make a simple paper airplane?
Here is another option for a lightweight model. Many people often wonder: how to make a simple airplane out of paper?
Important: This diagram will help you fold the product in 10 seconds. As a result, you will get a well-flying paper model - simple, fast and interesting!

How to make an airplane with a paper propeller?


To fold such an airplane, you need to prepare a sheet of paper, a paper knife, a pencil, and a needle with a bead at the end. Step-by-step instructions will tell you how to make an airplane with a paper propeller:
1. Take a flat sheet and fold it diagonally twice
2. Open the piece of paper and fold it along the line that will divide the diagonals into two parts. Open the sheet again, raising the corners along the resulting lines
3. Turn the left edge of the corner to the right and bend it. Return it to its original position and bend the right edge upward
4. From the left edge, make a bend again - the bottom should lie on the bend line of the triangle that was made at the previous stage. Bend the edge of the corner behind the resulting part
5. Unfold the right side and bend it towards the center
6. Make another fold towards the center, and tuck the top of the corner inward
7. Bend the right side towards the center, then straighten it again. Turn the left corner over and tuck the bottom edge into the hole on the right piece
8. Bend the resulting product in the center and fold the wings
9. All that remains is to make the propeller: take a sheet of paper measuring 6 cm x 6 cm. Draw it diagonally with a pencil. Make cuts along the drawn lines, not reaching the middle 7 mm
10. Fold the propeller through one corner and secure with a needle and bead
Important: The part may move apart, so glue the corners in the middle or smooth the propeller where it bends
11. Attach the part to the “tail” of the aircraft. The product is ready, you can launch it or give it to a child
How to make a boomerang plane out of paper, diagram?


There is another model of a paper “flying machine” - a boomerang. Imagine a product made by yourself that comes back to you after launch.

Scheme and step-by-step instruction will tell you how to make a boomerang plane out of paper:
1. Fold a piece of paper into four times and press on the corner with your finger
2. Bend one half of the paper cut to the center line and push the corner onto the quarter of the paper
3. Fold the sheet inward from the quarter fold to the top corner. You will get a bend in the form of a triangle. Press your finger along the edge
4. Straighten the triangle, and lifting it, insert your finger between the resulting parts. This is necessary to make sure that the folds are folded perfectly evenly.
5. Turn the product over and bend the other side of the triangle inward. Fold the wide end of the paper in the opposite direction
6. Do all this on the other side of the product
7. It turned out to be a “pocket”. Lift the top and fold it so that the edge lies evenly along the length of the paper. Place the corner in the “pocket”. Bend the top corner down
8. Do the above step on the other side of the plane - both sides should look the same
9. Fold the part on the side of the “pocket” upward. Do the same on the other side.
10. Open the product and place the leading edge inside. Protruding sections will appear in front - bend them. Remove the rear fin-shaped parts that appear
11. Turn the product over and fold the front part. Fold in half and iron the folds
12. Make the fuselage piece: Fold one side of the piece down along a line that runs parallel to the center fold. Do the same with the second side.
13. Fold a small piece of one and the other wing upward. Unbend the product. It already has a base and flat wings
14. Run your fingers along the front of the wings to create a curve. The plane is ready and can be launched
How to make a fast paper plane?
The paper airplane will fly quickly thanks to its folded tail in a special pattern. The nose of such an aircraft should be sharp and thin.


Below are step-by-step instructions on how to make a fast paper plane:
1. Bend a sheet of paper lengthwise. Unfold it
2. Now fold the sheet in half. From the middle, fold both edges down, and then straighten half of what you folded
3. Unfold the sides that are located on the side and fold each flap inward. First do this with the inner lapels, then with the outer ones.
4. Bend some of the wings back. Bend the wings from the bottom a short distance
5. Run your finger or ruler along the fold line and straighten the wings
6. Fold the resulting folds parallel to the folds of the wings. The plane is ready
How to make a good flying paper airplane?


Any paper airplane, if folded correctly, will fly well.
Tip: Carefully iron all bend lines with hard objects or fingers.
Tip: To make origami products, use only flat sheets of paper.
If a child comes up to you and asks how to make a paper plane that flies well, advise him to make a product with flaps or a complex “tail.” Such models fly far and high.
Important: The patterns for these models are described above, so you can start creating on your own or with your child.
How to make a fast and easy paper airplane: tips and reviews


As you have seen, there are many ways to make paper airplanes. It's easy to make a fast and light paper airplane. Tips and reviews will help you avoid mistakes and become an origami master.
Tip: If you are new to origami, try to make only simple models at first. When the paper begins to “listen” to you and you feel that the airplane models fly well, then begin to master more complex and unusual models.
Important: Before you start making the plane, prepare your paper. Prepare several sheets, as at first it will be bad for you - everything comes with experience.
Tip: Do not use wrinkled sheets of paper. An airplane cannot be made from bent and torn sheets.


Tip: Try to keep the product symmetrical about the axis (imaginary or real). If this is not observed, the plane will fall on its side during flight.
Make several models and organize a real air show on the street with your child. Remember your childhood - fly a paper airplane!
Video: Paper airplane
I will continue the topic of crafts for boys, which I told you earlier. Now it’s the turn of technology. Our sons really love crafting from paper, so I propose to make a craft using the origami technique, using sleight of hand, but we will also glue together interesting ideas from paper.
Paper airplanes become very popular at school, when boys begin to show a new quality in themselves - competition. Eventually they begin various kinds competitions, for example, whose craft will fly the farthest.
But the folding option, which is the most famous, does not allow the structure to fly, but only gives it a recognizable airplane shape. Therefore, below I will present several models that will delight you with their ease of soaring.
First, we will just make a cute paper applique. This option is more suitable for children preschool age. It is possible that the kids will need the help of their parents, because sometimes they need your help.

We will need:
- Sheet of cardboard
- Matchbox
- Scissors
First, we measure the length of the box. And we put this value on the wrong side of the cardboard. Now we are making the wings, so we will need two strips.

Cutting off the parts.

Now we make the tail blank. From the edge of the same sheet, we mark 1.5 cm, make two parallel lines and cut them off.

We mark 8 cm from the edge of the narrow strip and divide it.

These are the blanks we got. Check the picture.

Now we bend the long narrow strip in half and glue it exactly in the middle of the box. Each edge of the strip is glued to a different side of the box.

Give the wings the desired shape.

And glue them to the bottom and top of the box, perpendicular to the body.

Let's take care of the tail. Remember how we previously noted a strip 8 centimeters long? So this is our tail. Therefore, we glue it in the right place.

From the remaining 1.5 centimeter strip we make the penultimate part. Fold it in half and bend the edges at the same distance on both sides.

Glue it to the tail. Press down the edges well so that they have time to fix.

The final turn of the propeller has arrived. On cardboard we draw two drops with a circle in the middle and glue them to the nose of the plane. By the way, we have two propellers, so cut out two blanks at once.

The craft is very simple, but it looks quite impressive and neat. It was possible to paint the boxes in the required color in advance.
And I also suggest that you assemble the craft without using glue or tape. You just need to print out the diagram and carefully cut out all the parts. Folds must be made along the dotted lines.

How do you like this 3D puzzle? I'd love to hear your opinion.
How to properly fold an airplane that flies for a long time (100 meters)
In order for your craft to fly, you need to properly strengthen the nose and remove obstacles that prevent the free flow of air. Most often, these are folds on the wings that are bent down.
I will provide instructions with the correct actions. You only need to repeat.
Now let's start folding the Swallow model. It is distinguished by its unusual body shape and open tail.
Let's start marking the fold lines, which will help us fold the paper neatly in the future.
To do this, we wrap one top edge to the opposite side

Let's do the same with the opposite end.

Now let's find the middle.

Let's wrap up part of the sheet. The mark to which you need to fold will be the middle of all the folds that we did earlier.

It will turn out like this. Iron the fold more firmly.

Let's collapse this strip again.

And we'll cut off the extra edge. We will use this piece to create the tail.

Fold this strip in half twice.

Now let's turn the sides of the strip inward towards the center. Let's step back 1 centimeter from the edge and make small cuts on both sides.

Let's straighten the tail and put the part aside for a while.

Let's return to the main workpiece again. As a result of the folds, we got triangles. We find the top - this will be the nose of the product. We push the edges inward.

In the end it will turn out like this.

Now we wrap the ends of the triangle towards the top so that the edges coincide.

This is what the part looks like from the inside.

Let's fold the edges again.

Now let's assemble the two opposite ends and bend the top.


This is the result you will expect.

We form the wings by folding the part in half along the fold line.

The free edges of the wings also need to be folded.

Now we insert the tail into the airplane.

Of all the given schemes, this one may seem the most labor-intensive, but in the process of folding it will require greater care and accuracy from the student. And the result will fly perfectly.
Origami technique for beginners: folding patterns
For older boys or their dads who can already read and reproduce the diagram, I have prepared several drawings.
If desired, you can roll up any type of product: swallow, bomber, lightning and others. Sometimes children get carried away by one particular model, however, if any airplane flies, it will add bright colors to your child’s childhood.
So, detailed diagram the legendary Lightning. The lines show the actions of opening the folds to the sides.
All drawings show two sides: colored and white. The colored side is the front side, the white side is the back side.

Very beautiful model called Needle.

A popular model of a passenger airliner. Can't boast of flight speed, but the idea is very interesting.

The shape of a flyer is not quite familiar to many. But it has a sharp nose and wide wings, so it can also fly for a long time.

As you may have already noted, the first three steps are repeated in almost all diagrams.

And here is the most basic way to roll up a toy, only it doesn’t fly very far, it just makes loops. He suddenly changes position and falls down.

The same model, but in a different color, may seem more understandable to you.

If you twist the tip of the workpiece, you will get a blunt nose on the unit. By the way, your actions will not affect the flight range of this model in any way.

You can take any diagram as a basis and create your own model of a flyer based on it. After all, design abilities develop already in childhood.
How to make a paper airplane that flies far and is easy to make
If you want to quickly make a toy and quickly run away to play, then there is a universal model. If you repeat the folding pattern a couple of times, then your handles will already know the correct sequence of actions and the folding speed will increase significantly.
And when the guys see how far your design has flown, they will definitely come and learn how to do the same.
Such a plane also flies well on the street, when it is caught by the breeze and there are no physical barriers, such as tables and walls.
As always, we will use a standard sheet of A4 size.
Do not take thick paper; it is very difficult to fold it in several layers. Because of this, the craft may not work out.
When manufacturing almost any part, we initially look for the middle of the sheet. To do this, we fold it in half lengthwise so that the edges and corners match.
Use your fingernail to mark the fold line.

Turn the sheet wrong side out and tuck the edges in toward the middle. They should be the same size.

Now let’s turn each side towards the middle, capturing the previously formed triangle.

We turn the end to the opposite edge, aligning the tip with the fold line.

The result is a trapezoid. We wrap the ends of its upper base inward.

Now we bend the previously bent end up.

Fold the piece in half and smooth it well.

We bend it inward and push it inward between the wings with our finger.

This is what it looks like if you look from the side.

This is what the tail will look like from above.

We bend the wings, maintaining parallelism. 
The ends of each edge also need to be folded.

This model performed well in street conditions.
Step-by-step folding instructions for children
I started considering options for folding crafts with the most complex ones. And, if you have mastered them, then you will master this structure without difficulty. When you practice origami, it is important to explain to your child that all lines must be straight. It’s good to iron the folds with your finger or nail.

We only need one sheet of double-sided paper. You can, of course, use any paper, even newspaper, but we not only train motor skills and logic, but also develop the child’s aesthetic perception.
Fold the sheet in half and press the fold line well.

Now let’s unfold the sheet and fold the corners on both sides to the found center line.

Now we will bend the resulting corner, not reaching a couple of centimeters to the edge.

We wrap the resulting corners again to the fold line so that we get right triangles on both sides.

Let's turn the tongue up. This will fix the edges of the triangles.

Now we fold the workpiece in half along the found center line.

And we bend the edges of the product so that the wing line is flush with the body line.

This is what the assembled craft looks like from below.

It happened very quickly, right?
Volume airplane made of paper and plastic bottle
This is the product you will be pleased with as a result.

We make a chassis from two lids and juice straws.

Cover the bottle with newspaper. We also cut out wings and a tail from cardboard and also glue it on.

Don't forget the propeller.

It is better to paint over the newspaper with thick gouache or acrylic paints. They have a fairly dense base and are easily diluted with water.

Cut out decor from colored paper: portholes, symbols, stars, numbers. That's all - a gift for dad - the pilot will be ready.
Paper crafts are a favorite pastime not only for children, but also for adults. The very first thing parents teach their children to do is an airplane. A simple but very interesting toy. Everyone is probably familiar with the classic scheme. But in fact, there are a great many options for paper airplanes. We offer you several original circuits how to make an airplane out of paper. With their help, you can easily diversify your children’s leisure time, and you can also have fun yourself.
A paper airplane is a classic origami design. If you are new to this technique, then start with simple models. When you get used to the paper, “feel” it, and your planes acquire excellent smoothness and flightability, then move on to complex models. Before any craft, prepare yourself a few sheets of paper so that you can always start over if something goes wrong. Never use wrinkled sheets, otherwise the aircraft will not have the required characteristics. When making the diagram, make sure that all bends are symmetrical. Also, do not forget to wash your hands thoroughly before the procedure, because dirty stains easily remain on the paper. Make several models at home and go outside with your child to launch them. This will bring you a lot of positive emotions.
Simple paper airplane
We all know the classic design of a paper airplane since kindergarten. But, if you forgot or haven’t practiced for a long time, we will remind you of it. A simple airplane can be made in two ways.
Method number 1:
- Take a rectangular sheet of paper, a landscape one will do just fine;
- Fold it in half, then unfold it again, so you get a straight center line;
- Fold the upper left corner to the center line, do the same with the right;
- Bend the resulting upper corner down;
- Then align the vertices again as shown in the diagram;
- Bend the resulting corner upward, it will secure the upper corners;
- Fold the resulting model in half;
- Bend the wings in the opposite direction, they will straighten and the plane will be ready to fly.
Method number 2:
- Fold a rectangular sheet of paper in half lengthwise;
- Unfold and fold the top corners toward the center line;
- Fold the resulting outer corners again to the center line;
- Fold the shape in half and make the folds of the wings in the center. The second simple paper airplane is ready.

Fast paper plane
Many boys want to know how to make a fast airplane out of paper. This model should have a tail folded according to a special pattern. And the nose should be thin and sharp. Then the plane will fly faster.
- Bend the sheet lengthwise, then unfold it;
- Fold in half, fold both edges from the middle down, and then bend their halves back;
- Unfold the sides located on the sides and bend each flap inward - this should be done with the inner flaps, then with the outer ones;
- Bend a small part of the wings so that they look back, then bend the wings from the bottom a few centimeters;
- Secure the fold line by drawing a rigid finger or ruler along it, straighten the wings;
- The resulting bends must be bent parallel to the folds of the wings.

Cool Glider
A glider is a very cool airplane, which is very difficult to make from paper, but quite possible. A little patience and you will have an original paper airplane.
- Fold the paper in half and unfold it again;
- Place the sheet with the fold up, fold the corners inward - you will get a mark in the middle of the sheet;
- Make a fold in the center of the sheet - you will get a sharp nose of the plane;
- The nose must be folded so that it protrudes 2-3 mm beyond the edges of the corner bends;
- Then the paper is folded in the center so that the back side is inside;
- The wings should be bent - experiment with their width, achieving the optimal result.

War Hawk
The Hawk is a famous military aircraft. Aviation enthusiasts will be happy to add it to their paper collection. If you don’t know how to make such an airplane out of paper, we offer our diagram:
- Fold the rectangular sheet in half, then unfold it again;
- Fold the side corners to the center line;
- Fold the top corner with its end towards the bottom line of the sheet;
- Return the corner, fold it back, but with a slight bend;
- Fold the model in half;
- Fold the wings down;
- Unfold the wings and make additional folds at the edges.
[photo5]

Far flying fighter plane
The fighter plane model is one of the best. It flies well and is quite strong in its structure. It's a pleasure to play with such a plane. Step by step diagram for a long-flying fighter aircraft:
- Take an A4 sheet, preferably a thinner one, this will allow it to fly a little further;
- Fold it lengthwise, then unfold it back;
- Turn the fold up and fold in half along the short side;
- Fold the resulting upper corners overlapping so that the diagonal goes from the center of the top line to its corner in the bottom line;
- Then the upper corners are folded in half again so that their outer edge runs along the diagonal line; be sure to carefully iron all the folds with a ruler;
- Open each side like a bud and bend in half;
- Then, the resulting angles are turned back;
- After this, the upper parts on both sides are folded inward into the aircraft;
- The craft should be turned over and the same procedure done on the other side;
- Both parts need to be opened along the fold line;
- On the other hand, it is necessary to similarly open the extreme parts, you should get an isosceles triangle;
- The resulting figure should be folded in half;
- You need to step back 2.5 cm from the bottom line and mark a line along which the wings will bend;
- Carefully bend first one wing, then the other, do not forget to carefully iron all the lines;
- The final touch is to bend the wings for stability. To do this, approximately in the middle of the resulting plane, you should mark a line parallel to the base;
- Fold the corners up along this line;
- If desired, you can additionally make flaps. The plane is ready.

Spy plane
If you have already gotten your hands on simple circuits, we can move on to the question of creating an airplane from paper of a more complex design. We offer you a beautiful and original reconnaissance aircraft:
- Fold a rectangular sheet of paper as if you were going to make a square out of it;
- Then roll the sheet in the same way on the other side;
- You will get a triangle, bend its upper corner to the bottom line;
- Then turn the corner back, but with a slight bend;
- Fold the resulting figure in half;
- Mark a diagonal line and unfold the wings along it, do not forget to thoroughly iron all the folds. The model is ready to fly.

Liner
Another diagram with which you can make an unusual airplane out of paper. The airliner has an original shape, as well as excellent flying properties. With such a model, all the boys in the yard will simply be jealous. So, the liner diagram:
- As in the reconnaissance aircraft diagram, at the first stage the rectangular sheet should be folded as if you were going to make a square out of it;
- Fold the resulting upper triangle in half;
- Bend the upper corner so that it protrudes slightly beyond the bottom line of the triangle;
- Fold the shape in half, leaving the fold of the triangle inside;
- Next, make an indent from the central fold and bend the wings along it. There will be a small membrane inside the plane;
- The triangle that was bent at first will need to be straightened;
- The upper parts of the wings need to be slightly bent towards the outside of the aircraft;
- Spread the wings and bend the corners as shown in the diagram;
- Decorate the plane with messages and cutouts.

We have described for you 7 different diagrams that easily show you how to make a paper airplane. Each model has its own individual launch and landing characteristics. Make several airplanes you like, experiment with the width of the wings and flaps. This way you will find the most suitable model for your own purposes. Or you and your child can create an entire collection; this will be a great alternative to the time your child spends in front of the computer.
Children, regardless of their gender, love to make paper crafts, and especially airplanes. And parents should definitely help them in this matter. After all, paper crafts are practically safe, do not burden the budget and help the child develop thinking.
Airplanes made using the origami technique are very popular all over the world. There are over 100 designs of such airplanes. Every year there are competitions for the flight range of paper airplanes and the amount of time this craft spends in the air.
It is known that the first modern paper model was made in 1930. It was manufactured for performance testing in the Lockheed Corporation wind tunnel. After which paper airplanes began to be produced as independent models.
How to make a paper airplane that flies for a long time?

On this moment maximum residence time paper airplane in the air is 27.6 seconds. This record was set by Ken Blackburn, an American paper airplane enthusiast, back in 1983. He built such a long-flying aircraft using this design:
1-2. We bend the edges of a standard A4 sheet as shown in the figure. Then bend a 1 cm strip at the bottom of the sheet

3-10. We continue to fold the strips moving towards the second third of the sheet

11-12. Now fold the sheet in the middle to form wings

13-14. You should get a paper airplane like this. Don't forget to unscrew the “flaps” at the ends of the wings. They are one of the “secrets” of the long flight of this paper airplane model.
Try making a paper airplane using this design and maybe you will be able to break Blackburn's record.

How to make a paper airplane that flies far?
If your goal is to make a paper airplane with a long flight range, then this diagram may be useful for you:
1. Take a standard A4 sheet of thick paper. We begin to fold the airplane by bending it along the central longitudinal line.

2. Now bend the edges diagonally. The fold line of the wings should be as marked in the diagram with a dotted line. It is due to this angle that this aircraft is able to fly further than other models.

3. We use the longitudinal line again and fold the airplane in half. The edges must be folded as indicated in the diagram.

4. You should get an airplane like this. Start testing it.

This model can be improved by changing the balance. To do this, roll up a small ball of plasticine and place it closer to the nose of the plane. When testing it, find the optimal location for such a balance.
There is another origami design that will allow you to build a long-flying airplane. You can try thin cardboard as its base.
1. We use the landscape layout of the sheet and fold it in half

2. Fold the wings like a classic paper airplane design

3-4. Bend the triangle of the nose along the dotted line as in the figure

5. Folding the two halves of the airplane

6-8. We bend the wings taking into account the angle indicated in the figure.

9-10. We form the flaps and prepare the aircraft for testing

How to make and fold a simple airplane from a sheet of paper: step-by-step instructions, diagram

The simple, classic design of the aircraft is also very popular today. Probably everyone can fold such an airplane with their own hands. But, if you can’t do it, here’s an excellent diagram for learning how to fold such airplanes.
1. Take a sheet of A4 and A3 paper and fold its left and right edges towards the middle
2. We turn the left and right corners to the center line and fold the two halves of the plane
3. Unscrew the wings as shown in the picture

The simplest plane is ready.
Origami paper airplane
Origami is a Japanese technique of folding paper figures. Do not use scissors or glue. Just a piece of paper and your hands. The history of origami goes back many centuries. The appearance of this technique is associated with Buddhist monks, who, in order to reflect on the meaning of life, locked themselves in their cells and folded paper figures. In principle, all of the above airplane folding schemes can be called origami. Below is a modern diagram of a paper fighter.
1.
Take a standard A4 sheet and fold it in half
2.
We bend the upper corners to the middle and straighten them as shown in the figure.
3.
To make it easier to work with such an airplane, further fix the straightened corners
4.
We bend the obtuse corners of the resulting rhombuses back
5.
We also turn the side corners back. You should get a regular triangle
6.
We turn off the wings of the workpiece. They need to be bent and inserted perpendicularly  The finished paper fighter plane flies very well and will bring a lot of fun to your children.
What paper and materials may be needed?

The popularity of paper airplanes lies in the fact that to make them you need absolutely nothing but paper. Notebook sheets, printer paper, newspapers, thin cardboard, etc. are suitable. As for paper stiffness, experiment and find one that suits your specific model.
And if you want your folded paper airplane model to look beautiful, color it with markers, pencils or paint. When giving an exclusive design to your aircraft, look at photographs of such equipment on the Internet. After all, if you make it as similar as possible to real airplanes, it will bring even more joy to you and your children.
Speaking of children, when making these paper crafts child improves fine motor skills hands, develops fingers, uses your imagination and learns to think logically.
What to pay attention to when modeling?

Almost all paper airplane designs can be divided into two groups: long-flying and long-flying. In order to make an airplane that will fly as far as possible, use a long and narrow paper structure. Such airplanes usually have a rigid structure and a center of gravity shifted closer to the nose.
For airplanes that stay in the air longer, the main design feature is a large wingspan. At the same time, long-flying airplanes should not have a rigid structure. What is more important is its overall balance.
Additionally, symmetry is important when making paper airplanes. If one wing of such a paper structure is larger than the other, then such an airplane will fall onto it and will not fly even a few meters. Remember that not only the wings, but also the tail of the aircraft must be symmetrical.
And one more important point- balance. The designs of real paper airplanes do not use additional elements. But, if you are making an airplane for yourself, and not for a competition in terms of flight duration or range, you can use plasticine or additional paper or cardboard inserts to create a more optimal design for the design.
Paper airplanes - DIY crafts: diagrams
CONCORD
The infamous but very beautiful supersonic airliner Concorde can be made according to this scheme:

STUNTER
Here is another pattern for making a paper airplane. Unlike the previous models described in this article, this aircraft flies along a rather original trajectory.

FAST PLANE
1-3. Fold the sheet of paper in half along the transverse line. Then unfold and fold along the transverse line. Fold the sheet along the dotted lines.

4-6. Unfold the sides. We bend each flap inward. We do this first for the internal corners, and then for the external ones. Then we form the wings.

7-9. We turn the wings at some distance from the bottom. The fold line must be carefully ironed. Then you need to unscrew the wings.

The end result should be a plane like this.

GOLDEN STING
1-2. Bend the sheet of paper in half and return it to its original position. We turn the upper right corner of the paper towards the middle of the bottom side. There is no need to iron the fold line.

3-4. We bend the sheet at the intersection of the fold lines. After which we immediately return the sheet to its original position. We bend the upper corners of the paper along the line of the resulting bend.

5-7. We bend the upper edge along the already marked bend. Bend the corners from the center to the bottom corners. Fold half of each folded corner.

8-10. Now we bend the corners along the line marked in the figure with pre-folded corners. We iron the fold lines and bend the tip to the point where the airplane wings join.

11-12. We fold the wings back and connect the fracture sites. They are indicated in the figure with red dots.

SKAT
1-2. paper sheet fold in half along the longitudinal line. Unbend the sheet and connect the right sheet to the left edge along the dotted line.

3-4. We bend the sheet and repeat the above action with the opposite corner. Then we bend the small corners and the top of the sheet.

5-7. Along the line that we have already formed, we bend the right corner. Bend its corner along a vertical line (see picture). We bend the bottom corner.

8-10. We repeat the above steps for the opposite part of the sheet. We bend the nose and bend the airplane in half. When forming the wings, you need to carefully iron the fold line.


SWORD-BEARER
1-2. We form a longitudinal bend line as we did with the model described above. Fold the corners of the sheet along the dotted lines.

3-4. Now you need to turn over the sheet of paper and bend the top edges to the center line.

5-7. We fold the sheet of paper towards itself and bend the top as shown in the figure.

8-10. We begin to form the wings. We first bend one wing along the dotted line, and then the second. We iron the fold lines of the wings very carefully.

11-12. Squeeze out the paper tail between the wings. Give the paper airplane a finished look based on the drawing of the finished model.

Folding a simple airplane out of paper takes 5 minutes. Models of complex design require more experience and a sufficient amount of free time. Having assembly diagrams makes the process much faster and easier.
What paper and materials will you need?
To fold a paper airplane, all you need is paper. The most common stationery paper, A4 format, is suitable. For large models that are planned to be launched outdoors, you can take an A3 sheet. Larger size it is impractical to take, since launching and planning such an aircraft is problematic.
Paper thickness depends on the aircraft. Suitable for light, floating models classic paper for a printer or newspaper. For rigid, gliding aircraft, paper with a density higher than 100 g/m 2 is typical.
Due to the hardness of the material, it is possible to achieve the necessary flight characteristics.
In addition to paper, in rare cases, scissors or glue are additionally used to better secure the model. Beginners can use a long ruler; it helps avoid crooked and asymmetrical bends. If desired, the finished model can be painted in different colors or covered with stickers.
Classic paper airplane model
Airplane model in classic version consists of 6 actions:

The model is universal and suitable for launching by both children and adults. This is due to the average flight characteristics – sufficient for moral satisfaction.
Fighter jet
It takes longer to make a fighter jet.
This involves a lot of action during the folding process, but the work itself is not difficult at all:

A fighter jet is capable of flying fast and far when launched correctly. The plane must be thrown forcefully and at a slight angle of up to 50 degrees to the ground.
Military paper plane
Such a fighter flies smoothly and smoothly. To complete it, you need a landscape sheet and a few free minutes. 
Performance:
- Fold the sheet in half lengthwise to determine the central axis.
- Bend the upper corners close to the axial fold.
- Turn the sheet over and fold the corners back toward the center line. The result is a narrow and long “nose” of the aircraft.
- Straighten the folded top layer of paper from the back side to form a diamond consisting of 2 halves. Fold it in half. Thus, from a rhombus a triangle is obtained with the base at the top.
- Fold the workpiece in half with the folded layers facing out. Bend the wings at a distance of 2-3 cm from the axial fold.
The plane folds up quickly enough, the diagram is clear even to a child. It is better to take paper that is not very thick, since the nose of the model is already weighted. In flight, a military aircraft is characterized by smooth and long gliding with a smooth descent.
Paper airplane with propeller
To make an airplane with a propeller, you will need an A4 sheet and a paper square measuring 10x10 cm (for the propeller). The square is cut diagonally, not reaching the center 1 cm from each corner. Secure every second corner obtained with a needle in the center. The resulting propeller is finally attached to the nose of the aircraft.
The paper plane is folded according to the following pattern:

Children will like the plane because it is not like other models.
When launching, special skill is required, otherwise it will not fly. For reliability, the propeller can be glued with superglue after fixing; it is important not to get on the propeller itself, otherwise it will stop rotating.
How to make an unusual plane
Any model that does not look like a classic airplane looks extraordinary and attractive. 
This original aircraft resembles a passenger airliner, the assembly diagram is as follows:
- You need to make a square from a landscape sheet by cutting off the excess width.
- Press two diagonal folds onto the sheet. Fold in half to form a triangle.
- Fold the sharp corners towards the center to form a rectangle, then fold in half along the fold. You should end up with a right triangle with a folded base at the bottom and 3 independent corners at the top.
- The two outermost free corners are the wings. They must be bent at a distance of 3 cm from the base of the plane.
- A tail is formed from the central corner. To do this, you need to make a fold 3 cm wide, which is clamped between the base of the wings. For better fixation, the base is glued with PVA.
- The tip of the nose is cut from bottom to top at an angle of 30-40 degrees.
Scheme of how to make a boomerang plane
The boomerang plane is made from a landscape sheet of paper. 
The scheme consists of the following steps:
- Fold the sheet in half crosswise.
- Fold one half in half again and leave folded.
- Bend the workpiece in half lengthwise (with the folded section inward). Squeeze well and open the workpiece.
- Bend the resulting angles to the center line on both sides.
- Fold the resulting “nose” inward along the fold line located on the reverse side.
- Fold the workpiece in half and press firmly. Open again.
- Form wings. Bend small corners parallel to the fold existing at the edges of the wings.
- Fold in half with the small wings folded inward.
- Bend the large wings at a distance of 2-3 cm parallel to the entire plane.
The model is for the lazy, because with the right design, no matter how you launch it, it will fly back. Such paper toy Children will like it very much. It should be taken into account that the paper for a boomerang plane needs to be thin and light - then various turns and maneuvers are possible during the flight.
Origami paper airplane
A paper airplane, the design of which involves multiple folds and additions, is also called origami. Or rather, aerogi.
One of the representatives of this type of creativity is the following aircraft:
- The landscape sheet is folded in half lengthwise to determine the central axis.
- The upper corners are folded close to the central center line on both sides.
- The resulting acute angle is bent transversely inward. In this case, it is necessary to retreat 2.5-3 cm further from the previously bent corners.
- The workpiece is turned over. The top edge is turned up half a centimeter.
- The workpiece is turned over again, and the upper corners are folded towards the central fold.
- If everything is done correctly, there should be a small triangle at the bottom, which must be folded upward for additional fixation.
- The almost finished plane is folded in half with the folds facing outwards. All folds and folds are pressed well. It's better to do this with a ruler.
- The wings are formed in a special way. When they are laid down, the middle of the rear plane of the wing and the angle of the lower, rear base of the aircraft must coincide.
- To improve flight qualities, the wings can be bent again by half a centimeter along the edge.
Attention! This model is capable of flying for considerable distances, provided that it is folded correctly.
 The bends on the wings must be strictly at right angles, the aircraft itself must be symmetrical and proportional.
How to make a fast paper plane
A fast paper plane is similar in appearance to a fighter, but has wider wings and, accordingly, its design is different.
It develops step by step as follows:

This model flies faster than others due to its design: narrow and a long nose without weight and wide, maneuverable wings. Such characteristics will allow the aircraft to stay in the air longer.
What does it take for an airplane to fly far?
Paper airplanes are conventionally divided into long-flying and long-flying. Models that fly long distances are narrow and dense. Their main feature is their length and center of gravity, which is located closer to the nose of the product. 
The layout of a paper airplane should be proportional, with a correctly aligned center. When folding narrow and long models it is important that the wings are as symmetrical as possible. It is necessary to determine the places of bends in advance and make them even and clear.
Video: paper plane, diagram
How to make a paper airplane that flies far, watch the video:
Making an origami plane:
We also recommend
 How to learn to write beautifully and make your handwriting perfect?
 What every woman needs to know?
 Corporate party in USSR style New Year's Eve in USSR style
 Thanksgiving Day in Canada Canadian experience class, changes in the program
 How to remove belly fat after childbirth: procedures, masks and exercises Mask to reduce belly volume
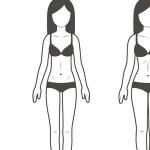 Types of female figures: ideal parameters and harmonious proportions