How to tighten the navel of a textile doll. MK: three-dimensional face for a doll
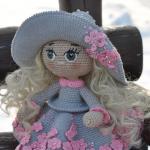
Knitted dolls are a type of needlework that has become especially popular recently. They are used for children, instead of ordinary dolls, and also as an element of interior decor. Dolls are crocheted and knitted according to patterns. To master the technique of creating them, it is enough to have minimal knitting skills, know the terminology and use the tips given below.
The photos below demonstrate how diverse, and at the same time cute and funny, knitted dolls can be.


Knitted doll patterns
 There are several ways to create knitted dolls:
- of 6 separately connected parts - head, torso, 2 parts each. legs and arms, which are then sewn into one piece;
- of 5 parts - a solidly knitted head and torso, as well as separately knitted parts of the arms and legs, which are subsequently sewn to the solidly knitted part;
- of 3 parts - a one-piece knitted part consisting of a head, torso and legs and separately knitted parts of the arms, which are then sewn on;
- from 1 piece - a doll figurine is knitted starting from the head or legs, with separately knitted limbs immediately tied into a common piece.

Below are knitting patterns for individual parts of the doll figurine
- Doll head

2. Torso and legs of the doll

 4. Knitting pattern


Knitted doll for beginners, step-by-step pattern from scratch

 To knit a doll you will need:
- remnants of yarn of different shades, among which there must be flesh-colored threads, with a total amount of about 150 g;
- knitting needles - 2.5-3 mm - paired and sock;
- filler;
- darning needle;
- a pair of doll eyes.
Knitting density: 26 p × 36 r (10 × 10 cm).
Basic pattern: stockinette stitch, purl stitch.
 Knitting pattern for individual parts

 For the torso
Cast on 40 stitches on the needles and knit 30 stitches. Ch.
Sew the finished rectangle along the sides and bottom, and pull along the top edge.
Fill the resulting bag with filler, tighten it along the upper edge, and make forming drawstrings to mark the navel and buttocks.
For the head
Cast on 50 stitches and knit. Ch.
In every person. R. perform increases at intervals of 3 sts.
Knit 10 rubles. no increases.
Reduce at 3-st intervals, knitting 3 and 4 stitches together.
Repeat the action for 2 more persons. R.
Sew the finished piece along the sides, tighten with thread along the top and bottom edges.
Arms and legs
Knit the details using sock knitting needles. Ch., cast on 20 points, evenly distributing.
Pull along the top and bottom edges. Fill fill. Shape the hands and feet by tightening the main parts of the legs and arms.
Assembly
Sew all the parts together. Make hair for the doll by tying individual strands of thread using a hook. Embroider a nose and mouth, attach ready-made eyes or embroider them. Make an outfit for the doll by sewing or knitting it separately.

A detailed master class on creating a doll with knitting needles is shown in the video.
Crocheted doll for beginners, pattern with detailed description from scratch

As a first attempt for novice needlewomen to crochet a doll, it is worth trying the option with a one-piece crocheted head and body. It is knitted as follows:
tie a chain of 37 chains, close it into a ring;
first 4 rubles – 37 st/bn;
5 r.: knit 39 st/bn in the following sequence: increase, 18 st/bn, increase, finish r. 17 st/bn;
6 r.: knit 41 st/bn in the following sequence: increase, 19 st/bn, increase, finish r. 18 st/bn;
7 p.: on p. previous. Row knit 41 st/bn;
8 r.: knit 43 st/bn in the following sequence: 20 st/bn, increase, finish r. 19 st/bn;
9-15 p.: on p. previous. Row knit 43 st/bn;
16 r.: knit 40 st/bn in the following sequence: 4 t/bn, decrease, 9 st/bn, decrease, finish r. 15 st/bn;
17 and 19 p.: on p. previous. row, respectively, knit 40 st/bn and 38 st/bn;
18 r.: knit 38 st/bn in the following sequence: 4 t/bn, decrease, 18 st/bn, decrease, finish r. 14 st/bn;
20 r.: knit 36 st/bn in the following sequence: 4 t/bn, decrease, 17 st/bn, decrease, finish r. 13 st/bn;
21 r.: knit 34 st/bn in the following sequence: increase, 4 st/bn, decrease, 16 st/bn, decrease, finish r. 12 st/bn;
22 r.: knit 32 st/bn in the following sequence: 4 t/bn, decrease, 15 st/bn, decrease, finish r. 11 st/bn;
23 rubles: on p. previous. Row knit 32 st/bn;
24 r.: knit 30 st/bn in the following sequence: 4 t/bn, decrease, 14 st/bn, decrease, finish r. 10 st/bn;
25 r.: knit 28 st/bn in the following sequence: 4 t/bn, decrease, 13 st/bn, decrease, finish r. 9 st/bn;
RUB 26: same as previous. Row knit 28 st/bn;
27 r.: knit 26 st/bn in the following sequence: 4 t/bn, decrease, 12 st/bn, decrease, finish r. 8 st/bn;
28 r.: knit 24 st/bn in the following sequence: 4 t/bn, decrease, 11 st/bn, decrease, finish r. 7 st/bn;
RUB 29: same as previous. Row knit 24 st/bn;
30 r.: knit 22 st/bn in the following sequence: 4 t/bn, decrease, 10 st/bn, decrease, finish r. 6 st/bn;
31 r.: knit 20 st/bn in the following sequence: 4 t/bn, decrease, 9 st/bn, decrease, finish r. 5 st/bn;
32 r.: knit 4 decreases every 3 st/bn = 18 st/bn;
RUB 33: same as previous. Row knit 18 st/bn;
34 rubles: knit 4 increases every 3 st/bn = 20 st/bn;
35 rubles: knit 4 increases every 4 st/bn = 24 st/bn;
RUB 36-41: same as previous. Row knit 24 st/bn;
42 rubles: knit 2 decreases every 10 st/bn = 22 st/bn;
43-44 rubles: on the previous paragraph. Row knit 22 st/bn;
45 r.: knit 2 decreases every 9 st/bn = 20 st/bn;
46 r.: knit 5 decreases every 2 st/bn = 15 st/bn;
47 r.: knit 5 decreases every 1 st/bn = 10 st/bn;
RUR 48: knit 2 dc together, tighten the edge.
To knit the feet, make an amigurami ring, into which you knit 6 dc. Further:
1 rub.; 12 st/bn, making 6 increases on the previous step. R.;
2-4 r. knit 12 st/bn;
5 rows: for the heel, make 2 increases in a row, finish the row with 10 st/bn = 14 st/bn;
6-11 r.: knit 14 st/bn;
12 r.: knit 2 sc together, fill the parts with filler, tighten the edges.
Knit legs from 35 r, 14 st/bn, made on a ring from a chain of 14 ch.
For the arms, work 6 dc into an amigurami ring and continue by making 6 increases on the next row = 12 dc. Next, knit 2 rows. without changes, that is, 12 st/bn in each r. On the next row, work 1 puffy st (thumb) and 11 dc (rest of palm). All subsequent 23 r. knit 12 dc in each row. Assemble the doll according to the drawing.

Another option for knitting a doll with a one-piece head and body, shown in the master class
Head of a knitted doll in detail
The principle of crocheting a doll head is always the same. It begins with the formation of an amigurami ring, knitted in the round, with an even distribution of increases and decreases. A detailed knitting pattern in rows is shown in the photo below.

 The process of crocheting a doll's head is shown in detail in the master class.
Below is a pattern for knitting a doll's head with knitting needles

How to embroider eyes on a knitted doll
The doll's eyes can be embroidered either when the head is completely tied or when it is not yet finished. The advantage of embroidering on an unfinished head is that bartacks and protruding thread ends are easier to hide inside the knitting. For embroidery, you can use several shades of thread (floss, wool or silk) - the darkest for the pupil and contours, colored ones for the iris, white for whites and highlights.

Eyes can be embroidered in several ways. The easiest way to do this is with satin stitch.
- Outline the location of future eyes and their contours. It is more convenient to do this with a self-dissolving marker or mark with thread.
- Embroider the pupils using satin stitch, taking 2 tbsp.
- Embroider the iris around the pupils.
- Embroider whites and highlights.
- Using small stitches, embroider the upper and lower contours of the eyes and eyelid.

To make the eyes of a knitted doll look three-dimensional, you can use another stitch for embroidery - rococo, in combination with a bead instead of a pupil.
 The sequence of embroidering eyes using this technique is shown in detail in the photo.

Hair for a knitted doll made of yarn, how to tie the hair of a knitted doll
There are several ways to make hair for a knitted doll:
- knit from fancy yarn - “grass”, “boucle”;

- knit with double thread using knitting needles, with a grooved pattern - garter stitch, English or French elastic;

- crochet a separate piece with an elongated loop pattern, and sew it to the top of the head like a wig;

- sew rows of threads cut into pieces onto a strip of fabric. Sew the finished part to the top of the head;

- attaching to the top of the head separate strands of threads cut and folded in half;

- crochet a wig;

- knit the backing in the form of a cap, and then embroider it with threads on top.

An interesting way of attaching hair without knots to the head of a knitted doll is demonstrated in the video below.
How to tie a mop of cute curls on the head of a knitted doll is shown in detail in the video.
How to make a face for a knitted doll
When shaping the face of a larger crocheted doll, tightening may be required to give it volume and a certain facial expression. To do this, the location of the eyes and nose is marked with pins, and then a tightening is performed using a needle and matching thread.
 If the doll is small or is quite happy with the option of a flat face, then you can do without a tightening. This means that after the doll’s eyes are embroidered, you can proceed to designing the nose, lips and eyebrows. Like the eyes, these details of the face can be embroidered by choosing the appropriate shade of thread. It is important to remember that depending on how the eyebrows and mouth are positioned, the doll’s facial expression depends. The process of embroidering lips and nose is shown in detail below in the photo and video.


Frame for a knitted doll
The presence of a frame gives a knitted doll the ability to hold its shape, as well as a certain pose, to be dynamic and flexible. It is inserted at the stage of assembling finished parts or during the process of knitting them.
To create the frame you will need the following materials and tools:
- 3 pieces of copper or steel wire with a cross-section of 1.2 mm;
- electrical tape, masking tape or medical plaster on a cotton base;
- pliers.
Taking one of the pieces of wire, bend it in half, insert it into the lower part of the body. Pull the leg parts onto the ends of the wire. To prevent the wire from breaking through the parts, its ends are folded into a loop using pliers and wrapped with electrical tape or any other material. Fill the legs and lower body with filler to give them volume.

From the second piece of wire, securing it to the top of the first, twist the spine and a large frame loop for the head. Tie the body piece around the frame or, if it was knitted before, put it on the frame, fill it with filler and sew it to the bottom.

Pass the third piece of wire through the twisted wire-frame of the spine at the level of the shoulder line, secure it by twisting and wrapping it with electrical tape or other fixing material. Bend the ends of the wire - the arm frame - into a loop.

Stretch the arm parts onto the wire frame, fill them with filler, and sew them to the body and head. Give the workpiece the desired pose.
Below are 2 master classes demonstrating how to make a frame for a knitted doll.
Legs of a knitted doll
The doll's legs can be connected from top to bottom and bottom to top, and also connected to each other at the transition point to the body or separated by a jumper, that is, they can be brought together or spaced shoulder-width apart.
 Following the pattern below, knit a pair of legs:
1 row: knit 6 tbsp into a ring.
2 p.: make increases in each paragraph of the previous one. R. = 12 tbsp.
3 rubles: make increases in the previous paragraph. R. with an interval of 1 p. = 18 st b/n.
4 rubles: make increases in the previous paragraph. R. with an interval of 2 p. = 24 tbsp.
5 r.: knit 24 tbsp behind the back walls of the previous stitch. r., without increases.
6-8 r: 24 tbsp. b/n.

9 rubles: make decreases on the previous step. R. with an interval of 6 p. = 20 tbsp.
10 rubles: make decreases on the previous step. R. with an interval of 9 p. = 18 tbsp.
11 rubles: make 1 decrease on the previous step. R. = 17 st. b/n.
12-18 r.: 17 tbsp. b/n.

19 rubles: make increases in the previous paragraph. R. with an interval of 3 p. = 20 tbsp.
20-25 rubles: 20 st. b/n.
To obtain the effect of flattened legs, connect the finished parts in the upper part of 3 tbsp. b/n. To get the effect of spread legs, connect them with a chain of 2-4 stitches, and then proceed to knitting the body.
 How to tie legs shod in shoes is shown in a master class
Master class on tightening knitted dolls
Tightening is a technological technique that allows you to give natural volume and expressiveness to individual parts of a knitted toy. A tightening is used to shape the torso and face of the doll - forming the cheekbones, nose, eye sockets, etc., after the associated parts are assembled and filled with filler. To tighten small parts, bobbin threads are used to match the main knitting; in other cases, the knitting threads themselves are used.
To tighten your head under your eyes, you need to:
- use pins to mark a place for future eyes;
- insert the needle at the marked place;

- make a stitch after 2-3 stitches; tighten;
- repeat the same steps with the second eye.

How to tighten the doll’s body is shown in the video
Crochet Barbie doll, diagram with description
 The height of the knitted Barbie is about 25 cm. To create it you will need:
- 50 g flesh-colored yarn;
- hook No. 1.8-2 mm;
- filler;
- stitching needle.
 The doll is knitted in a spiral, that is, without a VP rise.
Knitting a Barbie head begins with an amigurami ring, in which 6 st/bn are knitted.
4 r.: increase the number of sc/bn to 18, knitting 6 increases.
6 r.: increase the number of sc/bn to 24, knitting 6 increases.
In the 3rd, 5th and 7th rows, knit 12, 18 and 24 dc, respectively.
11 r: reduce the number of st/bn to 18, making 6 decreases.
13 rubles: reduce the number of st/bn to 12 by making 6 decreases.
15 rubles: reduce the number of st/bn to 6, making 6 decreases.
In rows 12, 14 and 16, knit 18, 12 and 6 dc, respectively.
Fill the head with filler and tighten the hole.
Knit the body by knitting 6 dc into an amigurami ring.
2 r.: increase the number of sc/bn to 12, knitting 6 increases.
3-4 rubles: 12 st/bn.
5 r.: increase the number of sc/bn to 18, knitting 6 increases through each sc/bn.
6 r.: increase the number of st/bn to 24, knitting 6 increases every 2 st/bn.
7 r.: increase the number of st/bn to 30, knitting 6 increases every 3 st/bn.
8-9 rubles: 30 st/bn.
10 rubles: reduce the number of st/bn to 24, making 6 decreases every 3 st/bn.
11 rubles: reduce the number of st/bn to 18, making 6 decreases every 2 st/bn.
12-13 r.: 18 st/bn.
14 rubles: reduce the number of st/bn to 16, making 2 decreases every 7 st/bn.
15 rub. 16 st/bn.
16 r.: increase the number of st/bn to 18, knitting 2 increases every 7 st/bn.
17 r.: increase the number of st/bn to 20, knitting 2 increases every 8 st/bn.
18 rubles: 20 st/bn.
19 r.: increase the number of st/bn to 24, knitting 4 increases every 4 st/bn.
20-21 r.: 24 st/bn.
22 r.: increase the number of st/bn to 28, knitting 4 increases every 2 st/bn, finish the row by knitting 12 st/bn.
23 r.: increase the number of st/bn to 32, knitting 4 increases every 3 st/bn, finish the row by knitting 12 st/bn.
24-25 rubles: 32 st/bn.
26 r.: reduce the number of st/bn to 28, making 4 decreases every 3 st/bn, finish the row by knitting 12 st/bn.
27 r: 28 st/bn.
28 r.: reduce the number of st/bn to 24, making 4 decreases every 2 st/bn, finish the row by knitting 12 t/bn.
29 rubles: 24 st/bn.
30 rubles: reduce the number of st/bn to 18, performing 2 decreases in a row, 6 sts
bn, 3 decreases in a row, finish the row by knitting 6 dc.
31 rubles: reduce the number of sc/bn to 14 by performing 1 decrease, 5 sc/bn, 2 decreases, 5 sc/bn.
Fill the body part with filler, decorate the shoulders, sewing 2 dc on each side. On the remaining sts, knit 3 rows of 10 sts. Fill the neck with filler, Sew on the head.
Bind the legs by doing 3 ch to begin with.
1st row: ch 1, 2 sc/bn, 3 sc/bn in the last stitch of the chain, turning the knitting, continue 2 sc/bn, 2 sc/bn in the first stitch of the chain
2-3 rubles: 8 st/bn.
4 rubles: 2 increases every 3 st/bn = 10 st/bn.
5 rubles: 10 st/bn.
6 rubles: 2 increases every 4 st/bn = 12 st/bn.
7 rubles: 12 st/bn.
Fill the foot with filler.
8 rubles: 6 decreases through each stitch = 6 st/bn.
9 p.: Pull st, and then dial on top 12 st/bn.
10 r.: knit 9 tbsp in the sequence - 3 tbsp, 2 decreases in a row, 3 tbsp, decrease.
11-14 r.: 9 st./bn.
15 r.: knit 10 st/bn in the sequence – 1 increase, 8 st/bn.
16 r.: knit 12 st/bn in the sequence - 2 increases in a row, 8 st/bn.
17 r.: knit 14 st/bn in the sequence - st/bn, 2 increases in a row, 9 st/bn.
18-20 r.: 14 st/bn.
21 r.: knit 12 tbsp in the sequence - 2 tbsp, 2 decreases in a row, 8 tbsp.
22 rubles: 12 st/bn.
23 r.: knit 14 st/bn in the sequence - 9 st/bn, 2 increases in a row, st/bn.
24 rubles: knit 13 st/bn in the sequence – 3 st/bn, 1 decrease,. 9 st/bn.
25 rubles: 13 st/bn.
26 r.: knit 14 st/bn in the sequence - 3 t/bn, 1 decrease, 4 t/bn, 2 increases in a row, 2 st/bn.
27 r.: knit 14 st/bn in the sequence - 2 t/bn, 2 decreases in a row, 2 st/bn, 1 increase, 3 t/bn, 1 increase, 1 st/bn.
28 r: knit 16 st/bn in the sequence - 2 st/bn, 2 increases in a row, 10 st/bn.
29 r.: knit 18 sc/bn in the sequence - 2 t/bn, 1 increase, 3 t/bn, 1 increase, 9 t/bn.
30-33 rubles: 18 st/bn.
34 r.: knit 19 st/bn in the sequence – 7 st/bn, 1 increase, 10 st/bn.
35-38 rubles: 19 st/bn.
39 r.: knit 20 st/bn in the sequence – 8 st/bn, 1 increase, 10 st/bn.
40-44 rubles: 20 st/bn.
As you knit, fill the leg parts with filler.
Tie your hands together by making an amigurami ring first.
1 -5 rubles: 6 st/bn.
6 r.: knit 8 tbsp in the sequence - 2 tbsp, 1 increase, 2 tbsp.
7-8 and 11-15 rubles: 8 st/bn.
9 r.: knit 8 tbsp in the sequence - 2 tbsp, 1 increase, 2 tbsp, 1 decrease, 1 tbsp.
10 r.: knit 8 tbsp in the sequence - 3 tbsp, 1 increase, 2 tbsp, 1 decrease.
16 r.: knit 9 st/bn in the sequence –1 increase, 7 st/bn.
17 r.: knit 9 tbsp in the sequence - 4 tbsp, 1 increase, 2 tbsp, 1 decrease.
18-22 rubles: 9 st/bn.
23 r.: knit 10 tbsp in the sequence - 6 tbsp, 1 increase, 2 tbsp.
24-30 rubles: 10 st/bn.
As you knit the piece, fill it with filler. Sew the finished parts of the arms to the body.
Embroider the face, sew on the hair.

Tilda is a popular doll image created by Norwegian artist Tonne Finanger. If you have minimal crochet skills, you can make it yourself.
To work you will need a hook, flesh-colored or white threads for knitting open parts of the body and colored threads for panties and blouses, filler.
Head and torso:
Knitting starts from the head. To do this, you need to make an amigura circle using flesh-colored threads.
1 r.: knit 5 st/bn.
3 rubles: alternation - 1 st/bn, increase = 15 st/bn.
4 rubles: alternation – 2 st/bn, increase = 20 st/bn.
5-10 rubles: knit sc/bn on the previous item. row = 20 st/bn.
11 rubles: alternation – 2 st/bn, decrease = 15 st/bn.
12-14 rubles: knit sc/bn on the previous paragraph. row = 15 st/bn.
15 rubles: alternation – 1 st/bn, decrease = 10 st/bn.
16-19 rubles: knit sc/bn on the previous item. row = 10 st/bn.
20 rub. : alternation – 1 st/bn, increase = 15 st/bn.
21 rubles: alternation – 2 st/bn, increase = 20 st/bn.
22 rubles: alternation – 3 st/bn, increase = 25 st/bn.
23-24 rubles: alternation – 4 st/bn, decrease = 30/36 st/bn.
25 rubles: alternation – 5 st/bn, increase = 42 st/bn.
26-28 rubles: knit sc/bn on the previous item. row = 42 st/bn.
After 26 p.m. change flesh-colored threads to colored ones.
29 rubles: 5 st/bn, decrease = 36 st/bn.
30 rubles: knit sc/bn on the previous item. row = 36 st/bn.
31 rubles: 4 st/bn, decrease = 30 st/bn.
32 rubles: knit sc/bn on previous stitch. row = 30 st/bn.
33 rubles: alternation – 3 st/bn, decrease = 24 st/bn.
34-38 rubles: knit sc/bn on the previous item. row = 24 st/bn.
39 rubles: alternation – 3 st/bn, increase = 30 st/bn.
40 rubles: alternation – 4 st/bn, increase = 36 st/bn.
Fill the knitted part with filler and continue knitting without changing the thread.
41 rubles: alternation – 5 st/bn, increase = 42 st/bn.
42 rub. alternation – 6 st/bn, increase = 48 st/bn.
43 rubles: knit sc/bn on previous stitch. row = 48 st/bn.
44 rub. alternation – 7 st/bn, increase = 54 st/bn.
45-46 rubles: knit sc/bn on the previous item. row = 54 st/bn.
47 rubles: alternation – 8 st/bn, increase = 60 st/bn.
48-53 rubles: knit sc/bn on the previous item. row = 60 st/bn.
54 rubles: alternation – 9 st/bn, increase = 66 st/bn.
55-59 rubles: knit sc/bn on the previous item. row = 66 st/bn.
60 rubles: alternation – 10 st/bn, increase = 72 st/bn.
61-66 rubles: knit sc/bn on the previous item. row = 72 st/bn.
67 rubles: alternation – 11 st/bn, increase = 78 st/bn.
68-71 r.: knit sc/bn on the previous item. row = 78 st/bn.
72 rubles: alternation – 38 st/bn, increase = 80 st/bn.
73 r.: knit sc/bn on the previous item. row = 80 st/bn.
Fill the knitted part with filler, connect its edges with a hook.
Legs:
1 r.: knit 5 st/bn.
2 rubles: 5 increases per previous item. row = 10 st/bn.
3-15 rubles: knit sc/bn on the previous paragraph. row = 10 st/bn.
16 rubles: alternation – 1 st/bn, increase = 15 st/bn.
17-27 rubles: knit sc/bn on the previous item. row = 15 st/bn.
Having knitted 26 rubles, change the threads to colored ones.
28 rubles: knit st/bn behind the back. Art. on p. previous row = 15 st/bn.
29 rubles: alternation – 2 st/bn, increase = 20 st/bn.
30-41 rubles: knit sc/bn on the previous item. row = 20 st/bn.
Fill the leg with filler, close the edges of the part, crocheting 10 dc.
42 r.: knit 10 st/bn for the back. st., turn the knitting and perform another 10 st/bn before the st. = 20 st/bn.
43-44 rubles: knit sc/bn on previous stitch. row = 20 st/bn.
45 rubles: alternation – 3 st/bn, increase = 25 st/bn.
46-50 r.: knit sc/bn on the previous item. row = 25 st/bn.
51 rubles: alternation – 4 st/bn, increase = 30 st/bn.
52-61 rubles: knit sc/bn on the previous item. row = 30 st/bn.
62 rubles: alternation – 5 st/bn, increase = 35 st/bn.
63-67 rubles: knit sc/bn on the previous item. row = 35 st/bn.
68 rub. alternation – 6 st/bn, increase = 40 st/bn.
69-73 r.: knit sc/bn on the previous item. row = 40 st/bn.
Fill the knitted piece with filler, crochet its edges without tearing off the thread, and sew the leg to the body. Repeating from 1 to 73 r., tie the second leg, sew it to the body.
Hands:
The piece is knitted from bottom to top. To do this, you need to make an amigura circle using flesh-colored threads.
1 r.: knit 5 st/bn.
2 rubles: 5 increases per previous item. row = 10 st/bn.
3-14 rubles: knit sc/bn on previous item. row = 10 st/bn.
15 rubles: alternation – 4 st/bn, increase = 12 st/bn.
16-30 rubles: knit sc/bn on the previous item. row = 12 st/bn.
31 rubles: alternation – 5 st/bn, increase = 14 st/bn.
32-46 rubles: knit sc/bn on the previous item. row = 14 st/bn.
After knitting 40 rubles, change the flesh threads to colored ones and fill the knitted part with filler.
47 rubles: 7 decreases per previous item. row = 7 st/bn.
Fill the arm part to the top with filler, tighten the edges of the part with thread, and sew the arm to the body. Repeating from 1 to 47 r. tie the other arm, stuff it and sew it to the body.

You can see the process of knitting a Tilda doll in the video presented in 3 parts below.
Head and torso
Using flesh-colored threads, make an amigurami ring and then knit
1 rub.: 6 st/bn.
2 rubles: 6 increases = 12 st/bn.
3 r.: knit rapport 6 times *1 st/bn, increase* = 18 st/bn.
4 r.: knit rapport 6 times *2 st/bn, increase* = 24 st/bn.
5 r.: knit rapport 6 times *3 st/bn, increase* = 30 st/bn.
6 r.: knit rapport 6 times *4 st/bn, increase* = 36 st/bn.
7 p.: knit rapport 6 times *5 st/bn, increase* = 42 st/bn.
8 p.: knit rapport 6 times *6 st/bn, increase* = 48 st/bn.
9 p.: knit rapport 6 times *7 st/bn, increase* = 54 st/bn.
10 rubles: knit rapport 6 times *8 st/bn, increase* = 60 st/bn.
11-20 p.: on p. previous. Row knit 60 st/bn.
21-27 r.: repeat the knitting sequence in the opposite direction from 10-3 r., performing decreases instead of increases
28 r.: knit rapport 6 times *1 st/bn, decrease* = 12 st/bn.
29 rubles: make 6 decreases = 6 st/bn.
Fill the head with filler, attach the eyes between the 17th and 18th rows, the distance between the eyes is 6 st/bn.
Body knitting pattern
Knitting begins from the feet, more precisely from the sole, and is carried out from the bottom up.
Using colored threads, knit a chain of 10 chains.
1 r round.: 25 st/bn knit in the following sequence: 2 ch rise, 4 st/bn in the next st., 8 st/bn., 5 st/bn in the last stitch of the chain, 8 st/bn, s/ With.
2 r. circular: 35 st/bn knit in the following sequence: 2 ch/bn rise, 1 st/bn in the same st, 4 st/bn in the next st., 8 st/n., 5 st/bn in one st, 8 st /bn, s/s.
3 rub. circular: 45 st/bn knit in the following sequence: 2 ch/bn rise, 1 st/bn in the same st., repeat the report 4 times * st/bn + increase*, ., 8 st/n., repeat the report 5 times * st/bn + increase*, 8 st/bn, s/s.
Change the thread and continue knitting the sole of the shoe.
4 r.: knit 46 st/bn, behind the back st.
5-7 r.: on the p. of the previous row, knit 46 st/bn.
8 r.: knit 42 st/bn in the following sequence: 24 st/bn, 4 decreases, 14 st/bn.
Insert a pre-cut insole from cardboard.
10 r.: knit 36 st/bn in the following sequence: 21 st/bn, 6 decreases, 9 st/bn.
11 r.: knit 30 st/bn in the following sequence: 1 st/bn, 6 decreases, 6 st/bn.
12 r.: knit 24 st/bn in the following sequence: 15 st/bn, 6 decreases, 3 st/bn.
13 rubles: repeat the report 6 times *2 st/bn, decrease* = 18 st/bn.
Change threads.
14-38 r.: knit 18 tbsp.
We begin to stitch the elbows, starting point No. 1
![]()
From point 1 through the arm we bring the needle to point 2, thus starting to stitch the inner elbow bend.
![]()
From point 2 we insert the needle into point 3, the thread goes over the nylon.
![]()
From point 3 we return to starting point 1
![]()
And from it, through the hand, we take the needle out at point 4, again return to the starting point, tie a knot between the “tail” and the main thread, then we will definitely hide all the “tails”)))
![]()
This is what the elbow looks like.
![]()
And this is what the finished doll’s hands look like.
![]()
Back view.
![]()
We begin to stitch the lower part of the body. From point 1 through the body we bring the needle out at point 2. I take a long and fairly thick needle so that it is convenient to stitch through all layers of foam rubber and padding polyester, I have to use a thimble, but there is nothing complicated about it)))
![]()
From point 2 we pass the needle and thread over the nylon and again return to point 1 to tie a knot between the “tail” and the main thread, I hope that you have already understood that I always leave the “tail” of the thread without fail, in the end it is much easier make ties and carefully hide all the ends and knots! The ass is almost ready)))
![]()
We again draw the needle from point 1 through the body to point 3
![]()
Point 3 is the navel of our doll, and again we return to point 1, tie a knot, adjusting the tension of the thread.
![]()
You can make additional dimples on the butt))) From point 1, already familiar to us, we take the needle through the body into the supposed dimple, marking a symmetrical point with a pin, return to point 1, tie a knot and repeat this operation for the second dimple. I’ll show you how to hide the “tails” a little later)))
![]()
We begin to stitch the knees, the principle is the same as for the elbows. From point 1, this is the popliteal dimple, we bring the needle through the body at point 2
![]()
From point 2 we lead the needle and thread over the nylon, insert the needle into point 3, through the body we return to point 1 and tie knots, achieving the desired thread tension..
![]()
This is what it looks like.
![]()
We hide the "tails". We collect all the threads into a needle and bring them out through the body at an arbitrary point, stretch and cut, all the ends will hide inside the body.
![]()
We also hide all the other “tails”
![]()
![]()
We begin to stitch the chest. From starting point 1, we bring the needle through the body at point 2.
![]()
From point 2 on top of the nylon we return to point 1 and tie knots, adjusting the thread tension.
![]()
![]()
From point 1 we draw the thread horizontally over the nylon and insert the needle at point 2 (just below the armpits)
![]()
Again through the body we return to point 1 and tie knots, adjusting the tension of the thread and the shape of the chest. From point 1 we repeat these steps again for the second half of the chest, i.e. to point 3 and back, tying knots again. We hide the “tails” in the usual way.
![]()
This is what we got)))
![]()
This is what our carcass looks like at this stage)))
![]()
We outline the nipples by simply pulling them out with a needle.
We begin to stitch through the body.
![]()
We sew crosswise, then we draw the thread around and fasten the knots between the “tail” and the main thread.
![]()
We hide the "tails".
![]()
You can see how to stitch the toes and make the feet more textured here: http://stranamasterov.ru/node/218359 photos 35-37 and 40. You can also highlight the feet by separating them from the main part of the leg. In the area of the ankle, from point 1 we sew the leg through to point 2, leaving a “tail”, and wrap the thread around the ankle, highlighting it. We tighten and tie knots, hiding the “tails” inside the leg.
This is what happened after sewing on the head. I put the head on the wire, which was specially left for this purpose, tighten it with a basting stitch around the neck and only then carefully sew it in the same way as the shoulder seams, only in a circle and with a semicircular needle.
![]()
![]()
Legs of a crocheted doll. I got sick with different dolls. Since I like knitting more than sewing, I decided to crochet a doll. To get started, I wanted to look at the knitted dolls of other masters, as well as their tips and descriptions. God! There were a lot of them.
So, everything in order.
Dolls can be knitted or crocheted.
Knitted dolls can be divided according to the type of knitting of parts.
Some dolls can have 6 separate parts: a torso, 2 legs, 2 arms and 1 head, which are then either sewn together, or only the head and torso are sewn together, and the legs and arms are attached in a hinged manner using threads or disks, so that then the doll could sit and stand.
Other dolls may have 2 solid parts: the head and torso are knitted in one piece, and then the legs and arms are sewn or attached.
Still other dolls can be knitted with one more piece, which can include the head, torso, and even legs, while only the arms remain movable or sewn on.
The fourth dolls can be connected by one piece altogether, i.e. the beginning of knitting comes from the head or from the feet, the arms are knitted separately, and then the arms are tied using the raglan technique or in a circle, but in this case the doll can only stand or lie down, respectively.
My first doll was knitted from all the individual parts. For stability, I inserted wire into all parts except the filler. But she turned out to be a bit of a “feather”, she doesn’t want to stand at all, she just sits, but she can also dance the “butterfly polka” or do the splits, which I didn’t really like.
I decided to knit the second doll so that only the arms could move. But at the same time, I wanted the knitted doll to both sit and stand without support. I also didn't want to sew on the legs.
Therefore, I decided that the legs and torso would be one whole.
I've tried a lot of legs. What different legs a knitted doll can have! Or rather, the attachment of the legs to the body can be different!
The legs can be the way the puppeteer intended them, i.e. completely straight, or with knees, or with large feet, or with small ones, etc.
But the attachment of the legs to the body may also vary.
As we have already found out, the legs can be articulated and move.

First, the legs are tied or sewn together, and then they move on to knitting the body.

Secondly, a small jumper of air loops is knitted between the legs, and then both the legs and the chain are tied.

But the first two options have one drawback: the doll will not sit, it will either sit or lie down.
I searched for options for a long time, finally, I found what I was looking for and settled on this third option...., in which the doll will perform three actions: stand, sit and lie down.
But the legs will not be sewn on. I didn’t want to suffer with these legs.
I flattened the legs and tied them in one general circle. And immediately I got what I wanted.
The doll sits and stands! And at the same time there is no need to sew on the legs,
Look for yourself, a crocheted doll in progress.

6.
7.
Recently, the doll is considered not only as a toy for small children, but rather as an elegant element of the interior or a collectible model. This applies to a greater extent to handmade textile dolls. These toys should be handled very carefully as they are very fragile. If you want to please your baby with such a doll, then try sewing any model yourself. During production, pay special attention to the formation of facial features. For this purpose, a special technique is used - tightening. We will consider in detail how the face of a textile doll is tightened in our article.
A doll, like any other toy, consists of several parts. The body, arms, legs, and head are sewn separately. Then all the parts are connected. The doll is almost ready, but it only seems at first glance. The hardest part ahead is working on the face. The entire outcome of the work done will depend on how carefully you work on the face, how clearly you convey all the features.

There are many options for how to tighten your face. Many craftswomen develop their own techniques, which they then use to sew models. Let's look at some of them.
Simple option
This option involves only highlighting the features a little.
To complete the work you will need a strong and reliable thread and a fairly long needle. The whole technique is just about connecting the dots correctly.
Look at the picture:

The points marked with numbers are connected to each other in pairs. That is, point one connects to point two, number three to number four, and so on. This way you will outline the contour of the lips, eyes, and wings of the nose.
Ready relief
Here the parts of the face are put together like a construction set. The cheeks, nose, and lips made of cotton wool, padding polyester, and wool yarn are placed on the head separately. The chin is formed separately. Next, from a fabric that stretches well, a piece is cut out that is sufficient to cover the finished head. Stretch the fabric well on the face, make a slight tightening to fix the top layer. See an example of tightening a child's face in the following images:


All that remains is to paint your face and do your hair.
Sculpture technique
The material used is nylon. Regular thick nylon tights will do. You will also need a long needle and reliable threads.
Let's take a closer look at the master class:
- Stuff the prepared fabric very tightly with synthetic padding. It is very important not to leave empty spaces, so that later you don’t end up with gaps on your face.

- Divide the resulting shape into the front and back parts. In the front part, select the forehead.

- Next, on paper, make a drawing of your future eyes and lips. Cut out the pieces.
- mark your face. Place the points where the outer and inner corners of the eyes, mouth, and nostrils will be. Attach the paper parts to the form and trace them.
- Each tie must be secured with a knot at the back of the head. Start tightening from the nose. To do this, secure the thread well at the back of the head. Insert the needle into the point representing the nostril. Then, a couple of millimeters from this point, insert the needle and bring it out in the depression above the nostril, tighten the thread a little. Return the needle to the starting point. Form the second nostril in the same way. To do this, bring the needle from the lower point of the first nostril into the depression above the second nostril. After finishing the nose, return the thread to the back of the head.

- lip tightening Each point is created using a separate thread. Sew and tighten the point responsible for the hollow above the upper lip. Do the same with the hollow under the lower lip. On the line connecting the depressions, find the point that is between the lips, tighten it too. Finally, tighten the corners of your lips.
- move excess filler from the chin area to the cheek area, thereby making them plumper.
- stitch the corners of the eyes. Use your fingers to form eye sockets. Make sure that the parts of the face are symmetrical.

- Now cover your head with a thin knitted fabric, partially secure it at the back of your head, leaving room for knots. The fabric should fit snugly to the form, then you can easily find all the stitched points.

- Use sewing pins to mark the stitched points, first for the nose, then for the lips, and so on.
- Carefully repeat tightening all the designated points.
- Sew along the contour of the eye, lightly pulling the thread. Sew with the needle backwards.

- the eyes can be made more prominent using self-hardening plastic. Apply it to the eye area and let it set.
- At the back of the head, sew the fabric to the end.
- The last stage is painting the face with paints.
A slightly long, but very high-quality process will give you a doll with a perfect face. Watch a video with an example of face tightening.
We also recommend
 Sketches of tattoos with meaning and their meaning Detailed tattoos
 My husband went to live with his parents and wants to file for divorce
 The best qualities of a man for harmony in marriage and not only A decent guy - what is he like?
 Greek hairstyle: modern options for different hair lengths Greek hairstyles for thin medium hair
 Easy to remove marker stains!
 MK: three-dimensional face for a doll