How to make glasses for a doll: we make them from scrap materials. How Tanya made sunglasses for a doll How to make glasses for a doll from wire
Girls, I salute you! I have long wanted an accessory like glasses for my girls. But on the Internet I saw only with a round frame. I didn’t really like them precisely because of their shape, like Cat Basilio’s. From my long-standing creative experience, I know that if you can’t find and buy, then do it yourself. Well, I did. And yesterday I showed it on social media. networks where I live. 
Received a lot of rave reviews. Well, to celebrate the fact that the glasses turned out and she really liked them, she promised to show them the process of making them. Once you promise, you have to fulfill it.
I like the traditional classic shape of the glasses. I have some experience working with wire. I don’t know how to solder wire and have never tried. Therefore, I decided to resort to more simple way wire fastening, which I have been using for a long time. In the top photos, the frames of the glasses are painted with golden acrylic enamel. But this should not be done. I'll explain why. If we glue “pieces of glass” (plastic) onto the Moment-Crystal, then this glue will corrode any paint. I had to glue it to Moment-Stolyar, which does not hold the plastic securely. Therefore, I recommend taking wire that does not need painting and does not have any kind of coating. I had soft silver-colored knitting wire in my hamster supplies. You shouldn’t take one that’s too tough either, you might not be able to handle it. You can find wire for making jewelry in stores. Master class - sounds a bit loud. But I hope my explanation fits this section.
Materials we will need:
1. Wire with a diameter of 1 mm - two 20 cm each (for the frame),
2. Thin wire for fastening parts, 
3. Cylindrical objects to bend the wire evenly, 
4. Round nose pliers, side cutters, scissors,
5. Plastic from a plastic bottle.
6. Moment-Crystal glue and Moment-Joiner glue.
You can, of course, draw a sketch of glasses and bend the wire according to the drawing. But because I found cylindrical objects with a suitable diameter, so it was more convenient for me without a sketch. 


We fasten the two parts with tape and fix them in three places with thin wire. We make sure that the thin wire lies in a spiral and that each subsequent turn does not overlap the previous one. 

Let's try it on our beauty :) And bend the ears right on the doll. 

We decorate the ears with the same thin wire and cut off the excess with side cutters. 


Now we need to coat the thin wire with Moment-Joiner glue so that, God forbid, it does not jump out of its place. Let the glue dry and take plastic from a bottle or any other plastic that is more convenient for you. 
It is better to outline the outline of the frame with something sharp rather than a marker, because you can stain the frame. You need to cut it out carefully and gradually, constantly trying it on so as not to cut off too much. When you are satisfied with the “pieces of glass”, you can carefully coat the frame with Moment-Crystal glue and glue them. This turned out to be the most difficult for me. No matter how hard I try, the glue is still a little visible from the outside, but it’s good that it’s only me :) From the inside it looks like this... 
And now we try on glasses for our girl, who becomes sooooo serious and smart in them :) And we make sure to tell everyone that our eyesight is completely fine, we put on glasses for beauty :) 
Many craftswomen wonder how to make glasses for a doll. Probably, most of them also think that this is very troublesome and not worthwhile cause. However, in fact, everything is quite easy and simple. To make such an accessory you will need a thin wire, a small bottle, for example, of nail polish remover, wire cutters and any corrugated paper, and a little free time.

First, we need to cover the wire with a small piece of paper. Small because there would be less unnecessary scraps later. We wrap the paper. These will be the two parts of the future frame.


It is also necessary to glue the short wire. It will be needed to connect two long ones. Please take into account all sizes according to the size of your doll. Therefore, we will not adhere to certain measurements. Everything is purely individual.

Then we glue the arms corrugated paper.

We cut off all excess. The connection remains. The short wire also needs to be bent; a lighter will do for this.

We cut off the remaining wire with wire cutters.
This is how we coat it with glue, you can use PVA or other office glue, you can also weld a paste (if time allows and you are willing).

We connect the frame and leave it for a short period of time so that it dries a little.

We paste a small piece of paper around the joints of the frame.

This is how a miracle should happen.

Both arms must be bent back, thus giving them the shape of real glasses. Again, we bite off all the excess. And at the end we bend the ends. Glasses are ready
As children, girls always loved to play with dolls, dress them up, and decorate them with various accessories. But, unfortunately, store shelves don’t always have what you need. There is a way out - to make jewelry with your own hands. This is quite a fun and not troublesome activity. This article will show you how to make glasses for This accessory gives a smart and respectable look not only to a person, but also to toys. Moreover, glasses can be made from those scrap materials that in most cases every person has at home. A little patience and free time - and the doll becomes a real fashionista!
How to make doll glasses from a paper clip: necessary materials
- Two regular paper clips. The larger the doll, the bigger size you need to choose paper clips.
- Pliers. It's better to stick with the miniature version.
- Wire cutters. But you can do without them.
- Future owner of the accessory to try on.
- Ten minutes of personal time.
How to make glasses from a paper clip for a doll: master class
The first step is to straighten the paper clips with your hands or using pliers. Next, we bend one end of the paper clip to the future “bridge” of the glasses and form part of the frame frame. We focus on the size of the doll's head. We do the same with the other tip of the paper clip. You should end up with a glasses base with two identical “connectors” for the lenses.
Using wire cutters, remove excess wire, if any. If there is no suitable tool, then we use what we have, that is, our hands. We twist the remaining tail of the paper clip in different directions until it falls off.
Let's move on to the temples of the glasses. We take another paperclip, straighten it, and then divide it into two equal parts with our hands or using wire cutters. Using pliers, we form as small ears as possible on the ends of each half.
We attach the ear arms to the frame frame and press them firmly using pliers. The optical accessory is ready!
Everything is very quick and simple, you just need to prepare it necessary materials before making glasses for the doll. "Monster High", by the way, such an accessory is also suitable. If you want more glamorous glasses, take colored paper clips, glitter and nail polish (suitable for hair or nails)

from wire: necessary materials
- Pieces of wire (one short and two longer).
- Wire cutters.
- Pieces of corrugated paper.
- Glue.
- Items for shaping glasses. For a “bridge” under the bridge of the nose, a lighter or something else oval or rectangular is suitable. Depending on the size of the glasses and the desired shape of the frame (round, square, rectangular), select the appropriate item. This could be a bottle of nail polish or perfume, a writing pen, a tube of mascara, and so on.
- Fantasy and some free time.
Round glasses made of wire: master class
If we make an accessory for a toy, then its size should, of course, be the same as for a doll. Making glasses from wire is very simple.
We cover long pieces of wire with corrugated paper. These will be two blanks for the frame. We do the same with a short wire. This part will connect the blanks for the frame, that is, it will be a “bridge” for the bridge of the doll’s nose.

When the glue dries, we make the frame. We take a long wire, apply it with the middle to the selected object (for example, a bottle of nail polish) and form the required form. If there was a round object, then you should get a circle and two pieces of wire extending from it. We twist them together. This will be the bow. We cover it with corrugated paper. We do the same with the second long wire.
Before making glasses for the doll, wait for the glue to dry. We make a “bridge” over the bridge of the nose using another form (for example, a lighter). We cut off all excess wire with wire cutters.
Coat the ends of the “bridge” with glue. We attach the frame frame to the parts. We are waiting for the glue to dry. To hide its traces, we cover the joints with corrugated paper.
Now let's give the glasses a realistic look. To do this, the tip of each arch must be bent back. Remove excess wire using wire cutters. The glasses are ready. Now they can be decorated with sparkles, rhinestones and other decorative elements.
How to make glasses for a doll with lenses: necessary materials
- A piece of wire. The length depends on the size of future glasses.
- Items for shaping glasses. A round one can be made using a felt-tip pen, and a square one can be made using a dice.
- Spoke.
- Pieces of a plastic bottle.
- Paint (acrylic or gouache with the addition of PVA glue).

Doll glasses with lenses: master class
You can use the wire method described above, or you can make a slightly different shape of the accessory. It would be a good idea to take measurements before making glasses for the doll. Or try on the accessory as it is being made.
So, we take the wire and make a bow at the tip using a knitting needle. We measure the distance from the ear to the temple. We bend the wire at a right angle. Using a cube we make a frame for one lens. We form a “frame bridge” under the bridge of the nose - a small arch; a knitting needle will be useful for this. We take the cube again and make a frame for another lens. Using a knitting needle, bend the second bow. The glasses are basically ready!
We make lenses. We cut out two identical parts from plastic. They must fit the frame. We try on the lenses to the glasses, trim them and glue them on. We are waiting for it to dry. Use paint to mask the traces of glue. The glasses are ready!
How to make sunglasses for a doll? Just take a bottle with dark or colored plastic. Glasses will perfectly complement rhinestones and sequins.

Anyone can make doll glasses: adults and even children. All you need is available materials, a little patience, free time, and you can enjoy the result!
I needed to make sunglasses for the doll. There may be several options, or rather, small ideas throughout the entire process. Then I decided to try polymer clay.
Why not wire? I think it's possible too. Polymer clay It’s easier to control the thickness of the frame, although the wire can be tapped in the right places) I made my first regular glasses from wire. The first sunscreens made of foamiran + wire (in the arms). Now let's try pg. You will get these little ones:
Needed:
Polymer clay;
Toothpick/stick;
Glass (from a frame, for example);
A printout with a photo of glasses in the size required for the doll;
A piece of translucent plastic (I used a regular kvass bottle!);
Super glue;
Scissors.
First, I found the type of glasses I needed on the Internet, printed it out in several sizes and chose which one was closest to the doll. I simply applied the cut out rectangles to my face. The easiest way to make such a set is in Photoshop or Illustrator (or in Corel, it doesn’t matter), but it depends on who you are. It’s possible in Word, probably)

Having chosen the desired option, cover it with glass. Roll out the clay into a thin sausage and carefully place it on the glass along the contour of the frame using a toothbrush. I pressed the glass a little so that the clay stayed in the right place.

We reduce it to the “bridge of the nose”:

We move and check for symmetry, if necessary, then tighten it back and forth with the tip of a toothpick. Bake. After baking, you can add clay in the right places to the required thickness, which may correct something. From the glass side, the frame will turn out neat and smooth, which is convenient. Or you can smooth the frame at the sculpting stage using varnish solvent. Or sand something after baking. Whatever is more convenient.

Then I made the arms and baked them.

I glued the arms to the main part with super glue. There is a point here: the strength of the structure will most likely still not be strong enough, sadly. You can try epoxy glue, because... is it stronger, or some other options. Or handle glasses carefully)

For glass we need translucent plastic. My glass was supposed to be black, but there was no black plastic nearby. So I carefully painted the brown piece using a sponge and black acrylic. It came out a little grainy, but evenly grainy and black.

Cut a piece of the required width, according to the width of the frame.

At the back we mark the boundaries for cutting with a pencil. You can cut it with nail scissors. Apply, check for evenness, cut off excess if there is any left.
We also recommend
 Quilling for beginners: patterns with detailed descriptions
 A story about Christmas in Great Britain
 Fountain “Friendship of the Peoples of the USSR Fountain with golden statues in a circle
 Test yourself: how well do you know your partner?
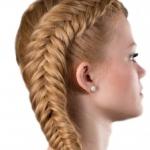 Fishtail braid and its weaving pattern
 Graphite hair color is a fashionable gray hair color for those in love with the extraordinary!