Weaving flowers from beads step by step. Weaving flowers from beads
Bead weaving is a very fascinating, incredibly beautiful and very useful type of needlework. Finally, we got to this wonderful art, and we will start with the most basic: beadwork for the very beginners is already waiting for you on this page. We'll tell you what tools and materials should be selected for your first beadwork, which figures are easiest to weave, which technique to use and which patterns are the simplest. We will be happy to help you create your first beaded masterpieces!
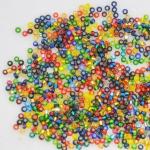
Beadwork for beginners, of course, begins with the selection of all the necessary materials. For us, at the forefront of everything is, of course, beads. Do you know how many varieties of all kinds of beads exist today?! Modern beads can be classified not only by color and price, but also by other important criteria:
- to size;
- by calibration;
- by form;
- by hole size;
- by quality and place of dyeing;
- according to the material of manufacture.
It’s worth understanding at least a little about all these subtleties in order to learn how to quickly and efficiently weave the products you need. Then you'll know what beads should be used to weave flowers and trees, what material makes the most beautiful roses, and what beads are best suited for creating jewelry. As the article progresses, we will introduce you to all the nuances of beadwork and the choice of material, so that you get a general impression of this type of needlework.
Bead size
The sizes of beads are small, medium, large and very large. Each type of bead has its own number, which can be used to determine the diameter of the beads. The most common sizes are from 6/0 to 15/0. Moreover, 15/0 is the smallest size (diameter about 1.5 mm), and 6/0 is the largest. These numbers indicate how many beads need to be placed in one line to make a 1 inch long chain. That is, with a size of 6/0 there will be 6 beads in 1 inch, and with a size of 15/0 there will be 15.
Calibration

High-quality beads must be the same size, that is, they must be calibrated. You can buy already calibrated beads (this will cost more), or you can sort different-sized beads yourself. The quality of your future product will depend on the calibration process. If you are making flowers, then the beads should be sorted (maybe not very carefully). But when creating a clasp necklace, you can use regular, uncalibrated beads.
Material
Modern beads are made from various materials, and we will tell you about the most popular types of beads.

- Beads with bugles. These are small colored tubes made of durable glass. The shape and color of the beads may vary significantly.
- Chameleon beads, changing colors depending on the lighting.
- Brocade beads. Transparent glass beads, painted in the middle with silver or gold paint.
- Pouring (wet beads). Pastel beads with a slightly pronounced shine.
- Mother of pearl (Ceylon) beads. Slightly transparent beads with a pearl-like finish.
- Opaque natural beads (regular, matte). Opaque beads without coating or shine.
- Plastic beads. Suitable for beginners.
Tools for beading: choosing everything you need for creativity
Video tutorials on beading should, of course, begin with the selection of tools and materials. We have already talked a little about the choice of beads. Let's move on to the tools. Beads can be strung on threads, fishing line or wire.

Bead threads can be used in different types:
- silk– the most reliable threads for beading, but their price is quite high;
- nylon (nylon) threads– inexpensive and durable, but difficult to tie;
- cotton threads– not strong enough;
- rubber threads– great for bead weaving. The best things to make from them are baubles and bracelets.
Selecting wire and fishing line

The wire for weaving with beads should be soft, preferably made of copper. Do not use too thin a wire, otherwise it will break after a few turns. Also, do not take very thick ones so that the products look neat. The fishing line is ideal for weaving voluminous compositions from beads, rigid structures such as flowers, leaves, crosses, etc. For colored beads, colored wires of appropriate shades are available for sale.

The fishing line must also be strong and thin. Beginners can also learn on a fairly thick fishing line with hard tips. Next, you will use more elegant designs. We select the thickness of the fishing line for stringing beads as follows: it should pass through the bead 2-3 times. If the beads are very small and the wire is very thin, we use needles.
Bead needle

Special needles are often used for beading; they are thin and flexible. Their size ranges from 10 to 16. The thinnest needle is No. 16, the thickest is No. 10. The most universal needles are number 12.
To get started, you will also need several useful tools:
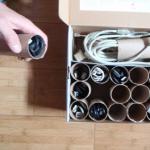
- organizer;
- pliers;
- scissors;
- tweezers;
- glue;
- pins;
- clasps and fasteners for jewelry.
Bead weaving for beginners: simple patterns for beginners
Once we have figured out the tools and materials, we can start beading: we have selected very accessible and simple patterns for beginners.
Today, there are many different techniques for weaving with beads; a huge number of video lessons have been filmed especially for beginner lovers of beadwork. We will also show you video instructions for beading, but a little later. Now let's look at pictures with simple diagrams.

Before moving on to knitting figurines and other products, it is worth learning how to weave beautiful bead chains. Figures 6 and 7 show so-called “one-thread” chains, which will not be difficult to make, even for children.

- For the first chain, we thread 4 beads into the thread.
- Pull the thread through the first bead and tighten the ring.
- We put on 2 more beads and pull the thread through the second bead of the outermost row.
- We pull the thread and add 2 more beads, and pull the thread through the second bead of the previous row.
- We continue to weave according to the same pattern until the required size of the product.
Figure 7 also shows a detailed diagram that you can use to weave a chain of flowers.
Master class on weaving beaded bracelets
We present a few more simple diagrams that demonstrate step by step the entire process of weaving beaded jewelry. Detailed and informative instructions with photos will help you create your first masterpieces from beads.
How to weave a bracelet from beads and seed beads: step-by-step master class


": how to make hyacinth, blue flowers, openwork rose and beaded daffodil.
Master class with step-by-step photos.
Spring is a time of awakening of nature and wonderful holidays. A floating bowl is an unusual, bright and delicate gift made by yourself. The floating bowl is a wish for love, prosperity and prosperity.
To make a floating bowl we will need the following materials:
Tea pair (cup and saucer);
scissors;
beads;
small beads of blue and green colors;
wire;
cold welding glue;
tablespoon or thick wire;
floral tape;
gypsum.
First we need to make from wire and beads flowers.
I made the petals using the French weaving technique, but without using an axial rod.


We weave several of these petals, connect them together, and weave a stamen of three to five beads into the middle.


The result is a flower.

In the same way we make several more colors; the size and color can be arbitrary and depend on the preference of the master.

To do this, we take green beads and use simple loop weaving to complete the next element of the craft.

We must make about 50 such leaves of different sizes. Then connect 10 leaves together.


After the flowers and leaves are ready, we move on to the next stage: preparing the bowl and saucer.
We take a tablespoon, attach its top to the bowl and the bottom to the saucer, or cut off two identical pieces of wire and fix them together with electrical tape. There is no need to wrap the wire until the very end, since the interaction of “cold welding” occurs better with the metal, and everything else eventually comes off. Next, bend the wire and glue it first to the cup, then to the saucer. We use “cold welding” for this; after fastening, you should wait several hours for the glue to harden. We intertwine the wire with floral tape, and cover the saucer with plaster to make it heavier.
It is better to start weaving leaves and flowers from beads from the bottom of the mug, gradually moving towards the saucer. The elements of the product must be positioned so that our base is completely hidden. If desired, you can complement the composition with beads, birds, butterflies - as you like.

The floating bowl is ready! I wish you creative success!
Video on how to make a simple flower with sharp petals:
"Tender hyacinth"

Material:
1. Beads No. 6 - 130 pcs.
2. Beads No. 10 – 130 pcs.
3. Silver wire for beads - 0.3 mm.
4. Iris threads.
5. Thick wire or wooden base for the trunk.
6. Glue “Moment”.
Stages of work:
1. Cut the wire into 6 cm pieces, count out the beads into 130 pcs.

2. We string one bead No. 10 onto the wire, bend it in half and thread both ends of the wire into bead No. 6. This way we make 130 blanks.

3. Take the base for the barrel and wrap it one piece at a time with Iris threads.


4. Having wound all the details of the flower, we secure the thread with glue.


The flowers are ready, we beautifully decorate our bouquet of beaded hyacinths.
A video on how to make simple flowers will be useful for beginners:
"Lacy rose from beads"
Master class on making.

Materials required for work:
1. Beads of different colors (pink, red, green).
2. Wire 0.3 mm - for weaving.
3. 2-3 mm wire for the barrel.
4.Floss threads (green) - for winding.
Manufacturing sequence:
First row of petals
Fig 1. Cut a wire 20 cm long and put beads on it - 15 pieces of pink color. Fold it in half and twist the loop, turning it 3 times.

Fig. 2. Then on one of the two wires we make 2 more loops, side by side.


Fig 4. After inserting the wire, you need to make an edging around the petal. To do this, we collect 6 red beads on the same wire and insert the wire into the middle bead of this loop.

Fig. 5. After this, we continue to make the edging between the loops; to do this, we collect 3 red beads on the wire and insert them into the adjacent loop, into the middle bead.

Fig. 6. After making the edging between the loops, you need to make the side one again, we also collect 6 red beads and insert them into the last 2 pink beads of the last loop. Then we twist the wires together.

Fig. 7. There should be 3 such petals.

Second row of petals.
Fig. 8. Cut the wire 40 cm long and make a petal of 4 loops of 25 beads, just as described above.


Fig. 10. We collect 4 pieces between the loops. red.

Fig. 11. And on the side there are again 10 pieces and we insert them into 2 beads of the last petal.

Fig. 12. There should be 4 such petals.

Third row of petals
Fig. 13. Cut the wire 60 cm and make a petal, which consists of 5 loops of 35 beads each.

Fig 14. Then we make a red edging. We insert the wire into 2 beads and collect 15-16 beads from the side. We collect 5 beads between the loops.

Fig. 15. We finish the edging in the same way as the first petals, collecting 15-16 beads on the side and inserting them into the last 2.

Fig. 16. You need to make 5 such petals.

Flower leaves
Fig. 17. On a wire 50 cm long we make 5 loops of different sizes: 15, 25, 35, 25 and 15 pcs. Green colour. We make sure to make the first one in the middle, then make all the loops on one wire.

Fig. 18. Then we make the edging in exactly the same way as on the petals. Having inserted 2 beads into the side, we collect 6 pieces. dark green, then between the loops we collect 10 and 12 pieces, then 12, 10, 6 and insert them into the last 2 beads.

Fig. 19. There should be 3 leaves.

Collecting leaves into a twig
Fig. 20, 21. Take one sheet, wire and floss threads. We attach the sheet to the wire and wrap it with thread.


Flower assembly
Fig. 23. Take a wooden stick, or a thick wire. And at one end we glue a large bead so that when we open the flower everything will be beautiful.


Fig. 25. Then we attach the petals of the second row in the same way, laying the petals opposite each other, wrapping them with several turns of thread. Next we attach the last row of petals, the largest ones. They need to be placed, slightly overlapping each other, and also wrapped with thread.

Fig. 26. After we wrap the stem to the middle, we apply a twig with leaves and wrap it to the end of our stem, at the end fix the tip of the thread with glue.

We straighten all the rose petals so that they look beautiful. Ours is ready! Thank you for your attention!
Video on how to make a very beautiful bouquet of peonies from beads:
"Bouquet of Daffodils"
We invite you to weave with us a charming bouquet of delicate spring flowers - daffodils.

For work we will need:
- 4 mm beads in yellow, orange, white and green colors,
- beads 8 mm yellow and green,
- copper wire 0.3 mm,
- floral wire 1.3 mm,
- scissors, pliers and wire cutters.

Stages of work:
We cut a wire about 1 m long, string 6 yellow beads in the middle, and close it into a ring. 
On each of the beads in the central ring, we build rings of 5 beads so that the side beads are yellow and the top beads are orange.

Having completed the last ring, we stop at the yellow bead of the central ring.

Let's move on to weaving the petals. We string 10 white beads and lock them in the yellow bead of the central ring.
Today I will show you how to weave and assemble a small beaded flower. I really like these flowers and serve as indispensable elements of my flower necklaces: this is the middle flower in the cream necklace, the smallest one in the chocolate one and the smallest one in the pink one. And now you will learn how to make them.
Let me make a reservation right away that I do not disclose the numbers of the shades I use in weaving. This is my terrible professional secret :) I will try to answer all other questions.
So let's get started.
We will need:
Japanese beads 11/0 in five different colors
Beads, pearls or crystals
Beading needles size 12
Japanese fishing line 0.19 mm
Pliers
Scissors
Petal patterns


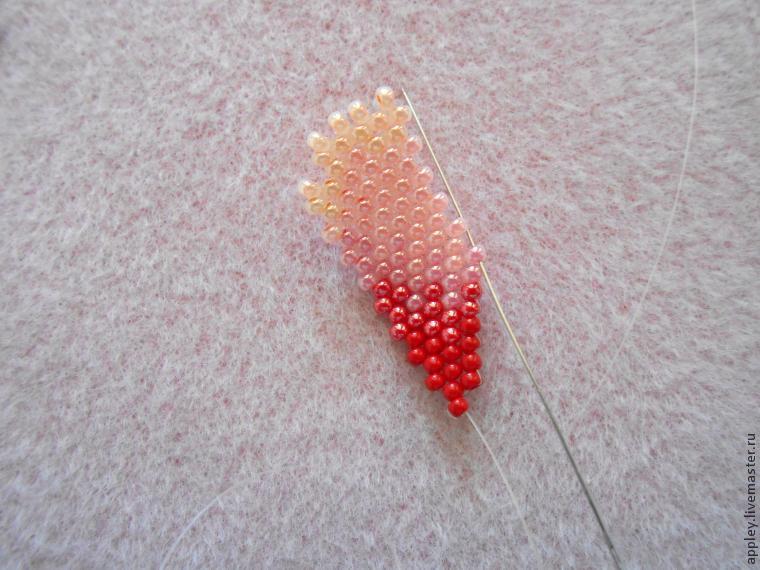
We weave ten large petals according to pattern 1 and five small ones according to pattern 2. For those who do not quite understand how exactly the petals are woven, I tell and show you. I weave my flowers in a mosaic, starting from the middle of the petal, first the left half, then the right. If you want, you can use brick weaving, then the petals will be softer and more flexible.
Cut a piece of fishing line a little over a meter long. We attach a stop bead in the middle. We collect 18 beads on the fishing line.

We thread the needle through the fourth bead from the end.

And we weave the second row of fabric, adding one bead of the corresponding color.

Now we weave the third row of fabric, starting as seen in the photo.

We finished the third row and make an addition along the upper edge of the petal. First, string 4 beads onto a fishing line.

We thread the needle through the first of the strung beads.

We tighten it, string another bead and thread the needle through the last bead of the third row - we begin the fourth row.

We wove the fourth row.

We begin decreasing along the lower edge of the petal. To do this, we thread the needle through the last bead of the fourth row.

We bring out the thread, tighten it and weave in the fifth row.

Now we weave the upper edge of half the petal. To do this, string 2 beads and thread the needle into the last bead of the fifth row.

We bring out the fishing line, tighten it and weave the sixth row.

We continue decreasing from below. We thread the needle through the last bead of the sixth row, bring it out and tighten it.

We begin to weave the seventh row.

We completed the seventh row.

We continue weaving the top edge. We collect 2 beads and bring the needle to the last bead of the seventh row. We tighten it. We weave the eighth row. Then we continue decreasing at the bottom of the petal (for some reason I didn’t take a photo). We bring the needle to the last bead of the eighth row and begin the ninth.

We wove the ninth row.

We continue to weave the top edge. We string two beads and bring the needle to the last bead of the ninth row. Next we weave the tenth row.

We continue decreasing from below: we thread the needle through the last bead of the tenth row, bring out the thread and tighten.
We weave the eleventh row.

We continue weaving the upper edge of the petal. This time we string one (!) bead and bring the needle to the last bead of the previous row. We tighten it. We weave the twelfth row.

We continue decreasing at the bottom. We bring the needle to the last bead of the twelfth row. We tighten and weave in the thirteenth row.

We weave the top edge of the petal. Now we're decreasing here. We bring the needle to the last bead of the thirteenth row. We tighten it. We weave the last - fourteenth - row.

We thread the needle into the last bead of the last row. We tighten it.

And we bring the line to the upper part of the petal, passing again through the last row.

Now we weave in additional beads to make the edge of the petal smoother.

We take the fishing line into the body of the canvas through 10-12 beads and cut it. This way we will avoid unnecessary nodes. Next, remove the stop bead and weave the second half of the petal in the same way as the first, starting from the third row. At the end of the weaving, we bring the fishing line into the lower outer bead.
Now I will show you how to connect the petals to each other.
So. our fishing line comes out of the lowermost bead of the first petal. We pass the needle through the lowermost bead of the second petal from bottom to top. We tighten it.

The photo shows that one of the petals has torn edges. I’ll show you how to weave such a petal some other time.
We pass the needle through the lowest bead of the first petal from top to bottom. We tighten it.

And again we bring the fishing line into the lowermost bead of the second petal in the direction from bottom to top. We tighten it.

We bring the needle into the second outer bead of the second petal from bottom to top.

We pass the needle through the second outermost bead of the first petal from top to bottom.

And again we bring the needle into the second outermost bead of the second petal from bottom to top. We tighten it.

We do the same with the third and fourth outer beads of our petals. Then we take the line into the body of the second petal through 10-12 beads and cut it.
Thus we connect 5 petals into a closed circle.

We make two such circles. We fold them so that between the two petals of one row the middle of the petal of the other row is visible.


Now we sew the circles together. This is a rather chaotic process; there is no single right solution. The main thing is to make sure that the stitching involves the two lower rows of beads near the petals, no more.
We ended up with this little flower.

We also make a circle from small petals woven according to pattern 2, but (!) we do not close it. We sew small petals together using 3 or 4 beads in the manner described above.
We take these petals and figuratively fold them into the middle of the flower.

Now we secure our structure with fishing line. I sewed the first and fourth petals together (or, if you want, let's call them the second and fifth) in the manner described above. However, we sew it together using fewer beads. We finish as soon as the structure becomes quite rigid. If the needle does not go into the bead, do not persist too much - the bead may burst, and you will have to intertwine everything. In this case, we will use neighboring beads.
This is what we should get.

Now we apply our center to the large petals and sew it on. Again, there is no single possible solution here. The main thing is to achieve rigidity of the structure and not spoil anything.
We sewed 4 petals from the middle. The fifth petal is still moving freely.

Now we attach the fifth petal. Let it be located slightly diagonally. Our flower is almost ready.


We decorate the middle with beads, crystals or soft tulle. I prefer Swarovski pearls.

I haven't secured my beads yet. This flower will be part of a necklace and I haven't decided what color hearts I want yet.
Our flower is ready. We admire it :)


And on a white background :)

Thank you all very much for your attention! Good luck and patience in making your beautiful flowers!
Report to moderator
In today's master class we will show you another option for weaving flowers from beads, which is performed using the technique of parallel weaving with arcs.
Accessories:
, orange No. 10
Czech beads, orange No. 6
Czech beads, beige No. 10
Czech beads, green No. 10
0.3 or 0.4 mm
Green thread
Tools: Scissors
Assembly:
Measure a piece of approximately 50 cm from the total coil of wire.

We string 15 orange beads onto the first edge of the wire. The size of the future petal will depend on how many beads you collect at first. The more beads, the larger the petal will be as a result.

We move the beads along the wire and leave a segment equal to about 3-4 cm at the end of the wire. After the beads, measure out the empty length of the wire about 10 cm, this will be the future stem of the flower, so you can adjust its size yourself. Next, bend the long edge of the wire and turn it upward.

Near the place where the bead set begins, the long edge of the wire is wrapped through the main column of wire with beads and you can begin to weave the petal.

This type of petal assembly is called parallel arc weaving. A column of beads is placed on the long edge in a quantity slightly larger than the previous one, about 2-4 beads. The shape of the petal will depend on how many more beads you string in a new row. If you collect beads, for example, adding 1-2 beads in each new row, then the leaf will have a more rounded shape, if you add 3-4 more beads, the petal will turn out to be more pointed. But it should be noted that after filling the hand, the beads are strung by the needlewoman by eye.

So, we collected beads and now a long piece of wire goes around the upper main column after the beads and turns the piece in the other direction.

Let's add one more column. The number of beads will be equal to the previous one and we close the circular row by twisting the wire through the main column with the central row of beads.

We turn the edge of the wire in the other direction and begin to collect beads for the new row, not forgetting to add beads in the new row.

Thus, we braid the central row with parallel arcs of three rows on each side.

We braid the last fourth row with beige beads to create a petal edging. You can do it at your own discretion. When you braid the last row, the long end of the wire will remain at the bottom; wrap it around the column of the future stem. Shorten the edge of the wire that is at the top a little, leaving a tip of about 1 cm.

Turn the petal inside out and bend the tip towards the post where the folds were.

We give the petal a convexity.

In a similar way, we will prepare 4 more such petals.

We make stamens. We take a wire measuring 20 cm. We collect 4 beads of large orange beads on its edge and, using the fifth bead, close the beads into a circle, passing the edges of the wire through the hole of the fifth bead. We tighten it.


Twist the wire slightly after the beads.

Forming a flower. We take all five petals in our hands, place the stamens on top of them and turn all the columns with wires into one stem.

We straighten the petals.

We weave a green petal according to the same pattern as the previous ones, slightly increasing it in size.

We connect it to the main stem of the flower.

We wrap the column with green threads and give it the appearance of a stem. Once again we correct all the petals and admire the result.

Here are some examples of compositions that can be made from this kind of flowers.


Recently, it has become truly fashionable to decorate your home with beaded crafts. This is an original interior element that will highlight the individuality of your home! Weaving is not a particularly difficult task, but it requires painstakingness and perseverance.
Beaded flowers: getting started
Before you get started, it's worth knowing what are beads, what types do they come in?.
Beads are small balls that have a small through hole. The color range is the most diverse. You can find matte or mother-of-pearl material for creativity, or work with whole-dyed or paint-dusted beads.
The quality of the beads depends on the manufacturer. For example, Chinese is not good enough. It may be unevenly colored, holes may be missing, and the beads themselves may be different in size. Best manufacturer considered the Czech Republic. Their products are smooth, neat, with a minimum amount of defects.
Of course, you can train and do your first works with Chinese beads. However, when you move on to making large, beautiful things, it is better to take Czech.
To work, you will need lavsan or nylon thread, wire or fishing line. Using fishing line they do volumetric crafts. Wire is useful if you want to give the product a shape, for example, as when working with beaded flowers. However, you should be careful with such items, they are quite fragile.
Beaded flowers: simple crafts
Described below ways to weave flowers from beads suitable for beginners.
Forget-me-not flower made of beads.

As you can see, to begin with, you need to string 6 beads onto the wire. The first one is yellow, the other five are blue. Then, we pass the end of the wire again through 2, 3 and 4 beads, and then into the very first one - the yellow one. The tip of the wire needs to be twisted under the yellow bead.
You need to make as many flowers as required, for example, to fill a basket or vase.
Then proceed to making the leaf. It is woven using parallel technique. First, 3 beads are placed on the middle of the wire, then the wire passes through the second and third beads. Then the number of beads increases until the middle of the sheet, then their number decreases. Secure the wire by twisting it. Make the required number of leaves. And combine your bouquet.
Flower "Chamomile" made of beads.

Using a parallel weaving technique, we make 10-12 petals for our chamomile. The center of the flower is made from yellow beads. Then, we make petals from green beads, according to the diagram. When all the individual parts of the flower are ready, we assemble them together. We connect the white petals with wire, inserting the yellow center inside. We attach leaves to the base wire. That's it, our chamomile is ready!
Beautiful beaded flower for beginners
The proposed flower is not at all difficult to make. To work, you will need 0.3 mm wire, beads for the middle of the flower and beads of two colors to make the flower itself.
We begin to weave the flower petals using the parallel weaving technique.


- The first, second and third row are pink beads, the fourth row is 2 pink beads, 1 white, again 2 pink. Fifth row - 2 pink, 2 white, 2 pink. And so on. The middle of the petal is 2 pink, 5 white, again 2 pink beads. After this row, the reduction of white beads begins.


- As a result, you get petals like the one in the picture below. You will need 5 of them.
- Next you should weave 5 smaller petals. There will be only one pink bead along the edges, and 3 white beads in the widest part of the petal.
- The next step is to make the middle of the flower. To do this, we string a large bead onto a wire and twist the ends of the fishing line under it.


- So, all the details of our flower are ready. This is what they should all look like.
- We take our “pestles”, connect them into one, and twist the ends of the wire together.
- We screw small petals to the middle from below.


- Then, again from below, we attach larger petals to the base.
- You can do whatever you want with the leftover wire. You can twist them together, wrap them with green thread or green ribbon, and form a flower stem. You can secure the ends well and trim off the excess wire.


- Twist the ends of the wire. You have a triangle-shaped petal with rounded edges.
- Then we move on to making the stamens. They will need approximately 30 cm of ordinary copper wire. 7 pink beads should be strung on it, then 3 should be left free, and after 4 we pull the wire in the same direction, not parallel.
- Align the stamen so that it is in the middle. Next, on each side of it, you need to make one more stamen. It is very important to ensure that all three stamens fit tightly together. We twist the ends of the wire under the stamens.


- Using the parallel weaving technique, we make 6 small petals. Weaving pattern: 1,2,3,3,3,2,1.
- Next, using the same technique, we make 5 large leaves. They are made according to the scheme: 2,3,4,5,5,5,4,3,2,1.
- Then we begin to collect the petals. We twist three large petals together and twist the ends of the wire. Then, a little lower, we screw in the remaining 2 large petals. It turns out to be a twig.
- Take the green wire, step back 15 cm from the edge, and string 3 white beads. We curl the edges. It turned out to be a bud. Then, we perform 2 more such buds. We retreat from the made buds and make 3 more such buds on the same wire.


- Now that all the parts of our rose are ready, we can begin assembling it.
- Take about 40 cm of thick wire for the base, wrap the stamens on top of it, and wind the ends of the wire onto thick wire.
- We place rose petals around the stamens and twist them at the base. We also screw the small petals under the bud. We wrap the base with floral ribbon.
- Next, at the base of the stem, we screw branches with leaves and buds. Your rose is ready!
Beaded flowers: photo


Beaded flowers: video
If you show perseverance and hard work in this work, over time you will begin to get magnificent crafts that can very well act as a gift for Birthdays, New Year and other holidays. I wish you success!