DIY toys for children and adults. DIY educational toys for kids
Despite the fact that the shelves of modern children's stores are literally sagging with all sorts of fun for kids, parents are increasingly asking themselves how they can make educational toys with their own hands. After all, you want the child to form an understanding of the properties and characteristics of the materials, objects and phenomena surrounding him. And who better to know than parents what exactly interests their child during what period of life. So why not make your own toy that will be interesting to your child? Moreover, this option is usually cheaper, and is safer for the little one, since you know all its components.
The role of educational toys in a child’s life
It is probably impossible to exaggerate the role of educational toys in a child’s life. After all, it is thanks to them that a little person learns about the world around him. Toys contribute to the development of the auditory and visual systems and attention. And if up to 6 months the baby only reacts with his eyes to bright objects and with his ears to new sounds, then after six months the child needs to touch various objects, hold them in his hands, carefully studying them, and sometimes chew them, and his hand toys should be ready for all this .
However, parents need to keep in mind that the smaller their child, the more attention needs to be paid to the safety of those things that fall into his hands (and sometimes into his mouth). And it is best to make educational toys for children with your own hands, using natural fabrics, yarn, sewing threads, wood, cardboard, paper and other materials that are safe for children. In this case, it is necessary to ensure that the materials have different colors, textures, density, etc. After all, this will contribute to the active development of the child.
Board with “forbidden” elements
Anyone who has their own children or knows children knows that a child, as soon as he begins to move independently around the house, strives to understand the things around him, and it cannot be otherwise. But, unfortunately, in every home there are objects that contact with can harm the child. In addition, many things can be damaged if used for other purposes. But everyone knows that the more parents prohibit a child from contacting a certain object, the more he strives for it, while any surprise toy occupies his attention for a maximum of 20 minutes. So why not please your baby by building a special stand for him?
To make such a “toy” you will need a board, as well as all sorts of objects that you do not allow your baby to use in everyday life. These are latches, locks, sockets, latches, Velcro, lacing, various switches and much more. All this must be attached to the board, and it must be hung on the wall at a height corresponding to the child’s height.
DIY fabric book
Every parent dreams of his child being successful and smart, but here you can’t do without a book, and you can accustom your child to it at a very early age. True, for this you will need not an ordinary book, although with the participation of an adult it may be suitable. But it is still better that among the items for the child’s entertainment there are not only soft toys made of fabric, but also books made of the same material. Moreover, making it yourself is an activity that any adult can do.
Of course, the purpose of this book is not reading, but rather getting to know the world around you, so use your imagination. For pages it is necessary to use fabric of various colors with bright patterns. On each one, sew some interesting flower, animal or object cut from a fabric of a different texture; felt is ideal. You can, for example, sew a shoe with real lacing so that the child can lace it up on his own. An interesting page could be a sewn flower of 5 large petals, which are pulled together into a bud using an elastic band. You can “plant” a moth from another fabric or cardboard in the middle. Try to create a book with the elements that your child is most interested in.
Corded "tablet"

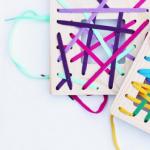
If you don’t have much time to make educational toys for children with your own hands, but still want to please your baby with something unusual, then a corded “tablet” is a great option for this. Its production will not take much time, the materials may even be at hand, and for the development of the child this toy will become simply irreplaceable.
You will need a sheet of plastic or plywood approximately A4 in size. Holes with a diameter of 5 mm are drilled at a distance of 1.5-2 cm from each other. In addition to the tablet itself, you will also need laces of various colors, and the more, the better. They will be the main instrument for realizing the child’s creative vision.
Homemade puzzles
All parents know about the existence of puzzles, but many of them do not even realize that it is not at all difficult to make these educational toys for children with their own hands. In addition, they will not be similar to those that are sold in stores in huge quantities. The easiest way to make puzzles at home is to cut a postcard into pieces. Their number should depend on how large you want the elements to be. For very young children, you can make puzzles from painted fabric in the same way.
Puzzles made from ice cream sticks are also interesting. You need to find a suitable picture, cut it out, take the sticks and stack them one next to the other so that the entire area of the image is covered. Then use tape to fasten the sticks together and stick a picture on top. When the glue dries, the sticks must be freed from the tape, and the picture must be cut at the places where they touch. As a result, you will get a lot of sticks with pieces of the picture, from which the child will need to put together a whole picture.

Felt puzzles
It is worth noting that, adhering to certain rules of sequence, you can put together not only a picture from parts, but also, for example, a sun, a rainbow and many other elements. So, to make puzzles in the shape of a rainbow, you will need felt in red, orange, yellow, green, blue, indigo and violet.
Parts of the rainbow should be cut out of felt - semicircles with a small notch at the bottom. In this case, the red arc should be the largest, and each subsequent one should decrease slightly in size, the last one - the purple one - will be the smallest. Such a toy will allow the child to become better acquainted with the phenomenon of the rainbow and remember the sequence of its colors.
Continuing the theme of getting to know natural phenomena, it would be appropriate to make toys in the form of other elements, the sun, for example. To do this, you will need to cut out a large circle and many thin strips - rays - from yellow felt. You can also cut out raindrops, clouds, flowers, butterflies, bugs, trees, leaves and many other elements that allow your child to put together whole pictures.

Homemade flying toys
After the child has already had plenty of time in the hands of various objects, has “seen enough” of their bright colors, managed to gnaw and tear them, he begins to actively move and again look for something new for himself. And here cars, balls and other things for outdoor games come in very handy, but even at this stage you can make certain items with which you can please your little one. First of all, these are all kinds of flying toys.
The simplest craft in this category is a paper helicopter. To make it you will need paper (preferably thick) and a paper clip. You should cut out a strip of paper approximately 48 mm wide and 140 mm long. Stepping 70 mm from the bottom on both sides, make 16 mm indentations and cut out a corner 10 mm high. Next, fold the lower part in three and secure it with a paper clip, and cut the upper part in two and bend it in opposite directions - these will be the propeller blades. Flying toys of this type can keep a child busy for a long time, and even a whole company if you make several helicopters, because then children will be able not only to admire how their toys spin in the air, but also to organize competitions among themselves.

"Pyramid" made of fabric
Pyramids are one of the most interesting for children; however, you don’t have to buy them at all, but can be successfully made at home. Moreover, hand-made pyramids can be very original and varied, which a child will undoubtedly like. You can, for example, sew a triangular pyramid from fabric. To do this, you will need fabric (preferably several colors), filler (sintepon, foam rubber, etc.), a needle and thread, scissors and Velcro. First you need to cut out triangles from the fabric - two of the same size. In this case, it is necessary to calculate so that each subsequent triangle is slightly smaller than the previous one.
Pads should be sewn from the cut-out blanks, filling them with padding polyester or any other material. The more such pads there are, the better. At the final stage, Velcro must be sewn to each triangle on both sides in the center to make it more convenient to build a pyramid from these pads. In a similar way, you can make similar toys from fabric of any shape - round, hexagonal, square, etc.

"Tissue" animals
Every child likes soft toys, but if you also make them with your own hands, then his delight will know no bounds. After all, at home, in addition to making funny toys, they can also be filled with unusual materials that will also arouse interest in the baby.
It’s worth noting right away that there is no need to pay too much attention to the pattern; it is enough that it at least slightly resembles the animal that you are going to make. That is, when cutting out a cat from fabric, it is enough to cut out a head with pointed ears, two legs at the bottom and two on the sides. You can cut out a bear figurine in the same way, except that the ears will be rounder, and the whole body and paws will be fuller.

When the two parts of the figure are sewn and the time comes to fill them, it is better to use not only soft material, but also some “unusual” one. For example, pour buckwheat, rice, peas or any other cereal inside. You can also fill a flat plastic box with small beads and place it inside the toy. Any small objects will do; the main task is to interest the child in their unusual shape or sound.
Passionate moms – participants of the flash mob game not only – They took a new look at the placement of toys in the children's room, but also shared ideas for educational toys made with their own hands.
There are sewn toys, toys – panoramas and toys – collections, toys made from matchboxes, jars and baby food caps, toys that you can carry with you, and board games. Many toys were made from scrap materials. See for yourself.
DIY toys “Locomotive” and “Chest of Drawers”
Yulia Alkhovik and daughter Alisa (1 year 11 months) made two toys from matchboxes "Locomotive" And "Komodik" for the development of fine motor skills:
We made this little locomotive from matchboxes covered with colored cardboard. A ribbon was pulled through the boxes. We study colors, put small objects inside according to color. Good motor training – open and close boxes.
And another matchbox toy – chest of drawers We glued several boxes together and the toy is ready.

DIY toys “Tactile caps”
Yulia Alkhovik also suggested sensory game “Tactile caps”:
The game is made simply from baby food caps. I glued various materials to the lids in duplicate. At first they played, simply looking, and found the same ones. When my daughter began to cope with it with ease, they complicated the task: they put it in a bag and began to pick up a pair there. It became more interesting to play.

DIY toy “Parking”
Spirenkova Tatyana for her son Alexey (2 years 1 month) made a toy "Parking"(intellectual development):
The parking lot for cars is made from shoe boxes and toilet paper rolls, decorated with cardboard, colored paper and a pine cone. Parking spaces allow you to learn counting from 1 to 5 and colors. You can also stick numbers on cars and place them in the appropriate parking space or sort them by color.

DIY toys: board games
Kobyakina Alena During geography weeks, I came up with two board games for my son. "On a plane over Africa" And "Antarctica"(intellectual development + physical development):
Game 1. “On a plane over Africa”
Required:
- map of Africa (divided into sectors (squares). For us, this is a drawn map);
- model of a small airplane;
- square leaves with drawn elements: rain, snow, sun, birds, hurricane. We place them on the playing field as we wish.
2 players play – pilot and dispatcher. Dispatcher task – guide the plane from point A to point B, giving instructions. For example, 3 cells to the north, 2 to the east, and so on. The pilot follows commands. If on the way he meets birds (a card with pictures of birds), then the pilot must flap his arms like wings. If we encounter a hurricane, we roll head over heels on the floor. You can come up with different game elements. This game is very fun to play, and plus we fix the cardinal directions and remember the names of countries and bodies of water.

Game 2. "Antarctica"
When we had a map of Antarctica ready, my son said that we should also make a game out of it. And we came up with a regular walker with a cube. The map was also divided into sectors. Each sector was numbered and marked where the “extra move”, “skip move” field and the arrows for moving the player forward and down along the route would be. The game is ready. We take a cube and chips and you can go on a trip to Antarctica.

DIY toy “Northern Box”
Vilyavina Tatyana shared the idea of making "Northern Box" for the thematic lesson “Reindeer”:
The base is a cardboard box, cotton wool, cardboard. We did it together with our son, he drew the northern lights, painted deer and dogs, and glued cotton wool. Children love to play with the “northern box”.
Another idea from Vilyavina Tatiana – vegetables from egg cartons (papier-mâché), made in preparation for Cucumber Day:

DIY toys for intellectual development
Anna Semennikova found a use for accumulated baby food jars – I made two games for intellectual development: "Number Jars" For son Rusik (almost 4 years old) And "Colored jars" For Margarita's daughters (1.5 years old):
Rusik and I are learning counting and number composition. He knows the numbers well, but we’re a little difficult with counting. So that's what the dots were for. Game options: find a suitable lid, by dots, by numbers, put the corresponding number of items into jars.

Game options for "Colored jars": Find the same jar, find the lids for the jars, put the items in a jar of the corresponding color.
There are plans to make sensory boxes out of jars. Place different items of the same color in them and cover them with rice of the corresponding color.
Jars also make interesting construction toys.

DIY toys: magnetic geometric construction set
For disposal of leftover self-adhesive film Anna Semennikova proposes to do magnetic geometric constructor:

DIY toy “Mathematical walker”
Svetlana and Gleb (5 years old) Melnikovs playing a homemade game at home "Mathematical walker"(intellectual development):
Game idea: in a playful way, repeat and consolidate counting skills, as well as spatial orientation skills (up, down, right, left).
Materials for creating the game:
- large sheet of cardboard;
- markers, colored paper, scissors and tape for design;
- 4 toilet paper rolls (depending on the expected number of players);
- acrylic paints;
- yogurt bottle caps for chips;
- digital chips, a small bucket of jam for chips.
Making a game:
1. On a large sheet of cardboard, draw cells and decorate the playing field with felt-tip pens (the size of each cell – 5 x 5 cm, in accordance with the diameter of the sleeve). I ended up with a playing field of 6 x 8 cells;
2. paint the sleeves with acrylic paints in different colors, draw a “face” on each player;
3. To create digital chips, you need to circle circles on colored paper in accordance with the diameter of the caps. Then use a felt-tip pen to draw a number and an arrow with the direction of movement (up, down, right, left) on each paper circle. When determining the number of numbers, it is necessary to proceed from the number of available caps, as well as the maximum number of cells on the playing field.
In this case, I was able to make 6 numbers (the maximum could be 8) and for each number one of the four arrows – There were 24 chips in total. Then we cut out the circles, glue them onto the lids and secure them on top for security with a strip of narrow tape. We put the chips in a bucket and you can start playing.
The essence of the game. Each player chooses a character – sleeve, place them in the middle at the base of either side of the playing field. Objective: be the first to reach the top opposite row of the playing field.
Players take turns drawing digital chips from the bucket and moving their characters along the squares according to the designations on the chip (for example, 2 squares to the right, 4 squares up, etc.). During the game, the child (at first with the help of an adult) must say the number and direction of movement shown on the chip, and then make the correct move himself.
If chips with arrows indicating an impossible direction of movement fall out (if the playing character is standing on the outer rows), then another chip is drawn. If a large number appears, and the number of moves in the desired direction is limited, then you can continue moving to the side.
Our experience. On the very first evening before bed, my son and I tried to play our math walker - it was interesting (for both my son and me), numbers and spatial concepts are well pronounced and remembered well.
My son really liked the funny characters, they are very convenient to hold and move. My child also became so excited, he wanted to win so much, and was sincerely upset when he had to go down. But the son eventually won and deservedly received a prize - a set of stickers!

Tired of the mess in your nursery? Tired of endlessly collecting toys for your child?
DIY toys: educational cubes
Oksana Delnova made for Vasilisa's daughter (1 year 1 month) two developing cubes(fine motor skills):
Soft development cube. Sides of the cube:
- Ladybug with a zipper, unzip it, and there is a key on the ribbon, black dots - buttons for fingers, the eyes move (bought at a craft store).
- Button side – touch it, chew it, there’s also a button hiding under the leaf. You can use them to work a little with flowers.
- Behind the Velcro door lives a dog. We unhook the door, stick it on, answer the questions: who is it? how does he bark? and so on.
- A phone number is hidden in a Velcro pocket – nibble, touch.
- We feel the beads of different sizes, try to tear them off and chew them.
At first I made each side separately, then I sewed all the parts together, inside there were cereals and coins for sound in shoe cover packages. There are loops and ribbons sewn in everywhere.
Cube with a hole for a pen. I covered an ordinary box with cardboard and sewed geometric shapes onto buttons from thick cardboard covered with velvet paper. Inside we store spiky balls, food caps, and rags. We take out the contents and put them back.

DIY toys: “Clothes” walker and walruses
Anna Usova suggested walking game “Clothes” to develop attention:
Various items of clothing are depicted on the field. We start playing from the bottom left cell. I dictate a sequence of actions to the child, and he must follow where we are moving and, when I stop, say where we are.
Another homemade toy Anna Usova for sons Gleb (7 years old) and Ignat (2 years 9 months) – walruses:
Once Gleb, coming from kindergarten, told us a story about sock eaters. They eat one sock and leave the other one. Then he cleaned out his socks drawer and found single socks there. “Sock eaters have been here,” the son concluded. After thinking a little, Gleb came up with an idea of what could be done with single socks - we made walruses out of them. We have 2 of them - each son has his own.

DIY toy: “Put rubber bands on your fingers”
Elena Fedorova suggested a game “Put rubber bands on your fingers.”(fine motor skills). There can be many options for placing rubber bands on your fingers.

DIY toys for learning colors
Alexandra Biyanova came up with it for my Alina's daughter (2 years 1 month) two color recognition games:
"Mermaid". You need a pocket with a pattern and colored cards. I glued strips of cardboard on the sides and bottom. I pasted the printed picture onto thin cardboard from a box of cookies. I made a slit in the drawing in place of the Little Mermaid's tail. I made a pocket nearby for colorful cards. You can play: change cards, find out the colors, dress up the Little Mermaid.
Sort by color. I glued pieces of colored paper into a box with dividers. Let's sort the fish – friends of the Little Mermaid. Let's offer them cakes – magnets, each fish has a different color of cake.

DIY toys: magnetic cards
Yulia Duryagina suggested an idea on how to do it magnetic cards:
You will need the cheapest plastic transparent magnets in which the pictures can be changed. Prepare cards with pictures of the required size, insert – and you're done!

A few more ideas from Yulia Duryagina:
You can teach a girl how to handle a needle using a hoop with burlap-type fabric and a large plastic needle (sold in sewing departments). You can mark points on the fabric with a marker where to insert the needle.
Fine motor skills can be developed with the help of this game: put circles made of an absorbent thick bath mat into large iron lids, mark points on them with a marker and stick stationery needles with a bitten tip.
From a large box you can make a screen for a puppet theater.

DIY toy: “Fire truck”
Anastasia Trofimova made a toy "Fire engine" for his three-year-old son, who asked “to make a fire truck that you could carry with you everywhere, but that it was not very small, it had doors that opened, you could put firefighters in it and put a ladder.”
I made a folding car that was not only a toy, but also developed fine motor skills. I made the machine itself from velvet film, laying an ordinary household napkin inside for density and the possibility of sewing.
There are pieces of credit cards sewn into the machine on only one side, so they can be raised and folded into the machine, making it flat, or lowered, and the machine becomes bulky. To ensure that the car is fixed when folded, the headlights, siren and ladder mount are Velcro. The ladder is a tool for lacing training, that is, in order for firefighters to have a ladder, it must be “pushed out” - the lace must be threaded.
The wheels of the car are also made of credit cards covered with velvet film. The wheels are fastened with buttons, they can be removed for “tire fitting”, while at the same time practicing how to fasten and unfasten the buttons.
The fire hose is attached to a button inside the car, it needs to be wound up and then hung on a hook on the side of the car. The cabin has a diaper strip to which firefighter figures can be easily attached using diaper Velcro.
The machine is very pleasant to the touch due to the velvet base; when playing, the wheels spin both folded and unfolded, the doors open and close with Velcro. It's also simply machine washable.
After some time, my son and I made a fire station together. We chose a suitable shoebox, covered the name and pictures with red paper, installed a floor divider, and cut a hole for a pole for firefighters to climb down. The son said that the fire department should have a control room, so there was a telephone, there should be a recreation area - a table with chairs, and a bedroom - shelves. To climb to the second floor, my son glued together a ladder from tubes, and from them he made a pillar for a quick descent in case of an alarm. And the fire truck took pride of place in the garage on the first floor.

DIY toys: treasure box and “Nests”
Olga Duk helped son (5 years old) collect and place his first treasure collection:
Now we are reading a book about the Moomins, in which there is one hero, Hemulen, who collects everything. My son (5 years old) really asked to make some kind of collection. I kept the box of sweets for a long time, and now the box came in handy. This will be our first treasure collection. We tried to play with my son finds. For example, what is in the second row, third from the right? What is in the third row, second from the left? We practiced rows, left/right. We also became acquainted with the concept of row and column.
In order to introduce daughter (1 year 7 months) with quantity, with numbers Olga Duk made a game "Nests"»:
I needed an egg container and balls. Container cells – these are nests, balls – bird eggs. It was necessary to lay the eggs of the birds in accordance with the numbers near the cells (nests). I told stories about birds, they looked at where there were more eggs, and some of the nests were completely empty. It was interesting.

DIY toys “Where is whose house” and logic caps
Ekaterina Akimova I made a game for my daughter Nastya “Find a house, or who lives where"(intellectual development + fine motor skills).
To create this game you needed matchboxes, self-adhesive paper, stickers with images of animals/insects/birds and their homes.
I covered the matchboxes with self-adhesive paper and pasted a picture of a house on top. Inside the box there is a picture of an animal/insect/bird.
Child's task – choose a house for everyone. This game also develops fine motor skills (the baby needs to insert the inner tray into the matchbox). My daughter came up with another way to play – creation of a turret.

Another homemade game that is played Ekaterina Akimova with daughter, – this is also a game with baby food caps:
What is necessary:
- baby food lids;
- picture stickers or pictures;
- scotch.
There are many options for games:
- pick up a pair (mother – Baby);
- find the object my mother wished for according to its description (“Small, yellow, says: “Pee-pee!”);
- divide objects into groups (living – inanimate, edible – inedible);
- put in front of the child 3 – 5 caps (depending on age); ask to remember; pick up one cover while the baby is not looking; ask what has disappeared, or, conversely, add another one;
- compose a story based on the lids laid out in front of the child.
"Child development system at home from A to Z". You can do this too!Do you have any homemade toys? Share in the comments!
I welcome everyone to today's topic! Glad to see both guests and friends! Today I will give all visitors to my blog a small but very pleasant surprise. For some, these will be memories of how their child was incredibly tiny and almost problem-free. Others will receive an equally valuable gift! They will learn how to make educational toys for children from 0 to 1 year old with their own hands.
But I myself will not be left without reward! Your attention and always useful and interesting comments, where you share your invaluable experience, will be the most wonderful gift for me. Well? Go?
What toys are interesting for babies under one year old?
First, let's find out which toys are interesting to babies under one year old. Then we'll see how you can build them yourself. I invite everyone to plunge into the cute childhood of their little ones, and remember how pleasant it was to come up with ideas yourself or borrow ideas from experienced parents in order to design funny crafts.
Please share these projects and your impressions of working on them! Why am I asking this? So that you can infect us! So that, after reading the article and your comments, readers will want to create and delight themselves and their little children!
How the baby develops
The baby will complete the programs of several universities in a year. He will get used to his body: he will understand how his arms, legs, eyes, tongue, etc. work. and will actively use this, studying everything that surrounds him. For a one-year-old toddler there are excellent helpers - reflexes built into it. Such as sucking and grasping, he will use them to play and explore the world. Let's take this into account.
Suitable toys for your favorite babies.


Simple "constructions"
Suitable? Exactly! Despite the fact that it seems that a child can be occupied with anything, even a mother’s palm or a small plastic jar, it is important to meet several conditions!
The toy must be:
- Safe;
- Bright;
- Age appropriate.
The principle of choosing what we will design for our baby will be built on this.
But first, let’s see what is suitable for each age, taking into account the possibilities, so that it is interesting both for the little ones and for the development of older toddlers.
There are light and simple models that can be made very quickly without much effort, and there are those that require a little more time and effort. But it’s worth it to make the baby happy and help him understand all the secrets of the world! I'll tell you about this too.
From 0 to 3 months
The child is an observer. At this age, his hearing, vision, and attention develop. Therefore, at first, static toys that can be examined and pulled into the mouth are suitable.
Do you know what kind of toy a month-old baby will like, and it will take no more than 10 minutes to make? A balloon on which we will draw a mouth and eyes!
And one day I watched a baby study with great attention a large photo of a dog. This is how easy it is to give joy! But the little one is growing, and he needs other fun to develop other abilities.
For example, he becomes interested in rattles that make sound. They are easy to make yourself, even from a sock. Bells can be bought at a fishing store.
And by 3 months more complex things are needed. For example, mobile. We'll talk about it a little later.
From 3 to 6 months
The safety of the toy takes on new parameters. The baby needs activities that develop hand motor skills. Therefore, everything that he grabs with his hands, feels and puts into his mouth “for testing” should not harm him.
Requirements:
- Nothing small;
- Rounded edges;
- Made from hypoallergenic material and paint covering the craft;
- Does not accumulate dust;
- Convenient for a tiny hand to hold.
A very good choice of musical subjects. And toys of different textures are important: smooth and with pimples, ribbed and with depressions.
If these are soft toys, then they are filled with latex balls or cotton wool. The main thing is to sew the toy well so that the child does not swallow the filling.
6 to 8 months
The baby can sit, crawl, and his musical abilities are at the peak of development. Let's pay attention to this. Usually in the kitchen, while I was cooking, I gave my son different pots and spoons and he played music.
You can also pour various cereals and beans into small plastic bottles; the baby loves to make noise with such maracas and watch how the cereal pours inside depending on how you turn the bottle.
From 9 months to a year
For toddlers at this age, any sensory interactive toys are relevant. Kids especially love those that develop logical abilities: matryoshka cubes and pyramids.
Various sorters, by size, shape, and possibly color, are perfect.
I used the word “love” for a reason! At this age, children's toys already have a different meaning. The kids develop likes and favorites. Parents most often buy them for their beloved baby.
But they can also be made from scrap materials.
When finishing a section, I always want you to participate and share your observations and thoughts. It will be interesting!
How and what toys you can make with your own hands
Rug and pillows.
Let's try to make an educational mat and toy pillows. They will be made according to the same principle. Only the rug can be of any shape, and for the pillow you will need a rectangle of fabric.
So, if the blanks are ready. Let's figure out what will decorate them? Perhaps some figures that the baby will be interested in looking at. He will feel them. So it would be nice to do them:
- pleasant to the touch,
- it is desirable that they differ from the main material (can you make them from felt? That would be great!),
- and the size of a baby’s palm (a little more is possible).
So, we cut out colorful circles, squares, mushrooms and bunnies. You can also take other things, for example, pom-poms from hats, soft toys, laces and bows (just so that the child does not get confused). We sew them onto the main workpiece. All that remains is to sew the edges of the rectangle, place some soft material inside, and the pillow is ready.
Touch mat
Stuffed Toys
The baby has grown up. He enjoys kneading, touching, squeezing our craft in his hands. We can quickly make it from children's tights, and the quality and interest in it will not suffer from the simplicity of the material. On the contrary, everything is in our hands.
If we cut off part of the trouser leg and sew one edge, we get a convenient bag that can be filled with buckwheat, small beans, dry peas, etc. sew up the other edge. And now let's use our imagination! You can tie our “bag” horizontally with a ribbon. And in front of us we already have a blank from which it is easy to make a snowman, a doll (by sewing on legs and arms and drawing a “face”) or a cat (tail and ears + a drawn muzzle). Fly fantasy!
What do you think of these ideas?
Mobile
How to design a mobile? We need a foundation. It can be any shape from what is available or can be cut from. For example, an embroidery hoop will do, or an old wooden (lighter to use) abacus, etc. It is advisable to wrap the base with tape or a strip of felt.
Let's try to make a mobile in several versions. You can bind to the base:
- Small soft or plastic toys;
- Sewn or knitted dolls;
- Paper origami.
One thing or a little of everything can be tied to the base and hung above the crib!
15 everyday game ideas for kids
1.Poke holes in a transparent cake box with a thick needle. Balls of threads of different textures and colors are placed inside. Leftovers work very well for this purpose, because eventually the threads become very tangled and need to be cut off and thrown away. The ends of the threads are threaded through holes in the lid of the box. You can tie a large bead or button to the end. The child pulls the threads, balls unwind inside, and the child is very amused by this.
2. Kids like to play with a very large, but very light toy. Take a 5 liter plastic bottle and put a few small items in it. Bring her to the place where the baby is playing or put her on the floor, let him push her and try to grab her.
3. Kids like to play with a very large, but very light toy. Take a 5 liter plastic bottle and put a few small items in it. Bring her to the place where the baby is playing or put her on the floor, let him push her and try to grab her.
4.Make simple rag toys: rectangular scraps are sewn and stuffed with other scraps, threads, plastic bags, balls, buttons, and beads. You can put a metal bell inside.
5.Take a strong rope or shoelace at least a meter long. Top it with tiny toys with loops, rings, beads and buttons. Limit some of the toys with knots on both sides so that they do not slide along the rope. You can put such a toy around your neck so that your baby can look at them, or hang it on a stroller.
6.Take: a sofa cushion, a thick needle and a coarse thread. Buttons of different sizes, small toys with eyelets, hooks and eyes, ribbons, ribbons, carpet rings, Velcro, pictures cut out of old children's things, several pockets and anything else that can be sewn on. Make small doors from pieces of fabric, opening which the baby will see a picture, a sewn toy or a button. Let the doors close with different fasteners - Velcro, hooks. Sew ribbons with toys at the end that can be taken out and put back inside the pockets. Sew several carpet rings in a row, stretch a ribbon through them, at the ends of which two small toys will ride back and forth.
7. Manipulation of different buttons and switches is well suited for the development of a baby’s hands. Screw or secure the following onto a large piece of smooth plywood or hardboard: store-bought light switches, an old telephone dial or panel with buttons, pieces of panel from an old radio or other devices (you can press buttons, some stick or not), turn a dial, move levers .), Latch - latch, latch, hook and eye, door chain and loop, small lock, and hang a key next to it on a string. Wooden slats are attached to the edges of the plywood on the reverse side, and at the back of the entire structure is a sheet of plywood of the same size. Loops are attached to the finished remote control, and the whole thing is hung on the wall in the gaming corner.
8. Take juice bags. You can always come up with some kind of entertainment for the baby from them. For example, take such a bag and cut it at the bottom, and cut slits with a knife on two opposite walls. Thread a narrow satin ribbon or braid 20-30 cm long through them. Tie medium-sized buttons (or whatever you find) to its ends. The baby will try to pull out the buttons on one side, returning the other to its place. This game develops the child’s hands and his thinking.
9. There is another great game that can be played with an empty shoebox. Take such a box and make six round holes in its bottom. Insert small pieces of fabric of different textures, ribbons, fur, rustling paper from the inside of the box and close the box tightly. It will be very interesting for the baby to pull out all this wealth! But to do this, he first needs to try to grab these objects with his fingers, and this is not so easy. To prevent your baby from losing interest in the game, change the contents of the box more often. The game introduces the child to new tactile sensations and develops fine motor skills well.
10.Take a rope, ribbon or braid one meter long. At some distance from each other, tie several toys, rattles to it, multi-colored clothespins, pieces of rustling paper and other items that are safe for a small child will do. Then this garland must be hidden in a pan, leaving the “tail” of the braid (about 15 cm) hanging freely on the floor. Invite your child to pull the string and see what happens. The little one will complete the task with interest and will be delighted with the “catch” he has caught.
11. Multi-colored large beads and buttons are strung on a strong thread (preferably nylon, so that a child cannot tear it). Tie the ends to make rosary beads. The baby will be happy to sort through these beads, while training fine motor skills of his hands, exploring different shapes and colors. These same beads are convenient to use during breastfeeding, so that the baby does not pull or pinch the mother (nursing mothers know how painful this is), but develops fine motor skills.
12.Actually, rattles are the endless fantasy of creative mothers. They can be made from many different items and materials. Here's another idea: Take a medicine bottle and put peas or small beads in it. Close the lid tightly. Wrap it in bright, pleasant-to-touch fabric, or rustling colored cellophane. Wrap the ends with thread to create a candy rattle.
Place beans, peas, beads in a fabric bag and tie it tightly - the baby will be happy to probe the contents of the bag. If you don’t have ready-made bags and don’t want to sew them, baby socks are quite suitable.
13.Cut pieces of fabric of different texture and color into strips that do not fray. Secure them onto the plastic ring. Give the ring to your child or hang it above the crib or play area so that the child can reach and finger the scraps. And also watch how they sway from the movement of his hands.
14.The balloon is attached to a thread or rope above the crib so that the baby can reach it with his arms and legs. And the baby will be able to “football” the ball.
15. Put foil, more cellophane, and rustling paper in a cellophane bag (preferably rustling and transparent). Tie tightly.
Make a hole in the cardboard box. Place various small items inside. It is better that these are not toys, but objects from “adult life” - a teaspoon, an empty compact, a box of cream, a small coin box, a comb, etc. and so on. At first, the child may be afraid to put his hand into the box, not seeing where the hand ends up, show him how to play. Quite quickly, this game becomes a favorite activity for kids - first pulling everything out, then putting it back and pulling it out again. And so on in a circle. With older children, this game can be complicated by asking them to take a certain object out of the box by touch.
The main thing in this design is to understand that we put ourselves, our warmth and soul into every craft for the baby! Our love! That’s why I really want to do my best for our little ones!
Friends, I will never tire of saying: “Thank you!” for your sincere attention to my observations and articles. It's always nice when someone subscribes to the news and wants to regularly read what I specially prepared for you! And one more thing, your comments bring the information to life and help bring everything closer to practical application. Therefore, I am grateful for your words of support!
Come and visit again. Invite your friends and acquaintances. Always yours! And for today I say goodbye! Bye bye!
A beautiful soft toy will not leave anyone indifferent, especially if it is handmade. Both children and adults will appreciate it.
Creating soft toys with your own hands is a rather interesting and exciting process that immerses an adult in childhood.

It doesn’t matter if you don’t have any experience as a seamstress, the main thing is the desire to make things, and anyone can handle a needle and thread.
DIY soft toys for beginners
A handmade soft toy is much more priceless than a purchased one. To make such an original item you will need:
- study the simple technology of its creation;
- select source materials;
- competently make a template for the future product.

On the Internet you can easily find a large number of master classes on making a wide variety of soft toys. You can also go to stores that sell handicrafts - there you can buy kits and manuals for creating soft toys with your own hands.
It will be just wonderful if you make a toy with your children. Such a pastime will develop their attentiveness, promote familiarization with work, order and accuracy.

The main thing is to remember safety and not leave children alone unattended.

Materials used to create a soft toy
The following fabrics can be used to create a soft toy:
- Knitted;
- Silk;
- Cotton;
- Wool;
- Velvet and velor;
- Felt.
General instructions on how to make a soft toy
- Select the source material, carry out the necessary preparatory work with it - washing, ironing, steaming;
- Cut according to the template;
- Baste all parts along the marked lines;
- Sew the parts;
- Fill the product with filler;
- Fold all the parts of the product and sew them;
- Finalize the appearance of the toy.

It is preferable to make a pattern from cardboard - this facilitates the process of tracing the template on the material and increases its service life.

Master class: how to make a “Mouse” toy with your own hands
A wonderful, small-sized toy “Mouse” is intended for babies up to 1 year old. It will help develop the sense of touch. Little ones will be very interested in playing with such a bright, funny little thing.

It’s very easy to sew a “Mouse”:
- Take the template provided;
- Prepare scraps of material, preferably bright colors and threads of a contrasting color;
- Align all parts of the product on the front side, sew them together using a buttonhole stitch;
- Make ears, eyes and nose;
- Place the padding polyester inside and sew on the tail.
Below you can see a photo of the finished toy.

A similar thing can be used as a Christmas tree decoration; all you need to do is make a loop.

Sew a turtle
We will need:
- multi-colored cotton scraps;
- cardboard template;
- padding polyester;
- buttons or beads for eyes;
- needles, threads, scissors.

- Let's make a pattern. To do this, draw the head, tail, legs and torso (with a radius of about 15 cm, make the bottom of the shell a little smaller);
- We attach the template to the wrong side of the material and trace it. Next, you need to cut out two parts for the head, tail, shell and 8 for the legs;
- We make 4 darts on the upper body. This will add volume to the product;

- We sew the parts of the head and legs together and stuff them with filler. We also sew the tail. We don’t fill it;
- We sew together all the parts of the shell, leaving holes for the limbs and filling;
- We connect all parts of the product with a hidden seam, sew on the tail;
- Let's make eyes. The turtle is ready!
Soft toy "Cat"
In order to sew “Cat”, we need a sock, and a new one. Next, decide what kind of cat you want as a result - fat or thin. This determines where to cut the toe.

For a fat cat, you will need the part that covers the sole. The upper part of the elastic band must be moved to the side. Then fill the toy tightly with filling so that the body is larger than the head.
Note!

We bend the edges of the hole inward, pin it together and sew it together. By stretching, we form the ears. The next step is to embroider the eyes, nose and mouth with a contrasting thread.

The finished product can be decorated with a beautiful ribbon, scarf, bow, or brooch.

Below are photos of a variety of soft toys that you can sew with your own hands.

Sewing toys at home is not at all difficult, and the result of such work will bring satisfaction. We wish you success!

Photos of soft toys with your own hands


Note!


Note!


Nowadays, we can increasingly see a variety of educational toys on store shelves. What is it - an educational toy and what is it for? If you look at the name itself, it becomes clear that this is a toy that aimed at child development one or another ability. It helps in the formation of fine motor skills or basic knowledge about any subject.
Basically, all toys perform a developmental function: for example, a rattle helps a child learn to control his hands (grab an object, throw it from one hand to another, throw). But still, developmental toys are those that can teach a child something while playing. And most of them can be made at home with your own hands.
Stages of child development by month
 Before you start making it, you need to find out the age of the baby, because a toy that is designed for a baby is unlikely to be of interest to a three-year-old child. And you also need to know what the baby is interested in, what he likes most. The shape of the future, its color, and so on will depend on these indicators.
It is necessary to remember that each child is individual. Perhaps he has already mastered some skills ahead of schedule, or maybe not.
- From 0 to 3 months.
A child at this age mostly lies on his back. Therefore, the main skill that needs to be developed is focusing and holding your gaze on an object. Mobile phones, colorful rattles, colorful garlands and beads are perfect for this.
The basic requirements for these toys are quite simple: they all must have different textures and shapes, and also be lightweight.
- From 3 to 6 months.
 At this age, the baby becomes more mobile, learns to roll over onto his tummy and begins to try everything by heart. This is an excellent time to develop your child's coordination, hearing, vision, and grasping skills.
Tumblers, colorful rag beads and balls, a mirror, rattles, an educational mat, and bracelets with buttons will be useful. All of them should be bright, multi-colored, have different textures, shapes and make sounds.
- From 6 to 9 months.
The little one is starting to crawl and is already recognizing its relatives. He can even keep himself busy with the game for a while. During this period, you need to talk to the child as much as possible, develop motor activity in him and teach him to take objects not with his whole hand, but only with a few fingers.
Educational mats, multi-colored sorters, pyramids, nesting dolls and musical ones will help you with this. All of them, of course, must be multi-colored, bright, have different shapes and textures, and also have different weights and methods of application.
- From 9 months to 1 year.
 At this age, the baby is already beginning to take his first steps and pronounce words. Therefore, it is necessary to concentrate all parental skills and knowledge on the formation of his motor and speech activity.
To do this, you can use developmental mats and books with colorful pictures, cars on wheels, finger puppets, pyramids, cubes, sorters and so on.
All of them should be multi-colored, consist of different parts, so that the child can assemble and disassemble them independently or under the supervision of an adult.
- From 1 year to 1 year 3 months.
The baby is already fully aware of the world around him. He wants to do everything on his own. Therefore, it is necessary to continue to develop the child’s motor and speech vivacity, as well as comparative thinking and generalization.
For this you need to use toys that can be folded and disassembled.
- From 1 year 3 months to 1 year 6 months.
 At this age, the baby continues to develop its imperfect speech, fine motor skills and thinking skills. Developing rugs, bright books, cubes, sorters, and secret books are perfect for this.
In order to teach a child to generalize objects with equal characteristics, they need to be selected with similar characteristics, sizes and colors.
- From 1 year 6 months to 1 year 9 months.
The baby continues to actively explore the world around him. During this period of development, it is necessary to teach the baby to actively use this or that object, play independently and express his emotions correctly.
Toys that directly reproduce real situations and objects around him will help you with this. Therefore, you need to choose object-based games, as well as those that require the child to name a color, shape, and so on.
- From 1 year 9 months to 2 years.
At this age, the toddler begins social development. It is necessary to direct all your skills to develop his understanding and separation of shape, color, and size.
Sorters, children's pyramids, all kinds of cubes and books are suitable for this. Thanks to them, the child will learn to separate them by shape, color, etc.
- From 2 to 3 years.
 The baby actively continues his social education. He already has experience communicating with other children and therefore it is necessary to continue to develop his fine motor skills and the ability to separate objects by shape, color and size.
Here you can use any toys, crafts made from paper and plasticine.
All toys must have a subject and role-playing character.
- From 3 to 5 years.
This is the age when a child is quite active and knows how to play independently. As a result, these skills need to be strengthened. To do this, you can take lotto or puzzles, a variety of games that will help the baby learn the time of day and seasons, the alphabet or numbers.
Materials from which you can make an educational toy with your own hands
You can make such a toy from any material that you can find in your home.
- Scraps of fabric. Educational toys are an excellent way to use leftover materials that every craftswoman has. For example, scraps of felt, fleece, knitwear, and so on.
- Sewing accessories. Here you will find laces, ribbons, beads, buttons, buttons and much more. Using thermal application you can make a toy with a secret.
- Furniture fittings. In the process of making toys, you can use various hooks, keys with locks, screws, and so on.
- Elements that make a rustling sound. You can achieve this effect by inserting a crumpled cellophane wrapper from a candy or chocolate into the item.
- Objects that rattle. Here, too, the choice is quite large. For example, you can pour beads, cereals (buckwheat, rice, peas), fruit seeds into a plastic Kinder Surprise egg. They will create noise when shaken.
- Ringing objects. Basically it will be a bell that you can buy in a store or maybe you have one at home.
- Shiny and transparent elements. This could be foil, the inside of the juice, or any wrapping paper.
- Items that can be opened or closed. All kids really like such elements, especially if there is something hidden under them. For example, it could be a pocket, a curtain. For making, you can use ordinary water or drink caps.
- Unnecessary clothes. You can use old children's clothes that the baby will no longer wear.
- Fillers. To fill toys, you can use foam rubber, padding polystyrene or polystyrene foam. Then your toy will hold its shape.
Types of educational toys
 On the Internet you can find many toys that are made by yourself: soft books, rugs, pillows, houses, figurines and much more.
Educational books
Children's educational mats
Developmental pads
Educational house
You can make a soft book with your baby's life story
All educational toys are divided into those that a child can play with independently, and those that cannot be played without the help of an adult. Basically, the first category includes those toys that are allowed in the first months of a baby’s life: they do not contain small and dangerous elements and help develop fine motor skills. The second toys contain elements that needs to be unfastened or unscrewed. This is where parents come to help the baby. But after several shows, the baby will be able to do it on his own.
The presence of an adult is also necessary where you need to read, count, determine where is left or right, top or bottom, identify colors or shapes, and so on.
Rattle bracelet
A child from 1 to 4 months will really like this bracelet. It will help in the development of hearing, vision and coordination.
Multi-colored beads
Such beads will teach the baby distinguish colors, sorting and moving beads will help in the development of tactile sensations. In addition to beads, you can string hand-knitted elements onto the ribbon: animals, fruits, and so on.
Baby soft pillow with buttons
 This will be quite an interesting toy for a child. Buttons of different textures, shapes, sizes and colors help in the development of tactile sensations. Thanks to its light weight, such a toy can be taken with you on any trip.
This educational toy will help your child learn to separate objects in size, shape and so on. For example, you can ask your child to find all the buttons of the same color or the same size and shape. He will be very interested in such a game.
Children's soft book
A handmade book develops the baby's fine motor skills and helps in learning colors and shapes, as well as the world around us in general.
Stand with locks, hooks
This toy will delight any child, because there are so many objects in front of him that can be opened, pressed, and rotated. It is very easy to make such a stand. You can use all kinds of locks, latches, hooks. In general, everything that dad can find in his garage.
Developmental mat
Such a rug will help with speech development and, of course, the child’s imagination. To make it you will need various scraps of fabric, fillers, rustling and ringing objects. On the canvas you can depict your child’s favorite fairy tale and its characters. In the process of playing and telling stories, the baby will develop speech, imagination, and fine motor skills.
Precautions when making toys for children

We also recommend
 Presentation "February 23 - Defender of the Fatherland Day" presentation for a lesson (7th grade) on the topic February 23, history of the holiday presentation
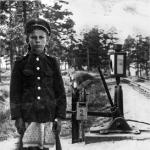 What does a children's railway look like around the world?
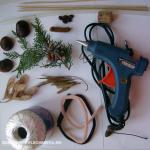 Do-it-yourself web with a chestnut spider and a dragonfly made from natural materials
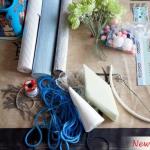 New Year's topiary Christmas tree: we decorate the holiday ourselves Topiary for the New Year's tree
 DIY educational toys for kids
 Asymmetrical stylish vest