Crochet a napkin round pattern description. How to crochet a simple napkin: diagrams and photos of work for beginners
Crocheting napkins is an activity that can captivate both beginners and experienced needlewomen. The article presents various patterns for knitting napkins with a detailed description of the work.
Crochet napkins
Crocheted napkins are an extraordinary beauty, the embodiment of lightness and tenderness. The craftswomen who create these magical woven snowflakes don’t just knit napkins, but give those around them a real fairy tale.
To learn how to knit napkins, in addition to a hook and a ball of yarn, you will need patience and attention. It is important that the needlewoman can correctly read the diagram and convey the pattern in her work.
IMPORTANT: You can knit a small napkin with a light pattern in a few hours, but creating a masterpiece with a complex pattern will take much more time.
For beginning needlewomen, it is better to first knit small-sized napkins with simple, uncomplicated patterns. When your hands get used to the new work, and the loops and posts become slender and even, you can move on to performing more complex elements.
In descriptions and explanations of diagrams, the following generally accepted abbreviations are often used:
- VP- air loop
- PS- half-column
- WITH- column
- RLS- single crochet
- S1H- double crochet
- S2H- double crochet stitch.


Video: Simple crochet round napkin
How to choose threads and crochet a simple napkin for beginners: diagram with description
Experienced craftswomen choose spider-thin yarn for their work. Deftly using crochet, they knit napkins of extraordinary beauty that look more like lace. However, those who are just learning to knit should not start with thin threads.
- To prevent the thread from getting tangled, choose medium thickness yarn. Wool blend and acrylic Perfect for first jobs.
- Thread color choose depending on the interior in which the finished napkin will be used.
- Hook size usually corresponds to the thickness of the thread. But if you need the knitting to look tight, take a thinner hook; if you want to get a large knitting product, choose a thick hook. To begin with, it is better to take a hook number 1.5. If they find it inconvenient to work with, it can always be replaced with a thicker or thinner one.
- For the first napkin, choose one of the simplest patterns- It’s better to finish a simple job than to quit a difficult one.
IMPORTANT: If you need to knit a thin openwork napkin, use bobbin cotton threads and a hook No. 0.5 - 1. For napkins of medium thickness, you need “Iris” threads and a hook No. 1.5.

Tutorial for crocheting a simple napkin:
Prepare a hook and thread, study the knitting pattern.


Since the napkin is round, start knitting from the center. Knit a 12-loop chain.


Tie the ring according to the diagram.


Connect the last loop with the chain chain loop, thus completing the circle.

Go to second row. Knit 3 chain stitches, 4 double crochets into the stitches of the previous row.


Repeat the pattern.

Do not connect the last loop of the row with the first; if you connect them, the pattern will be broken.


In the third row, according to the diagram, alternate 4 chain stitches with 6 double crochets. Knit the 4 middle columns so that the hook enters the base of the columns from the knitted row, knit the first and last so that the hook goes under the chain of chain loops of the knitted row.


Complete the 3rd row, like the previous one, proceed to knitting the 4th row.


In the fourth row alternate 5 chain stitches with 8 stitches + 2 double crochets.
Fifth- alternate 9 chain stitches with 10 stitches + 2 double crochets.
In the sixth- alternate 11 chain stitches with 4 stitches + 2 yarn overs, 11 chain stitches, skip 2 stitches of the previous row, 4 stitches + 2 yarn overs. At the end of the row, connect the last loop to the first.


In the seventh row knit 5 chain stitches, 15 stitches + 2 double crochets. Insert the hook under the chain stitches of the previous row. Then 5 air loops, a column under the air loops of the previous row.


At the end of the row, knit 6 chain stitches and connect the last loop to the first.
 Knitting a napkin, connecting the loops at the end of the 7th row
 In the eighth row knit 6 chain stitches, double crochet + 2 yarn overs, small picot of 4 chain stitches.


At the end of the work, fasten from the wrong side and carefully cut the thread. The work is finished, the napkin is ready!
Video: Crocheting napkins for beginners according to the pattern
How to crochet a beautiful white openwork napkin: diagram with description
Openwork napkins look great both on serving and coffee tables. They can be placed under candy dishes, cups, plates or fruit vases.
To make the napkins look light and delicate, take thin cotton threads and a thin hook (0.5 -1.2).
IMPORTANT: It is advisable for experienced needlewomen to use bobbin threads, but beginning craftswomen should take into account that working with them is very difficult and time-consuming.


Description:
Knitting the middle part:
- Cast on 10 air loops and connect them into a ring.
- 1 row: Knit 3 chain stitches (this will be a rise), 21 stitches + 2 double crochets.
- 2nd row: Tie 6 chain stitches, 1 stitch + 1 yarn over into the 2nd stitch of the previous row, 3 chain stitches.
- 3rd row: 5 air loops, 1 stitch + 1 yarn over (thread for the chain of the 1st row), 2 air loops, 1 stitch + 1 yarn over in the stitch of the 1st row, 2 air loops.
- 4 row: Knit 6 chain stitches, 1 single crochet stitch and 4 chain stitches.
- 5 row: Using connecting stitches, move the thread under 1 arch, knit 7 chain loops, 1 single crochet, 5 chain loops.
- 6th row: Start knitting again from the middle of the arch, knit 8 chain loops, 1 single crochet, 6 chain loops.
- 7th row: Move to the center of the arch, to do this, knit 9 chain loops, 1 single crochet, 7 chain loops.
- 8th row: Start from the middle of the arch. Work 3 chain stitches, 4 stitches + 1 yarn over, 3 chain stitches, 1 stitch + 1 yarn over into the next arch. Next: 3 chain stitches, 9 stitches + 1 yarn over. At the end you should get 4 stitches + 1 yarn over.
- WITH Rows 9 to 16: the pattern is similar to row 8, but carefully monitor the change in the number of columns in each row.
- Row 17: Pull the connecting thread to the last column. Knit 3 chain stitches, 4 stitches + 1 yarn over, 10 chain stitches, 5 stitches + 1 yarn over, 10 chain stitches.
- 18 row: Turn the napkin and knit in the reverse order: 3 chain stitches, 15 stitches + 1 double crochet under the arch, 1 single crochet in the stitch that is in the middle of the previous row, 16 stitches + 1 double crochet.
Every flower knit separately:
- Connect 8 air loops with a ring.
- 1st row: 3 chain stitches, 14 stitches + 1 yarn over.
- 2nd row: 12 chain stitches, 1 single crochet in the 6th stitch of the previous row, 10 chain loops, 1 single crochet in the 11th stitch of the previous row, 10 chain loops.
- 3rd row: Knit the petals by turning the product over. 2 chain stitches, 1 single crochet under the first arch, 1 single crochet, 13 double crochets + 1 crochet, 1 single crochet under the 2nd and 3rd arches.
IMPORTANT: When tying the third petal of the flower, do not forget to connect it to the middle part of the napkin. Tie and connect all the flowers in this way.
Knitting borders- the final stage in the work. The border consists of 7 rows:
- 1st row: 2 chain stitches, 9 single crochet stitches, 8 chain stitches, 10 single crochet stitches in 2 flower stitches. Then do the same over each flower.
- 2nd row: 5 chain loops, 1 stitch + 1 yarn over in 3 stitches above the petal, 2 chain stitches, 1 stitch + 1 yarn over in the next 3 stitch, 2 chain loops, 1 stitch + 1 yarn over in the last stitch above the first flower, 8 chain loops. Continue on each flower as well.
- 3rd row: 3 chain stitches, 7 chain stitches + 1 yarn over, 2 chain stitches, 8 chain stitches + 1 yarn over, 2 chain stitches.
- 4th row: completely repeats the 3rd row, however, if the knitting begins to “pull”, you can add air loops yourself (it will be enough to add 1 loop each).
- 5 row: 3 chain stitches, 7 chain stitches + 1 yarn over, 10 chain stitches, 8 chain stitches + 1 yarn over, 10 chain stitches.
- 6th row: turn the knitting, knit: 3 chain loops, 15 stitches + 1 crochet in the arch of the previous row, 1 single crochet between the stitches of the previous row, 16 stitches + 1 crochet in the next arch, 1 single crochet.
- 7th row: the entire row is tying the resulting elements with single crochets.
Finish the work by securing the thread and removing the remainder.
Beautiful crocheted heart shaped napkin- a great gift for a loved one for Valentine's Day. Several identical small heart napkins can be used to create a romantic setting or for table settings.
Crocheting a heart napkin is not difficult. It is enough to carefully study the diagram, choose the right yarn and hook and follow the recommendations from the description in your work.
To knit a heart, use a thin cotton thread and a No. 1 hook. Finished product size: 15 x 20 cm.


Description of the scheme:
- Dial 10 VP, connect with a ring.
- Collect another 50 VP.
- Connect the last 50th loop with the 10th from the end so that you get a ring.
- 1 row: 3VP (needed for lifting), 19С1Н (tie the ring with them), 3С1Н tie on three loops of the chain and three air loops that were knitted for lifting. Next, knit C1H from each stitch of the entire chain. In the center of the chain, knit 3C1H on two loops. This will form a corner of the heart. Tie the rings at the end of the chain with C1H, connect the PS with 3 loops of the chain.
- 2nd row: 3VP connect the PS with three columns of the previous row, turn the napkin. Further according to the scheme: C1H in every second loop of the previous row above the rounding, above the straight element - in every third. Knit 2 chain stitches between the stitches. When you reach the corner of the heart, tie the arch 6 VP. Finish the row by connecting the last stitch with the 3rd loop of the chain.
- 3rd row: Connect 3VP with 3 columns of the previous row using PS. Turn the napkin and then knit according to the pattern C1H, one above each column of the previous row and 2C1H in the arches above the straight section. In the arches above the curves, knit 3C1H. In the corner of the heart - 12C1H. Connect the last column at the end of the row using a PS with 3 loops of the chain.
- 4 row: complete repetition of row No. 2.
- 5 row: repeat row No. 3, only knit 2C1H over the arches and curves, and 10C1H in the corner.
- 6 row: C1H, 1VP, pico, 1VP. Connect the rings when tying the second one: 1 VP, 1 RLS, 1 VP.
The result should be a heart like this:

You can connect 2 of these napkins together. You will get a cute composition:


This is one of the easiest options for knitting a heart-shaped napkin, which even a beginner can knit on his own. Experienced craftswomen can choose more complex patterns.
Video: Crocheted heart. How to crochet a heart. Master Class
To crochet a square napkin measuring 25x25 cm, you will need 20 g of cotton yarn and hook No. 1.

 How to crochet a white openwork square and rectangular napkin: diagram with description

Description:
Main motive (repeated 16 times):
- Tie a 10 chain chain. Connect into a ring.
- 1st row: 1 VP for lifting, 15 sc in the ring, end of the row using PS.
- 2nd row: 3VP for lifting, 1 PS1N knit together with the last VP of lifting into the 1st lifting loop, 2PS1N knit together into the next RLS of the previous row, 5VP, 2PS1N knit together into the next RLS of the previous row, 2PS1N knit together into the next RLS of the previous row, 5 VP. Repeat 8 times. Finish the row with a connecting post.
- 3rd row: 4VP for lifting, 3S2N into the arch from 5VP of the previous row, 4VP, 4S2N into the same arch from 5VP, 4VP, 1 RLS into the next arch from 5VP of the previous row, 4VP, 4S2N into the next arch from 5VP of the previous row, 4VP , 4С2Н in the same arch from 5VP, 4VP, 1СБН into the next arch from 5VP of the previous row, 4 P. Repeat only 4 times. Finish the row, as before, with a connecting column.
- Next, continue working according to the diagram of the main motif, ending the rows with connecting posts.
- Connect the finished elements together, starch the finished product and leave to dry.
IMPORTANT: To get a napkin from rectangular motifs, knit not 16, but 20, 24, 28 or more repeating elements and connect them together in a certain order.
Filet knitting or fillet knitting(loin lace) is the creation of a grid, some cells of which remain empty, and some are filled. The drawing is created in a certain way, depending on how the grid cells are filled.
Fillet knitting is very simple, and the patterns are easy to read and resemble cross stitch patterns. The elements of fillet knitting patterns, as well as patterns for cross stitch, are black and white checkers, circles and crosses. Moreover, an empty cell in the diagram is always indicated by a white cell, and a filled cell can be indicated by a black cell, a cross, or a circle.
IMPORTANT: Before you start knitting a fillet napkin according to the chosen pattern, knit a small sample of 10 by 10 squares, from which you can evaluate the type and density of future work.
Knitting cells is done as follows:
- Empty – S1N, 2VP
- Filled - 3С1Н.
Any fillet knitting begins with a chain of VP.
Calculation of loops for casting:
For 1 cell – 3VP chains + 6 loops to form 1 cell of 1 row. In order not to carry out calculations, you can knit a chain of arbitrary length and start knitting cells from the beginning. Then the extra loops of the chain can be unraveled, and the missing ones can be tied up.
Video: Sirloin mesh. Adding and subtracting cells. Crochet.
IMPORTANT: The place from which work begins (starting point) is marked with an arrow on the diagrams.
Sometimes work on a fillet napkin starts from the bottom or the top. Often work begins precisely from the center, and from there it moves down and up. When you have to knit a voluminous loin, you can knit individual parts and elements, and then knit them together.
IMPORTANT: In order for a napkin knitted with fillet knit to be neat and dense, the loops must not be “loose” or stretched, otherwise the work will be uneven and the pattern will be blurry.


Knowing the decoding of the circuit (empty - С1Н, 2ВП; filled - 3С1Н), you can immediately start working.
Video: Napkin using the fillet technique. Knitting secrets
How to crochet a beautiful white openwork oval, round napkin: diagram with description
Openwork napkins not only decorate the table, but also add solemnity. The intricate weaves of thin white threads of openwork patterns look like fairy-tale airy cobwebs. To create magical thin napkins, a needlewoman will need good knitting skills, as well as patience and perseverance, because the work uses the thinnest threads and quite complex patterns.
Craftswomen who are good at crocheting and can accurately bring to life knitted patterns and designs can begin making openwork round and oval napkins, the diagrams of which are presented below.


Video: How to knit a round napkin “Delicate patterns”
To knit an openwork oval napkin according to the pattern presented below, prepare hook No. 1 (maximum No. 1.5) and thin yarn of the “Violet” type.


How to crochet a beautiful New Year's napkin with Santa Claus: diagram with description
Using self-knitted napkins, you can decorate your home in an original way for the holidays. For example, knitted napkins with Santa Claus can become an unusual New Year's decoration, and it would be quite appropriate to present such beauty to friends or relatives as a souvenir for the New Year.

 How to crochet a beautiful New Year's napkin with Santa Claus
 In order to knit a napkin with Santa Claus, you will need:
- threads of 5 colors (red, green, white, pink, black), but of the same thickness
- hook No. 1 – 2 (depending on the thickness of the selected yarn)
- beads

 How to crochet a beautiful New Year's napkin with Santa Claus, diagram
 Description:

Sunflower napkin so bright and sweet that even just looking at her lifts your spirits, because she reminds you of a warm, carefree summer and bright sun.

IMPORTANT: Working on such a napkin will seem fascinating to an experienced craftswoman and will require attention and patience from a novice craftsman.
To work you will need:
- Cotton yarn type SOSO, two colors (black and yellow)
- Hook No. 1


Description:
- Close 8VP with a ring.
- 1 row: In the center of the ring – 20С1Н.
- 2nd row: In each loop of the base C1H, dividing from 1VP.
- 3rd row: C1H in each base loop.
- 4 row: In each base loop, 2C1H, separating them with 2VP.
- 5 row: In the arches of 2VP, knit 2С1Н, 2ВП, 2С1Н.
- 6th row: repeat 5th + 2VP.
- 7th row: repeat 5th + 3VP.
- 8th row: repeat 5th + 4VP.
- 9th row: repeat 5th + 5VP.
- 10th row: repeat 5th + 6VP.
This is where the knitting of the black center ends. Carefully secure the end of the black thread and proceed to work on the sunflower petals.
IMPORTANT: It’s not scary if the middle turns out to be a gathered wave. Subsequent rows and further steaming will correct this.
Knitting in yellow:
- 11 row: Fasten the thread and knit into the arch of the previous row of 2VP: 2С1Н1, 2ВП, 2С1Н, 5ВП, 9С2Н, 5ВП.
- 12 row: 2С1Н in the arch of the previous row, 2ВП, 2С1Н, 4ВП, 9С2Н + VP in each loop of the base of the petal from the columns with 2Н of the previous row, 4ВП.
- Row 13: 2С1Н, 2ВП, 2С1Н, 4ВП. Then tie 8 arches from 4VP into each vertex of the previous row, 4VP.
- 14 row: complete repetition of row 13, except for the number of arches from 4VP. There will be 7 of them here.
- 15 row: Knit as row 13, only there will be 6 arches from 4VP.
- 16 row: 2С1Н, 2ВП, 2С1Н, 2ВП, 2С1Н, 4ВП. There will be 5 arches here.
- 17 row: Knit a petal: in the extreme arch of the last row, knit 2С1Н, 2ВП, 2С1Н, 4ВП, 4 arches, 4ВП, 2С1Н, 2ВП, 2С1Н.
- 18 row: 2С1Н, 2ВП, 2С1Н, 4ВП, 3 arches, 4ВП, 2С1Н, 2ВП, 2С1Н.
- Row 19: 2С1Н, 2ВП, 2С1Н, 3ВП, 2 arches, 3ВП, 2С1Н, 2ВП, 2С1Н.
- Row 20: 2S1N, 2VP, 2S1N, 2VP, 1 arch, 2VP, 2S1N, 2VP, 2S1N.
- 21 row: 2С1Н, 2ВП, 2С1Н, connect with the arch of the previous row, 2С1Н, 2ВП, 2С1Н.
The work on the petal is finished. Carefully cut the fixed thread.
Craftswomen who are not yet confident in their abilities can first knit a small sunflower napkin using an easy pattern, a detailed description of the work on which is in the video.
Video: Sunflower motif
Even a beginner can knit a delicate chamomile napkin, because the scheme of work is quite simple and understandable.


Video: Napkin Chamomile. Master Class
How to crochet a small white napkin in the shape of a snowflake: diagram with description
You can quickly and easily crochet a small white napkin in the shape of a snowflake. Such airy napkins can turn into Christmas tree decorations, New Year's decor or cute souvenirs. Also, interconnected snowflakes will serve as an original tablecloth on the festive table.


Scheme of work:


Description:
- Connect the thread with a ring and tie 1 ch for lifting.
- 1 row: Tie 8 sc into a ring, tighten the ring, tie a connecting post, and insert the hook into 1 sc post of this row.
- 2nd row: 3VP for lifting + 2VP according to the diagram. Next, tie 1C1H into the next loop, then 2VP, into the next loop 1C1H, again 2VP.
- 3rd row: 1 connecting column, 2VP, 3S1H with a common vertex, 5VP, into the next arch 4S1H with a common vertex, 5VP, continue knitting until the end of the row. Close with a connecting post, inserting the hook into the common vertex.
- 4th row: 1VP instep, 1SC in the same loop, picot from 3VP, 1SC in the same loop, picot from 5VP, 1SC in the same loop, picot from 3VP, 1SC in the same loop, 3VP in the common top. Continue in this manner until the end of the row.
- At the end of the work, cut the thread.


Video: Knitting snowflakes in 5 minutes. Crochet. Master Class
Beautiful volumetric napkin with violet flowers It will work if you attach several multi-colored violets to a white crocheted openwork base. You can take a napkin of any shape and size, so the main task is to learn how to knit violets for decoration.


Violets can be knitted in several ways. Let's look at one of the easiest:
- Take the middle (preferably from yellow yarn) from 4 VP, close it into a ring.
- Knit 10 sc into a ring.
- Attach a thread of a different color. These will be the petals.
- Knit a circle on the first 2 stitches.
- 1 row: 3C1H in each loop.
- 2nd row: 2dc in each column.
- 3rd row: Dc in each column.
- 4th row: make 3 decreases - at the beginning, middle and end of the row.
- 5 row: make the same 3 decreases, cut and fasten the thread.
- Also tie the remaining 4 petals.
- Tie the entire flower with a thread of a darker shade.
The result of the work should be a flower like this:


You can knit violets using the following patterns:


Video: How to crochet a violet flower
The “Lady” napkin, one of the most unusual and original, which will undoubtedly arouse admiration among friends and acquaintances, is actually very easy and quick to knit. “Ladies” can be of any colors, sizes and shapes, but each of them can decorate a home and lift your spirits.


 Original napkin "Lady"
 Detailed description of work on one of the "Ladies":


- Start with the cap. For convenience, turn the diagram upside down.
- Cast on 13VP, knit 3 rows in stitches, knit VP1N between them.
- After tying the hat, break the thread.
- Knit the upper part of the body with double crochets.
- Separately tie your arms and torso.
- Attach your hands to the skirt on the 11th row.
How to crochet a voluminous napkin: description, diagram
Elegant, light, voluminous two-color napkins not only look impressive, but are also very easy to knit. The “trick” of such napkins is their two-color nature. Similar plain napkins can get “lost” in the interior, and certainly won’t attract as much attention.
To work, you will need thin cotton yarn and a No. 1 hook.


The “base” of the napkin is knitted according to an easy pattern using single crochet stitches and a VP between them.


It makes no sense to describe this process in detail.
But knitting butterflies is very similar to knitting flowers.

This pattern will have to be changed a little, otherwise the butterflies will turn out very large. Therefore, future butterflies will be knitted in single crochet stitches.
- Make a ring from 6VP.
- 1 row: 8 groups of 3C1H and 3VP between them.
- 2nd row: Turn the knitting and knit: in the arches of the previous row 2 times, 5C1H and 5VP between them.
- 3rd row: 1СБН between two groups of columns of the previous row.
- Tie the arches: 7С1Н, 2ВП, 7С1Н.
- 4 row: RLS.
The result will be a flower with uneven, curled petals. But by bending it in half, you will get a beautiful voluminous butterfly in flight.
Place the butterflies on a napkin, securing them with a thread and a needle, and enjoy the beauty and tenderness of your own creation.
A large crocheted napkin can decorate a table in a living room, hall, nursery or kitchen. This original and beautiful product can give comfort and warmth to your home. Of course, it is difficult to decide on such a large job, but its result will certainly please the craftswoman and justify the effort and money spent.
To knit a white napkin - a tablecloth with a diameter of 180 cm you will need:
- hook No. 2.5
- cotton yarn type Cotton Troy (280m in 50 g), 1100 g

 How to crochet a large napkin for a table: diagram
Mandala napkin knitted from yarn of bright rich colors, will be an excellent interior decoration in ethno style. The mandala, in accordance with Hindu and Buddhist teachings, symbolizes the habitat of deities. By decorating their home with mandalas, the owners hope to attract divine grace, good luck and happiness into their home.


IMPORTANT: A mandala can only be round in shape, because even in translation this word means “disc”. The colored circles of the mandala represent the Universe and the home of divine beings, and the square represents the four cardinal directions.
How to crochet a colored napkin
The craftswomen note that work on these magical napkins progresses very quickly and with pleasure, and after knitting their mood improves. Most likely, this is due to the frequent change of bright colors. But what if the Hindu deities themselves help the needlewomen? Be that as it may, if your plans include making a colored napkin, it is best to start with knitting a mandala.
Not all needlewomen can crochet a two-color napkin with intricate patterns using a complex pattern. Beginners often give up knitting when they realize that they made a mistake somewhere and the pattern didn’t work out. To avoid disappointment and complete the job, you need to start by knitting light napkins.
Even an inexperienced craftswoman can knit such a rectangular two-color napkin with diagonal lines.
The work scheme is very easy and does not require special concentration and attention.
It turns out dense two-color napkin, size 25 by 35 cm, tied Tunisian knitting.
To make it you will need:
- white yarn “Snowflake” – 50 g
- colored yarn “Iris” – 10 g
- hooks No. 2.5 (Tunisian) and 3 (regular)
Description of work:
- A regular hook number 3 is only useful for casting on a chain of 50 loops.
- The rest of the work should be done with a Tunisian hook No. 2.5. Use it to knit 100 rows in Tunisian stitch according to the pattern.
- Use a chain stitch to trim the colored diagonal finish of the napkin.
- Tie a napkin with colored thread.
- When working on white binding, end each row with a connecting post.
Video: Tunisian knitting. Tools and a simple post.
“Takes away the eye” - this is what you can say about the “Bunch of Grapes” napkin. Working on it is so exciting that you want to knit these amazing napkins again and again.
The work is described in detail in the video:
Video: “Bunch of Grapes”, part 1
Video: “Bunch of Grapes”, part 2
Video: “Bunch of Grapes”, part 3

Crochet napkin hot tray so simple that just looking at this product is enough to reproduce it exactly. It will take very little time to make such a napkin, but with its brightness and originality it will decorate any kitchen.
When knitting napkins for hot occasions, you can give free rein to your imagination by changing and adding colors and elements. But several rules must be followed:
- The napkin should not have convex parts or parts, that is, it should be absolutely smooth and ensure stability of the dishes. Otherwise, using it may result in injury.
- Threads for knitting should be thick enough, and the finished product should not have holes, mesh or looseness in the pattern.
How to crochet a napkin for hot food? Ideas
How to crochet napkins for hot dishes?
Crochet money napkin - incoming money: diagram, photo
It turns out that prosperity, wealth, money and even large profits can be crocheted. To do this, just knit a small napkin (from 21 to 40 cm in diameter) and put it in the most visible place in the house with the words:
For a money napkin to “work” it must be tied according to the following rules:
- The napkin should be white (beige).
- Work on the napkin should begin on the new moon.
- A money napkin cannot have any other shape than a circle.
- In the center of the circle you need to insert or knit a gold coin.
- Rays should emanate from the center of the napkin.
- There can be 3, 5, 7, 9, 11 or any other odd number of rays.
IMPORTANT: You can take any scheme that meets the requirements as a basis. A distinctive feature of the napkin will be a small pocket in the center with a coin sewn into it.
While sewing a coin into the center of the circle, say:
If you don’t have a suitable scheme in mind, you can use this one:
Crochet money napkin - incoming money: diagram
The result should be a napkin like this:
Crochet money napkin - arriving money: photo
Those who have experienced the magical effect of money napkins claim that their financial condition really changes for the better as soon as this knitted talisman appears in the house.
Whatever napkin you choose for knitting, have no doubt that it will become an original, exclusive decoration for your home. In addition, while working on a napkin, you can learn to read patterns faster and practice basic knitting techniques.


The interior of the stylishly decorated home features handmade accents. Guests are sure to pay attention to crocheted napkins: the patterns give even beginners the opportunity to create a small masterpiece for those closest to them. Weightless openwork products embody different ideas - from abstract and floral motifs to figures of animals and insects. Thread manufacturers offer a huge selection of colors and materials. The final result depends on imagination, the purpose of the accessory and the skill of the needlewoman.
Handicrafts are back in trend. Housewives and successful businesswomen spend their evenings embroidering or knitting. For beginners, the greatest difficulties are caused by graphic instructions or text symbols of symbols. But gradually the crochet napkin pattern becomes an open book.
Conventions in text descriptions
For the convenience of needlewomen, universal names for the main elements - loops and posts - have been adopted:
- The basic air loop forms the basis of lace accessories of any shape and size, denoted by the abbreviation VP;
- The second most important element is the semi-column, which is abbreviated as PS. Another name is a connecting column.
- Crocheting a napkin necessarily includes making single crochets (SC) and double crochets - C1H, C2H, C3H. The numbers decipher the number of yarn overs - there can be more than three. It all depends on the complexity of the technology.
The combination of the presented elements according to the instructions allows you to create various patterns. Typically, textual explanations are attached to graphical manuals and provide details of the process. They are easier to navigate if difficulties arise.
Note to the craftswoman - deciphering abbreviations
Conventions in knitting patterns
Experienced knitters determine the structure of the pattern based on the finished product and can repeat the design they like. Craftsmen who know how to draw well and have spatial imagination create new napkins with crochet patterns themselves,
The author's developments serve as a guide for less experienced followers. Magazine and online publications can be easily identified by graphical symbols. This is the universal language of the creators of lace accessories, understandable to needlewomen all over the world:
- Circle - air loop;
- “Em dash” – half-column;
- “Plus” – single crochet;
- “Cross stitch” with one or more transverse dashes – double crochets, where the number of “crossbars” indicates the number of double crochets.
The guides also present additional elements that enhance the expressiveness of the pattern and help create various effects:

Symbols
How to read knitting instructions correctly
Without exception, all the manuals are standardized and figuring out how to crochet a napkin is not difficult:
- If the process proceeds in straight or reverse rows, the circuit is passed in rows from bottom to top. When making round products, start from the center.
- Odd rows are considered front rows and are read “in Arabic” - from right to left. Purl even ones as usual - from left to right.
- The repeating part of the pattern - rapport - is concluded between the “asterisks” (*...*). This symbol means that you need to repeat all the elements the specified number of times.
For the convenience of the master, the front and back rows can be marked in different colors or numbered. This makes it easier to navigate and not get lost, especially when knitting large items.

Two-color instructions are easier to read
It is important to know! “Round” instructions are “read” counterclockwise – they go sequentially from right to left.
Basic working techniques to make the process easier
How to crochet a napkin - the journey in the world of needlework begins with this pressing question. To avoid disappointment after the first experiments, you should take the advice of experienced craftsmen.
Preparatory stage
Before starting the process, stock up on tools and consumables. It is not recommended to choose thin threads for debut processes. Openwork lace will take a little time, but the first results will inspire you to improve your skills.
The best yarn to start with is mercerized cotton thread "Iris". They are quite elastic, smooth, pleasant to the touch. Available in a wide range of colors. Disadvantages include a tendency to curl.
As your skills improve, the yarn becomes more manageable and stops tangling. Acrylic and wool blend threads are also suitable for first experiments.
A detailed master class makes the first steps easier:
It is better to start your debut crocheting of napkins with a tool No. 1.5-2.5 with an ergonomic handle. When purchasing, it is better to compare several samples, evaluate which hook fits comfortably in your hand, and choose the appropriate length.
Step-by-step photo instructions
For the first experiments, choose a simple, intuitive pattern without complex double crochets. There will be fewer flaws in the finished work.

The optimal pattern for a successful debut
How to crochet a napkin for beginners:
- Start from the center of the future product - cast on a standard chain of air loops. In this case - 12.
- Loop the loops with a connecting semi-post.
- Move to the next row - knit the required number of VPs according to the schematic guide and move on to other elements - the pattern is based on C1H.
- Tie the ring completely - you should get 32 C1H. The circle is connected to a chain of 3 VPs and completes the row.
- The following elements are performed according to the diagram and follow the direction of movement counterclockwise.
- The last row is performed using the picot technique, which can be found in the video tutorial:
Place the finished napkin in a visible place


Step-by-step photos illustrate the work procedure
Color variations
To diversify napkins, novice needlewomen can use a simple and effective technique when crocheting - knitting multi-colored items using the same patterns or combining two or more colors in one accessory.

Napkin made of C1H - schematic illustration

The finished result
This solution allows you to create interesting accessories during the first experiments. A simple pattern looks more interesting, the product looks original and does not create a feeling of being secondary. You can safely decorate a table or window sill with it - place it under a flowerpot with indoor plants.

The original spiral beauty is a feasible challenge for beginners

The same design in a rainbow solution
Acrylic threads and iris are suitable for the process. The simplicity of the design is compensated by the spectacular color scheme.

An example of a spectacular solution - a sunflower

Sunflower diagram - the remaining fragments represent rapport
Trendy napkins for home and as a gift
The world of handicrafts has its own fashion and good omens. It is believed that accessories can have a positive effect on family wealth and the aura in the home. There are rituals associated with the beginning and end of the process. Crocheting napkins for beginners is no exception.
Money napkin
There is a belief associated with this decorative element. A coin placed in the center of the product has a positive effect on the family budget and promotes well-being in the home. The craftsmen begin work on the new moon. The future amulet is pulled at random from a bag into which the “candidates” are previously placed.
The coin must be odd, the denomination and country of origin do not matter. Knitting needs to be completed while the moon is growing. Napkin patterns from foreign magazines are suitable - the shape is important, it must be round. Pattern and size are of secondary importance. Such a talisman is kept in a place of honor to attract good luck to the house.
There are two ways to insert the amulet into the center of the accessory:
- At the beginning of the process. It is necessary to knit an amigurumi ring, the diameter of which corresponds to the central part of the napkin and coin. Further knitting will proceed strictly according to the instructions, and the pattern will not change.
- At the end of the process. In this case, a model with a closed center is chosen and at the final stage an additional element is knitted - a kind of repeat of the central part of the napkin. The part is sewn to the product, a small gap is left and a coin is placed in the pocket. Then the hole is sewn up.
A crochet money napkin - the diagram is presented below - differs in execution from the usual one. You can take almost any model as a basis. The central part is preliminarily assessed to determine whether the “core” is suitable for placing the coin.

Detailed diagram of a money napkin


The amigurumi technique is used to knit the center
Video tutorial on knitting an amigurumi ring:
Openwork products
Weightless lace accessories serve as decoration for a dining table, chest of drawers, or nightstand. Graceful, stylish and lace, fit into any interior style. This is a great gift and sign of attention. In such work, they invest more than skill - inspiration and a craving for beauty.
Beautiful crocheted napkins - patterns can be very different - look gentle and airy. Needlewomen have the opportunity to work with shapes and create not only round, but also oval and shaped products.
The basis of the plots are floral elements, which are generously trimmed with lace from air loops. Often, needlewomen choose abstract or ethnic motifs. Butterflies look beautiful and attractive.
Crochet openwork napkins according to the patterns are made similarly to simpler options. The knitting order does not differ from the standard one. It is necessary to ensure compliance with the manual - a minor error will have to redo the entire process. Therefore, before you start, you should evaluate your strength and skill.

Guide to knitting an openwork accessory

Example of a finished product

Beautiful butterfly - interior decoration

Stylish home decor element
Bulk napkins
The aerobatics in needlework are unusual crocheted napkins: you have to figure out the patterns, but the end result is completely worth the effort. Volumetric products look unusually beautiful and fascinating.
The instructions for creating such masterpieces require careful study and attention to detail. They give enormous scope for creativity and implementation of ideas. In such work, various solutions are possible:
- multilayer “rosettes” for decoration – tightly starched, turning into a lace vase;
- floral compositions – a bright, unfading bouquet blooms on the table all year round;
- butterflies or swans - the lightness of some and the grace of others fascinate and delight.

Example of graphic instructions and finished result

In this process, each swan and flower are knitted separately and sewn to the base.

A bright flower arrangement will warm you even on a winter day

A spectacular combination of openwork elements and voluminous colors
Creating such products is a labor-intensive process. It takes skill, patience, and skill. Master classes give a general idea of how to crochet tablecloths and napkins - diagrams and photos help you understand the general principle. For a high-quality implementation of an idea, it is best to turn to experienced needlewomen.
Masters work with ready-made magazine designs and create original compositions - this significantly expands the possibilities for creativity. Professional execution guarantees the absence of errors and flaws, accuracy and perfection. At the same time, you can learn a lot - invaluable knowledge and skills will be useful in the future when it comes time for your own master classes.
Crocheting is a good old tradition that is still supported by many craftswomen. The popularity and prevalence of such decor greatly simplifies the search for the desired pattern and description for it. However, there is also a downside to the situation: crocheted napkins have become so boring for knitters that they have become a kind of synonym for banality. The situation is saved by the development of fresh schemes and the search for new areas of application of familiar objects.
Types of napkins
Despite the fact that the first association with the word “napkin” invariably becomes an openwork circle, there are square, pentagonal and hexagonal, rectangular, diamond-shaped and many other shapes of napkins.
In modern designs, the large one can be relatively solid or openwork) most often remains round, but squares are also often found. It must be said that decorative elements with right angles are easier to place on flat surfaces.
The basic principle of knitting napkins
Knitting work on almost any napkin begins from the center and, gradually expanding the fabric, ends with the widest row. The only exceptions are products assembled from several separately related motifs.
Both small and large (the circuit can be of any shape) requires the presence of several main components:

Depending on the specifics of the pattern, the main fabric of the product may include some elements. For example, the technique of duplicating stripes of a pattern is often used. They are placed at different distances from the center, interspersed with very openwork or, conversely, solid areas. This distribution of the ornament allows you to effectively expand the canvas while maintaining the overall harmony of the product.
Knitting napkins

This small napkin is knitted as follows:
- 3VP, *2VP, 1СН*, 2VP.
- 3VP, 31СН.
- *3VP, 1СБН*.
- 3VP, 5VP, *2СН with a common top, 5VP*.
- 3VP, *5VP, 1СН*.
- 3VP, *2СН, 5ВП, 2СН, 1ВП*.
- *4СН, 2ВП, 4СН, 1СБН*.
- *15VP, 1СБН*.
- *2Dc with a common top, 3Dc, 2Dc with a common base, 5VP, 2Dc with a common base, 3Dc, 2Dc with a common top*.
- *2Dc with a common top, 6Dc, 5VP, 6Dc, 2Dc with a common top*.
- *2Dc with a common top, 7Dc, 5VP, 7Dc, 2Dc with a common top*.
Dc - double crochet, sc - single crochet, VP - chain stitch.
The description from * to * must be repeated until the end of the row.
How to change napkin sizes
The technique of alternating stripes of patterns described in the previous paragraph can be extremely useful for craftswomen who want to change the size of the napkin. Individual elements can be repeated as many times as necessary or eliminated completely. An excellent example of how to crochet a napkin from several patterns is the product shown in the following photo.

There is a very wide strip connected by mesh. It is obvious that with its help the expansion of the canvas to the planned dimensions was achieved.
Circular crochet napkin patterns also allow you to combine different patterns. The height of skill can be considered the successful combination of several elements and the creation of your own unique napkin.
Large circuit and application
A large decorative element such as the one shown in the photo below has an extremely wide range of uses.

In fact, it's not even a napkin, but a real tablecloth. The size of such products depends significantly on the materials that the craftswoman chooses. The thicker the thread, the larger the napkin, but the pattern also looks rougher. Knitted from dense threads with tight twist, such a large crocheted napkin (the pattern is proposed below) becomes an interesting carpet, umbrella, blanket or bedspread.
If desired, you can complete only part of the circuit. By moving to the final binding immediately after the central part, you can get a napkin of a smaller diameter. The small motif without binding becomes convenient for use in pullovers, tops and bags. quite often placed on the yoke of a knitted dress or on its side.
For convenience, the napkin diagram is divided into two parts.

Central fragment.

And two stripes of patterns with binding.
Description: crochet napkins
Begin work by setting a chain of eight air loops. In the second row, perform 16 single crochets, and then continue knitting in accordance with the pattern.
The central part of the pattern contains the very popular “pineapple” elements. Here they are arranged in several rows and greatly decorate the napkin. “Pineapples” are good for expanding fabrics, which is why they are so often used in napkin patterns. The first section of the diagram ends with several rows of mesh, on which a simple pattern of “bushes” will then be placed. This geometric pattern is formed by systematically filling some grid cells with “bushes” of four double crochets. If you need to remove any element of the circuit, excluding this strip will be the most convenient.
The final part of a large napkin
The main decor of this large napkin is the wide border running along its edge. The peculiarity of the scheme is that several patterns are combined here:
- Simple triangles made of “bushes” against the background of chains of air loops.
- Double crochet zigzag stitch.
- Small "pineapples".
- Empty fillet mesh with cells of different sizes.
All these ornaments are arranged simply masterfully. The beginning of one pattern is performed simultaneously with knitting the previous one. Thus, the developers managed to organically incorporate such seemingly different ornaments.
The patterns of formation of circular patterns and the principles of making decorative fabrics described in this article will be useful to those who are looking for information on how to crochet a napkin. Of course, it’s calmer to follow a detailed plan, but only improvisation can give you the feeling of true free creativity.
Friends, I bring to your attention a selection of fabulously beautiful crocheted napkins, as well as patterns for them. In my opinion, crocheting napkins is truly the pinnacle of crocheting skills. This is beauty, subtlety of work, and all products are lightweight.
These airy snowflakes made of fabric are a kind of embodiment of flight and lightness. Napkins perfectly complement any interior and make it feel homey. And of course, this is an excellent basis - a motive for knitting large elements, such as a bedspread or, say, a tablecloth. In addition, sitting down and starting to knit a napkin is a great way to relax and get a charge of good mood.
Beautiful and simple crochet blue napkin for the table

I’ll start the selection with such a wonderful openwork napkin.

Increasing!
Oddly enough, this is both a training ground for beginners and a pedestal for professionals. You can both learn to knit and create masterpieces. For example, for beginners, small napkins are perfect for creating their first product. Well, the fact that knitting them is interesting allows you to captivate a novice needlewoman.
Beautiful classic crochet round napkin

A wonderful example of a napkin crocheted using the fillet technique.

Increasing!
The knitting technique is also perfected by the fact that almost the entire arsenal of all kinds of loops is used in napkins. These include half-columns, chain stitches, double crochets, and many others. This gives you a good skill, and also teaches you to understand circuits.
I also want to draw your attention to the fact that these products also have different shapes. Here we can mention the classic round napkins, which are knitted in the round.
Beautiful openwork crocheted napkin with floral patterns
An awesome crochet napkin - it captivated me with its elegance! The knitting pattern is below.
You can lay such a napkin on the table or put a vase of flowers on it.
When crocheting napkins, the method of using motifs is very often used. Motifs are square, round, triangular. There are also more complex polyhedra, such as hexagonal ones, but they are rarely used.
In addition to all of the above, there is also a wide variety of napkin knitting techniques. For example, Irish lace. Or Bruges lace - a Belgian technique. Creativity in knitting napkins is like art. Only the master creates not with the help of paints and a brush, but with the help of yarn and a hook.
Okay, I'm babbling about something. Next, see a selection of samples of various napkins. They have one thing in common - they are crocheted. All photos are enlarged. Just click on the image with your mouse. Good luck with your knitting! And come back often. I always have something interesting for you.
Knitting patterns are increasing!


For starters, there is such a wonderful simple option. Beautiful crochet napkin - amazing pattern geometry!


But this beautiful round crocheted napkin will fit well on the table. In general, we must admit that Japanese options are considered the most sophisticated of all. They are also presented in this collection.


Here's another nice example of a beautiful round crochet doily - the central web is of particular interest here.


And this napkin has a structure very similar to coral.


A beautiful classic crochet napkin that looks like a snowflake.


Pineapple patterns in a beautiful crochet napkin.


Beautiful round crocheted napkin with a spades pattern.

Crochet a tablecloth from napkins

A beautiful square crocheted napkin with motifs can be turned into a large enough tablecloth for the table. The advantage of squares is that they can be combined and ultimately get a large canvas.

These are the options. This is, of course, not all that could be shown. But be patient, we are in no hurry. Right?
How to starch a crocheted napkin
After reading many guides on starching napkins, I came to the conclusion that they are hopelessly outdated. In all of them it is proposed to cook a paste from starch, but why such difficulties? It is much easier and faster to soak a napkin in wallpaper glue, which consists of starch that does not cause yellowing. It applies quickly and is not visible after drying. Ideal, in my opinion.
Make the solution thinner and dip a napkin into it, give it time to dry, and now you have a beautiful copy in front of you, smooth, without creases or curls. Wallpaper glue easily soaks in water, so don’t be afraid of ruining the product.
Video master class - simple crochet round napkin
To conclude the collection, I want to show a simple and understandable master class from Anna Andrienko on crocheting a simple napkin for beginners. There is nothing complicated in the lesson, just what a beginner needs.
I hope you liked these patterns for crocheting beautiful napkins and will take something for yourself to work with! Well, that’s all I have for today... Happy crafting!
From time immemorial, the border has been considered the element of knitting that gives any product true tenderness and sophistication. It can be used to decorate any crocheted items - from clothing to kitchen accessories (napkins, tablecloths, towels, curtains and much more). Moreover, not only finished knitted items are tied with a decorative border. Openwork lace, knitted along the free edge of the fabric, can breathe new life into an old, long-forgotten item from a women's or children's wardrobe.
Tags:
“Pineapple” is considered one of the most common openwork patterns in crocheted needlework. It's all about not only the relative simplicity of knitting it, but also the final result of the process - a “pineapple” pattern made using any of the many patterns turns out to be truly magnificent! 
Tags:

A skilled craftswoman of crochet needlework will “dress” any little thing in a case – from your favorite smartphone to a cute vase that serves as decor in the corner of the room. Although, in terms of the degree of complexity of knitting, covers are among those items that can be done even by beginners holding a hook in their hands for the first time.
Tags:
Japanese openwork is an original, but very labor-intensive crochet technique. Today, Japanese knitting is at the peak of its popularity - knitters all over the world are actively studying specialized books and magazines from Japan, trying to reproduce exclusive wardrobe and home interior items.
Tags:

Competition work No. 24 - Knitted napkins “Leaves” (Ksenia Shcherbakova)
Hello, needlewomen! My name is Ksenia. I have been crocheting since childhood. I really like to knit all sorts of little things for the home. I present to your attention two small napkins “Leaves”.
Yarn PNK them. Kirov "Iris", hook No. 0.95

Competition work No. 20 - Openwork napkin (Nadezhda Strogalova)
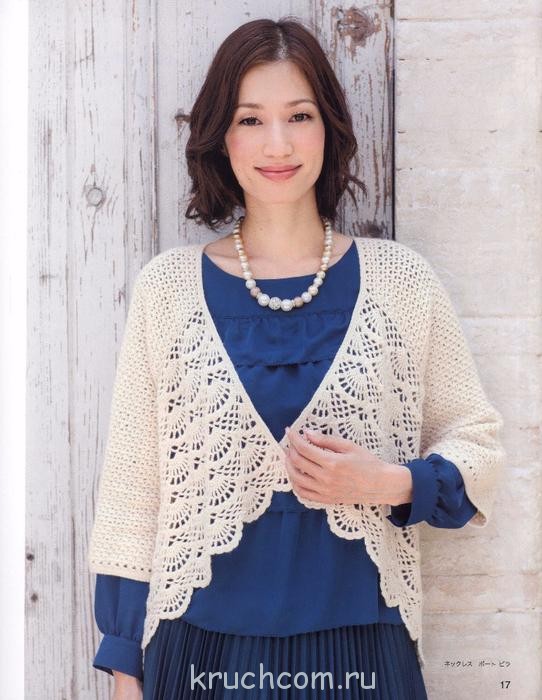
Good afternoon My name is Nadezhda. I was interested in knitting back in school, and with the birth of children it turned into love. I just can't imagine my life without knitting. I love both crochet hook and knitting needles. I present to your attention an openwork napkin. It has 12 petals, which makes it possible to make wall clocks in a rustic style. I think they will be adorable. Someday I will definitely find the time and do it))
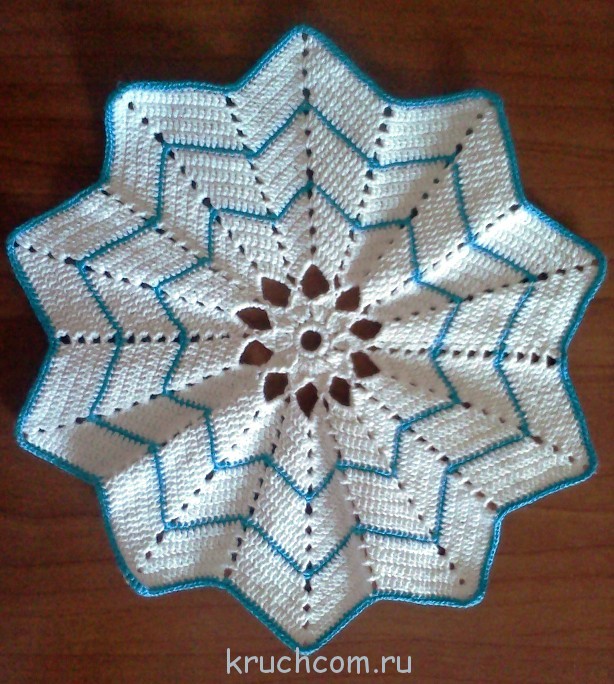
Competition entry No. 19 – Napkin “Lucky Star” (Ksenia Shcherbakova)
Hello, dear needlewomen! My name is Ksenia. I have been crocheting since childhood. I really like to knit all sorts of little things for the home. I present to your attention the “Lucky Star” napkin.
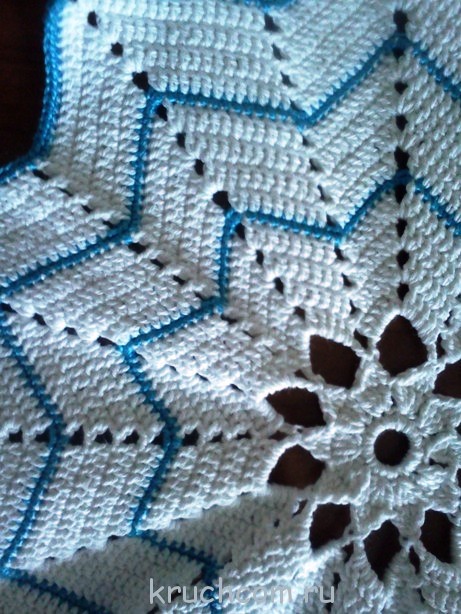
For knitting you will need: threads PNK them. Kirov “Lily” (white), “Iris” (blue), hook No. 1.5

Competition entry No. 14 – Oval crocheted napkin (Anait)
My name is Anait, I have been knitting for quite a long time, and crocheting for the last two years. You are already familiar with some of my works. This time I present for your competition an oval napkin, knitted from gray yarn - 100% cotton, hook No. 2.


Competition entry No. 12 – Knitted napkin for Easter (Alla)
Good afternoon! My name is Alla. I have been crocheting recently. I would like to present to your attention a napkin for your GREAT DAY!!! The holiday of the Holy Resurrection of Christ is approaching soon - the main event of the church calendar, the oldest and most important Christian holiday...
I've been eyeing napkins for a long time and decided to knit them.


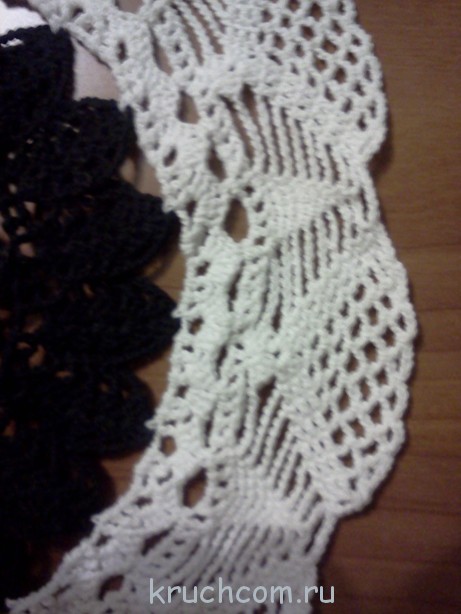
Competition entry No. 3 – Knitted napkin “Contrast” (Ksenia Shcherbakova)
Hello! My name is Ksenia. I have been crocheting since childhood. I learned to knit during craft lessons at school.
I would like to present to your attention a knitted napkin “Contrast”.
We also recommend
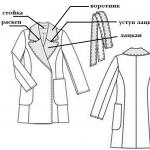 Collars, stoles, fur boas How to cut a fur collar for a coat
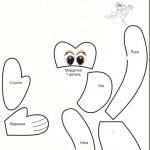 The best DIY monkey making tutorials on the internet!
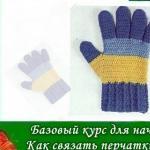 Openwork gloves made of white goat down
 Jacquard knitting patterns Jacquard patterns a, b, c, e, and f
 We make beautiful crafts from satin ribbons
 Logical and entertaining problems (300 problems) Easy riddles for children 5 years old short